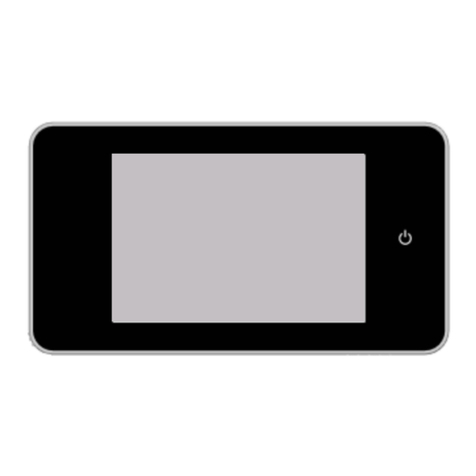
INTERSTEEL DIGITAL DOOR VIEWER 2.2 User manual

DIGITAL DOOR VIEWER 2.2
USER MANUAL
●All rights reserved including any changes of product
appearance, technical function and usage without prior notice to
users.
● Use of this product other than that for which it is intended for
or any modification to the original specification will invalidate
any guarantee given.
● Use of this product in any environment or in any way other
than specified here will also invalidate the guarantee.

Index
English - EN
Français - FR
Español - ES
..........................
..........................
..........................
02
34
26
Deutsch - DE
..........................
10
18
Dutch - NL ..........................

Attention:
1.Please read this user manual carefully before using our product.
2.Never attempt to repair or modify this product or its accessories
by yourself, to avoid injury and invalidating guarantee!
3.Any accidental factor such as being struck by lightning or any
incorrect operation could cause a memory loss on the SD card.
Keeping copies of the videos is strongly recommended in case
of memory loss. We are not responsible for any loss of data.
4.DO NOT use any chemicals to clean this product, such as
alcohol or benzene thinner.
5.Please change the batteries soon after the low-battery indicator
shows, in order to avoid any damage to this product which could
be caused by battery weeping.
Package list:
①LCD Screen
③4 x AAA batteries(OPTIONAL)
⑤Camera
⑦Tightening tool
②1 fixing screw
④Holding plate
⑥Locking barrel
②
⑤⑥
①③
AAA
AAA
AAA
AAA
⑦
④

FIG. 1
Installation instructions:
1.Replace the existing door viewer or drill a 14mm hole in the door at the
required height. Peel off the 3M sticker top layer and then insert the camera
from the outside . Ensure the door bell button is under the camera and adjust
the camera vertically to the ground(FIG.1)
2.Peel off the 3M sticker top layer on the holding plate and fit the holding
plate over the end of the camera wires on to the back of the door. Make sure
the arrow on the holding plate points upwards. Then screw up the locking
barrel on to the back of the camera.This will hold the plate to the door(FIG.2)
3.When inserting the camera wire into the socket ,ensure you match the
connectors correctly.( If inserted the wrong way, this can damage the wires
on the camera) The excessive wire should be gently placed into the groove
at the back of the screen.
4. Hook the screen over the bracket at the top of the holding plate and secure
with one small screw through the hole at the bottom of the screen
case. (FIG.3)
FIG. 4
FIG. 2
FIG. 3

Attention:
1.DO NOT force when opening and closing the lid to avoid
lid damage.
2.DO NOT press the lid to the opposite direction when opening to
avoid any lid damage.
3.When the low battery indicator is on, please replace all
batteries to avoid any damage to this product by battery weeping.
Installation and replacement of batteries:
Installation:
1.Slide the lid upwards to open, as shown in diagram.
2.Put in the batteries according to the “+” “-” sign on the lid.
3.Take the reverse steps to close the lid.
When the batteries run out, the low battery indicator will flash to
remind users to replace the batteries.
The following types of batteries can be used in this product: AAA,
LR03 1.5V alkaline battery. Any abandoned batteries should be
disposed according to local environment protection rules and
regulations.

5
1
Power Button
2
3
Operation instruction:
Parts specifications:
Button functions:
No:
basic function multi functions
●Press Menu button to enter menu page;
●When deleting pictures, press Menu button you can then choose to delete
the current photo;
●In picture browse and setting mode, press and hold the menu button to
exit the current page.
●In home page, press UP button to enter picture browse mode;
● After enters picture browse mode, press UP button to browse pictures
backwards;
●In setting mode, press Up button to adjust the item you selected;
Back side of screen case
5.camera data wire connector 6.TF card socket
●After installing new batteries, press and hold power butto n t o s ta rt.
1
2
3
4
5
6
4
Up
Down
Menu
●In picture browse mode, press Down button to browse pictures onwards;
●In setting mode, press Down button to adjust the item you selected;
●In home page, press Down button to take picture.

6
1 8 : 0 0
2012-7-30
1 8
1 8
1 8
10S 20S
15S
Time setting
Operation instructions:
System settings:
﹡Under normal mode, press “ ”to enter setting mode.
﹡Then you should see the below setting mode page.
﹡Press “ ” to find different settings:
Time--Date--Ringtone--Volume--Auto power-off time--Save file in
﹡Press “▼”to change the settings.
﹡In TIME/DATE setting, press “▼”will increase the current
number; Holding the button down will accelerate the adjustment.
﹡After the setting is changed, the system will automatically save the
result and exit the setting page in a few seconds.
﹡If you need to exit the setting page, press and hold “ ”.
Date setting
Ringtone setting Volume setting
0: silent mode
3: Max volume
Auto power-off
setting Save file in
* local file
* TF card
TF

01/22 12/22 09:26
Operation instructions:
To observe outdoors:
- Under normal mode, you can observe outdoors once you press the power
button.
- When visitors press the door bell, the bell will ring inside the room.
The screen will automatically turn on showing the image of outside. It will
automatically power off once the set time is reached.
- Under normal mode, press “▼” will take a picture of outdoors and save it
automatically.
Visitors:
- When visitors press the door bell button on the door viewer camera,the
door bell will ring inside the room.
-Meantime, the screen will automatically turn on, showing the image of
outdoors. It will automatically power off once it reaches the set time.
- Also as the door bell is pressed, the camera will automatically take a
photo of the visitors and the photo will be stored in the set file in case the
host is out, so as to check the visitors' identity afterwards or to use the
information for security purposes.
Replay and delete of the photos:
-Under normal mode, press “▲” to replay photos.
-When you browse the photos, press “▲” or “▼” to choose photos.
Current photo
number/total number
month/date shooting time
When you check the photos, press button “ ” to choose to delete the current photo.
After a short press on the button, you will see below icon:
- Press “ ▼ ” to confirm to delete.

Operation instructions:
Choose your auto-store file:
- Users can choose to save photos in local file or TF card.
- The default store is local file.
Vibration alarm function
The vibration alarm function is shut by default at the factory. The vibration
alarm function needs to be started by pressing the power button for 3
seconds when display turns on. The buzzer emits three beeps and a vibration
alarm icon appears in the lower right corner of the display, which
indicates that the vibration alarm function starts. To shut the vibration alarm
function needs to press the power button for 3 seconds when the display
turns on.The buzzer emits a long “drip” sound, the vibration alarm icon
disappears, which indicates the vibration alarm function shuts.
When the vibration alarm function starts, once the Digital Door Viewer
detects the vibration, it will trigger an alarm.After 10 seconds, the display
automatically turns on and emits a continuous alarm sound “Drip”, and a red
alarm icon appears in the lower right corner of the display. After 10
seconds the Digital Door Viewer stops the alarm, shuts down and continues
keeping the vibration alarm monitoring state.
After the vibration alarm is triggered, the owner can cancel the alarm at any
time by short pressing the power button of the display.
Memory Card Installation:
-There is NO TF card included. This should be purchased by user
separately.
- Please insert the TF card before installing batteries.
- Before inserting the TF card, make sure the metal cover above the TF
card socket is pushed towards the OPEN mark.
- Lift and open the upper of the metal cover and insert TF card into the
metal cover.
- Then replace the metal cover and push back to LOCK mark.
- Max. 8GB TF card can be used, over HDSC Class 6 is suggested.

Specifications:
Door thickness: 38~110mm
Door barrel diameter: 14-26mm
Camera: 0.3 Mega pixels
LCD Screen: 4.0”TFT
Resolution: QVGA (480x320)
Power: 4 AAA, LR03 1.5V alkaline battery
Local memory storage: Approx 26 photos (The amount could differ
depending on the type of environment the camera is situated in)
Exterior card type: Micro SD card (TF), max 8GB
Photo volume for 1GB: 2000pc (lab condition, the actual volume
could differ under different circumstances)
Size: 139(w) 77(H) 15.8(D)mm
Weight:185g

Let op:
1.Lees deze handleiding aandachtig door voordat u het product in
gebruik neemt.
2.Om schade aan het product en/of de gebruiker te voorkomen,
wordt afgeraden dit product zelf aan te passen of te repareren.
Hiermee vervalt tevens de garantie.
3.Toevallige factoren, zoals blikseminslag of onjuist gebruik kunnen
geheugenverlies op de SD kaart veroorzaken. Het is aan te bevelen
om kopieën van het beeldmateriaal te bewaren op een andere
locatie om verlies hiervan te voorkomen. Wij zijn niet verantwoor-
delijk voor het verlies van gegevens.
4.Gebruik geen chemicaliën zoals alcohol of thinner om het product
te reinigen.
5.Vervang de batterijen direct nadat de indicator dit aangeeft, zodat
u altijd optimaal gebruik kunt maken van de digitale deurcamera.
②
⑤⑥
①③
AAA
AAA
AAA
AAA
⑦
④
Verpakkingsinhoud:
Digitale deurcamera met LCD scherm 1x Schroef
4x AAA batterijen
Camera
Gereedschap
Montageplaat
Bevestigingscilinder
10

Installatie instructies:
1.Vervang de huidige deurcamera of boor een nieuw gat van 14mm
in de deur op de gewenste hoogte. Verwijder de 3M sticker aan de
achterzijde van de camera. Steek de camera aan de buitenzijde van
de deur door het gat van 14mm. Zorg ervoor dat de belknop aan de
onderzijde zit en plaats de camera in een rechte positie. (Fig. 1)
2.Zorg voor een stof- en vetvrije ondergrond en verwijder de 3M
sticker aan de achterzijde van de montageplaat en plaats de
montageplaat over het uiteinde van de camera op de deur. Let op
dat de pijl op de montageplaat naar boven is gericht. Draai de
camera vast met de bevestigingscilinder. (Fig. 2)
3.Wanneer u de datakabel aansluit, moet u ervoor zorgen dat dit op
de juiste manier gebeurd door het pijltje naar boven te laten wijzen.
Indien verkeerd geplaatst, kan dit de datakabel beschadigen. Plaats
het resterende deel van de kabel voorzichtig in de opening aan de
achterkant van de digitale deurcamera.
4.Plaats de digitale deurcamera op de montageplaat en draai deze
vast aan de onderzijde met de meegeleverde schroef. (Fig. 3)
FIG. 1
FIG. 4
FIG. 2
FIG. 3
Deur
Ophangen
Schroef
11

Installatie en vervangen van de batterij:
1. Schuif het klepje naar boven, zoals op de afbeelding weergegeven.
2. Plaats de batterijen volgens de‘+’‘-‘ tekens op het klepjes.
3. Sluit het klepje en schuif hem naar beneden om te sluiten.
Let op:
1.Forceer niet het openen en sluiten van het klepje om beschadigingen
aan het klepje te voorkomen.
2.Duw het klepje tijdens het openen niet in de tegengestelde richting
om beschadigingen te voorkomen.
3.Vervang alle batterijen als de indicator aangeeft dat ze leeg zijn,
hiermee worden beschadigingen voorkomen.
Wanneer de batterij leeg raakt, gaat de indicator knipperen om de
gebruiker te herinneren aan het vervangen van de batterijen.
De volgende type batterijen kunnen gebruikt worden in dit product: AAA.
LR03 1.5V alkaline batterij. Gooi lege batterijen niet in de vuilnisbak, maar
lever deze in bij een inzamelpunt voor batterijen.
12

1
2
3
●
●
●
1
2
3
4
5
6
4
Installatie en vervangen van de batterij:
Onderdelen specicaties:
Knoppen functies:
Pijl naar boven
Op het beginscherm drukt u op de pijl naar boven om de gemaakte
foto’s te bekijken.
Om door de foto’s te bladeren, drukt u op de pijl naar boven om
achteruit door de foto’s te gaan.
Op de instellingpagina drukt u op de pijl naar boven om het
geselecteerde item aan te passen.
●
●
●
Druk op de menuknop om naar het menu te gaan.
Wanneer u foto’s wilt verwijderen, druk op de menuknop om te
kiezen voor het verwijderen van de huidige foto.
Op de foto- en instellingspagina te verlaten, houdt u de menuknop
ingedrukt.
Menuknop
Pijl naar beneden
Aan/uit knop
●
●
●
Om door de foto’s te bladeren, drukt u op de pijl naar beneden om
vooruit door de foto’s te gaan.
Op de instellingspagina drukt u op de pijl naar beneden om het
geselecteerde item aan te passen.
Op het beginscherm drukt op de pijl naar beneden om een foto te
maken.
●Na het installeren van nieuwe batterijen, druk op de aan/uit knop
om te starten.
Achterkant van het scherm
5.Camera datakabel connector 6.SD kaart contactpunt
Nr. Basis functies multi functies
13

Op het normale scherm, druk “ ”om naar instellingen te gaan.
Vervolgens ziet u de onderaan afgebeelde instellingspagina.
Druk“ ”om verschillende instellingen te vinden:
Tijd – datum – ringtone – volume – automatisch uitschakelen – bestand opslaan in
Druk“ ”om de instellingen aan te passen.
In tijd/datuminstelling, druk“ ”om het huidige getal te verhogen; als u deze knop
ingedrukt houdt, wordt de aanpassing versneld.
Nadat u de instellingen heeft aangepast, zal het systeem deze automatisch opslaan
en de instellingspagina na enkele seconden afsluiten.
Houdt de “ ” ingedrukt om de instellingspagina te verlaten.
1 8 : 0 0
2012-7-30
1 8
1 8
1 8
10S 20S
15S
▼
TF
Gebruikersinstructies
Systeeminstellingen:
●
●
●
●
●
●
●
▼
Tijd instelling
Datum instelling
Ringtone instelling Volume instelling
0: stil
max volume
Automatisch
uitschakelen
instelling Bestand opslaan in:
* lokaal
* SD kaart
14

Wanneer u de foto’s bekijkt, drukt u op “ ”om de geselecteerde foto te verwijderen.
Na kort indrukken ziet u het volgende icoon op het scherm:
01/22 12/22 09:26
-
Gebruikersinstructies
Naar buiten kijken:
Druk op de aan/uit knop om een beeld van buiten te tonen.
Wanneer een bezoeker de deurbel indrukt, hoort u een beltoon. Het scherm
wordt automatisch ingeschakeld en toont het beeld van buiten. Het scherm
gaat automatisch uit zodra de ingestelde seconden verstreken zijn.
Op het beginscherm drukt u op “ ” om een foto te maken van buiten. Deze
wordt automatisch opgeslagen.
-
-▼
-
Bezoekers:
Wanneer bezoekers op de deurbel van de digitale deurcamera drukken hoort u
een beltoon.
Tegelijkertijd gaat het scherm aan en laat het beeld van buiten zien. Het
scherm schakelt automatisch uit nadat de ingestelde seconden verstreken zijn.
Wanneer de deurbel is ingedrukt, maakt de camera automatisch een foto van
de bezoekers en deze wordt opgeslagen op de gekozen locatie. In het geval
dat de eigenaar niet thuis is, kan men de bezoekersidentiteit achteraf bekijken
of de informatie gebruiken voor veiligheidsdoeleinden.
-
-
Terugkijken of verwijderen van de foto’s:
Druk op het beginscherm op “ ” om de foto’s terug te kijken.
Om door de foto’s te bladeren drukt u op “ ”of “ ”.
▲
▲
Nummer van de huidige
foto/totaal nummer
▼
Maand/dag Tijd waarop de foto genomen is
- Druk “ ” om het verwijderen te bevestigen.
▼ 15

-
Gebruikersinstructies
Trilalarmfunctie
De trilalarmfunctie is standaard uitgeschakeld. Om de trilfunctie in te schakelen,
dient u de aan/uit knop 3 seconden ingedrukt te houden totdat u 3 piepjes hoort
en u rechtsonder in het scherm het ziet.
Om de trilalarmfunctie uit te schakelen herhaalt u deze actie. U hoort weer een
pieptoon en het verdwijnt. Dit betekent dat de trilalarmfunctie uitgeschakeld
is.
Als de trilalarmfunctie is ingeschakeld, zal de digitale deurcamera trillingen
detecteren en wordt het alarm geactiveerd. Na 10 seconden wordt het scherm
automatisch ingeschakeld, klinkt er een continu alarmsignaal en verschijnt er een
rood alarmpictogram rechtsonder in het scherm. Na 10 seconden stopt het
alarm en blijft het trilalarm ingeschakeld.
Nadat het alarm is geactiveerd, kan de eigenaar het alarm op elk moment
annuleren door kort op de aan/uit knop van het display te drukken.
Kies een locatie voor uw bestanden:
De gebruiker kan kiezen om de foto’s lokaal of op een SD kaart op te slaan.
De standaardinstelling is het lokaal opslaan van de foto’s.
-
-
Geheugenkaart installeren:
Er is een 128MB SD kaart meegeleverd.
Plaats de geheugenkaart alvorens u de batterijen in de digitale deurcamera
plaatst.
Voordat u de geheugenkaart plaatst, zorg ervoor dat u het metalen klepje in de
richting van de OPEN markering schuift.
Til en open het metalen klepje en plaats de SD kaart in het metalen klepje.
Sluit het klepje en duw het in de richting van de LOCK markering.
Voor dit product kunt een geheugenkaart van max. 8 GB gebruiken, SDHC Class
6 wordt aangeraden.
-
-
-
-
-
16

Specicaties:
Deurdikte: 38 – 110 mm
Diameter: 14-26 mm
Camera: 0.3 Megapixels
LCD scherm: 4.0“TFT
Resolutie: QVGA (480x320)
Stroomvoorziening: 4 x AAA batterijen, LR03 1.5V alkaline batterijen
Lokale fotogeheugen: ongeveer 50 foto’s (Het aantal kan verschillen, afhankelijk
van de omgeving waarin de camera is geplaatst)
Externe geheugenkaarttype: Micro SD kaard, maximaal 8 GB
Fotogeheugen voor 1GB: 2000 stuks (het werkelijke geheugen kan verschillen)
Formaat: 77 x 139 x 15,8 mm (hxbxd)
Gewicht: 185 gram
17

2
134
56 7
1 2
5 6
3 4
7
AAA
AAA
AAA
AAA
Achtung:
1.Lesen Sie diese Anleitung vor der ersten Bedienung bitte
sorgfältig durch.
2.Die Demontage der Kamera oder dem Gehäuse ist NICHT
zulässig.
3.Die Montage ist sorgfältig und gemäß Anleitung auszuführen.
4.Bei unsachgemäßem Einsatz, Montage oder Bedienung
sowie bei Verwendung von nicht originalen Zubehörteilen
übernimmt BKS keine Haftung!
Lieferumfang:
Digitaler Türspion
Kamera
Befestigungsschraube
3 x Hülse
4 x AAA Markenbatterien
Befestigungswerkzeug
Halteplatte
18

Montage:
1. Nehmen Sie den vorhandenen Türspion aus dem Türblatt heraus
oder bohren in Augenhöhe ein Loch von 14 mm Durchmesser.
Ziehen Sie die Folie von der Rückseite der Kamera und stecken
Sie die Kamera von außen in das Bohrloch. Achten Sie dabei auf
die horizontale Ausrichtung der Kamera. Dabei muss das
Klingelsymbol unterhalb der Kamera sein (Abb. 1).
2. Ziehen Sie die Folie von der Rückseite der Halteplatte ab und
platzieren diese auf die Innenseite der Tür auf dem Bohrloch.
Führen Sie das Kabel der Kamera durch das Loch der Halteplatte
sowie die Verriegelungshülse. Schrauben Sie von der Innenseite
die Verriegelungshülse auf das Gewinde der Kamera und ziehen
es mit dem mitgelieferten Befestigungswerkzeug fest. Dadurch
wird die Halteplatte am Türblatt befestigt (Abb. 2). Achten Sie
darauf, dass die Pfeilmarkierung nach oben zeigt.
3. Das Kabel der Kamera muss nun mit der Buchse auf der
Rückseite des Bildschirms verbunden werden. Verstauen Sie
überschüssiges Kabel in der Vertiefung an der Rückseite des
Bildschirms. Achten Sie darauf, dass der Kabel nicht knickt.
4. Hängen Sie den digitalen Türspion auf die Halterung an der
Oberseite der Halteplatte und sichern das Gehäuse zusätzlich mit
der mitgelieferten Befestigungsschraube. Die Schraublochung
befindet sich unterhalb des Gehäuses (Abb. 3).
19
Table of contents
Languages:
Other INTERSTEEL Digital Photo Frame manuals
