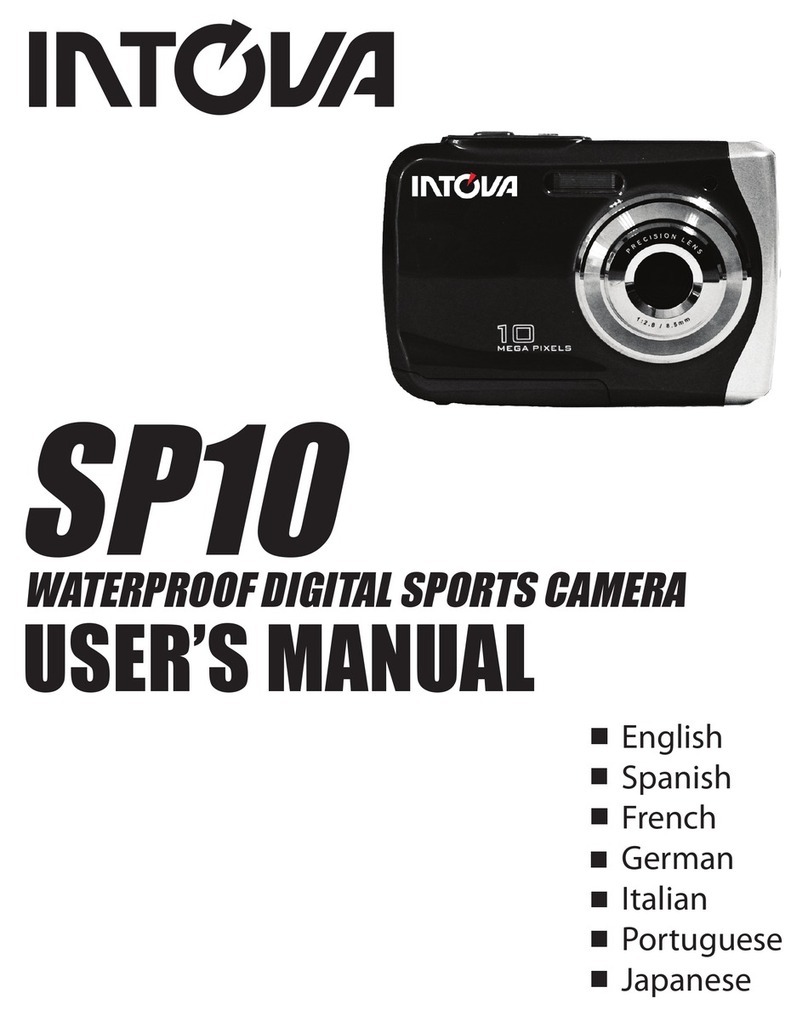
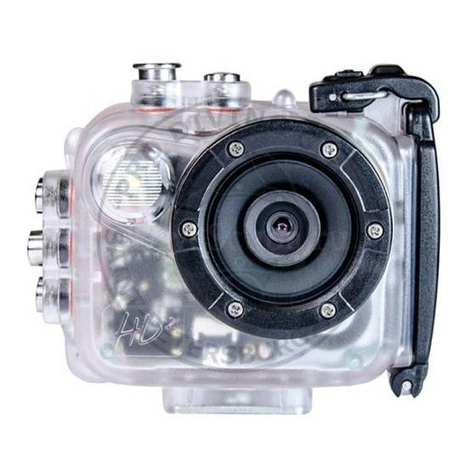
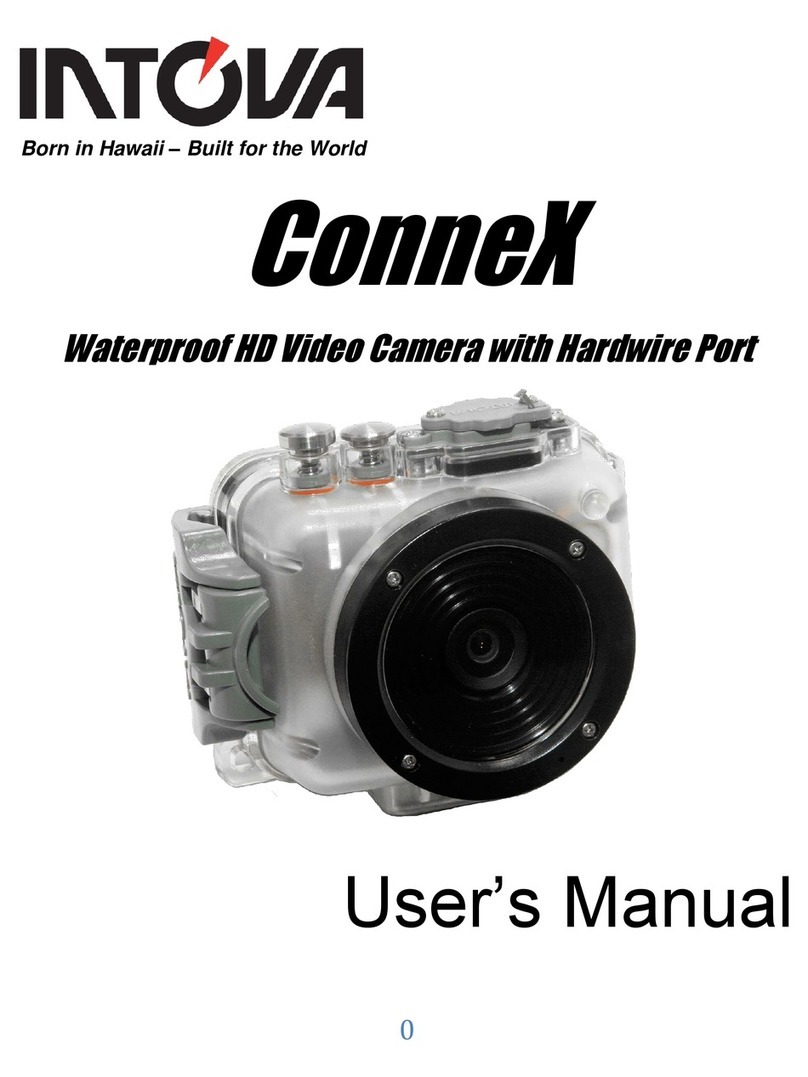
Intova SP10 User manual

SP10
WATERPROOF DIGITAL SPORTS CAMERA
USER’S MANUAL
English
Spanish
French
German
Italian
Portuguese
Japanese

Index
English ………………………………………………………….…… 1-10
Spanish …………………………………………………………..… 11-20
French …………………………………………………………....... 21-30
German …………………………………………………………..… 31-40
Italian …………………………………………………………......... 41-50
Portuguese ………………………………………………………....51-60
Japanese …………………………………………………………... 61-70

1
Intova SP10 Camera Manual
IMPORTANT
- Do not open the battery door under water.
- Close the battery door properly for best water sealing.
- Rinse the camera with cool, clean water after use.
-Store in a cool and dry environment
1. Getting to know your camera
3m waterproof design
10.0 Mega pixels resolution
Digital still camera
Digital video recorder
Built-in flash
4x digital zoom
2.4 " TFT color display
Micro SD card support
2 x AAA alkaline batteries
2. Functional parts

2
1 Shutter Press this button to take photographs or to start /stop recording
a video clip, or to confirm changes in menu mode.
2 Power on/off
button Press this button to switch on and press it for at least 2 seconds to
shut off. Press to hide/display the status icon on the LCD screen.
3 Strap hook Hook for attaching the wrist strap to the camera.
4 Flash light Use the built-in flash to give the subject extra lighting if it is in dark
surroundings(the best flash performance is within 1.5m).
5 Lens Records the image to be taken.
Note: Keep the lens clean. Dirt and fingerprints will affect the quality
of the picture.
6 Busy indicator When the indicator is blinking, the camera is busy.
7 Macro switch
Macro mode: Select this mode to take close-up photographs
(distance 11cm - 18cm).
Normal mode: Select this mode to take photographs from
0.5m - infinity.
8 LCD screen Display photographs, video clips, camera setting and menu.
9 Up/Tele
In Preview mode: press this button for Tele (zoom in);
In Menu mode: press this button to move up the selection bar.
In Playback mode(photo): press this button to zoom in.
In playback (Video playing) mode: press to start/pause the video.
10 Down/Wide
In Preview mode: press this button for Wide (zoom out);
In Menu mode: press this button to move down the selection bar.
In Playback mode(photo): press this button to zoom out.
In Playback mode: press this button to get into the thumbnail mode
11 Left / Flash light
In Menu mode: press this button for the left selection;
In Playback mode: press this button to move to previous frame;
In Photo infinite Preview mode:
press this button to switch Flash modes; (the flash cannot be used
in macro mode)
In Photo (zoom in) Playback mode: press to move to the left area of
the photo.
In playback (Video playing) mode: press to fast rewind.
12 Right / Playback
Press this button to get into Playback mode;
In Playback mode: press this button to next frame;
In Menu mode: press this button for the right selection;
In Photo (zoom in) Playback mode: press it to move to the right area
of the photo.
In playback (Video playing) mode: press it to fast forward.
13 Mode
Press this button to switch between movie and still capture mode;
In Playback mode:press this button to exit.
In Photo (zoom in) Playback mode:press it to move to the up area
of the photo. In playback (Video playing) mode: press it to stop the
video.
14 Menu / Delete In Preview mode: press it to enter the settings Menus.
In Playback mode:

3
Press it for a short time to enter “Delete single/ all files”mode;
Press it for a long time to enter file compiling and system setting
menu. In Photo (zoom in) Playback mode: press it to move to the
down area of the photo.
15 Tripod connector To attach camera to tripod.
16 Micro SD card
slot Micro SD card storage location.
17 USB interface Via this connection, you can download photographs and video clips
to a computer.
18 Battery
compartment Compartment for 2 x AAA alkaline batteries
3. Explanation of the status icons
Item Function Description
1 Mode selected Photograph mode.
Video mode.
2 Flash indicator
Force flash: The flash is on for all photos.
Auto flash: The camera determines if
flash should be used or not.
No flash: The flash is turned off.
3 Normal/Macro
mode indicator
Normal mode (0.5m – infinity).
Macro mode (11cm – 18cm).
4 Self-timer Shows selected Self-timer setting
5 Selected resolution
16M = 4608x3456; 10M = 3648x2736;
5M = 2592x1944; 3M = 2048x1536;
VGA = 640x480
6 Picture quality
Super fine.
Fine.
Normal.

4
7 Battery indicator The batteries are full.
The batteries are empty.
8 Zoom indicator Shows the zoom ratio in preview mode
9 The micro SD card
indication
The micro SD card is inserted and will be used
as storage for PHOTO and VIDEO
10 White balance Shows the selected white balance mode
11 Photo/Video counter Photo mode: No. of pictures that can be taken.
Video mode: Recording time in second.
4. Details for camera setting
16M pixel resolution 4608x3456
10.0M pixel resolution 3648x2736
5.0M pixel resolution 2592x1944
3.0M pixel resolution 2048 x 1536
Resolution
VGA resolution 640 x 480
Quality Super Fine/Fine/Normal Picture quality setting
Metering Center/Multi/Spot Metering setting
Auto Automatic white balance
Daylight White balance selected for
daylight conditions with good
sunlight
Cloudy White balance selected for cloudy
conditions
Tungsten White balance selected for
tungsten lighting
White balance
Fluorescent White balance selected for
fluorescent lighting
ISO Auto/100/200/400/800 Sensitivity selection
Exposure ±2.0, ±1.7, ±1.3, ±1.0, ±0.7,
±0.3, 0 Exposure setting
Self Timer On/Off Self timer setting
Sharpness Hard/ Normal/ Soft Sharpness setting
Effect (Preview)
Normal/ B&W/ Sepia/
Negative/ Lomo/ Pencil
Sketch/ Red/ Green/ Blue/
Vivid
Effect (Playback) B&W/Sepia/Negative/Mosa
ic/Red/Green/Blue
Effect setting
Date Stamp On/ Off Date stamp setting
Settings
Photo
Quick View On/ Off Quick view setting

5
Movie Size VGA 640 x 480
QVGA 320 x 240 Video resolution setting
Auto Automatic white balance
Daylight White balance selected for
daylight conditions with good
sunlight
Cloudy White balance selected for cloudy
conditions
Tungsten White balance selected for
tungsten lighting
Video
White balance
Fluorescent White balance selected for
fluorescent lighting
Sounds Off/On Microphone
Frequency 50Hz / 60Hz Select power frequency in your
location
Power Save Off / 1Minute / 3 Minutes Auto power off selection
Language English/German/Italian/
Portuguese/French/Spanis
h/ Japanese Display language selection
Date/Time YY/MM/DD;DD/MM/YY
MM/DD/YY; Date or time setting
Format Yes/ No Format the memory location
selection.
Reset All Yes/ No Reset all settings
Setup
Version See the firmware version
Note: The camera will remain on the last setting when it is turned off.
5. Using the camera
5.1 Installing the batteries
1. Open the battery door.
2. Insert 2 x AAA alkaline batteries into the camera.
3. Close the battery door.
5.2 Inserting a memory card (not included)
This camera has no built-in internal memory. Micro SD memory card is required (not included).
Follow the instructions below to insert the optional micro SD memory card into the camera.

6
1. Turn off camera.
2. Open the battery door.
3. Insert the micro SD card into the camera.
Note: There is only one correct direction to insert the micro SD memory card into the slot. Do
not force the card into the memory card-slot, it may damage both the camera and the
micro SD memory card.
Note: The micro SD memory card must be formatted before taking photographs. See the
following sections for more information.
5.3 Formatting the micro SD card
1. Press the menu button ( ) in PHOTO or VIDEO mode.
2. Select the setup mode by pressing the right button.
3. Select the format icon by pressing the W( ) button and press the SHUTTER button to
confirm.
4. Press the SHUTTER button to format the SD memory card.
5.4 Setting the resolution
The camera can be set to different resolutions.
1. Press the menu button ( ) in PHOTO mode, select the resolution icon using the W
( ) key and press the SHUTTER to confirm.
Resolutions: VGA (640 x 480), 3M (2048 x 1536),
5M (2592x1944), 10M (3648x2736),
16M (4608x3456)
2. Five different resolutions will be displayed. Select the desired resolution by using the up
or down button and press the SHUTTER button to confirm the selection.
5.5 Taking photographs
1. Turn on the camera.
2. Depending on the distance to the object being photographed, use macro switch to adjust
the distance. Select the flower symbol ( ) if you wish to take a close-up photograph
(11cm –18 cm).
If you wish to take a video or a photograph of surroundings or people (0.5m – infinity), set
the macro switch to normal mode ( ).
3. If you are not sure if there is enough lighting, turn on the automatic flash( ) by pressing

7
the flash button. (If the battery power is too low, the flash won’t be activated).
4. Use the LCD screen to aim at the object you wish to take photographs of.
5. Press the SHUTTER button and wait until the LCD display turns on again.
5.6 Zoom in and out
The camera can zoom in up to 4 times.
Zoom in or out by pressing the up or down button, a number will appear on the display, 4x is the
maximum zoom ratio.
5.7 Self-timer setting
You can use the self-timer function when you take a photograph of yourself or when you take a
photograph without flash of an object. To avoid shaking of the camera a tripod is
recommended.
1. Set the camera to photo mode.
2. Press the menu button ( ). The menu will appear.
3. Press the
W( ) button to select Self Timer and confirm by pressing the SHUTTER
button.
4. Press the
W( ) button to select the “On” option
5. Press the SHUTTER button to confirm. The self-timer function is now ready for use.
6. Aim at the object you wish to take photos of.
7. Press the SHUTTER button to take a photograph.
8. The photo will be taken after the timer reaches the delay time of 10 seconds. The camera
will beep during the delay time.
5.8 Recording video clips
1. Press the mode button to select the video clip mode ( ).
2. For setting the resolution, Press the menu ( ) button and select Resolution, then press
the SHUTTER button to confirm. Two resolutions will be displayed.
VGA (640 x 480), QVGA ( 320 x 240).
3. Press the SHUTTER button to start recording videos, press the right button to pause and
press the SHUTTER button again to stop recording. The video clip will now be saved as
an AVI file in the camera memory.
5.9 Playback photographs
1. Press the( ) button to get into playback mode.
2. The last picture or video clip taken will be displayed. Press the W() to get into the
thumbnail mode. Press the Left /Right /Up /Down button to select the desired picture,
and press the Shutter button to view.
3. In full screen display, press the T( ) button to zoom in the photo.
4. To shift the image in zoom-in mode, press the SHUTTER button and then use the
mode/menu/left/right buttons.
5. Press the menu( ) button in Playback mode, press again and hold the menu button
until the menu options displayed. Select SLIDE SHOW and set up the desired slide show

8
way. Press the SHUTTER button to confirm. The pictures saved on the micro SD card
will be displayed in sequence automatically. To stop slide show, press the menu button.
6. Press the menu ( ) button in Playback mode, press again and hold the menu button
until the menu options displayed. Select Photo Effect and press the SHUTTER button.
Select the desired effect by pressing the up/down button and press the shutter button to
confirm. The image will be saved as a separate image.
5.10 Protecting photographs/ videos
You can prevent the photographs/videos in the micro SD card from accidental erasure.
Follow the instructions below to protect photographs/videos.
1. Press the ( ) button to get into Photo playback mode.
2. Press the left or right button to select the photograph/video clip to be protected.
3. Press the menu ( ) button in Playback mode, press it again and hold the menu button
until the menu options displayed. Select Protect and press the SHUTTER button
4. Select “Protect single” or “All” and press the Shutter button to confirm.
5.11 Resizing photographs
A captured image can be resized to a smaller size and saved as a separate image.
Follow the instructions below to resize photographs.
1. Press the ( ) button to get into Photo playback mode.
2. Press the left or right button to select the photograph to be resized.
3. Press the menu ( ) button in Playback mode, press again and hold the menu button
until menu options displayed. Select Resize and press the SHUTTER button to select
the new image size.
4. Select the new size and press the SHUTTER button to conform. The image will be
saved as a separate image.
5.12 Playback video clips
1. When video clips are displayed, press the up button to start playing the video and press
the up button again to pause playback.
2. Press the right button to fast forward or press the left button to rewind.
3. Press the mode button to stop and exit .
5.13 Deleting photographs and video clips
You can delete a single photograph / video clip, or delete all the photographs / video clips in the
memory.
Follow the instructions below to delete photographs.
1. Press the ( ) button to enter playback mode.
2. Press the left or right button to select photograph/video clip to be deleted.
3. Press the menu/delete button()and select “Delete This Image(Video)” or “All” .
4. Press the SHUTTER button to confirm.
5. Press the menu button to exit.
9
NOTE: Select “All” and Press the SHUTTER button to confirm, all the pictures and videos will
be deleted.
Photos that are protected from accidental delete cannot be deleted. To delete photos, set
photos to unprotect mode(Section 5.10), and then follow the file delete procedure.
6. Connecting to a PC
The unit can be connected to the computer as mass storage device and transfer photo/video
files for storage.
7. Specifications
16.0 Mega pixels: (4608x3456)
10.0 Mega pixels: (3648x2736)
5.0 Mega pixels: (2592x1944)
3.0 Mega pixels: (2048x1536)
Image resolution
VGA: (640x480)
Lens F/2.8 f = 4.8mm
Focus range 0.5m. ~ Infinity
Macro mode 11cm – 18cm
Digital zoom 4x
Flash strobe Built-in ( Auto / force / off )
LCD display 2.4" TFT color display
White balance Auto / Daylight / Cloudy / Fluorescent / Tungsten
Video mode 30fps@VGA / 30fps@QVGA with micro SD card
External memory card Supports micro SD cards up to 32GB
File format Picture: JPEG, Video: AVI
Self timer 10 seconds
PC interface USB 2.0
Power source 2 x AAA alkaline batteries

10
8. System requirement
Operating system Win XP (SP3)、Vista32/64 Win7 32/64 and Mac OS X 10.6.8
or above
CPU Pentium 4 / 3.0G or faster recommended
RAM 1 GB MB RAM (Vista : 2 GB)
Interface USB port
CD CD ROM Driver
9. Troubleshooting
Problem Cause Solution
Cannot turn on the camera Low battery power.
Battery placed at wrong
polarities.
Replace or install the battery
correctly.
Photos can not be saved
when taking pictures. The memory card hasn’t
been formatted properly. Format the memory in setup
mode of the camera. Please
refer to section 5.3.
Cannot find removable disk
after connecting the
camera to the computer.
Connection failure. Make sure all cable connections
are secured and restart the
computer if necessary.
Flash does not work. Battery power is too low. Replace with new 2 x AAA
alkaline batteries
The batteries used up very
fast. Incorrect or old batteries Replace with 2 x AAA alkaline
batteries
The photos are blurry 1. The camera is not held
steadily
2. The lens of camera is
dirty.
1. Hold the camera steadily until
it beeps when taking video
photo.
2. Clean the lens with soft dry
cloth.
For EU only

11
Intova SP10 Manual
IMPORTANTE:
- No abra la tapa de las baterías debajo del agua.
- Cierre la tapa de las baterías apropiadamente para sellarla de agua.
- Enjuague la cámara después de usarla y déjela seca al momento
de guardarlo.
1. Conoce tu cámara
Diseño a prueba de agua de 3M
10.0 Mega pixeles resolución
Cámara de fotos digitales
Cámara de vídeo digital
Luz de flash incorporada
Zoom digital 4x
Pantalla de color de 2.4" TFT
Compatibilidad con tarjetas de micro SD
Dos pilas alcalinas AAA
2. Partes funcionales

12
1 Obturador
Pulse este botón para tomar fotografías o iniciar / detener la
grabación de un videoclip, o confirmar los cambios en el modo
de menú.
2 Botón de on/off Pulse éste botón para encenderla, vuelva a pulsarlo para
apagarla.
3 Gancho de correa Gancho para unir la correa de muñeca a la cámara.
4 Luz de flash
Utilice el flash incorporado para dar al sujeto luz extra en caso de
estar en entornos oscuros (la distancia recomendada de flash está
en 1.5m.).
5 Lente
Graba la imagen a captar.
Nota: Mantenga limpia la lente. LA suciedad y las huellas
pueden afectar la calidad de la imagen.
6 Indicador ocupado Cuando el indicador está encendido, la cámara está ocupada.
7 Botón de Macro
Modo Macro: Seleccione éste modo para tomar
fotografías desde cerca (distancia 11cm - 18cm.
Modo Normal: Seleccione éste modo para tomar
fotografías desde 0.5m - infinito
8 Pantalla LCD Muestra fotografías, video clips, ajustes de la cámara y el
menú..
9 ARRIBA Modo de menú: Arriba, modo de Foto/Video/Prevista: Ampliar.
10 Abajo Modo de menú: Abajo, modo de Foto / Vídeo / Pré-estréia:
Alejar
11 Izquierda / luz de
Flash
Para la selección IZQUIERDA en el modo de menú.
Para la selección de funciones de luz de Flash en el modo de
fotografía.
12 Derecho /
Reproducción
Para la selección DERECHA en el modo de menú.
Pulse para entrar en el modo de reproducción.
13 Modo Pulse para seleccionar modo FOTO / VIDEO.
14 Menú / Eliminar
Pulse para entrar en el modo de ajuste de la cámara.
Pulse para eliminar las fotos / vídeos en modo de
reproducción.
15 Conector de trípode Para fijar la cámara sobre trípode.
16 Ranura para tarjeta
de micro SD Ubicación de almacenamiento de tarjeta de SD.
17 Interfaz USB Puede descargar las fotografías y clips de vídeo a un
ordenador a través de esta conexión.
18 Compartimento de la
batería Compartimento para dos pilas AAA.

13
3. Explicación del estado de los iconos
Artículo Función Descripción
1 Modo seleccionado Las fotografías de modo.
Videos modo.
2 Indicador de flash
Grupo de flash: El flash se encuentra en en
cualquier ambiente.
Flash automático: La cámara determina si
el flash se debe utilizar o no.
Sin flash: El flash está apagado.
3 Normal / Macro
Indicador del modo de
Modo normal (0,5 m - infinito).
El modo macro (11cm - 18cm).
4 Temporizador Muestra seleccionada Ajuste del disparador
automático
5 Resolución
seleccionada
16M = 4608x3456, 3648x2736 = 10M;
5M = 2592x1944, 2048x1536 = 3M;
VGA = 640x480
6 Calidad de imagen Súper bien.
Muy bien.
Normal.
7 Indicador de la batería Las baterías están llenas.
Las pilas están vacías.
8 Indicador de zoom Muestra la relación de zoom en el modo de vista
p
revia
9 La indicación de la
tarjeta micro SD
La tarjeta Micro SD se inserta y se utiliza como
almacén para la FOTO y VIDEO
10 El balance de blancos Muestra el modo seleccionado el balance de
blancos
11 Foto / contador de
vídeo
Modo de foto: No. de imágenes que se pueden
tomar.
El modo de vídeo: El tiempo de grabación en un
segundo .

14
4. Detalles para los ajustes de la cámara
16 millones de píxeles de
resolución
4608x3456
10.0 Mega píxeles de
resolución 3648x2736
5.0M píxeles de resolución 2592x1944
3.0M píxeles de resolución 2048 x 1536
Resolución
Resolución VGA 640 x 480
Calidad Super fino / Fino / Normal Ajuste de la calidad
Medida Centro / Multi / Puntual Medición de ajuste
Auto Balance de blancos automático
Luz de día
El balance de blancos
seleccionado para la luz del día
que rodea
Nublado
El balance de blancos
seleccionado para nublado que
rodea
Tungsteno
El balance de blancos
seleccionado para luz de
tungsteno
El balance de
blancos
Fluorescente
El balance de blancos
seleccionado para fluorescente
que rodea
ISO Auto/100/200/400/800 Sensibilidad de la selección
Exposición ± 2,0, ± 1,7, ± 1,3, ± 1,0, ±
0,7, ± 0,3, 0 La exposición ajuste
Temporizador On / Off Ajuste de Temporizador
Nitidez Duro / normal / soft Nitidez ajuste
Efecto (Preview)
Normal / B & W / Sepia /
Negativo / Lomo / Dibujo a
lápiz / Rojo / Verde / Azul /
Vivo
Efecto
(Reproducción)
B & W / Sepia / Negativo /
Mosaico / Rojo / Verde / Azul
Efecto ajuste
Sello de fecha On / Off Ajuste de la fecha sello
Foto
Vista rápida On / Off Selección de la vista rápida
Tamaño de la
película
VGA 640 x 480
QVGA de 320 x 240
Vídeo configuración de la
resolución
Configuración
Vídeo
El balance de
blancos Auto Balance de blancos automático

15
Luz de día
El balance de blancos
seleccionado para la luz del día
que rodea
Nublado
El balance de blancos
seleccionado para nublado que
rodea
Tungsteno
El balance de blancos
seleccionado para luz de
tungsteno
Fluorescente
El balance de blancos
seleccionado para fluorescente
que rodea
Sonidos Apagado / Encendido Ajuste de sonidos
Frecuencia 50Hz / 60Hz Seleccione la frecuencia de
alimentación en su lugar
Ahorro de
energía Off / 1 minuto / 3 Minutos Apagado automático de selección
Lengua
Inglés / Alemán / Italiano /
Portugués / francés /
español / japonés
Selección del idioma
Fecha / Hora AA / MM / DD, DD / MM / AA
MM / DD / AA;
Fecha y tiempo de fraguado
Formato Sí / No Dar formato a la selección de
ubicación de la memoria.
Restablecer
todo Sí / No Restablecer todos los ajustes
El programa de instalación
Versión Ver la versión del firmware
Nota: La cámara seguirá siendo el último ajuste cuando está apagado.
5. Utilizando la cámara
5.1 Instalando las pilas
1. Abralacubiertadelaspilas.
2. Inserte 2 pilas alcalinas AAA en la cámara.
3. Cierre la puerta de la batería.

16
5.2 Insertando la tarjeta de memoria (no incluida)
Esta cámara tiene una incorporada memoria interna. Esta memoria se puede ampliar con una
tarjeta de memoria micro SD (no incluida).
Siga las siguientes instrucciones para insertar la tarjeta opcional de memoria de micro SD en la
cámara.
1. Primero apague la cámara.
2. Abra la puerta de la batería.
3. Inserte la tarjeta SD en la cámara.
Nota: Sólo hay una dirección correcta para insertar la tarjeta de memoria de micro SD en la
ranura. No fuerce la tarjeta en la ranura de la tarjeta de memoria, es posible que la
tarjeta de memoria de cámara y micro SD.
Nota: La tarjeta de memoria de micro SD debe ser formatada antes de tomar fotografías. Vea
las secciones siguientes para más información.
5.3 Formateando la memoria o tarjeta SD
1. Pulse el botón de menú( ) en el modo de FOTO o VÍDEO.
2. Seleccione el modo de configuración pulsando el botón de la derecha.
3. Seleccione el icono de formato pulsando el botón W( ) y pulse el botón OBTURADOR
para confirmarlo.
4. Seleccione la memoria interna o la tarjeta SD y confirme con el botón OBTURADOR.
5.4 Ajustando la resolución
La cámara se puede ajustar a diferentes resoluciones.
1. Pulse el botón de menú( ) en el modo de FOTO, seleccione el icono de la resolución por
la tecla W( ) y pulse el OBTURADOR para confirmar.
Resoluciones: VGA (640 x 480), 3M (2048 x 1536),5M (2592x1944), 10M (3648x2736);
16M (4608x3456)
2. 5 mostrará seis diferentes resoluciones. Seleccione la resolución que desee con el botón
arriba o abajo y pulse el botón OBTURADOR para confirmar la selección.
5.5 Tomando fotografías
1. Encienda la cámara.
2. Dependiendo de la distancia al objeto fotografiado, utiliza el interruptor de macro para
ajustar la distancia. Seleccione el símbolo de la flor( ), si desea tomar una fotografía de

17
primer plano(11cm –18 cm).
Si desea tomar un video o una fotografía del entorno o las personas(0.5m - infinito), ajuste
el interruptor de macro al modo normal( ).
3. Si usted no está seguro de si hay suficiente iluminación, enciende el flash automático ( )
pulsando el botón del flash. (Si la energía de batería es demasiado bajo, el flash no se
activará).
4. Utilice la pantalla LCD para el objetivo que desea tomar la fotografía.
5. Presione botón del OBTURADOR y espere hasta que la pantalla de LCD se enciende de
nuevo.
Precaución: 1) Teniendo foto por objeto en rápido movimiento no es recomendable.
2) La imagen puede ser distorsionada al tomar la fotografía en un vehículo en
movimiento.
5.6 Ampliar y alejar
La cámara se puede ampliar hasta 4 veces.
Acercar o alejar pulsando el botón hacia arriba o abajo, un número aparecerá en la pantalla, 4x
es el máximo de zoom.
5.7 Ajuste de temporizador
Puede utilizar la función de temporizador cuando se toma una fotografía de usted o cuando
toma una foto sin flash de un objeto. Para evitar el temblor de la cámara, un trípode se
recomienda.
1. Ajuste la cámara en el modo de foto.
2. Pulse el botón MENU ( ). El menú aparecerá.
3. Pulse el botón W( ) para seleccionar el Modo de Captura y confirmarlo pulsando el botón
OBTURADOR.
4. Pulse el botón W( ) para ajustar el tiempo de retardo: 10S temporizador.
5. Pulse el botón OBTURADOR para confirmar. La función de temporizador ya está listo para
su uso.
6. Apunte al objeto que desea tomar la foto.
7. Pulse el botón del OBTURADOR para tomar una fotografía.
8. La fotografía se tomará después de que el cronómetro llega el tiempo de retardo de 10
segundos. La cámara emitirá un pitido durante el tiempo de retardo.
5.8 Grabación de clips de vídeo
1. Pulse el botón MODO para seleccionar el modo de clip de vídeo ( ).
2. Para establecer la resolución, pulse MENÚ ( ) y selecciona la Resolución y luego
presione el botón OBTURADOR para confirmar. Dos resoluciones se mostrará.
VGA (640 x 480), QVGA ( 320 x 240).
3. Pulse el botón OBTURADOR para iniciar la grabación de vídeo, pulse el botón
OBTURADOR para detener la grabación. El videoclip se guardará como un archivo AVI en
la memoria de la cámara.

18
5.9 Reproducción de fotografías
1. Pulse el botón ( ) para entrar en modo de reproducción.
2. La última clip de imagen o de vídeo tomada se mostrará. Use los botones izquierda o
derecha para hojear las fotos o vídeos
3. En la visualización a pantalla completa, pulse el botón T() para ampliar la foto.
4. Para ver las imágenes en miniatura, pulse el botón W().
5. ra cambiar la imagen en el modo de ampliar, pulse el botón OBTURADOR, y utilice las
flechas arriba / abajo / izquierda / derecha.
6. Pulse el botón MENU ( ) en el modo de Reproducción, pulse de nuevo y mantiene el
botón MENU hasta que las opciones de menú que aparece. Seleccione PRESENTACIÓN
DE DIAPOSITIVAS y seleccione el tiempo de presentación de diapositivas. Pulse el botón
OBTURADOR para confirmar. Las imágenes guardadas en su cámara o su tarjeta micro
SD se mostrará en la secuencia de forma automática. Para detener la presentación de
diapositivas, presione nuevamente el botón OBTURADOR.
5.10 Reproducción de clips de vídeo
1. Cuando se muestran las clips de vídeo, pulse el botón OBTURADOR para iniciar la
reproducción del vídeo y pulse el botón OBTURADOR para detener la reproducción.
2. Presione el botón derecho para avanzar rápido o presione el botón izquierdo para
rebobinar.
3. Pulse el botón de abajo para detener.
4. Pulse el botón de modo para salir.
5.11 Eliminar clips de fotografías y video
Puede borrar una sola fotografía / vídeo, o borrar todas las clips de fotografías y vídeo en la
memoria.
Siga las siguientes instrucciones para borrar la fotografía.
1. Pulse el botón ( ) para entrar en el modo de reproducción.
2. Pulse el botón izquierdo o derecho para seleccionar la fotografía / vídeo que desee
eliminar.
3. Pulse el botón MENU / borrar ( ) y seleccione "Eliminar esta imagen (Video)" o "Todo".
4. Pulse el botón OBTURADOR, y seleccione Aceptar para confirmarlo.
5. Pulse el botón de modo para salir.
NOTA: Seleccione "Todos" y presione el botón OBTURADOR para confirmar, todas las fotos y
videos serán eliminados.
6. Conexión a un PC
La unidad puede ser conectada a la computadora como dispositivo de almacenamiento y
transfiere el archivo de foto o vídeo a su almacenamiento.
Other manuals for SP10
1
Table of contents
Languages:
Other Intova Digital Camera manuals

Intova
Intova SP10 User manual

Intova
Intova 3.1M Digital Camera User manual

Intova
Intova IC16 User manual

Intova
Intova Sport HD Installation guide

Intova
Intova SS04 User manual

Intova
Intova CP9 User manual

Intova
Intova CP9 User manual

Intova
Intova Sport HD II User manual

Intova
Intova CP8 User manual

Intova
Intova SP8 User manual
Popular Digital Camera manuals by other brands

Panasonic
Panasonic Lumix DMC-TZ70 Operating instructions for advanced features

Sanyo
Sanyo Xacti Series instruction manual

Jaycar Electronics
Jaycar Electronics QC 8020 user manual

Olympus
Olympus 550WP - Stylus Digital Camera instruction manual

ScopeAround
ScopeAround Fit user manual

Kodak
Kodak LS443 - Easyshare Zoom Digital Camera user guide