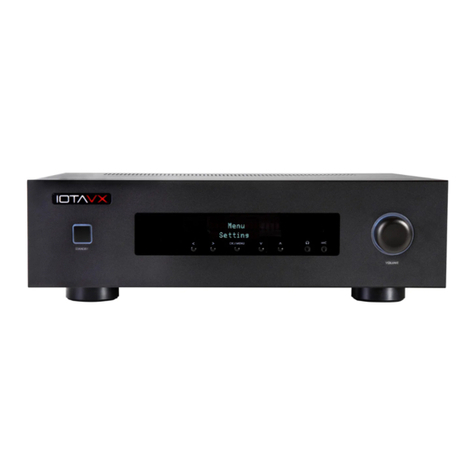
IOTAVX NP3 User manual

NP3
User Manual
Version 1.2
SAFETY INSTRUCTIONS
1. Read this user manual.
2. Keep this user manual.
3. Heed all warnings.
4. Follow all instructions.
5. Do not use this apparatus near water.
6. Only clean with a dry cloth.
7. Do not block any ventilation openings. Only operate the device in accordance with the
manufacturer's instructions.
8. Do not place the device near any heat sources such as radiators, heaters, stoves, or other
devices (including amplifiers) that generate heat.
9. Make sure that the power cord is not pinched, especially at power outlets and where it
emerges from the device.
10. Use only accessories specified by the manufacturer.
11. Only to be used in combination with the stand, tripod, bracket or table specified by the
manufacturer or sold with the device. If a caster is used, use caution when the cart /
equipment combination moving to avoid injury from tipping over.
12. Pull out the power plug during lightning storms or when unused for long periods.
13. Leave all maintenance work to qualified service personnel. Maintenance is required when the
device has been damaged in any way, e.g. For example, if the power cord or plug has been
damaged, liquid has been spilled or objects have fallen into the apparatus, the apparatus has
been exposed to rain or moisture, does not operate normally, or has been dropped.
14. For information on the power supply, see the manufacturer's operating instructions. Note that
different operating voltages may require the use of different power cables and / or mounting
plugs.
15. Do not install the device in an unventilated rack.
16. The user should not attempt to service the device beyond what is described in the operating
instructions. All other maintenance work should be referred to qualified service personnel.

1
This equipment has been tested and found to comply with the limits for a class B digital device,
pursuant to part 15 of the FCC rules. These limit values are intended to provide adequate protection
against harmful interference in a residential complex. This equipment generates, uses, and can
radiate radio frequency energy and, if not installed and used in accordance with the instructions, may
cause harmful interference to radio or television reception.
This can be determined by switching the device off and on. The user is prompted to correct the
interference by one or more of the following measures:
● Reorient or relocate the receiving antenna.
● Increase the separation between the equipment and the receiver.
● Connect the equipment into an outlet on a circuit different from that to which the receiver is
connected.
● Contact the dealer or an experienced radio / TV technician.
RECYCLING IN COUNTRIES OF THE EUROPEAN UNION
This symbol on the product or on the packaging means that your electrical and
electronic equipment at the end of its life should be disposed of separately from your
household waste. There are separate collection systems for recycling in the EU. For
more information, please contact the local government agency or the dealer where you
purchased the product.
WARNING
WARNING: To reduce the risk of fire or electric shock, do not expose this
apparatus to rain or moisture.
NOTICE: To avoid the risk of electric shock, never remove the cover (or
back cover). There are no user serviceable parts inside. Contact
qualified service personnel.
THE LIGHTNING SYMBOLalert with an arrow symbol is intended to the
user to the presence of an uninsulated “dangerous voltage” within the
product housing which may be of sufficient strength to represent the risk
of electric shock to persons.
1

2
Product description
Front side
1. Standby button
Button for switching the device on and off and displaying the operating status.
2. CD drive
Play CD's.
3. VFD display
Shows the current playback and the menu.
4. USB front
Connection of USB sticks or hard drives with up to 500 GB of storage space.
5. WiFi antenna
Access to your home network and the Internet via WiFi.
The antenna must be aligned vertically for optimal reception.
6. Back button
Jump to the previous title.
7. Next button
Jump to the next track.
8. Eject button
Eject the CD from the CD drive and navigate through the menu.
9. Volume control
Adjusting the volume and navigating the menu.
10. Mode button
For calling up the source selection and for calling up and exiting the menu.
2

3
Rear side
1. Analog audio outputs
For analog connection to an integrated amplifier or power amplifier.
2. Digital audio outputs
For digital connection to an integrated amplifier or AV receiver.
3. Digital audio inputs
For digital connection of additional source devices to the NP3.
4. USB Audio (PC)
For the transmission of audio via USB from a source device (e.g. PC).
5. Radio antenna (DAB + / FM)
For receiving radio signals via DAB + or FM.
6. Extension Port
For connecting the optional IOTAVX Bluetooth adapter.
7. USB back
For connecting USB sticks or hard drives with up to 500 GB of storage space.
8. Ethernet connection
For connecting the NP3 to your home network via LAN.
9. Service switch
Only for service purposes by qualified personnel.
10. WiFi antenna
Access to your home network and the Internet via WiFi.
The antenna must be aligned vertically for optimal reception.
3

4
11. RS232C
RS232C input for control via an external control system.
12. Trigger input and output
Connection to other devices to synchronize switch-on and switch-off processes.
13. Dimmer input and output
Connection to other devices to synchronize the lighting.
14. IEC power connector
The IEC power connector accepts any standard IEC power cord.
Remote control
1. Power button
For switching the device on and off.
2. Eject button
Ejects the CD from the CD drive.
3. Forward / backward buttons
For skipping forward and backward or for forwarding and
rewinding.
4. Input buttons
To select the input:
CD: CD drive
NET: Streaming
USB AUDIO: USB audio (PC)
Optical: Optical input
Coaxial: Coaxial input
BT: Bluetooth adapter (optional)
DAB / FM: Radio (DAB + / FM )
USB A: USB Front / USB Back
5. Shuffle button
Activate / deactivate random playback.
6. Repeat button
Set Single / total or no repetition.
7. AUTO SCAN
For automatically searching for radio stations.
4

5
8. DIM button
To control the lighting of the device.
9. MENU button
To enter the system settings.
10. Repeat button
Set single / total or no repetition.
11. Control pad
To start / pause the playback process and to navigate in the menu.
12. Back button
For reaching the higher level in the menu.
13. MODE button
For entering the source selection and for entering and exiting the menu.
14. Mute button
To mute the analog output of the NP3.
15. Preset button
For selecting the desired preset.
16. Volume button
To control the volume of the analog output of the NP3.
17. INFO button
To show the playback information of the respective source in the display.
18. Numeric keypad
For direct selection of the desired title and for saving presets.
5

6
Basic operations
Before making any connections between the NP3 and other equipment, read the manuals that came with your
other components. Do not connect the power cord to the NP3 until you have completed and checked all
connections.
Switching on the device:
Press the POWER button to switch on the NP3. As soon as the power LED lights up white, the device is ready for
use. Press the POWER button again to put the NP3 into standby mode. As soon as the power LED lights up red,
the device is in standby mode.
Connection options
Use of the NP3 as a source device for an amplifier (AV receiver, integrated amplifier,
etc.):
The NP3 has two digital outputs (optical, coaxial). If your AV receiver or integrated amplifier has such an input,
we recommend that you use it to connect the devices. If your AV receiver or integrated amplifier does not have a
digital input, use the analog output of the NP3 to connect to your device.
Use of the NP3 as a pre-amplifier (connection of an external power amplifier):
To connect the NP3 to an external power amplifier, use the analog output of the NP3 and connect it to your power
amplifier.
Connection of additional source devices to the NP3:
The NP3 has two digital inputs (optical, coaxial). If you want to connect other source devices to the NP3, you can
connect them to the digital inputs.
Menu
You call up the menu by pressing the MENU button. Navigate in the menu with the help of the control pad. In the
menu of the NP3 you will find the following setting options:
System Info
To display the device name and the version number of the components.
Network Wizard
Shows you the available WiFi networks after a scan. To connect using WiFi, select the desired network and enter
the password. You can navigate to the left or right with the control pad and select the desired character with the
ENTER key in the middle of the control pad. With you can delete the last entered character. Press to
confirm the entry of your password. The password only needs to be entered once.
APD Setting
APD On: The device switches to standby mode after approx. 30 minutes if there is no signal present.
APD Off: The device does not switch to standby mode.
6

7
MCU Upgrade
For updating the device's chip software. Only as instructed by qualified personnel.
CD Upgrade
For updating the software of the CD drive. Only as instructed by qualified personnel.
Firmware Upgrade
For updating the firmware of the device. Only as instructed by qualified personnel.
System Reset
Resets the device to the factory settings.
STREAMING
Please first connect the included WiFi antenna to the NP3 or connect the NP3 to your LAN via Ethernet port.
Connect the device to the Internet as described in the chapter “Menu” - “Network Wizard”.
Android and iOS users:
Download the following app:
Wiim Home
When starting the app, all compatible devices are searched for and displayed. Please select your NP3 here. In
the app, you can display the streaming services you want and use them to log in with your individual account
details.
Radio (DAB + / FM)
Please first connect the enclosed wire antenna to the NP3.
When you select DAB or FM for the first time, the device automatically searches for stations and automatically
assigns a preset to the first 40 stations found. With the forward button on the remote control, you can switch
between these 40 stations stored in presets and all other existing stations and, if you wish, assign them to one of
the 40 presets.
If you want to assign a station to a different preset, select the desired station and press the MEM button. Then
you can assign the station to the respective preset by pressing the desired number in the numeric keypad.
Note: If you assign a new preset to a station, the station previously saved under this preset will be overwritten.
7

8
Note: By pressing the AUTO SCAN button you start the station search again, which overwrites the previous
presets.
Dear customer,
If you have technical difficulties setting up or using your new product, please contact our customer service.
Customer service email address: [email protected]
We wish you many years of pure audiovisual enjoyment with your new IOTAVX equipment
8
Table of contents
Other IOTAVX Network Hardware manuals
Popular Network Hardware manuals by other brands

Radicom Research
Radicom Research RB8762CMF Series Designer's guide

Simplex
Simplex 4100-6038 installation instructions

ZoneVu
ZoneVu Fusion user guide

Cisco
Cisco CSC-C2FCIT Installing and upgrading

CES
CES VAD-1 installation manual

8e6 Technologies
8e6 Technologies Enterprise Filter Authentication R3000 user guide