005
Quick Installation
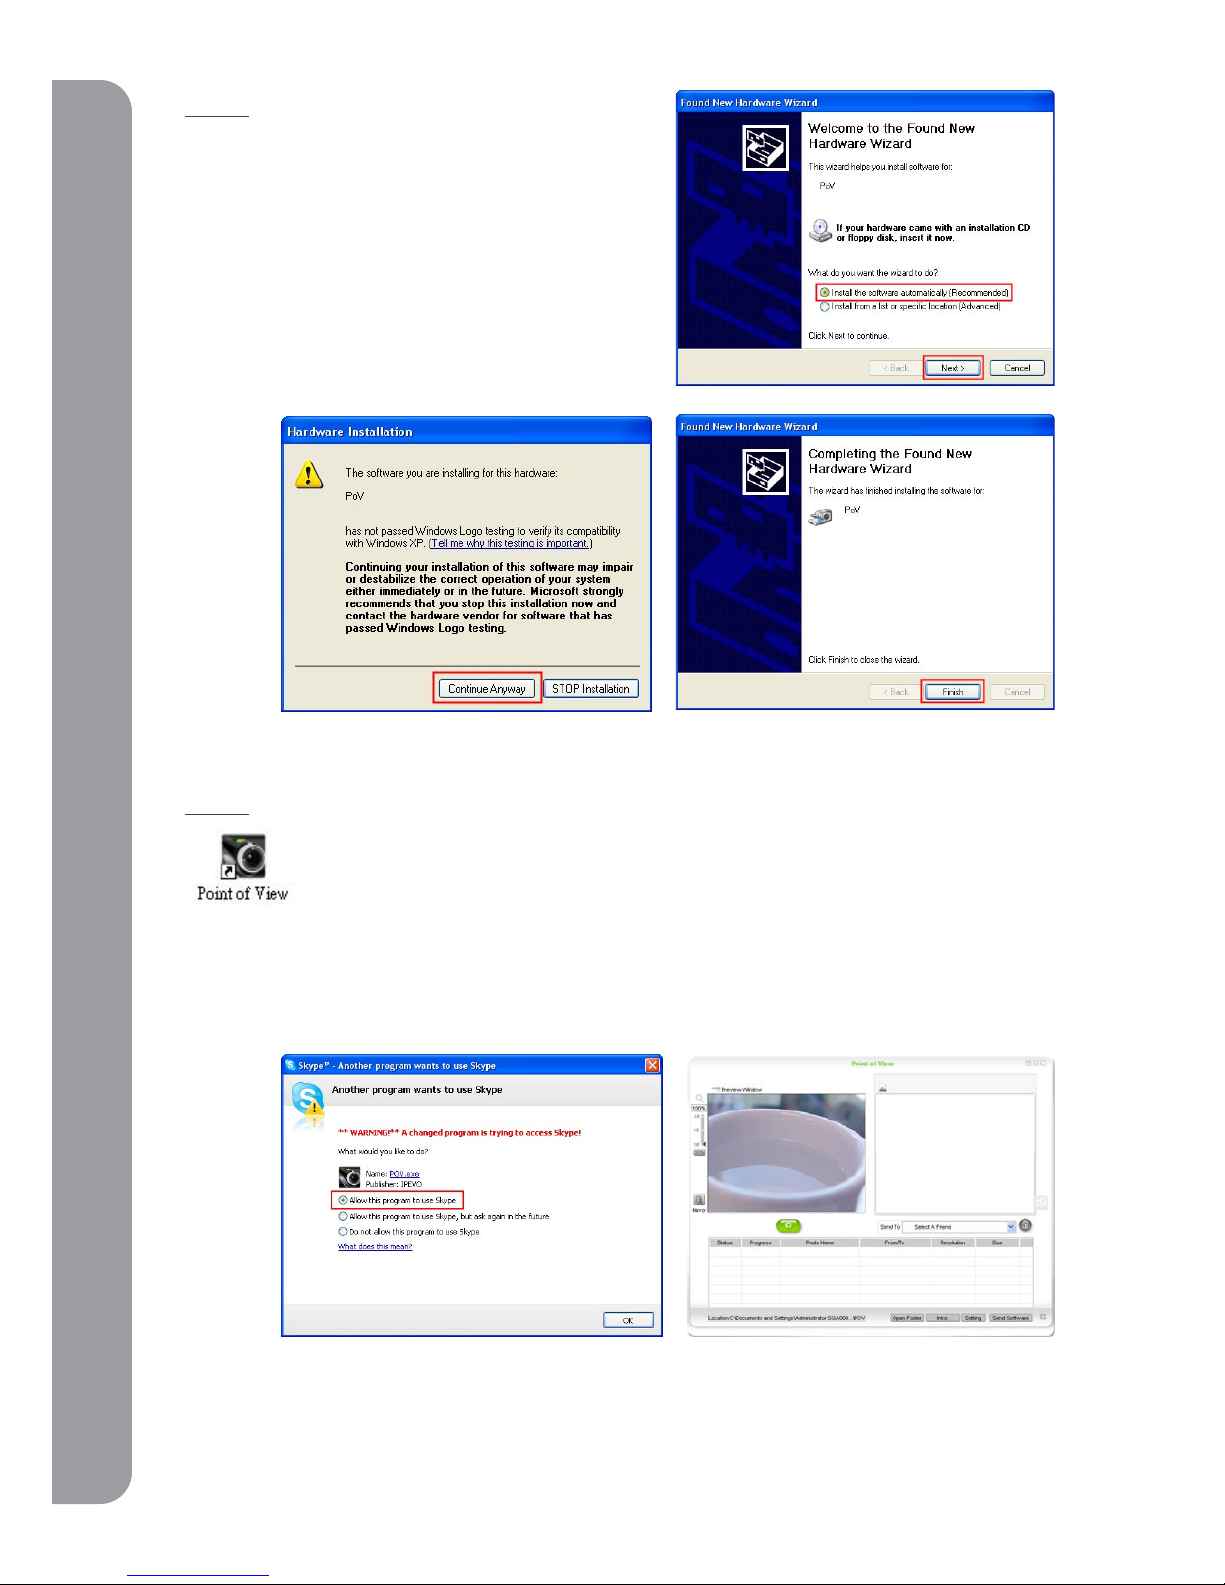
Step 2.
When the installation is complete, you may insert
the PoV into your computer’s USB port. Windows
will automatically detect the new setting and
start “Found New Hardware Wizard”. Please
follow the instructions on the screen to finish
installing the software.
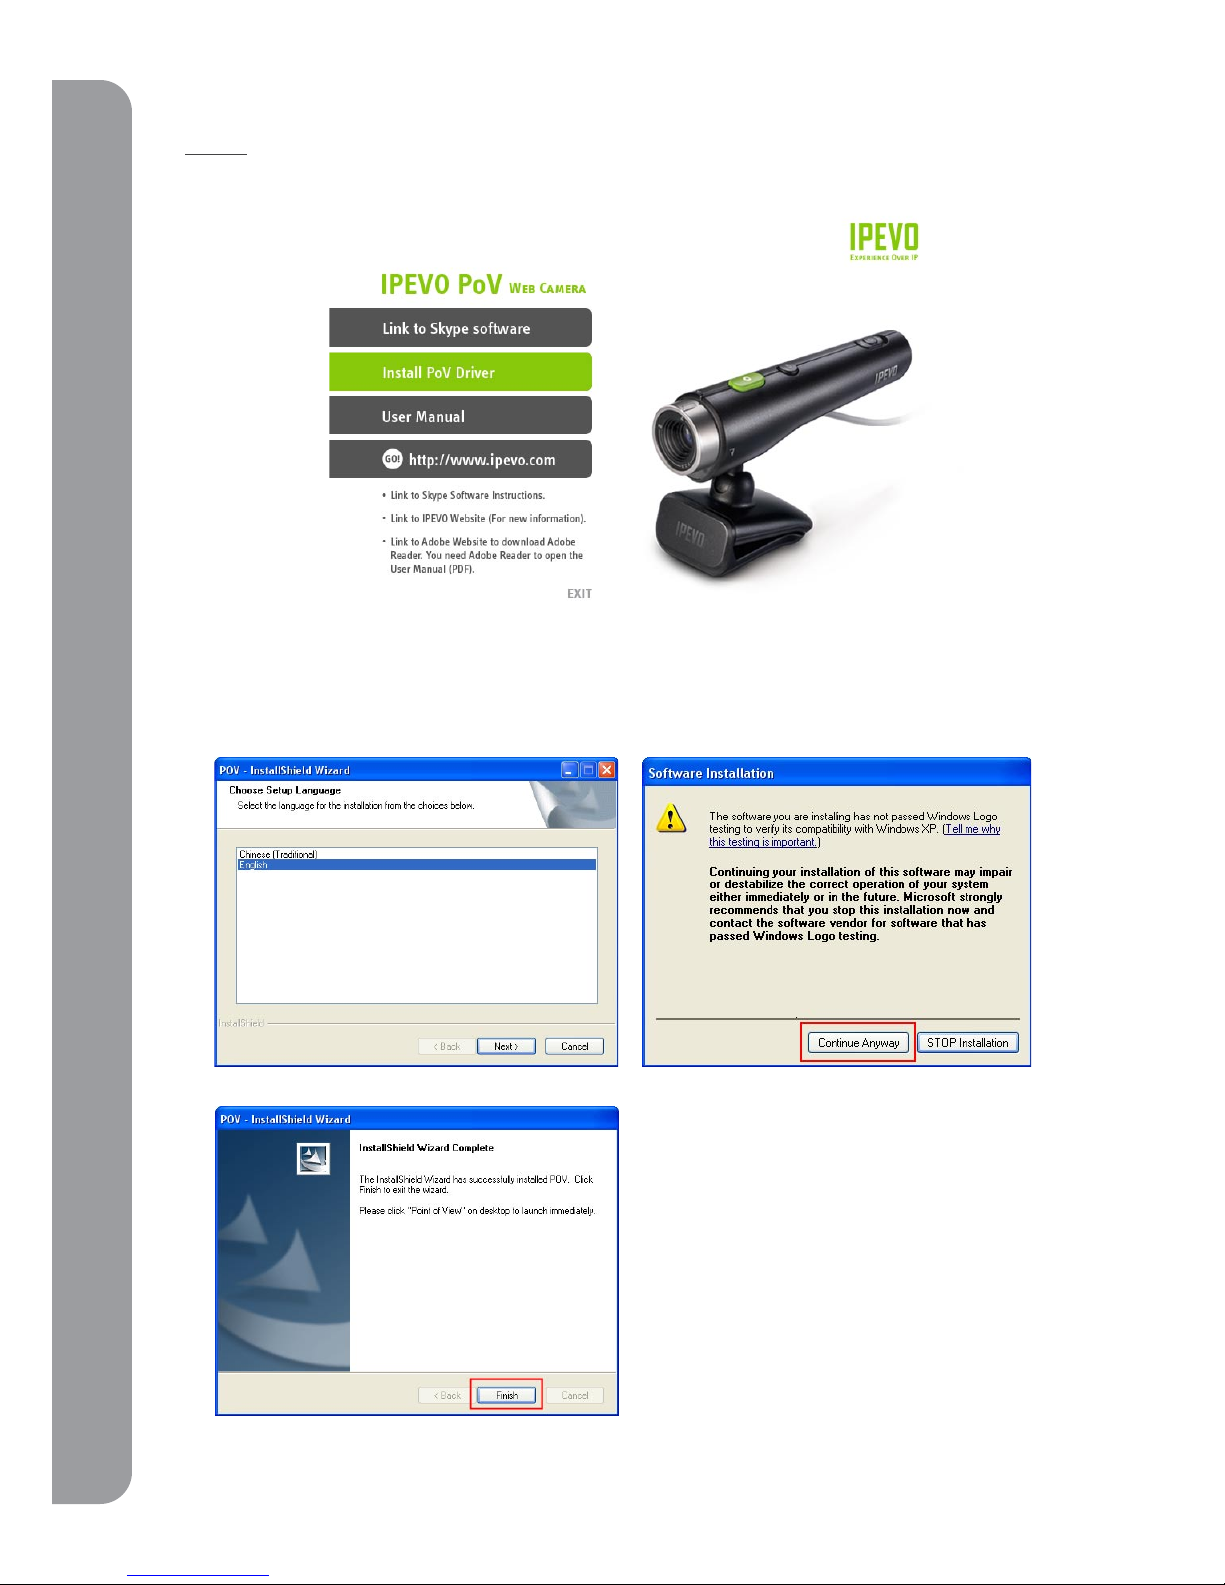
If you see a warning screen, please click
“continue anyway” to install the PoV software.
Step 3.
A shortcut to begin using the PoV software will be added on your computer
desktop after the installation is complete.
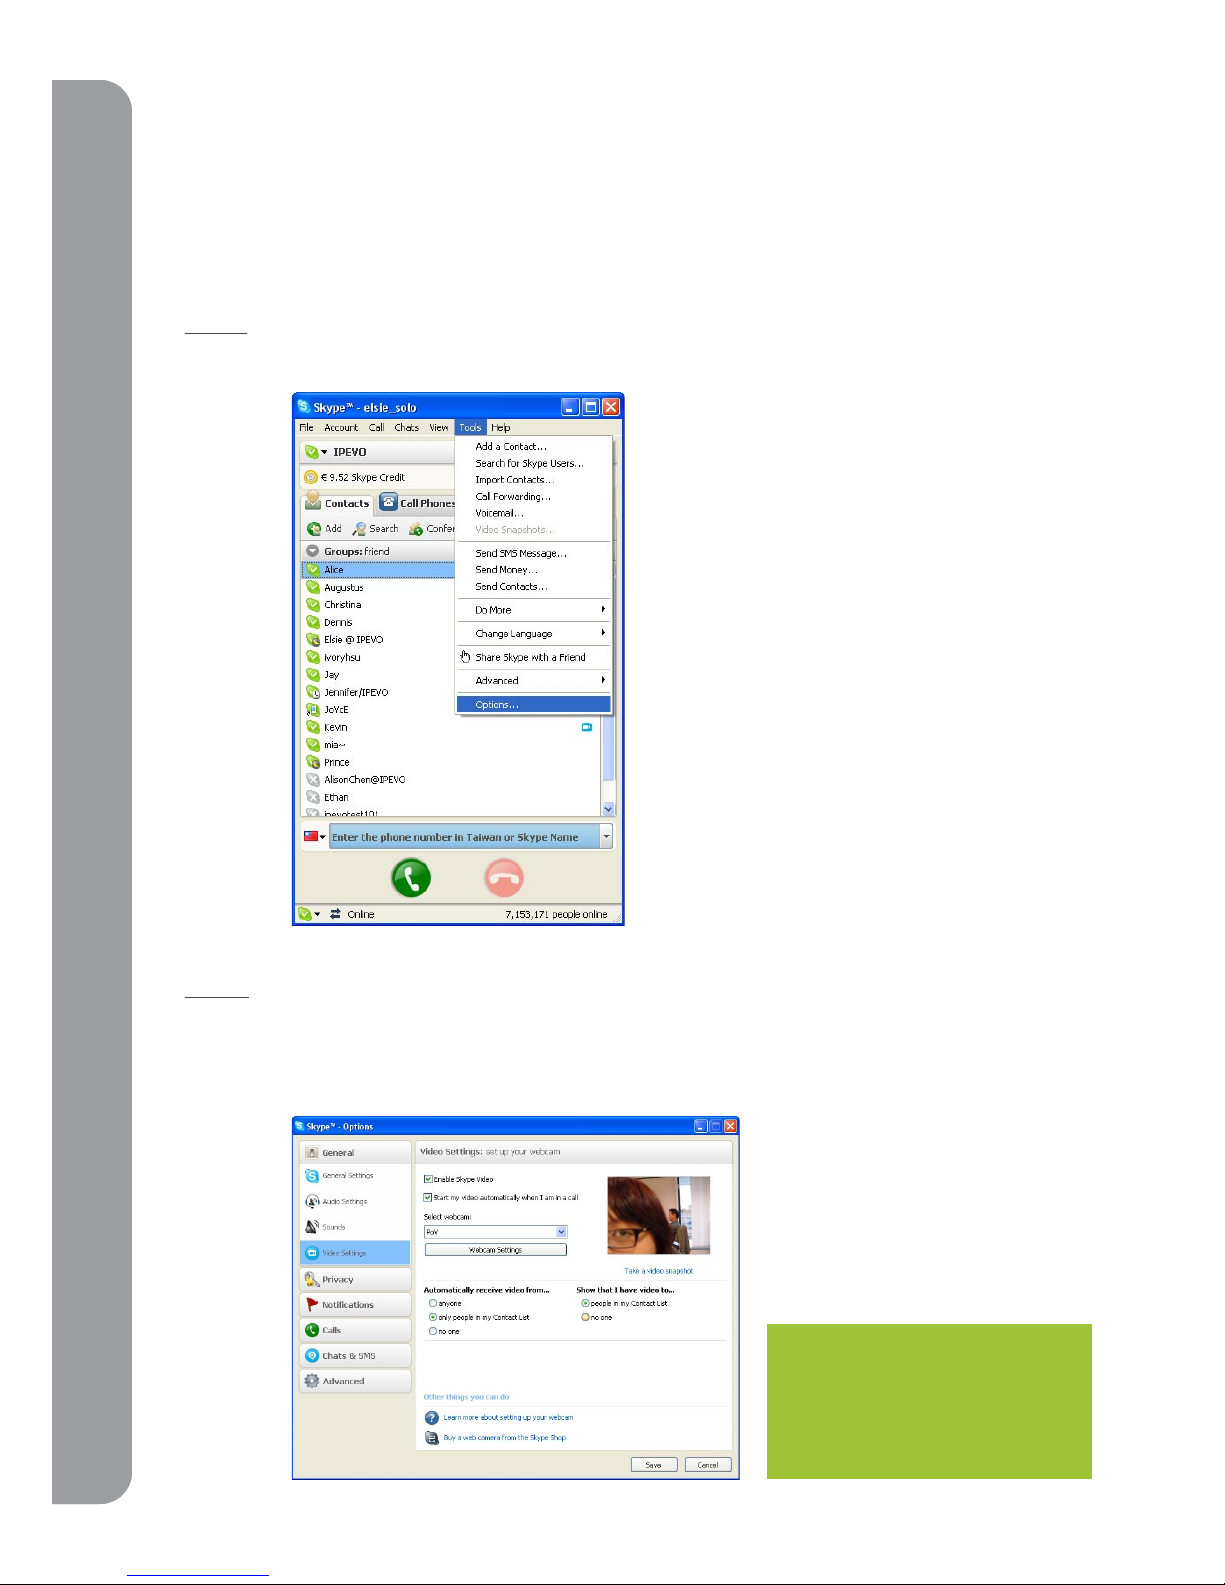
Start using the PoV and enable Skype file sharing and the “Remote Monitor” by double clicking
the PoV icon on your desktop or by selecting the program from your Window’s Start menu. To
prevent future pop -ups, select “allow this program to use Skype”.
1-4 Uninstalling the PoVDriver
To uninstall the PoV, go to Start-All Program-IPEVO, choose “PoV uninstall” and follow the
instructions on your screen to uninstall the program.