Ispring RO500AK Service manual

RO500 and RO500AK 3-Stage Under Sink Reverse
Osmosis System
INSTALLATION INSTRUCTIONS
& OWNER’S MANUAL
Ver. 08/2021
Copyright ©2005-2021 ISPRING WATER SYSTEMS, LLC. All rights reserved.

We stand behind our products
Since 2005, iSpring has been dedicated to providing high-quality drinking water to families across
the United States. We provide various residential faucets and water filtration systems that purify
your water in everyday life and deliver pure, healthy, and tasty water to you and your family.
At iSpring, we strive to develop products to the highest of standards and aim to make excellent
drinking water accessible for all households. With affordable pricing, reliable quality, prompt
delivery, and top-notch customer service, we hope to assist in bringing you great water for years to
come.
Page 1www.123filter.com | (678) 261-7611 | [email protected]

Prior to Installation
Read this instruction manual carefully prior to installation.
Keep this manual readily available for future reference.
Table of Contents
User Information.....................................................................................................3
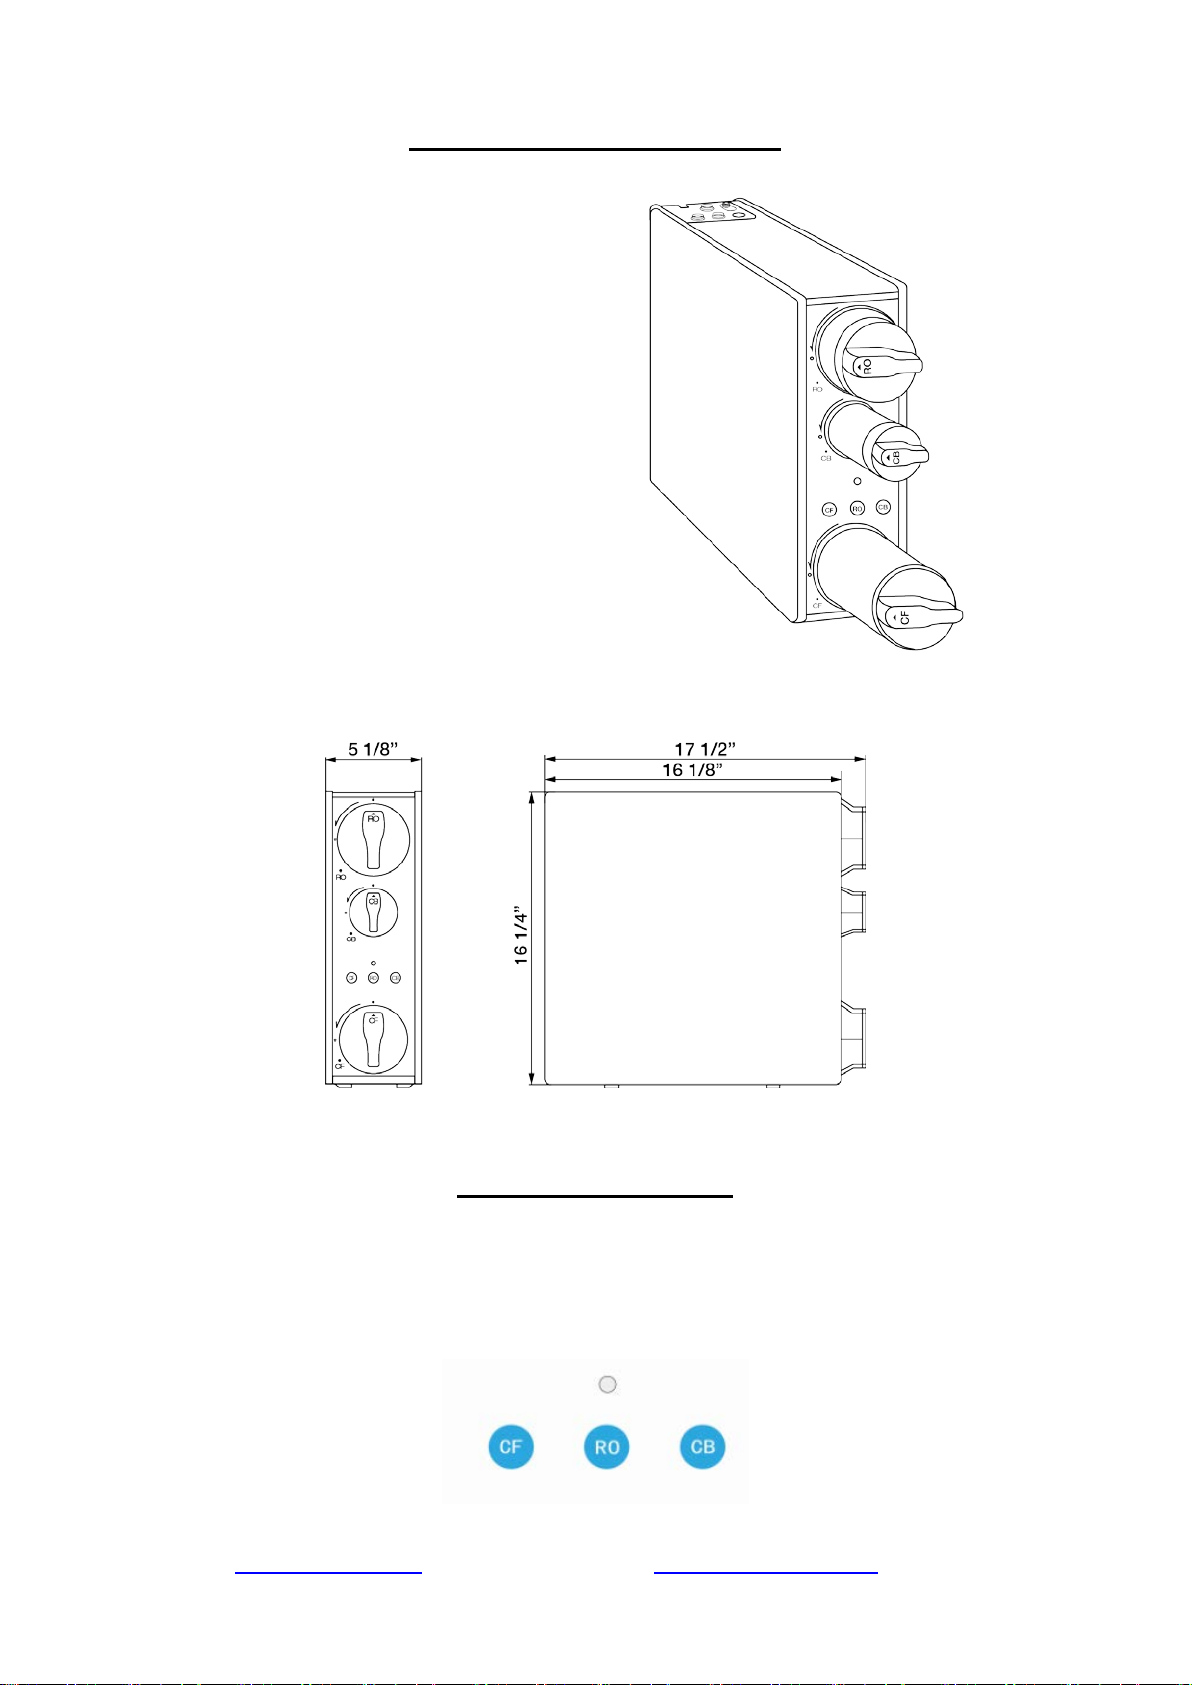
Component Identification.......................................................................................4
Product Features .....................................................................................................5
Product Structure and Size .....................................................................................6
Filter Life Indicator ................................................................................................6
Installation
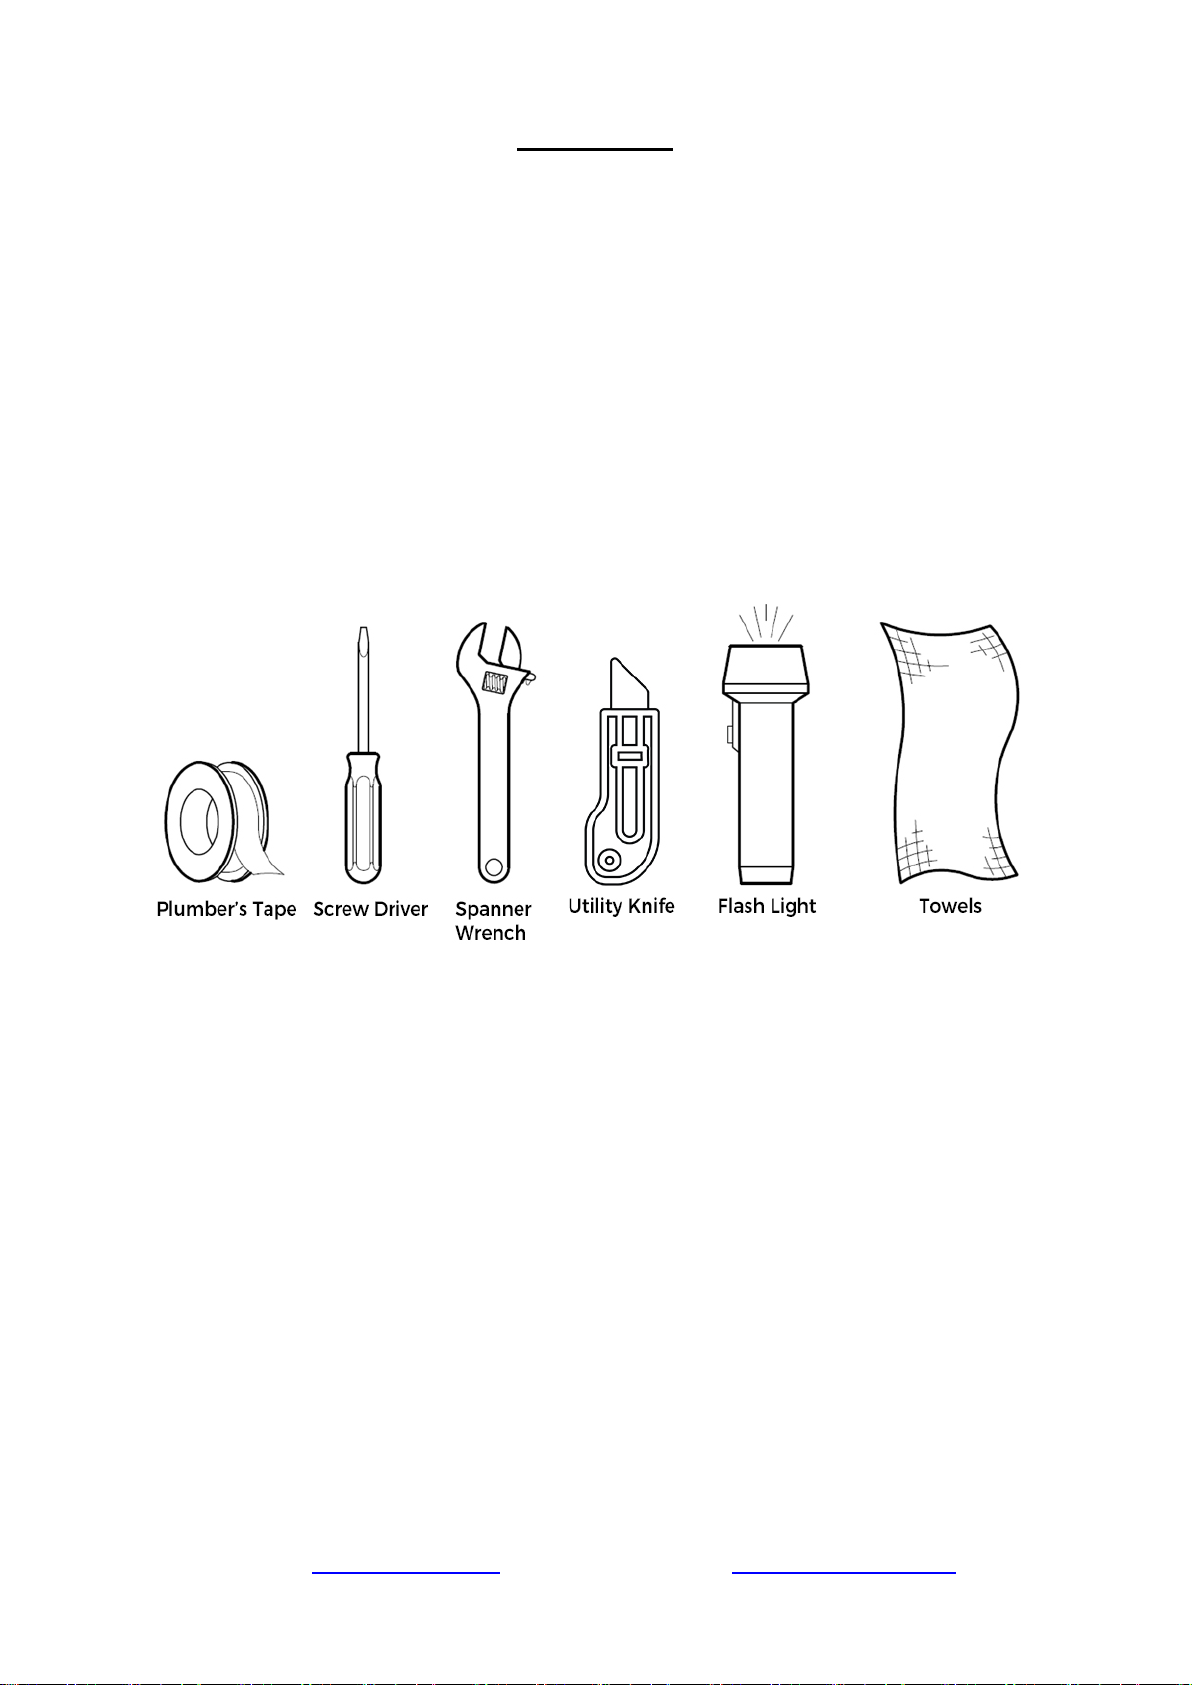
Preparation..............................................................................................................7
Feed Water Adapter Installation.............................................................................7
Filter Installation.....................................................................................................8
System Installation and Setup ................................................................................9
Faucet Installation.................................................................................................11
Connecting Faucet Power Supply and Main Power Supply ................................12
Using the System
Starting for the First Time....................................................................................13
Routine Maintenance............................................................................................13
Fault Codes...........................................................................................................14
Filter Service Life Display ...................................................................................14
Machine Function Description .............................................................................15
Filter Service Life Reset.......................................................................................16
Manual Rinsing Mode ..........................................................................................16
Warranty
Warranty...............................................................................................................17
Warranty Registration...........................................................................................18
www.123filter.com | (678) 261-7611 | support@123filter.com Page 2

User Information
The user must adhere to the installation specifications described in this Product Installation and
Operation Manual (hereinafter referred to as the "instruction manual"). iSpring is not responsible
for damage, loss, or injury resulting from neglect, improper maintenance, or unauthorized
modification of products.
●The unit should be placed only on flat surfaces. Do not mount on a wall.
●This product is designed for residential use only. Contact iSpring customer service to
inquire about usage in non-residential settings.
●The operating temperature range is 41°F - 100°F. If the water temperature or ambient
temperature falls below 41°F, immediately shut off the inline water supply, turn off the inline water
adapter, and drain the remaining water from the system.
●In case of malfunction due to damage or failure of the power supply system, unplug the
system immediately and contact iSpring customer service for guidance.
●If leaking occurs, shut off the inline water supply by turning off the adapter. Then unplug
the system and contact iSpring customer service.
●Use only authorized iSpring parts and filters. Using unauthorized or aftermarket
components will void the product warranty.
●This product is equipped with built-in systems to prevent internal leaks and minimize the
risk of water damage. However, it is recommended that users check external fittings and
connections regularly to ensure all components are secure and operating properly.
●Unauthorized modification and disassembly are strictly prohibited and will void the
warranty.
●Never touch the power cord connector when your hands are wet, as this may result in
electric shock.
Page 3www.123filter.com | (678) 261-7611 | [email protected]

Product Features
1) Product Scope
A. For residential use ONLY.
B. Applicable water quality: municipal.
2) Water Treatment Process
Municipal tap water → Composite filter → Reverse osmosis filter → Post-activated carbon
filter (Alkaline filter on RO500AK model only) → Purified water
3) Filtration Performance
Stage
Filter
Purpose
1st Composite filter
Removes unpleasant chlorine, taste, odors, cloudiness and coloring.
Removes dirt, sand, silt, rust, and scale particles and absorbs THMS
and pesticides.
2nd Reverse osmosis
membrane
Removes lead (removes up to 98% of lead), chlorine, fluoride,
arsenic, hormones, asbestos, calcium, sodium, and more using a
0.0001 (one ten-thousandth) micron membrane.
3rd
Carbon block filter
Further enhances the sense and taste of the water.
Alkaline Filter (On
RO500AK model only)
Adding back essential minerals, while enhancing the water taste.
4) Specifications
5) Filter Service Life Table:
Filter
Recommended replacement cycle
First stage composite filter
6 months
Second stage reverse osmosis membrane
24 months
Third stage carbon block filter
12 months
•This system works at maximum performance when connected to a municipal water supply with
an inlet pressure of 60 psi and a temperature of 75°F.
•The actual water flow rate will vary depending on several factors, such as water quality, high
TDS (500 ppm+), low temperatures (below 55°F), and low pressure (below 25 psi). These will
limit the performance of the system and reduce the filter’s life.
Specification
Working Pressure
15 - 70 psi
Working Temperature
41–100°F
Flow Rate of Purified Water
Up to 0.4 gal/min.
Power Specifications
Input: 100-240V AC
Output: 24 DC
Page 5www.123filter.com | (678) 261-7611 | [email protected]

Product Structure and Size
1) Product Overview
First-stage composite filter (CF)
Third-stage carbon block filter (CB)
("CA" Alkaline filter on RO500AK models)
Second-stage reverse osmosis membrane (RO)
2) Dimensions
Filter Life Indicator
The filter life indicators are controlled by a timer and flow monitor.
Change the filter when the light runs red. To reset the indicator after filter replacement, see
"Filter Serve Life Reset".
www.123filter.com | (678) 261-7611 | support@123filter.com Page 6

Installation
1) Preparation
A. It is strongly recommended to watch the video "iSpring RO500 Tankless RO Reverse
Osmosis 500GPD Water Filtration System DIY Installation" on Youtube.com prior to
installation.
B. Choose a suitable location for the system. Again, it cannot be mounted and must be placed
on a flat surface and make sure this system is to be installed on INDOOR cold-water supply
ONLY.
C. Check the packing list to confirm all accessories are included in the package. Contact
iSpring customer service if any components are missing.
D. Required tools:
2) Feed Water Adapter Installation
•Turn off the cold-water supply valve and unscrew the kitchen faucet connector pipe.
•Install the feed water adapter on the cold-water supply valve and tighten with a spanner
wrench: (make sure the O-ring is seated inside the adapter).
•Re-install the cold-water hose on the feed water adapter, then tighten with a spanner
wrench (make sure the O-ring is seated inside the hose cap).
Page 7www.123filter.com | (678) 261-7611 | [email protected]

3) Filter Installation
This product features an easy-changing design that allows users to change the filter without
shutting off the water supply. To install the filter, follow the steps listed below.
Precautions
A. Make clean cuts on the tube to ensure a tight, sealed connection.
B. Always use the C-clips to secure the quick-fitting connections.
C. After assembly, check to ensure the connection is not leaking.
Step 1
Remove the COVERS AND RUBBER PLUGS on the upper end of each filter.
Step 2
Install each filter in the appropriate slot with the name of the filter listed on the side:
1. The composite filter is mounted to the bottom slot.
2. The reverse osmosis membrane is mounted to the top slot.
3. The post carbon filter or alkaline filter is mounted to the slot located in the middle.
www.123filter.com | (678) 261-7611 | support@123filter.com Page 8

Installation: Insert the filters with the handles pointed outward. Align the arrow with the mark on
the side of the slot. The filter should fit snugly into the system’s fittings. Turn the filters clockwise
until the arrow on each filter is aligned with the mark on the top of the slot.
4) System Installation and Setup
A. Cut the WHITE 3/8" PE pipe to the appropriate length using a utility knife.
B. Insert one end of the tube into the feed water adapter. Tighten the nut using a spanner wrench.
C. Insert the other end of the WHITE tube into the 3/8" port marked "Inlet" at the top of the
system. Secure the connection by inserting the enclosed 3/8" C-clip.
D. Cut the 1/4" WHITE tubing and RED 1/4" red tubing with a utility knife to an appropriate
length.
E. Insert the WHITE tubing into the 1/4" port marked "Drinking Faucet". Insert the RED tubing
to the port marked "Drain" at the top of the system. Insert the 1/4" C-clips to lock the
connection.
Page 9www.123filter.com | (678) 261-7611 | [email protected]

F. Connect the other end of the 1/4" WHITE tubing to the smart faucet on the waterproof
connector that corresponds to the water purifier and tightens the nut. The RED tubing will be
connected to the drain saddle.
G. Choose a spot on the drainpipe that is convenient for installing the drain saddle and tubing. A
horizontal pipe is recommended to minimize the dripping sound.
H. Drill a 1/4" hole in the drainpipe and paste the black sticky pad around the hole.
I. Cut the 1/4" RED tubing end tip to make a 45-degree angle. Insert the tubing through the hole
to the drainpipe, install the backplate, and tighten the two screws with hex nuts while the
tubing remains in the hole. Pull the tubing lightly to make sure it is secure.
www.123filter.com | (678) 261-7611 | support@123filter.com Page 10

5) Faucet Installation
Choose a suitable location on the sink or countertop and install the faucet on a flat surface,
as shown in the image below. You will need to drill a 1" hole (no larger than 1 1/2") if your
kitchen sink does not have an existing one.
How to drill a 1" hole in your sink or countertop
1. It’s highly recommended to watch the YouTube video "How to Drill Faucet Holes" to get
a better understanding of the process. Depending on what kind of countertop you have, you
may want to hire an experienced professional to ensure the hole is drilled correctly.
2. Choose a 1/2" Diamond Core Bit for granite and a titanium drill bit for steel. Do NOT use a
hammer drill on natural stone, glass, and ceramic.
3. An indent should be made with a punch on steel before drilling to help guide the bit.
4. Use caution when drilling on a Porcelain sink, as it could be easily chipped. Set drill speed
on slow. Press the bit downward firmly until breaking through the slippery surface. Some
people found it is easier to secure the bit by drilling through a piece of wood that is firmly
pressed on the surface.
5. Use coolant to disperse heat. Choose water for granite and oil for steel. Use the Water
Suction Cup to hold coolant inside and prevent the drill bit from slipping.
6. Starting at the slowest speed, hold the drill firmly and vertically and prevent the drill bit
from slipping on the counter.
7. Once breaking through the smooth surface, swirl the drill a little to apply pressure in a circle
evenly.
Be patient and deliberate. It can take 20 – 40 minutes to drill through 1".
Page 11 www.123filter.com | (678) 261-7611 | [email protected]

6) Connect Faucet Power Supply and Main Power Supply
Connect the power adapters as shown below. Plug in the main power supply to the "Power"
socket on top of the system, then plug the power cable on the faucet to the "Faucet power"
socket. The faucet needs to be plugged in to start the system. The faucet comes with a build-
in TDS (Total Dissolved Solids) monitor, and the screen on the faucet displays in-time TDS
level of the purified water.
The completed system connection should be as shown below.
www.123filter.com | (678) 261-7611 | support@123filter.com Page 12

Using the System
1) Starting for the First Time
A. To start the system, plug it in, turn on the feed water adapter, then turn on the faucet. Vibrations
can be expected as the pump starts.
B. Rinse the RO membrane for 5 minutes.
C. Turn on the faucet and let it run for at least 30 minutes to flush the system. This should be done
each time the filters are changed.
D. During this time, carefully check all fittings for a secure connection. Use a damp paper towel to
wipe clean and verify that no connections are leaking.
E. Once the rinsing is completed, turn the faucet off and check again for leaks. If no leaks are
present, the system is ready for use.
2) Routine Maintenance
•If you will not use the system for two weeks or longer, disconnect the water supply, drain
the system, and disconnect the power.
•Follow the recommended filter replacement schedule. Replace the filter any time the
indicator is on. Note that the actual filter life depends on the family size and water source
quality. Failure to replace the filter at the appropriate times can damage the system and
potentially cause health hazards.
Precautions for Changing the Filters
A. Unscrew the filter to be replaced counterclockwise and relieve the pressure.
B. Screw the corresponding replacement filter into each slot.
C. After replacing the filter, flush the system by running the water for at least 30 minutes after
installing a new filter(s).
D. Reset the filter status. Please refer to the "Filter Service Life Reset" part.
Page 13 www.123filter.com | (678) 261-7611 | [email protected]

3) Fault Codes
Type Reminder Solution
Display code Buzzer
E1: Water shortage
prompt
The fault light flashes red
once per second.
Filter CF Filter flashes
blue once per second.
When the user runs
water, the machine
will buzz three times.
Once the inlet water
pressure returns to
normal, the water
shortage prompt is
automatically
reconciled, and the
machine resumes
regular operation.
E2: Water leakage
protection
The fault light flashes red
once per second.
Filter RO Filter flashes
blue once per second.
The buzzer will sound
for 3 minutes.
Identify leakage
source. Once
corrected, the product
automatically returns
to regular operation.
E3: Timeout
protection for
continuous pump
operation
The fault light flashes red
once per second.
Filter CB Filter flashes
blue once per second.
The buzzer will sound
four times.
Reconnect to the
power supply.
E4: Start-stop
protection for
frequent pumping
The fault light flashes red
once per second.
Filter CF+RO Filter
flashes blue once per
second.
The buzzer will sound
five times. Reconnect to the
power supply.
E5: Low-
temperature
protection
The fault light flashes red
once per second.
Filter CB+RO Filter
flashes blue once per
second.
The buzzer will sound
six times. Reconnect to the
power supply.
4) Filter Service Life Display
Service Life Stage Remaining Life
(Days)
Remaining
Capacity
(net water/liter)
Prompt
Indicator Color Buzzer
Normal >15 >150 Blue None
Warning 0 - 15 0 - 150 Purple Sounds twice.
Alarming 00Red Sounds when
water is flowing.
www.123filter.com | (678) 261-7611 | support@123filter.com Page 14

5) Machine Function Description
No.
Function
Operation
Status Indicator
1Rinsing
Prior to the
First Use
Rinse RO MEMBRANE for 5 minutes,
then flush by running water for 30+
minutes.
1. The water quality indicator is
red and flashes once per second.
2. The water quality indicator
shows the real-time data within 6-
35 minutes of water discharge
time and flashes once per second.
2
Rinsing
After
Powering
On
When the machine is powered on, rinse
RO MEMBRANE for 20 seconds. If the
user turns on the water during the rinsing,
the system will switch to its normal mode.
The water quality indicator shows
the status before powering off
during the rinsing and flashes
once per second.
3
Rinsing
After
Cumulative
Use
If the RO pump accumulates water for
more than 2 hours, rinse the RO
MEMBRANE for 20 seconds. If the user
runs water during the rinsing, the system
will switch to its normal mode.
The water quality indicator
displays the state prior to flushing
and flashes once per second.
4Self-
Cleaning
Rinsing
If not used after 24 hours, rinse the RO
MEMBRANE for 20 seconds. If the user
runs water during the rinsing, the system
will switch to its normal mode. (Note:
Timer will reset after powering off.)
During the rinse, the water quality
indicator displays the quality
before rinsing and flashes once
per second.
5Rinsing
after Filter
Change
After replacing each filter:
1. Compound filter: open the faucet to
rinse the filter for 30 minutes.
2. RO membrane filter: manual rinse
the RO membrane for 5 minutes.
3. Post-carbon filter: open the faucet to
rinse the filter for 15 minutes.
4. RO membrane filter is reset
simultaneously with the other filters:
manual rinse the RO membrane for 5
minutes, then open the faucet to rinse
the filter for 30 minutes.
5. If the composite filter and the post-
carbon filter are simultaneously reset:
manual rinse the RO membrane for 5
minutes, then open the faucet to rinse
the filter for 15 minutes.
1. When rinsing RO
MEMBRANE, the water quality
indicator is lit red and flashes
once per second.
2. The rinsing filter water quality
indicator shows real-time water
quality data and flashes once per
second.
6Running
Water Normal operation.
While running, the water quality
indicator displays the water
quality status and is always on.
After 30 seconds, the water
quality indicator displays the real-
time water quality data and is
always on.
7Standby
The machine stops operation and enters
standby mode.
Water quality indicator off.
8Powering
On
While powering on, multiple display
indicators are on at the same time. Each
indicator flashes in the order of status
(blue, purple, red), and each state is
illuminated for 1 second, for a total of 3
seconds.
Page 15 www.123filter.com | (678) 261-7611 | [email protected]

6) Filter Service Life Reset
To perform a manual reset, press and hold the "Filter Service Life" button for 5 seconds. This
action will be accompanied by a "Beep" sound as the filter is resetting. When the filter service
life indicator light lit blue, and the buzzer sound gone, indicating the reset was successful.
7) Manual Rinsing Mode - RO Membrane
Press and hold the corresponding reset buttons CF+RO+CB for 3 seconds. A short "Beep"
sound will indicate that the system has entered the manual rinsing mode. The system starts
rinsing the RO membrane for 5 minutes.
(The water quality indicator shows the state before rinsing and flashes once per second.)
Press and hold the corresponding reset buttons CF+RO+CB for 3 seconds again. Another short
"Beep" sound will indicate that the system has exit the manual rinsing mode.
If the user runs water while rinsing, the system will automatically exit the manual rinsing mode.
www.123filter.com | (678) 261-7611 | support@123filter.com Page 16

Warranty
This Limited Warranty extends to the original purchaser of the system only. This warranty covers all Manufacturer-
supplied items only that prove to be defective in material, workmanship, or factory preparation. This warranty covers
parts only; all labor is excluded from this warranty, including, but not limited to, services related to the removal,
replacement, installation, adjustment, maintenance, and/or repair of the unit or its components items. excludes all non-
Manufacturer labor required for any servicing of the unit, including, but not limited to, servicing related to installation,
adjustment, maintenance, and repair of the unit. This warranty applies only for the first full calendar year from date of
purchase. The following items are excluded from this warranty: membranes, filters, O-rings, and all other parts or
components that require regular replacement as a result of ordinary usage.
Disclaimers: This Limited Warranty applies only if the system is installed, used, and maintained in compliance with all
instructions and requirements enclosed with the system. This warranty will be void for failure to observe the following
conditions:
1. The system is to be used with potable water supply only.
2. Feed water pressure to the unit is no less than 45 psi (30 psi for systems with built-in booster pump) and no greater
than 70 psi.
3. The system is to be used on water supplies with chlorine concentrations of 1.0 mg/L (ppm) or less.
4. Feed water temperature to the unit must be no less than 41°F and no more than 100°F.
5. Total dissolved solids (TDS) in feed water must be less than 750 mg/L (ppm).
6. Feed water must have a pH between 4 and 8.
7. Turbidity must be less than 1.0 NTU.
8. SDI must be less than 5.
9. Feed water must be completely free of iron, manganese or hydrogen sulfide.
While the testing was performed under standard laboratory conditions, actual performance may vary. The Manufacturer
does not know the characteristics of your water supply. The quality of water supplies may vary seasonably or over a
period of time. Your water usage may vary as well. Water characteristics can also change if the drinking water
appliance is moved to a new location. The Manufacturer assumes no liability for the determination of the proper
equipment necessary to meet your requirements, and we do not authorize others to assume such obligation on our
behalf.
This Limited Warranty does not cover any Manufacturer-supplied items that are defective as a result of the use of
improper parts, equipment or materials. This warranty does not cover alterations or modifications of the unit or failure
of a unit caused by such alterations and modifications.
This Limited Warranty does not cover malfunctions of the unit due to tampering, misuse, alteration, lack of regular
maintenance, misapplication, fouling due to hydrogen sulfide, manganese or iron, scaling from excessive hardness,
turbidity greater than 1.0 NTU, Silt Density Index (SDI) greater than 5.0 SDI, or excessive membrane hydrolysis due to
chlorine levels in excess of 1.0 mg/L (ppm). In addition, damage to the unit due to fire, accident, negligence, act of
God, or events beyond the control of the Manufacturer are not covered by this warranty.
Incidental and Consequential Damages Limitation: The Manufacturer will not be responsible for any incidental or
consequential damages as a result of the failure of this unit to comply with express or implied warranties or any defect
in the unit, including but not limited to, lost time, inconvenience, damage to personal property, loss of revenue,
commercial losses, postage, travel, telephone expenditures, or other losses of this nature. In case some states do not
allow the exclusion or limitation of incidental or consequential damages, you may choose to return the system. If you
choose to keep it, you insist this exclusion STILL apply to you.
Owner’s Warranty Responsibilities: As a condition of this Limited Warranty, the owner must ensure that periodic
maintenance of the system is performed as described in the literature enclosed with the system. Neglect, improper
maintenance, abuse, modification, or alteration of the unit will invalidate this Warranty. Should your unit develop a
defect or otherwise fail to perform in accordance with this warranty, you should contact the retailer from whom the
product was originally purchased.
Implied Warranties: The implied at-law warranties of merchantability and fitness for a particular purpose shall
terminate on the date one year after the date of purchase.
NOTE: IN CASE SOME STATES DO NOT ALLOW LIMITATIONS ON HOW LONG AN IMPLIED WARRANTY
LASTS, YOU MAY CHOOSE TO RETURN THE SYSTEM. IF YOU CHOOSE TO KEEP IT, YOU AGREE THAT
THE ABOVE LIMITATIONS STILL APPLY TO YOU.
Page 17 www.123filter.com | (678) 261-7611 | [email protected]

Warranty Registration
To register your product for the warranty, visit our website at 123filter.com and go to the
"Warranty" tab.
We provide a 30-day money-back guarantee, a 1-year manufacturer warranty, and lifetime tech
support for all of our products. However, we do not have the order information from websites other
than 123Filter.com (Amazon, Home Depot, etc.), so please be sure to fill in that information upon
registration of your system. If you have any questions or concerns about your product, please do
not hesitate to call or email us, or put it in the notes/comments upon your warranty registration.
Your satisfaction is our business!
If you are happy with our products and service, please show your support by
writing a product review on Amazon, even just a single line. It takes you just a
minute but means a lot to us. Thank you!
www.123filter.com | (678) 261-7611 | support@123filter.com Page 18
This manual suits for next models
1
Table of contents
Other Ispring Water System manuals
Popular Water System manuals by other brands

A.O. Smith
A.O. Smith LOTUS-75M user manual

Elkay
Elkay EZH2O LZWS-LRPBM28K installation instructions

King Technology
King Technology AQUA SMARTE Plus MINERAL ACTIVATOR Operational instructions

WSMP
WSMP JR-138 Installation & maintenance

Everpure
Everpure Kleensteam II Single System EV9797-21 Specification sheet

Taco
Taco SmartPlus instruction sheet