IST Proline DELTA J-1900/E User manual

J-1900/E
Buoyancy Compensator Devices
Owner’s Guide

Thank you for choosing IST BCD
Definitions of Warning, Cautions and Notes
A warning indicates a situation that, if not void,
will result in serious injury or death.
A caution indicates a situation that, if not void,
may result in serious injury or death.
A Note indicates a situation that, if not avoid, may
result in minor or moderate injury or damage to the
BCD.
2

CONTENTS
General Warning and Cautions------------------------------
Airway
Attaching Low Pressure inflator hose----------------------
Threading the tank band and buckle-----------------------
Attaching the BCD to tank------------------------------------
Donning the BCD
Over pressure Relief Valves----------------------------------
Cummerbund Adjustment-----------------------------------
Dumpable Weight pouch-------------------------------------
Maintenance
Limited Warranty and Disclaimer---------------------------
Service Record
4
6
7
7
8
9
10
10
11
12
13
14
3

General Warning and Cautions
Read owner’s guide and any labels affixed to the BCD thoroughly before
using this product. If you do not completely understand these instructions,
do not use this BCD.
Do not use this BCD if you have not received proper training
and certification in SCUBA diving.
The BCD is intended as abuoyancy compensator only and it could not be
consider as a “Life buoys and lift jacket.
This is not alife jacket; it does not guarantee ahead up position of the
wearer at the surface.
Emergency face up flotation may not be provided for all wearers and in all
conditions.Improper use, or intentional misuse of this product may cause
serious injury or death.Do not inhale gases from within this BCD.
4
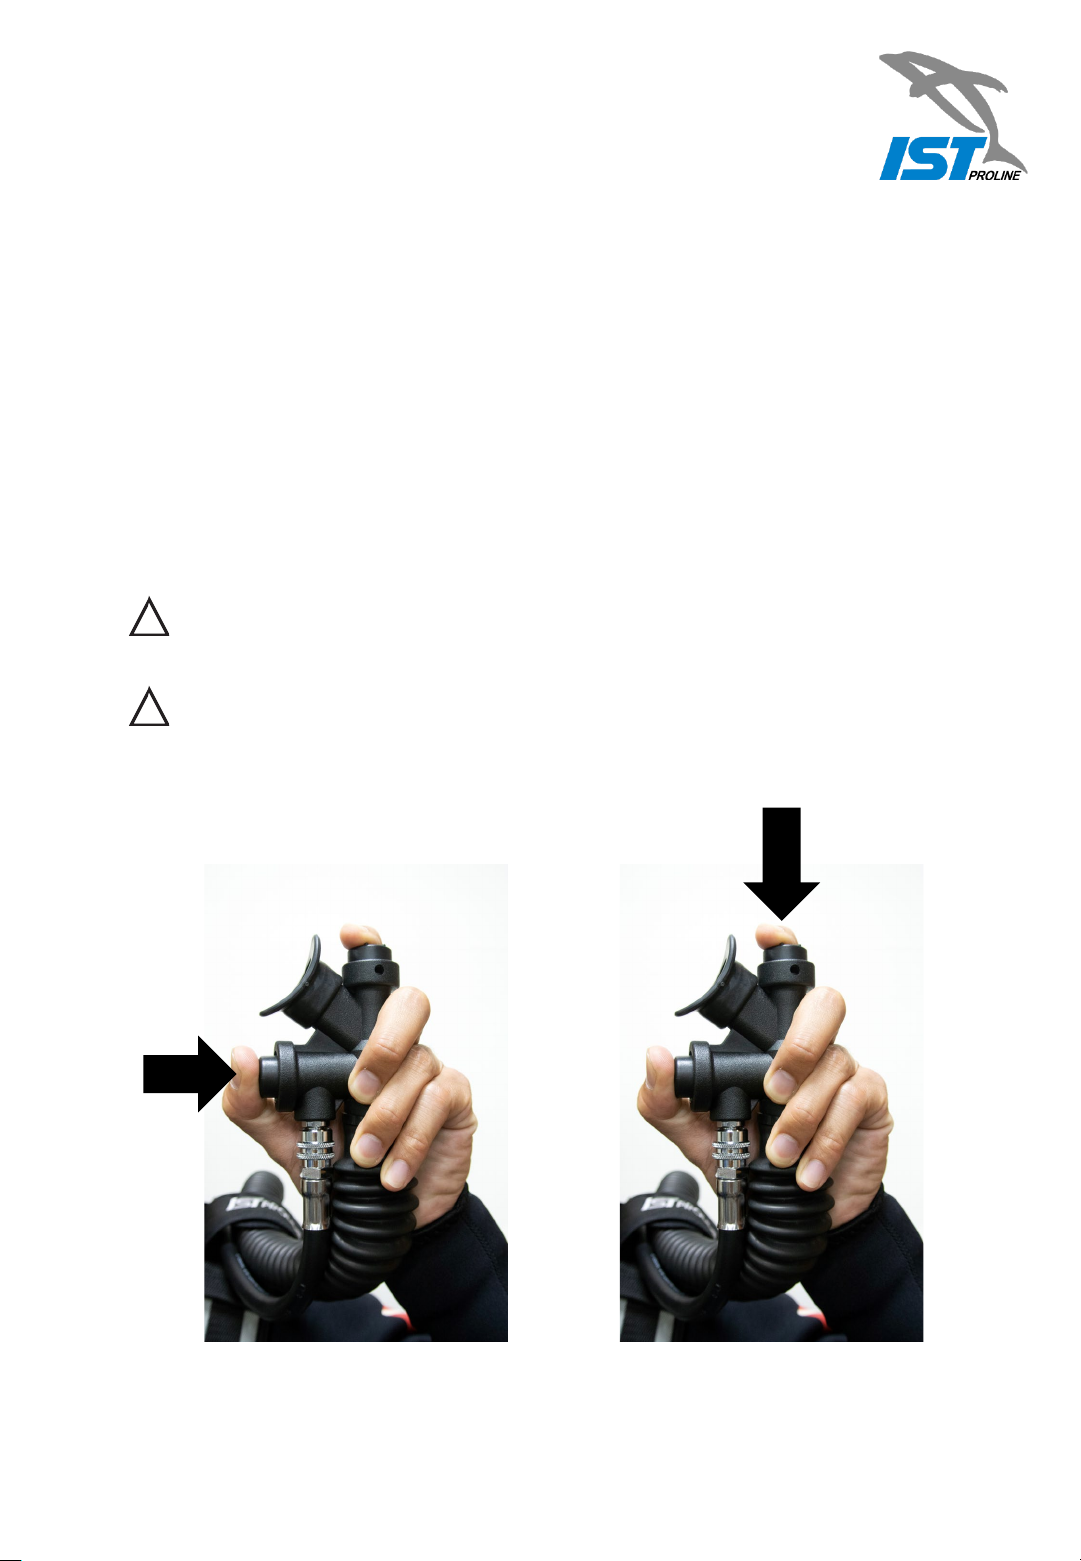
Prior to each dive, full inflate the BCD and inspect for leakage,
damage and proper operation.
Before diving this BCD in open water, it is important to familiarize
yourself with it first in confined shallow water, do not enter open water
until you have weighted yourself properly and become familiar with
using all of its features and adjustments.
Before entering water, check to ensure that you can ditch the dumpable
weight pouch quickly and easily without any obstruction. You may need
to do it when under water in the events of out of air emergency or
uncontrolled descent.
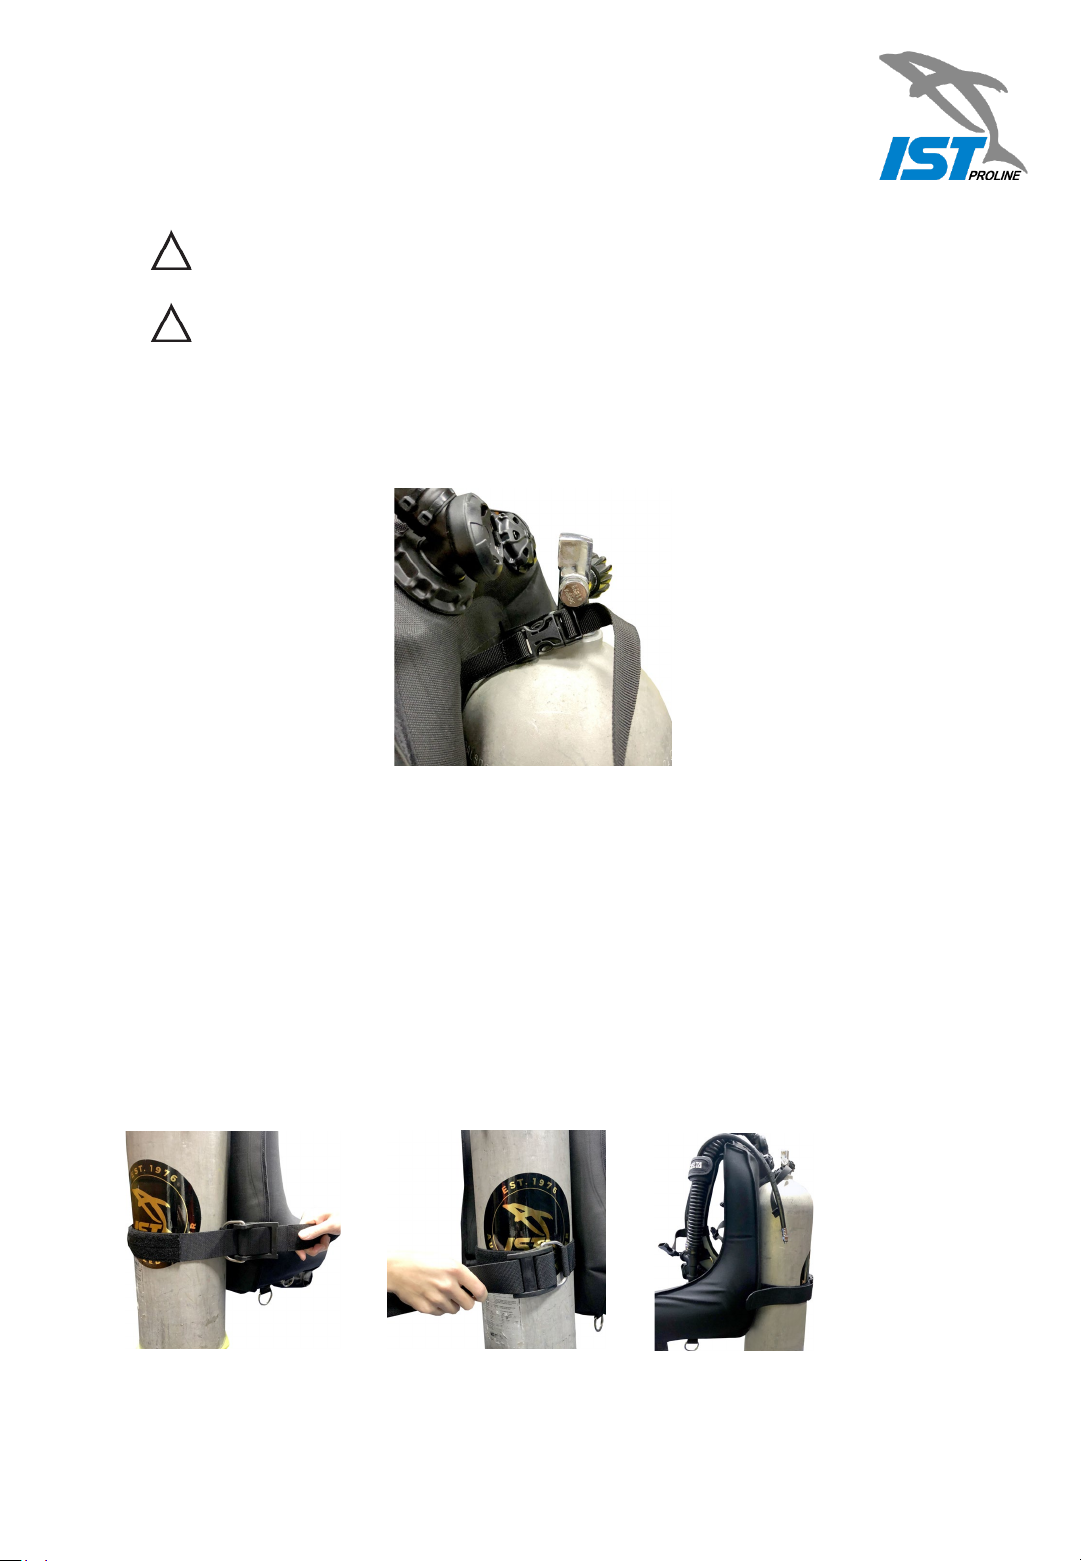
Obtain prescribed service for this BCD from an IST dealer at least once
ayear. The service consists of acomplete overhaul of the power inflator
and ageneral air leak inspection of valve connections and bladder.

Repair and disassembly must only be performed by IST dealers.
Unauthorized service will void the warranty and may cause this product to
malfunction.
The Maximum depth covered by certification is 50 meters. Limitation to use
of compressed air in compliance with EN12021 Maximum recommended
cylinder capacity is 20 liters (See Fig. 1) Temperature Range for Use:
Air -20℃to +50℃
Water -2℃to +40℃
Abuoyancy compensator is not abreathing system
and that gas should not be inhaled from the
buoyancy compensator's bladder.
5
Marking
When fully inflated in fresh water at sea level, approximate buoyancy
capacity of each size is as follows which is printed on a label sewn on BCD:
J-1900 BC’S LIFT: 122N (27.41lbf)

Fig. 1 Fig. 2
Airway
Power inflator
Inflator’s Working Pressures are 110 psi (7.58bars) Minimum, 160 psi
(11.03bars) Maximum, and 140 psi (9.65bars) nominal.
Inflator button, Press it to inflator BCD. (See Fig. 1) Manual button and
Mouthpiece, press it to deflate BC or oral inflate BCD (See Fig. 2)
Note: Oral inflation of your BCD under water is askill that must be achieved
under the supervision of acertified diving instructor.
Depressing the oral inflator button while the BCD is empty may allow the
water to enter the bladder.
Note:
6

Fig. 4 Fig. 5 Fig. 6 Fig. 7
Ensure the presence of an O-ring. (See Fig. 4)
Screw the male end into the LP port of regulator, make sure it secured.
(See Fig. 5)
Attach female end onto inflator nipple. (See Fig. 6)
Attaching Low Pressure inflator hose
Warning: Only attach the LP hose to the lower pressure (LP) port of
regulator.Attach to the High Pressure (HP) port may cause the
hose to burst and result in serious injury.
7
Fig. 8 Fig. 9 Fig. 10
Fig. 11 Fig. 12
Open the tank valve slowly and press the inflator button to hear the air
flowing into BC. (See Fig. 7)
Threading the tank band and buckle
Note: BCD is shipped with the tank band pre-threaded through the buckle.
(See Fig. 8/Fig. 9 / Fig. 10 /Fig. 11 /Fig. 12 )

Fig. 13
Note: Wet the tank band first, the nylon webbing stretches alittle while wet.
Note: Make sure the metal loop of the tank band is as close to the rear of
BCD as possible, this will provide a great range of adjustment.
Loop the tank locator strap over the tank valve; adjust it to hold the
BCD at the desired height position. (See Fig. 13)
8
Fig. 14 Fig. 15 Fig. 16
Open the buckle and pull the free end of the tank band until the backpack fit
the tank very tight. (See Fig. 14)
Close the buckle half and thread the free end of the band through the end
slot of the buckle (See Fig. 15)
Close buckle and secure the Velcro closure of the tank band. (See Fig. 16)

Fig. 17 Fig. 18 Fig. 19 Fig. 20
Have your dive buddy hold the BC/cylinder assembly behind you, while your
arms through the shoulder straps(See Fig.20).
Donning the BCD
Loosen each strap to its maximum length by lifting up on the bottom tabs
of the buckle. (See Fig.17)
Open the sternum strap buckle (See Fig.18) and waist strap buckle if
equipped, and open the waistband (See Fig.19).
9
Fig. 21 Fig. 22 Fig. 23 Fig. 24
Pull the BC onto your back, adjust it comfortably fit your height; fasten close
the waistband until it is close fit for your waist. (See Fig.21)
After your dive buddy released the BC/cylinder assembly, and the weight of
the BCD was located on your hips and shoulders, bend forward at the waist
and tighten the shoulder straps by pulling down on the D-rings located on the
ends of the straps (See Fig.22).
Readjust the waistband, if necessary, so that it is comfortably fit your waist
but not restricting, with 4inches of overlapping closure.
Close the sternum and waist straps, if equipped, and pull the free ends until
they are comfortably snug but not restricting (See Fig.23&24)

Fig. 25 Fig. 26
It automatically release air when the air pressure inside the bladder is nearly
2.4 psi (0.165bar) over ambient.(See Fig. 25)
You can pull the ball to rapidly dump the air too.(See Fig. 26)
The maximum outflow relief valve is the dump valve which assembly at
the bottom or top of BC. (See Fig. 26)
Over Pressure Relief Valves
Note:Whenever you remove and replace the cap of the valve, make sure
that the stainless spring is in correct place;pull it to feel the spring
function well and inflate the BCD to see if it is secured and no leak.
10
Some BCD models have this feature.
Fig. 29 Fig. 30 Fig. 31
Put weight into pouches. (See Fig. 29 &Fig. 30)
Insert weight pouches into BCD and secure with Velcro and/or buckles.
(See Fig. 31 Fig. 32 Fig. 33)
Grasp the handles and pull them out firmly and completely out of BCD. (See
Fig. 34 and 35)
Caution: To avoid injuring other divers, always look below you before
dropping weight.

Fig. 32 Fig. 33
11
Fig. 34 Fig. 35
Warning: You must practice the ditching of these Dumpable Weight
Pouches prior to each dive.

Maintenance
Note: Improper maintenance will void the warranty and cause this product to
malfunction.
During use, do not pull the BCD on the sand and stone.
Do not sit on BCD or set heavy/sharp objects on the BCD.
Do not put the BCD under sunshine unattended.
Do not dip the BCD in chlorine water.
12
Fig. 36
After use:
Rinse the outside of BCD thoroughly with fresh water. Fill the BCD one
third full with fresh water through the inflator mouthpiece. Fully inflate the
BCD, rotate and shake the BCD to rinse the interior thoroughly.
Drain the water out through mouthpiece.
Fully inflate the BCD and allow it to dry inside and outside.
Slightly inflate the BCD for storage in cool place.
Warning: Do not hang the BCD on hooks
like this, it will puncture the
bladder:(See Fig.36)

IST warrants the original purchaser for ayear from the date of purchase.
The product will be free from defects in material and workmanship, provided it
receives normal use and proper care.
The warranty must be made through the same IST dealer and asale receipt
must accompany the product to be returned.
These warranty are limited to repair or replacement at the discretion of IST.
Disclaimer
IST disclaims and excludes any liability for incidental or consequential
damages.
Normative References
EN1809: 2014+A1: 2016 Diving equipment -Buoyancy compensators -
Functional and safety requirements, test methods.
EN250: 2014 Respiratory equipment —Open-circuit
self-contained compressed air diving apparatus-Requirements, testing,
marking.
13
Limited Warranty

Service Record
Purchase date:
BCD Model: Serial no.:
OEM customer:
OEM customer phone no.:
14
1. Service person signature Date
Notes:
2. Service person signature Date
Notes:
3. Service person signature Date
Notes:

15
4. Service person signature Date
Notes:
5. Service person signature Date
Notes:
6. Service person signature Date
Notes:
7. Service person signature Date
Notes:

ISTSportsCorp.
Room A, 6th Floor ,No.6 ,Lane 345 ,Yangkuang St. ,Neihu ,Taipei ,Taiwan 1491
Tel:+886 2 26272516
Fax: +886 2 26599056
E-mail:diving@istsports.com
CE marked have been approved to EN 1809:2014 +A1:2016 EC Type
examination conducted by:
EU declaration of conformity can accessed at
www.istsports.com
Copyright 2021 IST ©
16
Table of contents
Other IST Proline Diving Instrument manuals