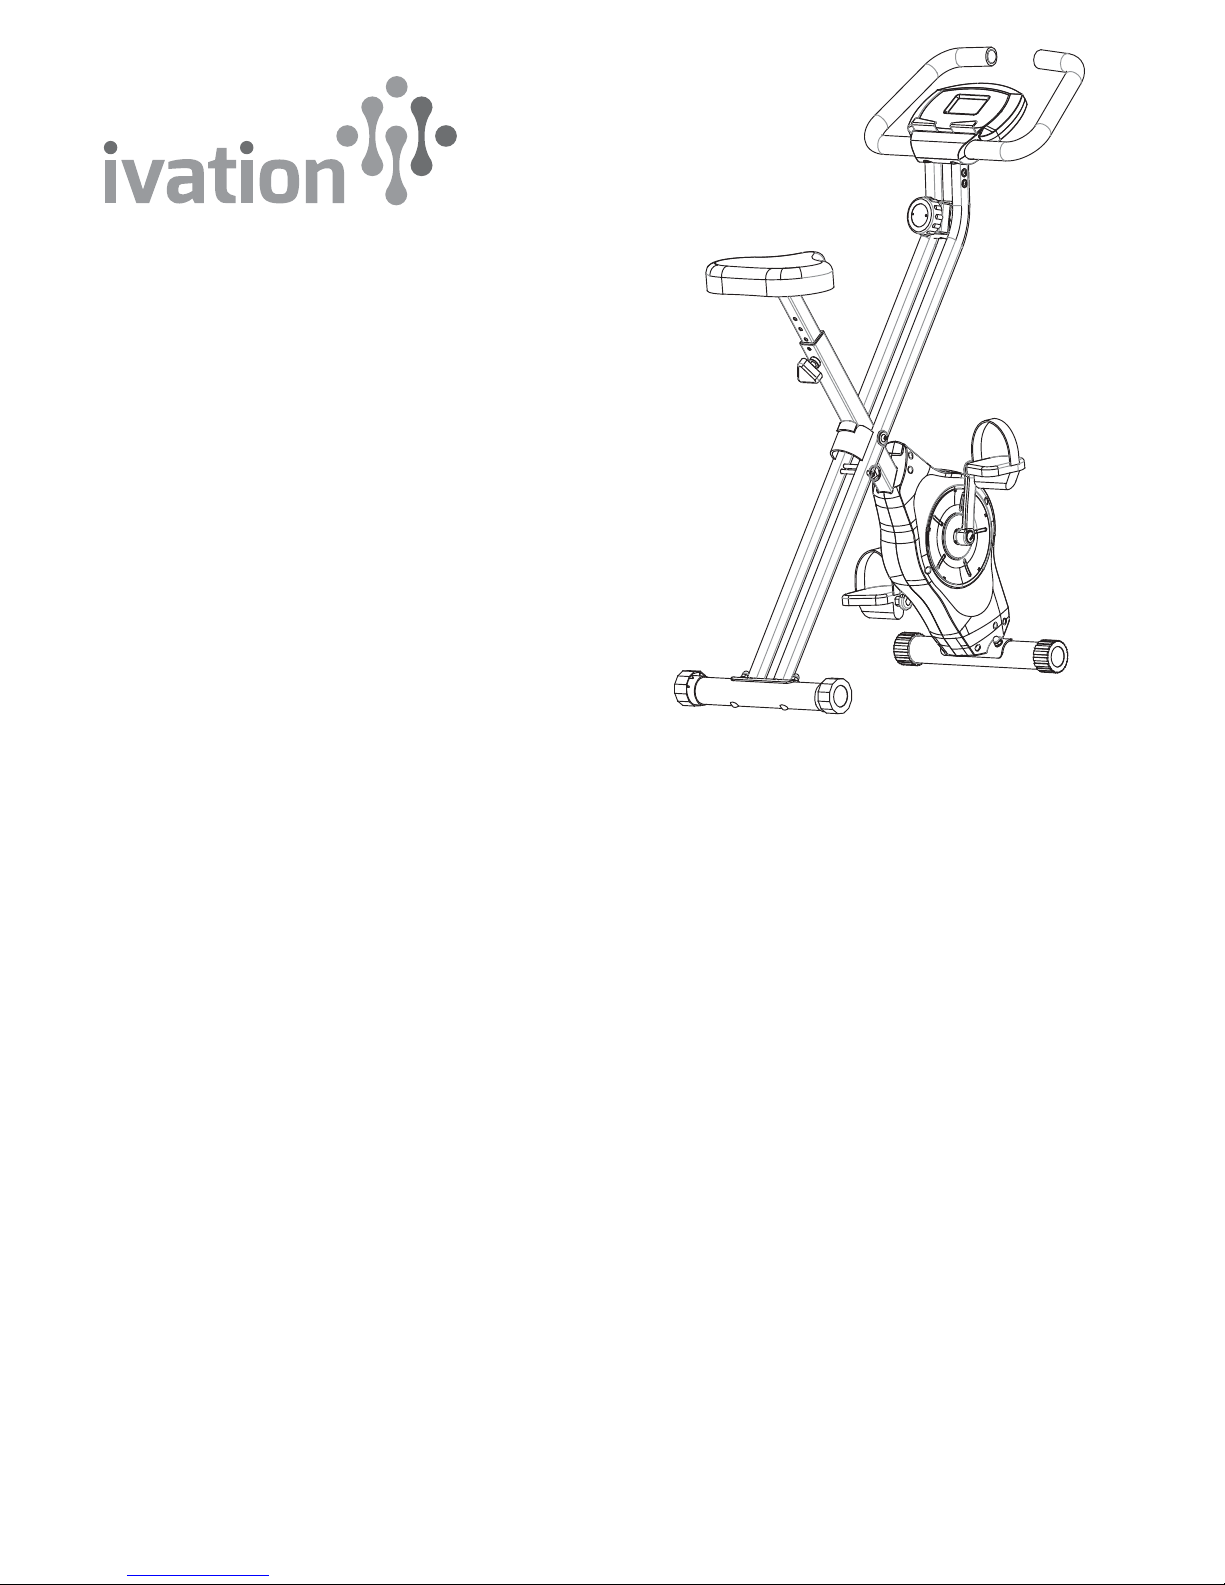
Ivation IVAFMUBWP User manual

Folding Magnetic
Exercise Bike with Pulse
User Manual
Thank you for purchasing the Ivation Fitness Folding Magnetic Exercise Bike with
Pulse. This User Guide is intended to provide you with guidelines to ensure that
operation of this product is safe and does not pose risk to the user. Any use that
does not conform to the guidelines described in this User Guide may void the
limited warranty.
Please read all directions before using the product and retain this guide for
reference. This product is intended for household use only.
This product is covered by a limited one-year warranty. Coverage is
subject to limits and exclusions. See warranty for details.
Important Safety Information
Please keep this manual in a safe place for reference.
1. Read this entire manual before assembling and using the equipment. Safe and efficient use can only be achieved if the equipment is assembled,
maintained and used properly. Ensure that all users of the equipment are informed of all warnings and precautions.
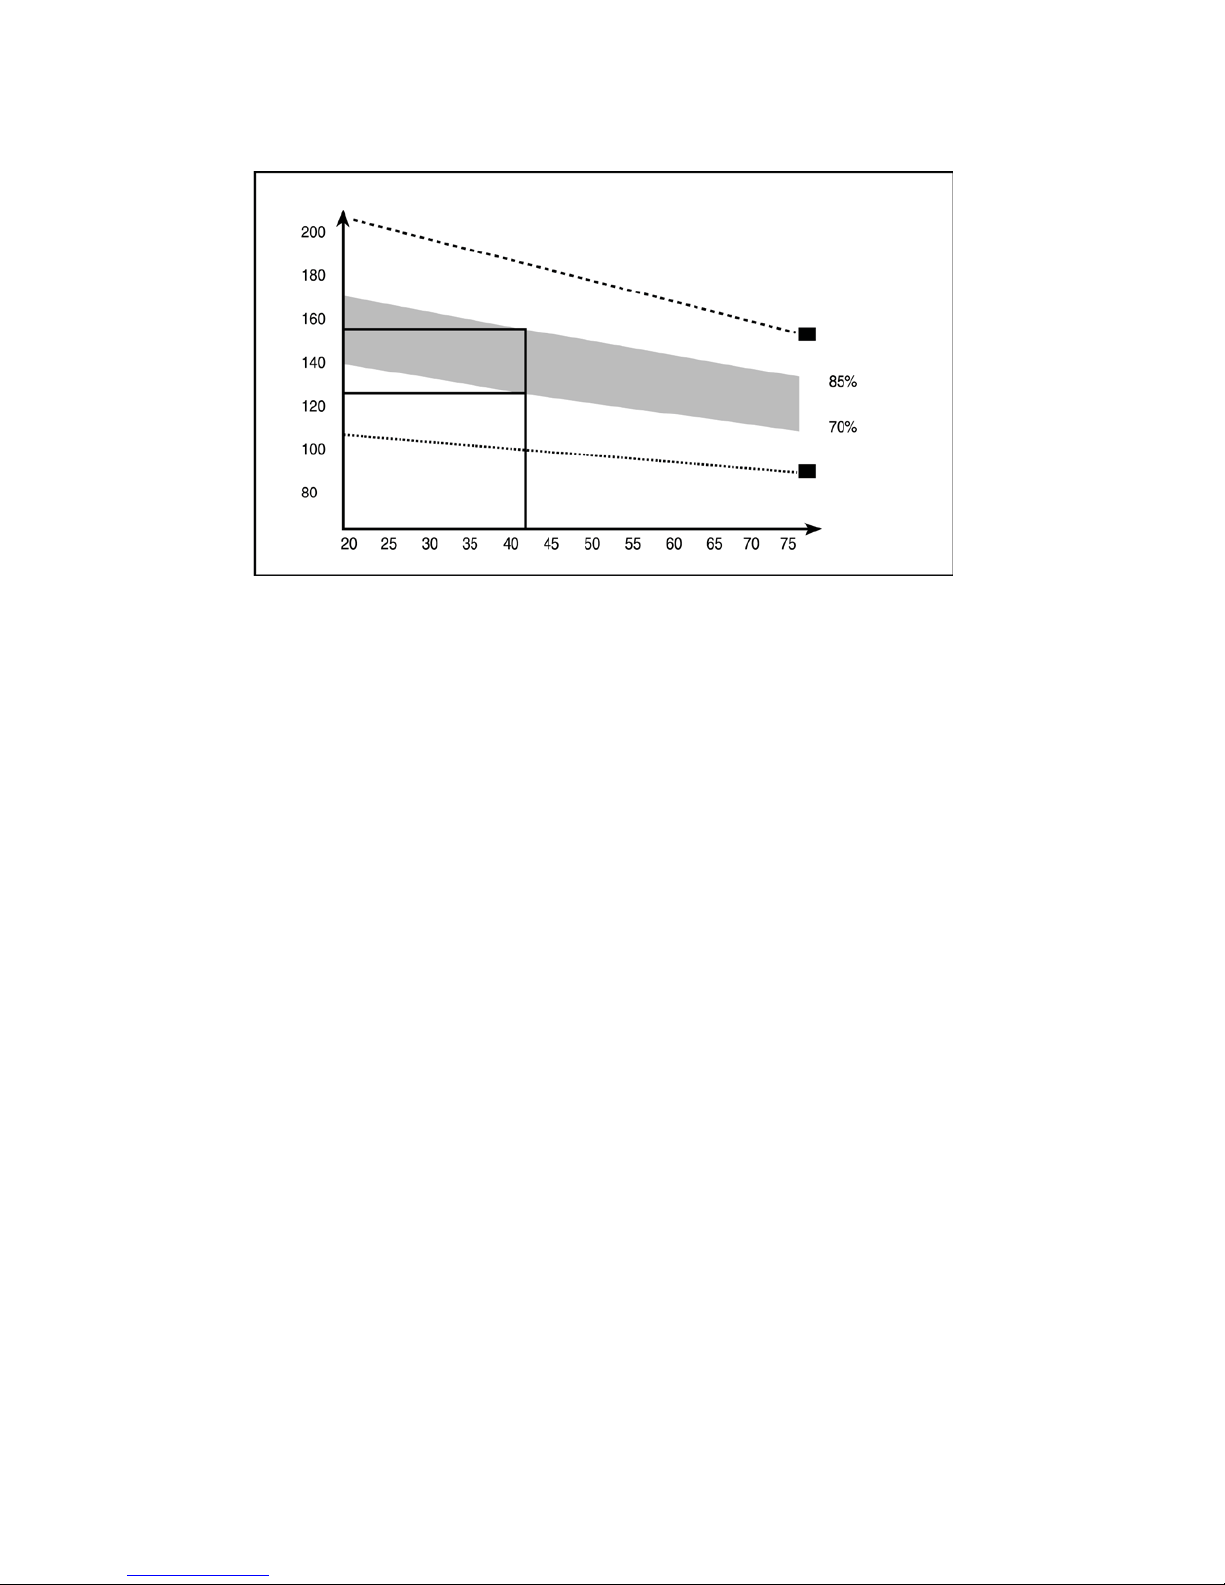
2. Before starting any exercise program, consult your doctor to determine if you have any physical or health conditions that could create a risk to
your health and safety, or prevent you from using the equipment properly. Your doctor's advice is essential if you are taking medication that
affects your heart rate, blood pressure or cholesterol level.
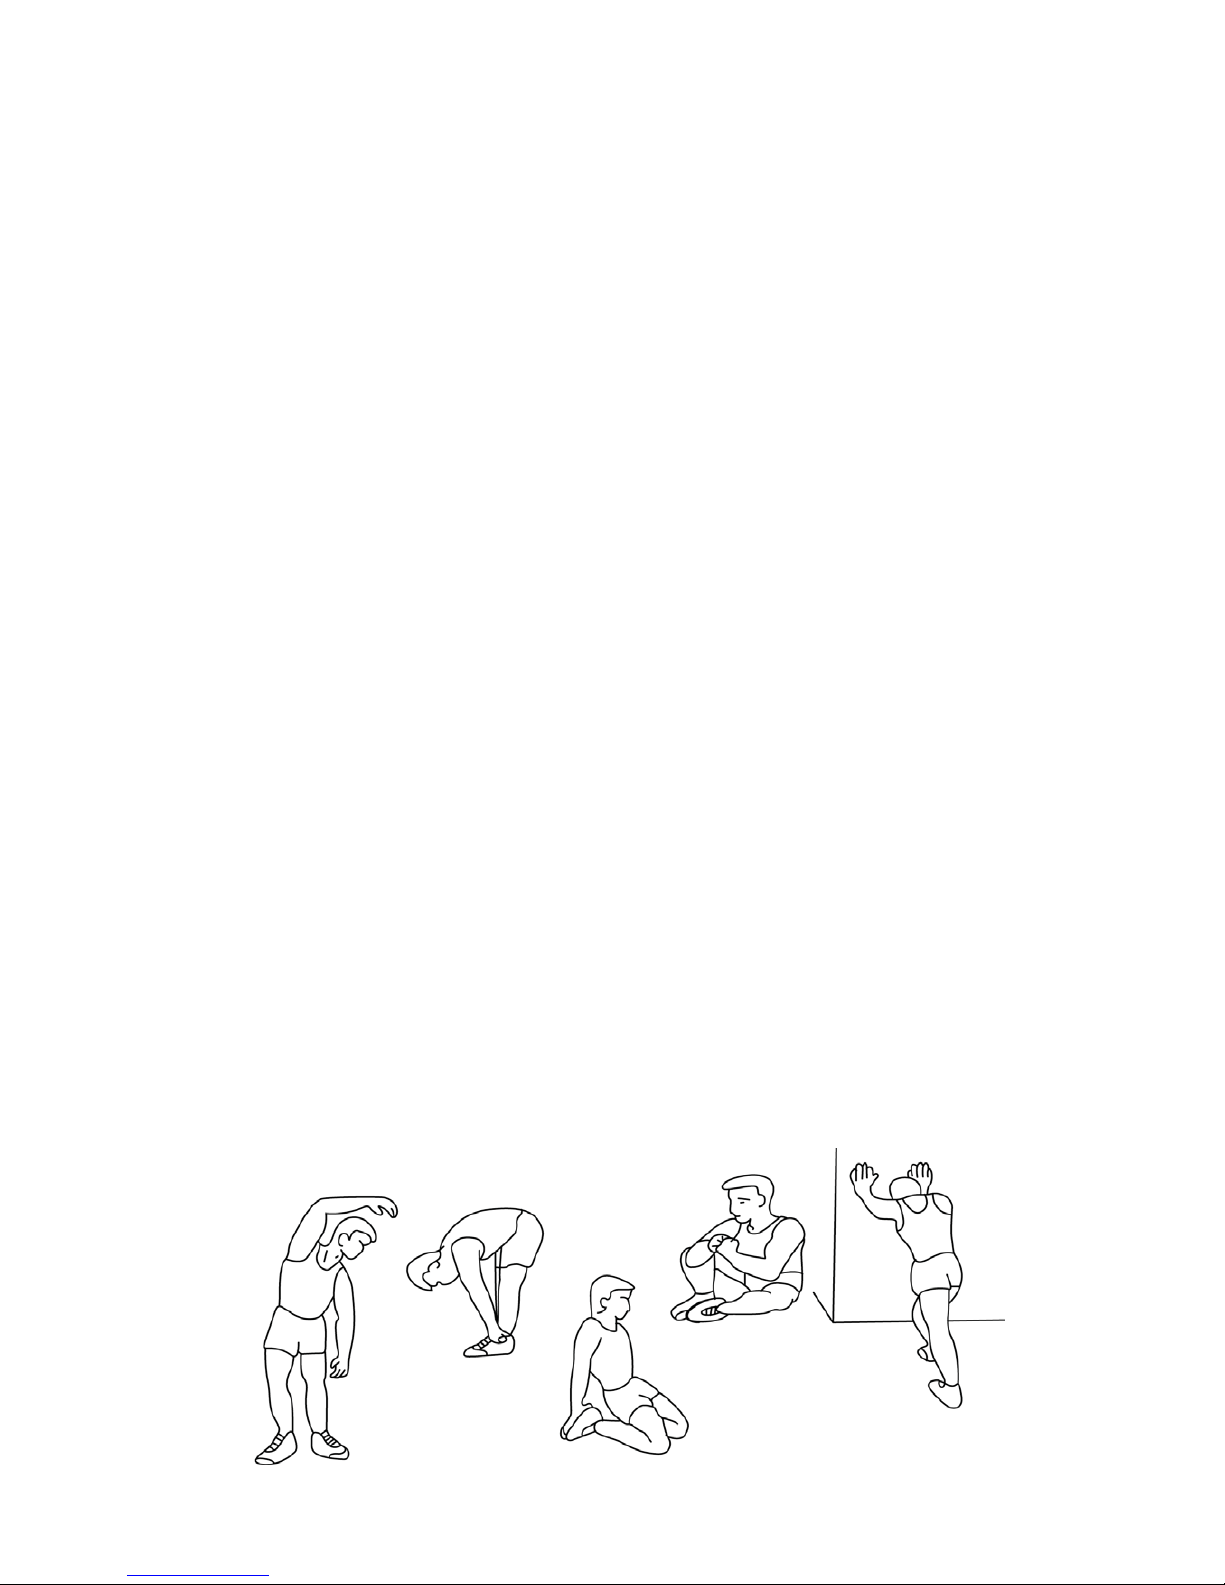
3. Be aware of your body's signals. Incorrect or excessive exercise can negatively affect your health. Discontinue exercising if you experience any
of the following symptoms: pain, tightness in your chest, irregular heartbeat, extreme shortness of breath, or feeling lightheaded, dizzy or
nauseous. If you do experience any of these conditions you should consult your doctor before continuing with your exercise program.
4. Keep children and pets away from the equipment. The equipment is designed for adult use only.
5. Use the equipment on a firm, flat, level surface with a protective cover for your floor or carpet. For safety, the equipment should have at least
1.6 feet of free space all around it.
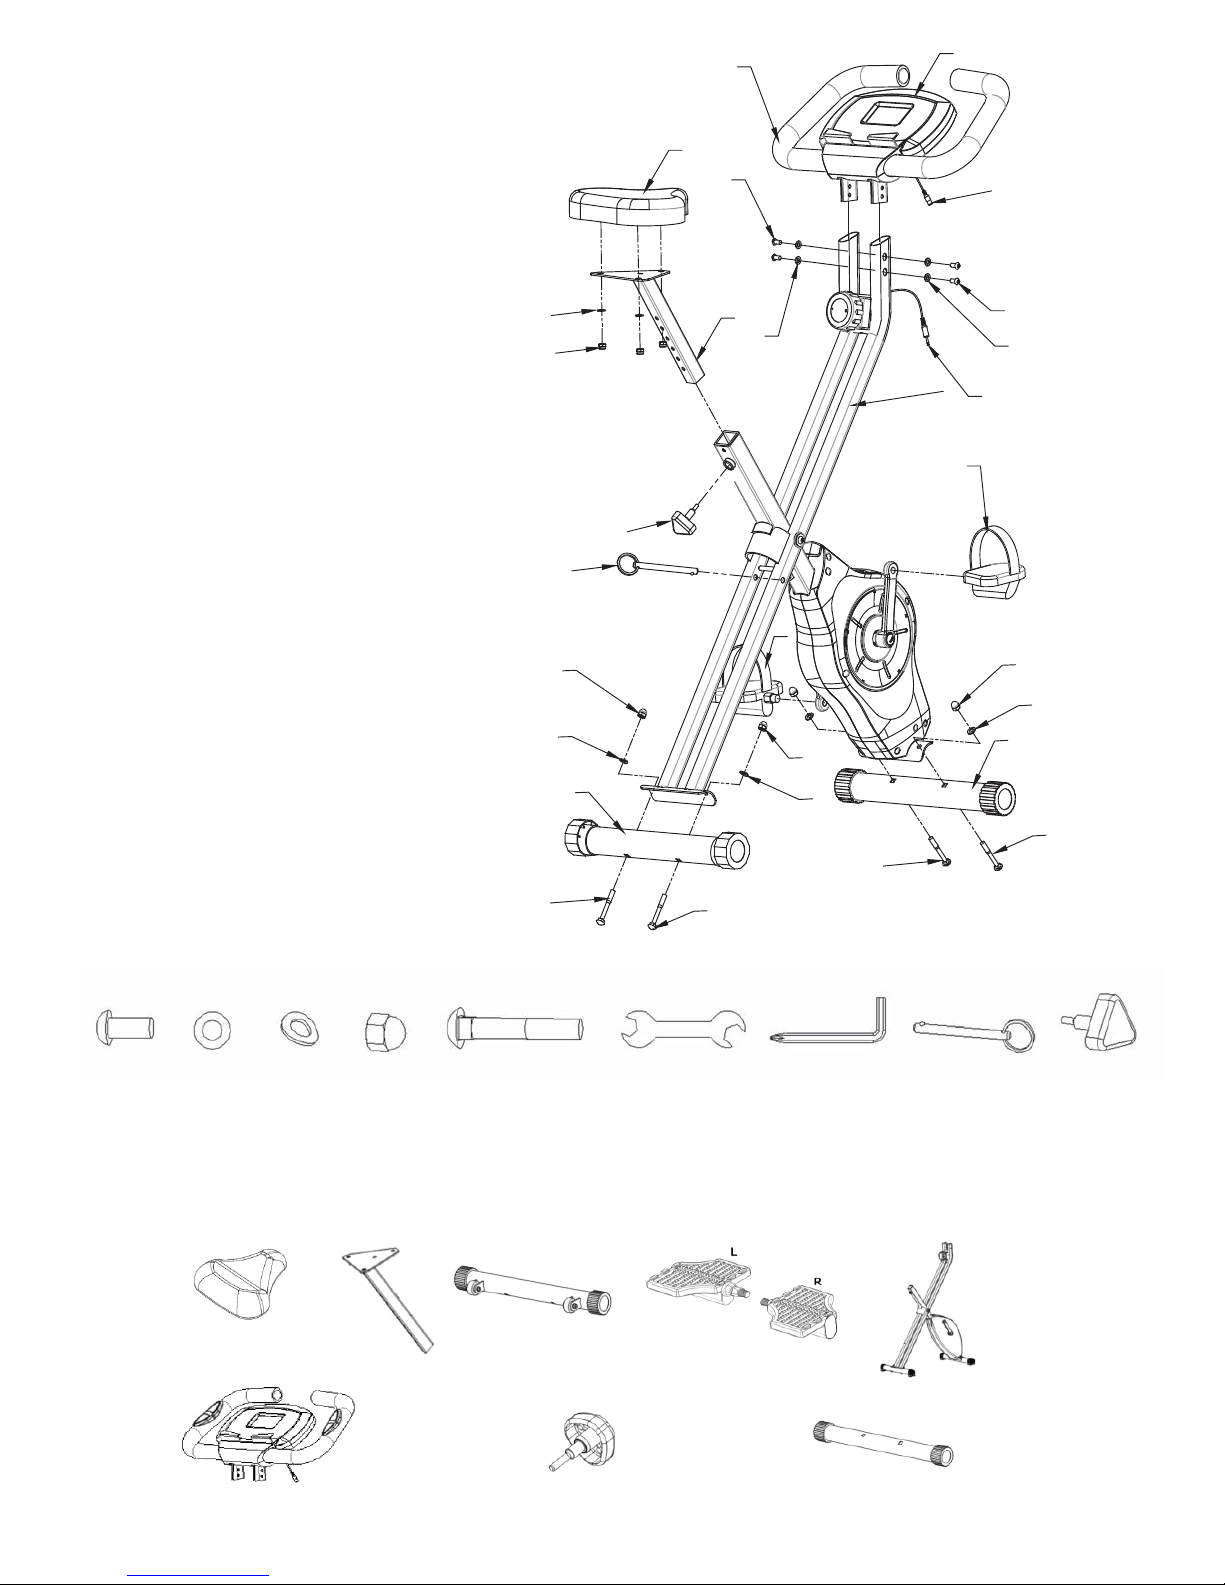
6. Before using the equipment, ensure that the nuts, bolts, and parts such as the pedals are securely tightened.
7. The safety level of the equipment can only be maintained if it is regularly examined for damage and/or wear and tear.
8. Always use the equipment as indicated. If you find defective components when assembling or checking the equipment, or if you hear any
unusual noises coming from the equipment, discontinue use until the problem has been rectified.
9. Wear suitable clothing when using the equipment. Avoid wearing loose clothing which may get caught in the equipment or clothing that may
restrict or prevent movement. Operate slowly at the beginning. Hold the handlebar tightly and do not let your body leave the seat
when exercising.
10. The equipment has been tested and certified for domestic, home use only. Maximum weight capacity is 300 lbs. Braking is speed independent.
11. The equipment is not suitable for therapeutic use.
12. Care must be taken when lifting or moving the equipment so as not to cause injury. Always use proper lifting techniques and/or use assistance.
Features
• Eight (8) levels of resistance adjustment
• Seat vertical adjustable system
• Handle pulse sensor
• Monitor for time, speed, distance, calories, heart rate
• Sturdy frame and non-slip feet for safety and efficiency
• Ideal for body exercise and body slimming
• Great for use at home, office of gym
• Three (3) piece cranking system
• 2.5kg flywheel and V-belt drive
Specifications
Material: Steel, ABS
Product size: 33.46'' x 17.32'' x 44.49''
Max Capacity: 300 lbs.
Folded dimensions: 7.72” x 16.14” x 52.56”
Package Contents
• Fitness Exercise Bike
• User Manual
1

Identifying the Parts
1. Handlebar
2. Seat Post
3. Stabilizers (2 count)
4. Monitor
5. Seat
6. Left Pedal
7. Right Pedal
8. Adjustment Knob
9. Console Cable
10. Cap Nuts (4 count)
11. Flat Washers (4 count)
12. Curved Washers (4 count)
13. Cap Nuts (4 count)
14. Curved Washers (4 count)
15. Safety Pin
16. Flat Washers (3 count)
17. Nylon Lock Nuts (3 count)
18. Connecting Cable
19. Main Cycle Body
20. TV/Cell Phone Holder
Assembly Parts
Unpack the box. The tools needed for assembly have been included. Check the List of Assembly Parts below to ensure that all of the assembly parts
are present and in good condition. If anything is missing please check the packing materials to verify it was not concealed inside.
19
5
16 2
17
14
14
12
13
12
13
14
14
3
3
6
12
13
7
8
18
4
9
1
10
10
11 11
15
2
BOLT
M6*15 (4pcs.)
Flat Washer
18*1.5 (4pcs.)
Curved Washer
20*1.5 (4pcs.)
Cap Nut
M8 (4pcs.)
Carriage Bolt
M8*50 (4pcs.)
Rigent Wrench
13–15 (1pcs.)
Allen Wrench
(1pcs.)
Safety Pin
(1pcs.)
Knob
(1pcs.)
Connecting Parts
Seat Cushion
Seat Mount
Front Stabilizer
Pedals
(Left and Right)
Main
Frame
Console Seat Adjustment Knob Rear Stabilizer
2

Assembly Instructions
14
14
12
13
12
13
14
14
3
3
12
13
2
5
16
17
2
8
19
18
9
18
4
9
1
10
10
11 11
15
1. Attach the Front Stabilizer to the main frame
using two sets of nuts and washers.
3. Insert the seat mount into the frame and line up the holes. Secure
the seat in position with the Adjusting knob. The height for the seat
can be adjusted after the bike is fully assembled.
5. The pedals are marked "L" and "R" (Left and Right). Connect them
to their appropriate crank arms. The Right pedal threads on
clockwise, while the Left pedal threads counter-clockwise.
4. Insert the console frame into the bike main frame. Tighten the
handlebar to the main frame with two bolts and two flat washers,
and connect with wire.
2. Attach the seat to the seat mount. The studs will insert
through the seat mount holes. Secure the using the flat
washers and nuts.
7
6
3

Operating Instructions
Adjusting the Seat/Using the Cycle
• The seat height can be adjusted by removing the adjustment knob and raising or lowering the seat. There are seven (7) holes in the seat mount
allowing for a range of heights. Once the correct height has been chosen, refit the adjustment knob and tighten. The tension control knob allows
you to alter the resistance of the pedals. High resistance is more difficult to pedal; low resistance is easier. For best results set the tension while
the bike is in use.
Understanding the Monitor
MODE: This button lets you select and lock on to a desired function.
1. Auto ON/OFF:
• The system turns on when “MODE” button is pressed
• The system turns off automatically when the speed sensor has no signal input or no button is pressed for approximately four (4) minutes.
2. Resetting:
The unit can be reset by changing the batteries or by pressing the “RESET” button for three (3) seconds.
3. Presetting TIME, DISTANCE, ODOMETER, PULSE and CALORIES:
a) Press the “MODE” button until the function to be preset flashes.
b) Press the “MODE” button again once the function brand stops flashing.
c) Choose the value you want for exercise using the “SET” button.
d) When the speed sensor has signal input, the monitor will begin to count down.
e) It will beep for ten (10) seconds indicating the completion of workout according to your preset. Press any button to stop beeping.
f) If data is not preset, any function data will count up.
• TIME: The time of exercise will display by pressing the “MODE” button until “TIME” appears.
• SPEED: Current speed will display by pressing the “MODE” button until brand SPD appears.
• DISTANCE: The distance of each workout will display by pressing the “MODE” button until “DIST” appears.
• ODOMETER: The total distance will display by pressing the “MODE” button until “ODO” appears.
• CALORIES: The calories burned will display by pressing the “MODE” button until “CAL” appears.
• SCAN: Automatic display of the following functions in the following order:
TIME SPEED DISTANCE ODOMETER PULSE CALORIES (repeat)
Battery
• This monitor uses two “AA” batteries. Replace the batteries in the compartment in the back of the unit.
Monitor Specifications
• TIME (TMR)..................... 00:00-99:59 MIN
• SPEED (SPD) ......................... 0.0-99.9KM/H
• DISTANCE (DST).................. 0.00-999.9KM
• ODOMETER (ODO)................ 0.00-999.9KM
• CALORIES (CAL).................... 0-9999KCAL
• HEART RATE (PULSE)............ 40-240 BPM
Exercise Guidelines
Using This Exercise Bike will provide several benefits. It will improve your physical fitness, tone muscles, and, together with calorie-controlled diet,
help you lose weight.
1. The Warm-Up Stage
This stage gets blood flowing around the body to help muscles work properly. It also reduces the risk of cramps and muscle injury. It is advisable to
do stretching exercises as shown below. Each stretch should be held for approximately 30 seconds. Do not force or jerk your muscles into a stretch.
If you experience pain, STOP.
SIDE BENDS OUTER THIGH
INNER THIGH
CALF / ACHILLES
FORWARD
BENDS
4

2. The Exercise Stage
Results depend upon your personal effort. After regular use, the muscles in your legs will become more flexible. Work to your own pace,
maintaining a steady tempo throughout. The intensity of your workout should be sufficient to increase your heart rate according to the target
zone shown on the graph below.
This stage should last at least 12 minutes. Recommended use is 15 to 20 minutes.
3. The Cool-Down Stage
This stage helps your cardio-vascular system and muscles wind down. This is a repeat of the warm-up exercise except at a reduced tempo.
Continue for approximately five (5) minutes. Repeat the stretching exercises, remembering not to force or jerk your muscles into the stretch.
As you become more physically fit, you may need to train longer and harder. It is advisable to train at least three times a week, and if possible
space your workouts evenly throughout the week.
4. Fault Finder
If numbers do not appear on your computer, please ensure all connections are correct.
5. Muscle Toning
To tone muscles using this exercise bike, you will need to set the resistance to a high level. This will place more strain on leg muscles and may
mean you cannot train for as long as you would like. If you are also trying to improve your fitness you need to alter your training program. You
should train as usual during the warm-up and cool-down phases, but near the end of the exercise phase, you should increase resistance to make
your legs work harder. You will have to reduce your speed to keep your heart rate within the target zone.
6. Weight Loss
Your effort is the determining factor for your success at losing weight. The harder and longer you work, the more calories you will burn.
Effectively this is the same as if you were training to improve your fitness. The only difference is the goal.
Care and Maintenance
• Keep liquids away from the control panel of the monitor. Spills on the monitor may cause damage or electric shock.
• Use this product on a flat, stable surface to prevent falling and causing damage or injury.
• For all repairs, contact customer service.
• DO NOT use chemicals or cleaning agents to clean this product.
Customer Service:
info@myivation.com
866-849-3049
Distributed by
C & A Marketing
2 Bergen Turnpike
Ridgefield Park, NJ 07660
Made in China
ivation is a trademark of
C&A IP Holdings, LLC
©2015 All rights reserved
HEART RATE
TARGET ZONE
MAXIMUM
COOL DOWN
AGE
5
Table of contents