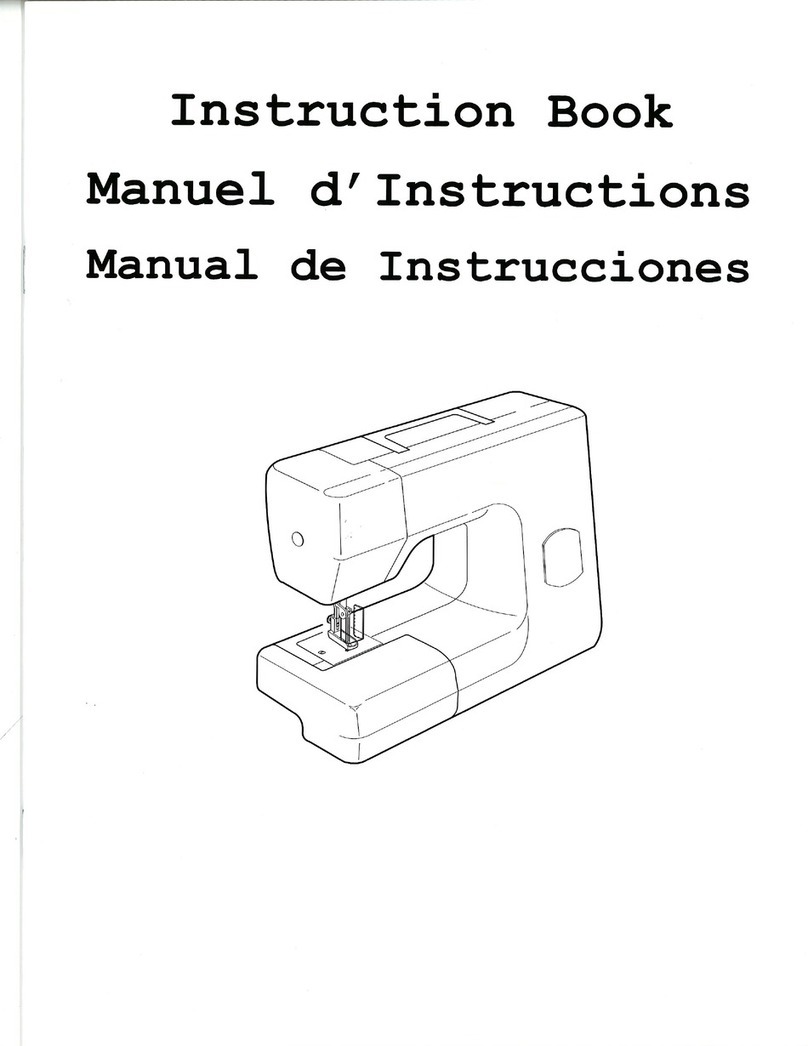
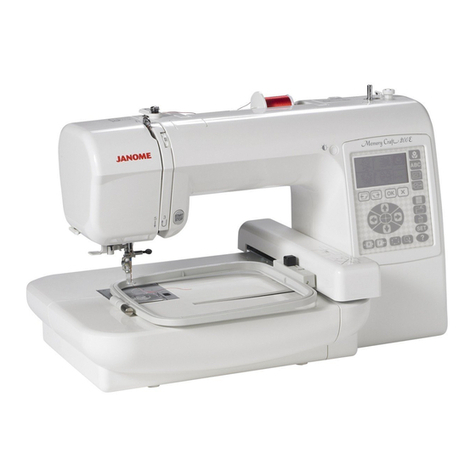
Janome Hello Kitty 18750 User manual

Instruction Manual
Manual De Instrucciones
Livre D’Instructions

II
IMPORTANT SAFETY INSTRUCTIONS
This appliance is not intended for use by persons (including children) with reduced physical, sensory or mental
capabilities, or lack of experience and knowledge, unless they have been given supervision or instruction concerning
use of the appliance by a person responsible for their safety.
Children should be supervised to ensure that they do not play with the appliance.
When using an electrical appliance, basic safety precautions should always be followed, including the
following:
This sewing machine is designed and manufactured for household use only.
Read all instructions before using this sewing machine.
Please note that on disposal, this product must be safely recycled in accordance with relevant National legislation relating to
electrical/electronic products. If in doubt please contact your retailer for guidance. (European Union only)
DANGER— To reduce the risk of electric shock:
An appliance should never be left unattended when plugged in. Always unplug this sewing machine from the
electric outlet immediately after using and before cleaning.
WARNING— To reduce the risk of burns, re, electric shock, or injury to persons:
1. Do not allow to be used as a toy. Close attention is necessary when this sewing machine is used by or near
children.
2. Use this appliance only for its intended use as described in this owner’s manual.
Use only attachments recommended by the manufacturer as contained in this owner’s manual.
3. Never operate this sewing machine if it has a damaged cord or plug, if it is not working properly, if it has been
dropped or damaged, or dropped into water.
Return this sewing machine to the nearest authorized dealer or service center for examination, repair, electrical or
mechanical adjustment.
4. Never operate the appliance with any air opening blocked. Keep ventilation openings of this sewing machine and
foot controller free from accumulation of lint, dust and loose cloth.
5. Never drop or insert any object into any opening.
6. Do not use outdoors.
7. Do not operate where aerosol (spray) products are being used or where oxygen is being administered.
8. To disconnect, turn all controls to the off (“O”) position, then remove plug from outlet.
9. Do not unplug by pulling on cord. To unplug, grasp the plug, not the cord.
10. Keep ngers away from all moving parts. Special care is required around the sewing machine needle.
11. Always use the proper needle plate. The wrong plate can cause the needle to break.
12. Do not use bent needles.
13. Do not pull or push fabric while stitching. It may deect the needle causing it to break.
14. Switch this sewing machine off (“O”) when making any adjustment in the needle area, such as threading the
needle, changing the needle, threading the bobbin or changing the presser foot, and the like.
15. Always unplug this sewing machine from the electrical outlet when removing covers, lubricating, or
when making any other adjustments mentioned in this owner’s manual.
SAVE THESE INSTRUCTIONS

III
INSTRUCCIONES IMPORTANTES DE SEGURIDAD
Esta máquina está diseñada y fabricada exclusivamente para uso DOMÉSTICO.
Esta máquina no es un juguete. No deje que los niños jueguen con la máquina.
La máquina no está pensada para que la utilicen los niños o personas discapacitadas sin una supervisión
adecuada.
Siempre que utilice esta máquina, tome ciertas precauciones mínimas de seguridad:
Lea todas las instrucciones antes de utilizar esta máquina.
PELIGRO: Para reducir el riesgo de descarga eléctrica:
No deje nunca la máquina sin vigilancia mientras esté enchufado. Desenchufe siempre la máquina de la
toma eléctrica cuando termine de utilizarla y antes de limpiarla.
ADVERTENCIA: Para reducir el riesgo de quemaduras, incendio, descargas eléctricas o
lesiones personales:
1. No deje que nadie utilice la máquina como si fuera un juguete. Preste especial atención cuando la maquina
de coser sea utilizada por niños(as) o cerca de ellos(as).
2. Utilice la máquina únicamente para los nes descritos en este manual.
Utilice únicamente los accesorios recomendados por el fabricante e indicados en este manual de
instrucciones.
3. Nunca utilice esta máquina de coser si tiene un enchufe o un cable en mal estado, si no funciona
correctamente, si se ha golpeado o está dañada, o si ha caído en agua. Envíe esta máquina a la tienda o
centro de mantenimiento más próximo si es necesario examinarla, repararla o someterla a ajustes eléctricos
o mecánicos.
4. No utilice nunca la máquina si tiene bloqueada alguna vía de ventilación. Mantenga las vías de ventilación de
esta máquina y el pedal de control libres de pelusa, polvo y trozos de tela.
5. No deje caer ni introduzca ningún tipo de objeto en ninguna abertura.
6. No utilice la máquina en exteriores.
7. No utilice la máquina donde se empleen productos de aerosol (spray) o donde se administre oxígeno.
8. Para desconectar, ponga todos los controles en la posición OFF (“O”) y desenchufe la máquina.
9. No tire del cable para desenchufar. Para desenchufar la máquina, sujete el enchufe, no el cable.
10. Mantenga los dedos alejados de todas las piezas móviles. Tenga especial cuidado en la zona de la aguja.
11. Utilice siempre la placa de agujas adecuada. Una placa incorrecta puede hacer que se rompa la aguja.
12. No utilice agujas que estén dobladas.
13. No tire de la tela ni la empuje mientras esté realizando el punzonado. La aguja podría desviarse y romperse.
14. Apague la máquina (“O”) al realizar ajustes en la zona de la aguja, como cambiar la aguja o el pie
prensatelas, por ejemplo.
15. Desenchufe la máquina cada vez que tenga que retirar alguna cubierta, realizar un engrase o cuando desee
realizar cualquier otra reparación mencionada en este manual de instrucciones.
CONSERVE ESTAS INSTRUCCIONES
Tenga presente que, cuando desee deshacerse de este producto, deberá reciclar el producto de forma
segura, en cumplimiento de la legislación nacional relacionada con los productos eléctricos y
electrónicos. Si tiene alguna duda, póngase en contacto con el distribuidor (sólo válido en la Unión
Europea).

IV
INSTRUCTIONS DE SÉCURITÉ IMPORTANTES
Cette machine n’est pas censée être utilisée par des personnes (y compris des enfants) ayant des capacités physiques,
sensorielles ou mentales réduites ou un manque d'expérience et de connaissances, sauf si elles sont sous surveillance
ou ont été instruites sur l’usage de la machine par une personne responsable de leur sécurité.
Les enfants devraient être surveillés pour s’assurer qu’ils ne jouent pas avec la machine.
Lors de l’utilisation de cette machine, il convient de toujours suivre les consignes de sécurité élémentaires, et de prendre
notamment les précautions suivantes :
Lire toutes les instructions avant d’utiliser cette machine.
DANGER – Pour réduire le risque de choc électrique :
Ne jamais laisser la machine sans surveillance lorsqu’elle est branchée. Toujours débrancher cette machine de la prise
de courant, immédiatement après son utilisation et avant de procéder au nettoyage.
AVERTISSEMENT
CONSERVER CES INSTRUCTIONS
Remarque : à la mise au rebut, ce produit devra être recyclé en toute sécurité d’après la
législation en vigueur concernant les appareils électriques et électroniques. En cas de doute,
demandez conseil à votre marchand. (Union Européenne seulement)
— Pour réduire les risques de brûlures, d’incendie, de choc
électrique ou de blessures :
1. Ne pas utiliser cette machine comme un jouet. Il convient de faire particulièrement attention lorsque cette machine
est utilisée par des enfants ou dans leur entourage.
2. Ne jamais utiliser cette machine à coudre à d’autres ns que celles pour lesquelles elle a été conçue, comme le
décrit le présent manuel.
Utiliser uniquement les accessoires recommandés par le fabricant tel qu’indiqué dans le présent manuel.
3. Ne jamais faire fonctionner cette machine si le cordon d’alimentation ou la che ont été endommagés, s’il y a
un problème de fonctionnement, si elle est tombée ou a été abîmée, ou si elle est tombée dans l’eau. Retourner
cette machine au distributeur autorisé ou au service tech nique le plus proche an de la faire examiner ou réparer
ou de faire procéder à certains réglages électriques ou mécaniques.
4. Ne jamais faire fonctionner la machine si l’un des orices de ventilation est obstrué. Veiller à ce que les orices de
ventilation et la pédale de cette machine ne soient jamais encombrés de peluches, poussières et morceaux de
tissus.
5. Ne jamais laisser tomber ou insérer des objets dans les ouvertures.
6. Ne jamais utiliser la machine à l’extérieur.
7. Ne pas la faire fonctionner en cas d’utilisation de produits aérosols (vaporisateurs) ou d’administration d’oxygène.
8. Pour l’éteindre, mettre tous les interrupteurs sur la position Arrêt (“O”), puis retirer la che de la prise.
9. Ne pas débrancher en tirant sur le cordon d’alimentation. Pour débrancher, saisir la che et non le cordon.
10. Tenir ses doigts à l’écart de toute pièce mobile. Faire tout spécialement attention aux abords de l’aiguille.
11. Toujours utiliser la plaque à aiguille adéquate. Une mauvaise plaque peut casser l’aiguille.
12. Ne pas utiliser d’aiguilles tordues.
13. Ne pas tirer ou pousser le tissu en piquant. Cela pourrait dévier l’aiguille et la casser.
14. Eteindre la machine (mettre l’interrupteur sur « O ») avant d’effectuer des réglages à proximité de l’aiguille, comme
le changement d’aiguille ou de pied-de-biche, etc.
15. Toujours débrancher la machine de la prise électrique avant de retirer les couvercles, de la lubrier ou avant
d’effectuer un quelconque réglage d’entretien courant mentionné dans le présent manuel d’utilisation.

V
TABLE OF CONTENTS
SECTION I. NAMES OF PARTS
Names of Parts.................................................................. 2
Standard Accessories ....................................................... 4
SECTION II. GETTING READY TO SEW
Connecting Machine to Power Supply .............................. 6
• To use the foot control..................................................... 6
• To use the start/stop button............................................. 6
Before Using Your Sewing Machine .................................. 6
Operating Instructions ...................................................... 8
Controlling Sewing Speed ................................................. 8
Machine Operating Buttons........................................ 10-12
Speed Control Lever........................................................ 12
Presser Foot Lifter .......................................................... 14
Thread Cutter ................................................................. 14
Extension Table ............................................................... 14
• To detach the table........................................................ 14
• To attach the table......................................................... 14
Free-arm sewing.............................................................. 14
Changing the Needle ...................................................... 16
Selecting Thread and Needles ........................................ 16
Changing the Presser Foot ............................................. 18
• To attach........................................................................ 18
• To remove...................................................................... 16
To Remove and Attach the Foot Holder .......................... 18
• To remove...................................................................... 18
• To attach........................................................................ 18
Bobbin Winding .......................................................... 20-24
• Setting the spool ........................................................... 20
• Additional spool pin ....................................................... 20
• Removing the bobbin .................................................... 20
• Winding the bobbin ....................................................... 22
• Inserting the bobbin....................................................... 24
Threading the Machine.................................................... 26
• Threading the machine.................................................. 26
• Needle threader ............................................................ 26
• Drawing up the bobbin thread ....................................... 28
Adjust the Needle Thread Tension for a Straight Stitch
....... 30
• Correct tension.............................................................. 30
• Tension is too tight......................................................... 30
• Tension is too loose....................................................... 30
Adjust the Needle Thread Tension for a Zigzag Stitch .... 32
• Correct tension.............................................................. 32
• Tension is too tight......................................................... 32
• Tension is too loose....................................................... 32
LCD Display..................................................................... 34
Stitch Patterns ................................................................. 34
SECTION III. STRAIGHT STITCH SEWING
Straight Stitch .................................................................. 36
• Starting to sew .............................................................. 36
• Finishing sewing............................................................ 36
Use the Seam Guides ..................................................... 36
Turning a Square Corner................................................. 36
• To adjust the stitch length.............................................. 38
• To adjust the needle drop position................................. 38
Automatic Reverse Stitch ................................................ 40
Auto-lock Stitch................................................................ 40
Stretch Stitch ................................................................... 40
Zipper Sewing............................................................. 42-44
• To snap on the zipper foot............................................. 42
• Fabric preparation ......................................................... 42
• To sew ...................................................................... 42-44
SECTION IV. ZIGZAG STITCH SEWING
Zigzag Stitch............................................................... 46-48
• To adjust the stitch width ............................................... 46
• To adjust the stitch length.............................................. 46
To Drop or Raise the Feed Dogs..................................... 48
Button Sewing ................................................................. 48
Overcasting with Zigzag Stitch ........................................ 48
SECTION V. UTILITY AND DECORATIVE STITCHES
Blind Hem Stitch.............................................................. 50
• To sew ........................................................................... 50
Shell Stitch....................................................................... 50
Patchwork Piecing........................................................... 52
Box Stitch ........................................................................ 52
Scallop Stitch................................................................... 54
Smocking......................................................................... 54
Applique........................................................................... 56
• To adjust the stitch width ............................................... 56
Fagoting........................................................................... 56
Cross Stitch ..................................................................... 58
Decorative Satin Stitches ................................................ 58
Decorative Stitches.......................................................... 60
Decorative Stitch Combinations ...................................... 60
SECTION VI. BUTTONHOLE
Various Kinds of Buttonholes and Their Uses ................. 62
Square Buttonhole...................................................... 64-66
• To sew ...................................................................... 64-66
To Adjust Buttonhole Stitch.............................................. 68
• To adjust the stitch width ............................................... 68
• To adjust the stitch density ............................................ 68
Round-End Buttonhole .................................................... 68
Keyhole Buttonhole ......................................................... 68
Corded Buttonhole........................................................... 70
Darning Stitch.................................................................. 72
• To sew ........................................................................... 72
• To sew a shorter darning............................................... 72
• To sew a same-sized darning........................................ 72
• To sew the evenness of the darning............................. 72
Tacking ............................................................................ 74
• To sew ........................................................................... 74
• To sew a shorter tack .................................................... 74
• To sew a same-sized tack ............................................. 74
Eyelet............................................................................... 74
• To sew ........................................................................... 74
• To adjust the shape of an eyelet.................................... 74
SECTION VII. STRETCH STITCHES
Triple Stretch Stitch ......................................................... 76
Sculpture Stitch ............................................................... 76
Saddle Stitch ................................................................... 76
Multiple-zigzag Stitch....................................................... 78
• Seam nishing............................................................... 78
• Mending ........................................................................ 78
Overedge Stitch............................................................... 78
Serging ............................................................................ 78
Elastic Stretch Stitch........................................................ 80
Stretch Patching .............................................................. 80
Correcting Distorted Stitch Patterns ................................ 80
• Stretch stitch pattern ..................................................... 80
• Evenness of tacking ...................................................... 80
SECTION VIII. CARE OF YOUR MACHINE
Cleaning the Hook Race and Feed Dogs........................ 82
Replacing the Bobbin Holder........................................... 84
Problems and Warning Signs .......................................... 86
Troubleshooting............................................................... 89

VI
INDICE
SECCION I. NOMBRE DE LAS PARTES
Nombre de las partes ...................................................................3
Accesorios estándar.....................................................................5
SECCION II. PREPARACION DE LA MAQUINA
PARA COSER
Conexión de la fuente de alimentación ........................................7
• Uso del pedal .............................................................................7
• Uso del botón de inicio/parada...................................................7
Cuando utilice por primera vez su máquina de cose....................7
Para su seguridad ........................................................................9
Clavija polarizada .........................................................................9
Control de la velocidad de costura ...............................................9
Botones de la máquina..........................................................11-13
Palanca de control de velocidad.................................................13
Palanca de elevación del prensatelas........................................15
Cortahilos ...................................................................................15
Tabla de ampliación....................................................................15
• Desmontaje ..............................................................................15
• Montaje ....................................................................................15
Costura con el brazo libre...........................................................15
Cambio de aguja ........................................................................17
Selección de hilos y agujas ........................................................17
Cambio del pie prensatelas........................................................19
• Montaje ....................................................................................19
• Extracción ................................................................................19
Desmontaje y montaje del amarre prensatelas..........................19
• Extracción ................................................................................19
• Montaje ....................................................................................19
Bobinado de la canilla ...........................................................21-25
• Fijación del carrete...................................................................21
• Pasador de carrete adicional ...................................................21
• Extracción de la canilla ...........................................................21
• Devanado de la canilla.............................................................23
• Colocación de la canilla en el portacanillas .............................25
Enhebrado del hilo de la aguja...................................................27
• Enhebrado del hilo de la aguja.................................................27
• Ensartador de agujas ...............................................................27
• Extracción del hilo de la canilla ................................................29
Ajuste de la tensión del hilo de la aguja para puntada recta
...........31
• Tensión correcta.......................................................................31
• El hilo está demasiado tenso ...................................................31
• El hilo está demasiado ojo .....................................................31
Ajuste de la tensión del hilo de la aguja para puntada zig-zag
....33
• Tensión correcta.......................................................................33
• El hilo está demasiado tenso ...................................................33
• El hilo está demasiado ojo .....................................................33
Pantalla LCD ..............................................................................35
Patrones de puntadas ................................................................35
SECCION III. COSTURA DE PUNTADA RECTA
Puntada recta .............................................................................37
• Para empezar a coser..............................................................37
• Para terminar a coser...............................................................37
Uso de las guías de costura.......................................................37
Cómo coser una esquina cuadrada............................................37
• Ajuste de la longitud de la puntada ..........................................39
• Ajuste de la posición de caída de la aguja ...............................39
Puntada invertida automática.....................................................41
Puntada de jación automática ..................................................41
Puntada recta triple ....................................................................41
Costura de cremalleras o cierres...........................................43-45
• Cómo colocar el prensatelas para cremalleras........................43
• Preparación de la tela ..............................................................43
• Para coser...........................................................................43-45
SECCION IV. PUNTADAS DE ZIG-ZAG
Puntada de zig-zag................................................................47-49
• Ajuste de la anchura de la puntada..........................................47
• Ajuste de la longitud de la puntatda .........................................47
Bajada o elevación de los dientes de arrastre............................49
Costura de botones ....................................................................49
Sobrehilado con puntada en zigzag ...........................................49
SECCION V. PUNTADAS UTILES Y PUNTADAS
DECORATIVAS
Dobladillo invisible......................................................................51
• Para coser................................................................................51
Puntada en forma de concha .....................................................51
Unión de pezas parcheadas.......................................................53
Puntada de caja..........................................................................53
Festones.....................................................................................55
Fruncido......................................................................................55
Apliques......................................................................................57
• Ajuste de la anchura de la puntada..........................................57
Fagoting......................................................................................57
Punto de cruz .............................................................................59
Puntadas en satén decorativas ..................................................59
Puntadas decorativas.................................................................61
Combinaciones de puntadas decorativas...................................61
SECCION VI. OJAL
Varios tipos de ojales y sus usos................................................63
Ojal cuadrado ........................................................................65-67
• Para coser...........................................................................65-67
Ajuste de la anchura de la puntada y la densidad de los ojales.69
• Ajuste de la anchura de la puntada..........................................69
• Ajuste de la densidad de la puntada ........................................69
Ojal redondeado.........................................................................69
Ojal de cerradura........................................................................69
Ojal acordorado..........................................................................71
Puntada zurcida..........................................................................73
• Para coser................................................................................73
• Cosido de zurcidos más cortos ................................................73
• Cosido de zurcidos del mismo tamaño ....................................73
• Adjuste de la uniformidad del zurcido ......................................73
Embaste .....................................................................................75
• Para coser................................................................................75
• Cosido de embastes más cortos..............................................75
• Cosido de embastes del mismo tamaño ..................................75
Ojalillo.........................................................................................75
• Para coser................................................................................75
• Ajuste de la forma del ojalillo....................................................75
SECCION VII. PUNTADAS ELASTICAS
Puntada recta triple ....................................................................77
Puntada de refuerzo...................................................................77
Puntada vistosa..........................................................................77
Puntada de múltiple zig-zag .......................................................79
• Cosido cal...............................................................................79
• Zurciendo o remendando .........................................................79
Puntada de sobrehilado..............................................................79
Puntada en tejidos de punto.......................................................79
Puntada elástica de extensión....................................................81
Remiendos elásticos ..................................................................81
Corrección de patrones de puntadas distorsionados .................81
• Patrones rectos elásticos .........................................................81
• Uniformidad del embaste .........................................................81
SECCION VIII. MANTENIMIENTO DEL LA MAQUINA
Limpieza del recorrido del portacanillas y los dientes de arrastre
........83
Cambio del portacanillas ............................................................85
Problemas y señales de advertencia..........................................87
Detección y solución de problemas............................................90

VII
PARTIE I. IDENTIFICATION DES PIÈCES DE LA
MACHINE
Identication des composants ......................................................3
Accessoires standard ...................................................................5
PARTIE II. PRÉPAREZ-VOUS À COUDRE
Branchement de la machine sur l’alimentation électrique ...........7
• Utilisation de la pédale ...............................................................7
• Utilisation de la touche de démarrage (start/stop) .....................7
Les premières fois que vous utilisez votre machine.....................7
Prise polarisée..............................................................................9
Contrôlez la vitesse de couture ...................................................9
Touches de commande de la machine..................................11-13
Commande de la vitesse............................................................13
Relève-pied presseur .................................................................15
Coupe-l .....................................................................................15
Table d’extension........................................................................15
• Retrait.......................................................................................15
• Installation ................................................................................15
Couture avec le bras libre...........................................................15
Changer l’aiguille........................................................................17
Choisir le l et les aiguilles .........................................................17
Changement de pied presseur ...................................................19
• Installation ................................................................................19
• Retrait.......................................................................................19
Retrait et installation du porte-pied.............................................19
• Retrait.......................................................................................19
• Installation ................................................................................19
Remplissage de la canette ....................................................21-25
• Réglage de la bobine de l.......................................................21
• Porte-bobine supplémentaire ...................................................21
• Retrait de la canette .................................................................21
• Remplissage de la canette.......................................................23
• Insertion de la canette..............................................................25
Enlage de la machine ...............................................................27
• Enlage de la machine.............................................................27
• Enle-aiguille intégré................................................................27
• Remonter le l de la canette ....................................................29
RégIage de la tension du l de l’aiguille pour le point droit
.................31
• Tension correcte.......................................................................31
• Si la tension est trop élevée .....................................................31
• Si la tension est trop faible .......................................................31
RégIage de la tension du l de l’aiguille pour le point zig-zag
........33
• Tension correcte.......................................................................33
• Si la tension est trop élevée .....................................................33
• Si la tension est trop faible .......................................................33
Afcheur à cristaux liquides........................................................35
Motis de points ...........................................................................35
PARTIE III. COUTURE AU POINT DROIT
Point droit ...................................................................................37
• Début d’une couture.................................................................37
• Finitíon d’une couture...............................................................37
Utilisation des guides de couture................................................37
Pour coudre un angle droit .........................................................37
• Réglage de la longueur de point ..............................................39
• Réglage de la position de piqûre de l’aiguille...........................39
Point arruère automatique..........................................................41
Point de blocage.........................................................................41
Point droit extensible ..................................................................41
La couture des fermetures à glissière ...................................43-45
• Pour xer le pied à fermeture à glissière..................................43
• Préparation du tissu .................................................................43
• Pour coudre.........................................................................43-45
PARTIE IV. POINTS ZIG-ZAG
Zig-zag simple .......................................................................47-49
• Réglage de la largeur de point .................................................47
• Réglage de la longueur de point ..............................................47
Abaissement ou relevage des griffes d’entraînement ................49
TABLE DES MATIÈRES
Couture des boutons ..................................................................49
Surlage au point zigzag ............................................................49
PARTIE V. POINTS UTILITAIRES ET DÉCORATIFS
Ourlet invisible............................................................................51
• La counture ..............................................................................51
Point coquille ..............................................................................51
Patchwork...................................................................................53
Point de créneau ........................................................................53
Point de feston............................................................................55
Smocks.......................................................................................55
Appliqués....................................................................................57
• Réglage de la largeur de point .................................................57
Entre-deux..................................................................................57
Point de croix..............................................................................59
Points lancé décoratif .................................................................59
Points décoratifs.........................................................................61
Combinaisons de points décoratifs.............................................61
PARTIE VI. BOUTONNIÈRE
Différentes boutonnières et leurs utilisations..............................63
Boutonnière carrée................................................................65-67
• Pour coudre.........................................................................65-67
• Réglage de la largeur et de la densité des points de
boutonnière..............................................................................69
• Réglage de la largeur de point .................................................69
• Réglage de la densité des points .............................................69
Boutonnière arrondie..................................................................69
Boutonnière à œillet ...................................................................69
Boutonnière cordonnet ...............................................................71
Point de reprise ..........................................................................73
• Pour coudre..............................................................................73
• Couture d’une reprise plus petite .............................................73
• Couture d’une reprise de la même taille ..................................73
• Ajustement de la régularité de la reprise..................................73
Arrêtes de couture......................................................................75
• Pour coudre..............................................................................75
• Réalisation d’un arrêt de couture plus court.............................75
• Réalisation d’un arrêt de couture de la même taille .................75
Œillet...........................................................................................75
• Pour coudre..............................................................................75
• Réglage de la forme de œillet ..................................................75
PARTIE VII. POINTS EXTENSIBLES
Point droit extensible ..................................................................77
Point bouclette............................................................................77
Point sellier.................................................................................77
Point zig-zag multiple .................................................................79
• Finition des coutures ................................................................79
• Repriser....................................................................................79
Point de surjet.............................................................................79
Point tricot...................................................................................79
Point extensible pour la xation des élastiques..........................81
Point à rapiécer extensible .........................................................81
Correction des motifs déformés..................................................81
• Motif de points stretch ..............................................................81
• Régularité des arrêts de couture..............................................81
PARTIE VIII. ENTRETIEN DE VOTRE MACHINE
Nettoyage du logement de crochet et des griffes
d’entraînement..........................................................................83
Remplacement du porte-canette ................................................85
Problèmes et indications d’alerte................................................88
Dépistage des pannes................................................................91
2
NOTE:
Sewingmachinedesignandspecicationsaresubjectto
changewithoutpriornotice.
Names of Parts
q Extensiontable(Accessorybox)
w Needleplate
e Needlethreader
r Threadcutter
t Facecover
y Threadtake-uplever
u Threadtensiondial
i Spoolpin
o Largespoolholder
!0 Bobbinwinderspindle
!1 Bobbinwinderstopper
!2 Holeforadditionalspoolpin
!3 Valuesetbuttons
!4 Cursorbuttons
!5 LCDdisplay
!6 Speedcontrolslider
!7 Needlepositionup/downbutton
!8 Auto-lockbutton
!9 Reversestitchbutton
@0 Start/stopbutton
@1 Hookcoverplate
@2 Presserfoot(ZigzagfootA)
@3 Footholder
@4 Needleclampscrew
@5 Needle
@6 Hookcoverreleasebutton
@7 Powerinlet
@8 Footcontroljack
@9 Powerswitch
#0 Handwheel
#1 Carryinghandle
#2 Upperthreadguide
#3 Presserfootlifter
#4 Buttonholelever
#5 Free-arm
#6 Dropfeedlever
#7 Footcontrol
#8 Powersupplycord
q
w
e
r
t
y
ui o !0 !1
!2
!3
!4
!6
!7
!8
!9
!5
@0
@1
@2
@3
@4
@5
@6
@7
@8
@9
#0
#1
#3
#4
#5
#6
#2
#7 #8
SECTION I. NAMES OF PARTS

3
Nombre de las partes
q Tabladeampliación(cajadeaccesorios)
w Placadeagujas
e Enhebradordeagujas
r Cortahilos
t Placafrontal
y Tirahilos
u Reguladordetensióndelhilo
i Pasadordecarrete
o Portacarretesgrande
!0 Devanadordecanilla
!1 Topedeldevanador
!2 Oricioparasegundopasadordecarrete
!3 Botonesdeajustedevelores
!4 Botonesdecursor
!5 PantellaLCD
!6 Correderadecontroldevelocidad
!7 Botónparasubir/bajarlaaguja
!8 Botóndecierreautomático
!9 Botóndecosturahaciaatrás
@0 Botóndeinicio/parada
@1 Placadelacubiertadelportacanillas
@2 PiePrensatelas
@3 Soportedelpie
@4 Tornillodejacióndelaaguja
@5 Aguja
@6 Botóndeaperturadelaplacadecubiertadelportacanillas
@7 Tomadealimentación
@8 Conectordelpedal
@9 Interruptordeencendido
#0 Volante
#1 Asadetransporte
#2 Guíahilos
#3 Alzadordelpieprensatelas
#4 Palancadeojales
#5 Brazolibre
#6 Bajelapalancadelosdientesdearrastre
#7 Pedaldecontrol
#8 Cabledealimentación
Identication des composants
q Tabled’extension(boîtederangementd’accessoires)
w Plaqueàaiguilles
e Enle-aiguille
r Coupe-l
t Plaquefrontale
y Levierreleveurdel
u Sélecteurdetensiondul
i Porte-bobine
o Disquexe-bobinegrandmodèle
!0 Brochedudévidoir
!1 Butéedudévidoir
!2 Troupourporte-bobinesupplémentaire
!3 Touchesdeprogrammation
!4 Touchesducurseur
!5 Afcheuràcristauxliquides
!6 Curseurderéglagedelavitesse
!7 Touchedepositionhaute/bassedel’aiguille
!8 Touched’arrêtautomatique
!9 Touchedemarchearrière
@0 Touchededémarrage(start/stop)
@1 Couvercledecrochet
@2 Piedpresseur
@3 Porte-pied
@4 Visdepince-aiguille
@5 Aiguille
@6 Boutond’ouvertureducouvercledecrochet
@7 Entréed’alimentation
@8 Prisedelapédale
@9 Interrupteurdemisesoustension
#0 Volant
#1 Poignéedetransport
#2 Guide-l
#3 Releveurdepied
#4 Levierdeboutonnière
#5 Braslibre
#6 Levierd’escamotagedesgriffesd’entraînement
#7 Pédaledecontrôle
#8 Cordond’alimentation
NOTA:
Diseñoyespecicacionesdelamáquinadecoserpodrían
cambiarsinpreaviso.
REMARQUE:
Lesspécicationsetconceptiondelamachineàcoudre
sujettesàmodicationssanspréavis.
PARTIE I. IDENTIFICATION DES PIÉCES DE
LA MACHINE
SECCION I. NOMBRE DE LAS PARTES

4
1 5432
6 10987
12 1413
q
Bobbins
w
Needle set
e
Zigzag foot: A
r
Satin stitch foot: F
t
Zipper foot: E
y
Automatic buttonhole foot: R
u
Seam ripper/Buttonhole opener
iScrewdriver
o
Large spool holder
0!Small spool holder
1!Spool stand
2!Spool pin felt
3!Additional spool pin
4!Lint brush
11
Standard Accessories

5
q Canillas
w
Juegodeagujas
e
Prensatelasparazig-zag:A
r
Prensatelasparapuntadadecorativa:F
t
Prensatelasparacremalleras:E
y
Prensatelasparaojalautomátique:R
u
Cortador/Abreojales
i
Destornillador
o
Tapa-carretesgrande
!0
Tapa-carretespequeñol
!1 Basedelcarrete
!2 Fieltroparaportacarretes
!3 Portacarretesadicional
!4 Cepillodelimpieza
q
Canettes
w
Jeud’aiguilles
e
Piedzig-zag:A
r
Piedpourpointpassé:F
t
PiedàfermetureàglissièreE
y
Piedàboutonnièreautomatique:R
u
Découd-vite/Ouvreboutonnière
i
Tournevis
o
Granderondelledeporte-bobine
!0
Petiterondelledeporte-bobine
!1 Plaquepourte-bobine
!2 Feutredeporte-bobine
!3 Porta-bobinesupplémentaire
!4 Brosseapeluches
Accesorios estándar Accessoires standard

6
Before Using Your Sewing Machine
Beforeusingyoursewingmachineforthersttime,placea
scrapoffabricunderthepresserfootandrunthemachine
withthreadforafewminutes.Wipeawayanyoilwhichmay
appear.
*Donotplaceanythingonthefootcontrolwhennotsewing.
e
w
r
u
t
iy
q
w
t
er
q
SECTION II. GETTING READY TO SEW
Connecting Machine to Power Supply
• To use the foot control
Turnoffthepowerswitchq.
Insertthefootcontrolplugwintothefootcontroljacke.
Insertthemachineplugrintothepowerinlett.
Insertthepowersupplyplugyintothewalloutletu.
Turnonthepowerswitchq.
Thefootcontrolsigniwillbedisplayedwhenthe
footcontrolisconnectedtothemachine.
q
Powerswitch
w
Footcontrolplug
eFootcontroljack
r
Machineplug
tPowerinlet
y
Powersupplyplug
u
Walloutlet
i
Footcontrolsign
• To use the start/stop button
Turnoffthepowerswitchq.
Insertthemachineplugwintothepowerinlete.
Insertthepowersupplyplugrintothewalloutlett.
Turnonthepowerswitchq.
qPowerswitch
wMachineplug
ePowerinlet
rPowersupplyplug
tWalloutlet
NOTE:
Thestart/stopbuttondoesnotworkwhenthefoot
controlisconnected.

7
SECCION II. PREPARACION DE LA MAQUINA
PARA COSER
PARTIE II. PRÉPAREZ-VOUS À COUDRE
Les premières fois que vous utilisez votre machine
Lespremièresfoisquevousutilisezvotremachine,placezune
chutedetissusouslepiedpresseuretfaitesfonctionnerlamachine
sanslpendantquelquesminutes.Essuyezlestracesd'huilequi
pourraientseproduire.
Cuando utilice por primera vez su máquina de
cose
Cuandoutiliceporprimeravezsumáquinadecoser,coloqueuna
piezadeteladebajodelelprensatelas
yhagafuncionarlamáquinasinhilo,duranteunospocosminutos.
Esnormalqueaparezcansalpicadurasde
aceite,límpielasycosanormalmente.
Conexión a la fuente de alimentación
• Uso del pedal
Apaguelamáquinaq.
Introduzcaelenchufedelpedalwenelconectordelpedale.
Introduzcaelenchufedelamáquinarenlatomade
alimentaciónt.
Introduzcaelenchufedealimentaciónyyenlatomadela
paredu.
Enciendalamáquinaq.
Elsignodelpedali.aparecesielpedalestáconectadoala
máquina.
q
Interruptordeencendido
w
Enchufedelpedal
e
Conectordelpedal
r
Enchufedelamáquina
t
Tomadealimentación
y
Enchufedealimentación
u
Tomadepared
i
Signodelpedal
• Uso del botón de inicio/parada
Apaguelamáquinaq.
Introduzcaelenchufedelamáquinaw.enlatomade
alimentacióne.
Introduzcaelenchufedealimentaciónrenlatomadela
paredt.
Enciendaelinterruptorq.
q
Interruptordeencendido
w
Enchufedelamáquina
e
Tomadealimentación
r
Enchufedealimentación
t
Tomadepared
NOTA:
Elbotóndeinicio/paradanofuncionacuandoelpedalestá
conectado.
Branchement de la machine sur l’alimentation
électrique
• Utilisation de la pédale
Mettezl’interrupteurd’alimentationqenpositiond’arrêt.
Introduisezlachedelapédalewdanslaprise
correspondantesurlamachinee.
Introduisezlachedelamachinerdansl’entrée
d’alimentationt.
Branchezlached’alimentationydanslaprisemuraleu.
Mettezl’interrupteurd’alimentationqenpositiondemarche.
Lesymboledelapédaleis’afchelorsquelapédaleest
raccordéeàlamachine.
q Interrupteurd’alimentation
w Fichedelapédale
e Prisedelapédale
r Fichedelamachine
t Entréed’alimentation
y Fiched’alimentation
u Prisemurale
i Symboledelapédale
• Utilisation de la touche de démarrage (start/stop)
Mettezl’interrupteurd’alimentationqenpositiond’arrêt.
Introduisezlachedelamachinew.dansl’entrée
d’alimentatione.
Branchezlached’alimentationrdanslaprisemuralet.
Mettezl’interrupteurd’alimentationqenpositiondemarche.
q Interrupteurd’alimentation
w Fichedelamachine
e Entréed’alimentation
r Fiched’alimentation
t Prisemurale
REMARQUE:
Latouchededémarrage(start/stop)nefonctionnepaslorsque
lapédaleestraccordéeàlamachine.

8
Controlling Sewing Speed
Sewingspeedisvariedbythefootcontrol.
Theharderyoupressonthefootcontrol,thefasterthe
machineruns.
WARNING:
Whileinoperation,alwayskeepyoureyesonthe
sewingareaanddonottouchanymovingpartssuch
asthethreadtake-uplever,handwheelorneedle.
Alwaysturnoffthepowerswitchandunplugfromthe
powersupply:
-whenleavingthemachineunattended.
-whenattachingorremovingparts.
-whencleaningthemachine.
Donotplaceanythingonthefootcontrol,otherwise
themachinewillruninadvertently.
Operating Instructions:
Thesymbol“O”onaswitchindicatesthe“off”positionofa
switch.
Forapplianceswithapolarizedplug(onebladewiderthan
theother):Toreducetheriskofelectricshock,thisplugis
intendedtotinapolarizedoutletonlyoneway.
Ifitstilldoesnott,contactaqualiedelectriciantoinstall
theproperoutlet.Donotmodifythepluginanyway(U.S.A.
andCanadaonly).
*FootcontrolmodelYC-485EC-1isusedwiththissewing
machine.

9
Clavija polarizada
Paraaparatosconclavijapolarizada(unapiezadelenchufemás
anchaquelaotra).
Andeevitarelriesgodedescargaseléctricas,estaclavijaestá
diseñadadeformaquesólopuedeintroducirseenunsentidoden-
trodeunatomadecorrientepolarizada.Sinoencajacomple-
tamenteenlatomadecorriente,inviertalaclavija.Sitampoco
encajadeestaformapóngaseencontactoconunelectricista
cualicadoparaqueleinstaleunatomadecorrienteapropiada.
Nointentemodicarlaclavijadeningunaforma.
Conestamáquinadecoserdeberáusarseelpedaldecontrol
ModeloYC-485EC-1.
Control de la velocidad de costura
Elpedaldecontrolsirvepararegularlavelocidaddelacostura.
Lavelocidadseregulapulsandoelpedaldecontrolconlaplanta
delpie,amáspresión,másvelocidad.
Prise polarisée
Pourlesappareilsayantuneprisepolarisée(unelamepluslarge
quel’autre).Anderéduirelesrisquesdechocélectrique,cette
prisedebranchementestconçuepours’adapteràlapriseélec-
triquemuraledansunseulsens.Siellenerentrepascomplète-
mentdanslaprise,retournez-la.Siellenesebranchetoujours
pas,faitesappelàunélectricienqualiéquiinstallerauneprise
appropriée.N’essayezpasdemodierlaprise.
LapédaledecontrôleYC-485EC-1s’utiliseaveclamachine.
Contrôlez la vitesse de couture
Onchangelavitessedecoutureàl’aidedelapédaledecontrôle.
Plusvousappuyezsurlapédale,pluslamachinevavite.
AVERTISSEMENT :
Lorsquelamachineestenmarche,gardeztoujoursles
yeuxsurlazonedecoutureetnetouchezàaucunedes
piècesmobilestellesquelereleveurdel,levolantou
l’aiguille.
Metteztoujoursl’interrupteursurlapositionarrêtet
débranchezl’alimentationélectrique:
- quandvouslaissezlamachinesanssurveillance.
- quandvousattachezoudéposezdespièces.
- quandvousnettoyezlamachine.
Neplacezjamaisd’objetsurlapédale,sinonlamachinese
mettraenmarcheintempestivement.
ATENCIÓN:
Mientraslamáquinaestéfuncionando,nopierdadevista
lazonadecosturaynotoqueningunapiezamóvil,comola
palancatirahilos,elvolanteolaaguja.
Noolvideapagarelinterruptorydesenchufarlamáquina
delaredeléctrica:
- Cuandovayaadejarlamáquinadesatendida.
- Cuandovayaajaroaretirarunapieza.
- Cuandovayaalimpiarlamáquina.
Nocoloqueningúnobjetosobreelpedal;silohace,la
máquinafuncionaráinesperadamente.

10
w
e r
t
y
w
e
r
q
q
q Start/Stop Button
Lowerthepresserfootlifter.
Pressthestart/stopbuttonqtostartthemachine.
Themachinestartsrunningslowlyfortherstfew
stitches;itthenrunsatthespeedsetbythespeedcontrol
slider.
Pressthestart/stopbuttonqagaintostopthemachine.
NOTES:
•Themachinerunsslowlyaslongasyoupressandhold
thestart/stopbuttonq.
•
Thestart/stopbuttonqcannotbeusedwhenthefoot
controlisconnectedtothemachine.
w Reverse Stitch Button
Whenstitches(00,01,10,11)areselected,the
machinewillsewinreversewhilethereversestitchbutton
wispressed.
Ifyoupressthereversestitchbuttonwwhensewingany
otherstitches,themachinewillimmediatelysewlocking
stitchesandautomaticallystop.
Ifyoupressthereversestitchbuttonwwhenstitch
pattern00,01,10,or11isselectedandthefootcontrolis
notconnected,themachinewillsewinreverseaslongas
thebuttonispressed,andthemachinewillstopwhenthe
buttonisreleased.
e Auto-lock Button
Whenstitches(00,01,10,11)areselected,
themachinewillimmediatelysewlockingstitchesand
automaticallystopwhentheauto-lockbuttoneis
pressed.
Ifyoupresstheauto-lockbuttonewhensewingany
otherstitches,themachinewillsewlockingstitchesatthe
endofthecurrentpatternandautomaticallystop.
r Needle Position Up/down Button
Pressthisbuttontobringtheneedleupordown.
Themachinewillstopwiththeneedleupordown
dependingontheneedlepositiondeterminedbythis
button.
Machine Operating Buttons

11
Botones de la máquina
q Botón de inicio/parada
Bajeelalzadordelpieprensatelas.
Presioneelbotóndeinicio/paradaqparaponerenmarchala
máquina.
Lamáquinadarálentamentelasprimeraspuntadasyluego
aceleraráhastaalcanzarlavelocidadjadaconlacorrederade
controldevelocidad.
Vuelvaapresionarelbotóndeinicio/paradaq.paradetenerla
máquina.
NOTAS:
•Lamáquinafuncionalentamentemientrasmantenga
presionadoelbotóndeinicio/paradaq.
•Elbotóndeinicio/paradaqnopuedeusarsesielpedalestá
conectadoalamáquina.
w Botón de costura hacia atrás
Cuandosehanseleccionadolaspuntadas(00,01,
10,11),lamáquinacoseensentidoinversomientrasmantenga
presionadoelbotóndecosturahaciaatrás.
Sisepresionaelbotóndecosturahaciaatrás wmientrasse
estáncosiendootraspuntadas,lamáquinacoseráunaspuntadas
decierreysedetendráautomáticamente.
Sipresionaelbotóndecosturahaciaatrásw,cuandosehan
seleccionadolospatronesdepuntada00,01,10o11yelpedal
noestáconectado,lamáquinacoseenretrocesosiemprey
cuandosemantengapresionadoelbotón,ylamáquinase
detieneasoltarelbotón.
e Botón de cierre automático
Cuandosehanseleccionadolaspuntadas(00,01,
10,11)lamáquinadaráinmediatamentelaspuntadasdecierre
ysedetendráautomáticamentealpresionarelbotóndecierre
automáticoe.
Sipresionaelbotóndecierreautomáticoealestarcosiendo
lamáquinaencualquierotrapuntada,lamáquinadarálas
puntadasdecierrealacabarelpatrónactualysedetendrá
automáticamente.
r Botón para subir/bajar la aguja
Presioneestebotónparabajarysubirlaaguja.
Lamáquinasedetendráconlaagujaarribaoabajodependiendo
delaposiciónquedeterminadaporestebotón.
q Touche de démarrage (start/stop)
Abaissezlerelève-pied.
Appuyezsurlatouchededémarrage(start/stop)qpourdémarrer
lamachine.
Lamachinedémarredoucementpourlespremierspoints,puis
avanceàlavitessesélectionnéeàl’aideducurseurderéglagede
lavitesse.
Appuyezdenouveausurlatouchededémarrage(start/stop)q
pourarrêterlamachine.
REMARQUES:
•Lamachineavancelentementtantquevousmaintenezla
touchededémarrage(start/stop)qenfoncée.
•Latouchededémarrage(start/stop)qn’estpasopérationnelle
lorsquelapédaleestraccordéeàlamachine.
w Touche de marche arrière
Quandlespoints(00,01,10,11)sontsélectionnés,la
machinecoudenmarchearrièresivousappuyezsurlatouchede
marchearrière.
Sivousappuyezsurlatouchedemarchearrièrewpourn’importe
quelautrepoint,lamachinecoudimmédiatementdespointsde
blocagepuiss’arrêteautomatiquement.
Sivousappuyezsurlatouchedemarchearrièrewlorsquele
motifdepoint00,01,10ou11estsélectionnéetquelapédalen’est
pasraccordée,lamachinecoudenmarchearrièretantquevous
appuyezsurlatoucheets’arrêtedèsquevouscessezd’appuyer
surlatouche.
e Touche d’arrêt automatique
Quandlespoints(00,01,10,11)sontsélectionnés,la
machinecoudimmédiatementdespointsdeblocageets’arrête
automatiquementlorsquevousappuyezsurlatouched’arrêt
automatiquee.
Sivousappuyezsurlatouched’arrêtautomatiqueependant
lacoutureden’importequelautrepoint,lamachinecoud
despointsdeblocageàlandumotifencours,puiss’arrête
automatiquement.
r Touche de position haute/basse de l’aiguille
Cettetouchesertàreleverouabaisserl’aiguille.
Lamachinepeuts’arrêteravecl’aiguilleenpositionrelevéeou
abaisséeselonlapositiond’aiguilledéterminéeparcettetouche.
Touches de commande de la machine

12
tCursor Buttons
Usethesebuttonstomovethecursoru.
Pressbuttontomovethecursortoright.
Pressbuttontomovethecursortoleft.
yValue Set Buttons
Usethesebuttonstochangethesetvalue.
Movethecursorunderthedigityouwouldliketochange.
Pressbuttontoincreasethevalue.
Pressbuttontodecreasethevalue.
u
t
y
Speed Control Lever
Sewingspeedcanbevariedbythespeedcontrolleverac-
cordingtoyoursewingneeds.
Toincreasesewingspeed,slidethelevertotheright.
Todecreasesewingspeed,slidethelevertotheleft.

13
t Botones del cursor
Useestosbotonesparamoverelcursoru.
Presioneelbotónparamoverelcursoraladerecha.
Presioneelbotónparamoverelcursoralaizquierda.
yBotones de ajuste de valores
Useestosbotonesparacambiarlosvaloresdeajuste.
Coloqueelcursordebajodeldígitoquedeseacambiar.
Presioneelbotónparaincrementarelvalor.
Presioneelbotónparadisminuirelvalor.
t Touches du curseur
Utilisezcestouchespourdéplacerlecurseuru.
Appuyezsurlatouchepourdéplacerlecurseurversladroite.
Appuyezsurlatouchepourdéplacerlecurseurversla
gauche.
y Touches de programmation
Utilisezcestouchespourmodierunevaleurprogrammée.
Placezlecurseursouslechiffrequevoussouhaitezmodier.
Appuyezsurlatouchepouraugmentercettevaleur.
Appuyezsurlatouchepourdiminuercettevaleur.
Commande de la vitesse
Lavitessedepiqûrepeutêtremodiéeparlacommandedela
vitesseselonvosbesoins.
Pouraugmenterlavitessedepiqûre,déplacerlacommandevers
ladroite.
Pourdiminuerlavitessedepiqûre,déplacerlacommandeversla
gauche.
Palanca de control de velocidad
Utilicelapalancadecontroldelavelocidadparacambiarlave-
locidaddecosidosegúnsusnecesidades.
Paraaumentarlavelocidad,deslicelapalancahacialaderecha
Parareducirlavelocidaddecosido,deslicelapalancahaciala
izquierda.

14
q
we
r
Extension Table
Theextensiontableprovidesanextendedsewingareaand
canbeeasilyremovedforfreearmsewing.
Theaccessoriescanbestoredinthetable.
• To detach the table
Pullthetableawayfromthemachine,asillustrated.
• To attach the table
Pushtheextensiontable,insertingthetabintotheslotuntil
thetablesnapsintothemachine.
qExtensiontable
wTab
eSlot
rAccessorystorage
Free-arm Sewing
Free-armsewingisusedforstitchingsleeves,waistbands,
pantlegsoranyothertubulargarments.
Itisalsousefulfordarningsocksormendingkneesor
elbows.
Presser Foot Lifter
Thepresserfootlifterraisesandlowersthepresserfoot.
Youcanraisethefootabout1/4˝(0.6cm)higherthanthe
normaluppositionforeasyremovalofthepresserfoot,or
tohelpyouplaceheavyfabricunderthefoot.
q
Loweredposition
w
Normalupposition
e
Extraupposition
Thread Cutter
q
Threadcutter
Youdonotneedapairofscissorstocutthethreadafter
sewing.Simplyusethebuilt-inthreadcutter.
q
q
w
e
w
e
Table of contents
Other Janome Sewing Machine manuals

Janome
Janome MEMORYCRAFT 300E User manual

Janome
Janome JR3000 Series User manual

Janome
Janome 4119 User manual

Janome
Janome HD9 User manual

Janome
Janome Memory craft 9900 User manual

Janome
Janome MC400E User manual

Janome
Janome Sewist 740DC User manual

Janome
Janome SKYLINE S6 User manual

Janome
Janome MS3015 User manual

Janome
Janome C30 User manual

Janome
Janome MyStyle 100 User manual

Janome
Janome MEMORY CRAFT 9000 User manual

Janome
Janome 1200D User manual

Janome
Janome MC 200E - User manual

Janome
Janome M50QDC User manual

Janome
Janome MW3018LE User manual

Janome
Janome DC 3018 User manual

Janome
Janome New Home 580 Manual

Janome
Janome YC-482J-EC User manual

Janome
Janome JW7630 User manual