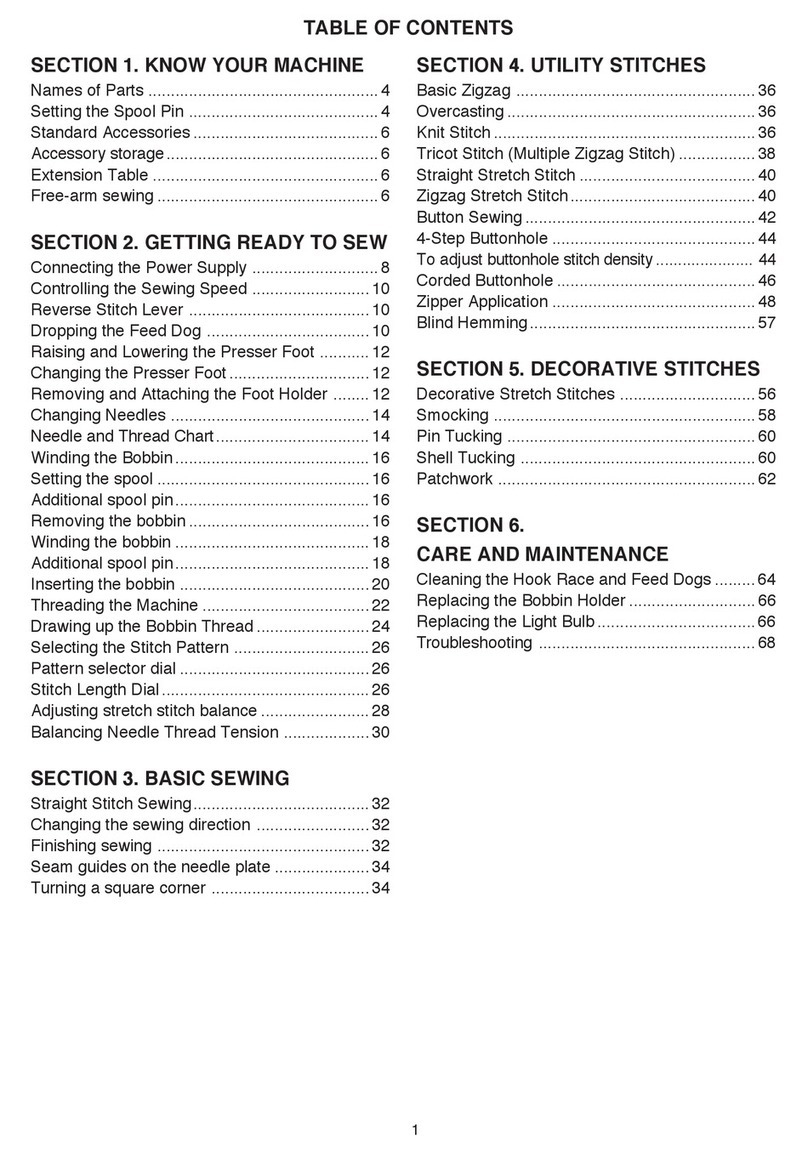
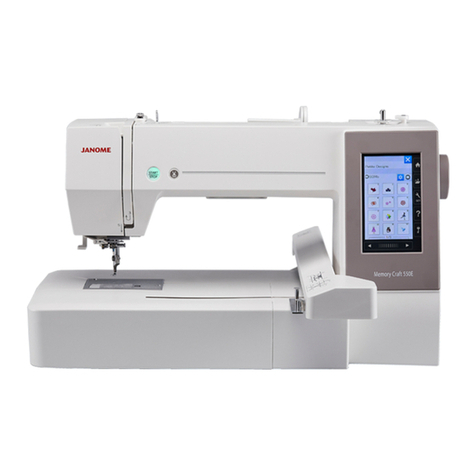
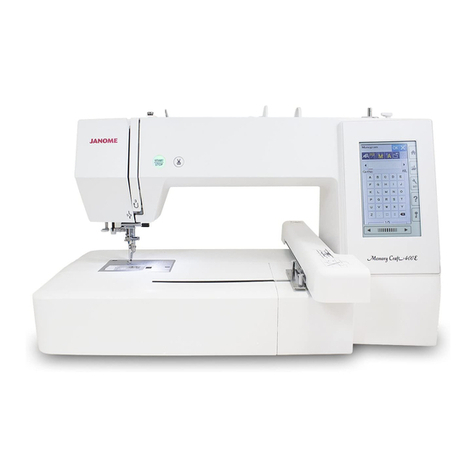
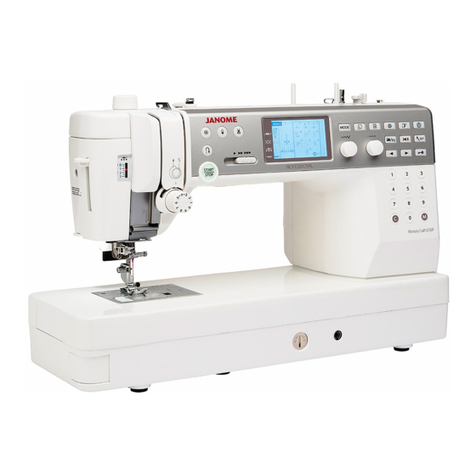
Janome memory craft 4900 User manual

www.toews.com
Janome
Memory Craft 4900
Instruction Manual
Janome Memory Craft 4900 Instruction Manual
Janome Sewing Machine 4900
www.toews.com
MC4900 Owners Manual/ User Guide
www.toews.com
WARNING– To reduce the risk of burns, fire, electric shock or injury to persons:
1. Do not allow to be used as a toy. Close attention is necessary when this sewing machine is used by or near children.
2. Use this appliance only for its intended use as described in this instruction book.
Use only attachments recommended by the manufacturer as contained in this instruction book.
3. Never operate this sewing machine if it has a damaged cord or plug, if it is not working properly, if it has been dropped or
damaged, or dropped into water.
Return this sewing machine to the nearest authorized dealer or service center for examination, repair, electrical or
mechanical adjustment.
4. Never operate the appliance with any air opening blocked. Keep ventilation openings of this sewing machine and foot
controller free from accumulation of lint, dust and loose cloth.
5. Never drop or insert any object into any opening.
6. Do not use outdoors.
7. Do not operate where aerosol (spray) products are being used or where oxygen is being administered.
8. To disconnect, turn all controls to the off (“O”) position, then remove plug from outlet.
9. Do not unplug by pulling on cord.To unplug, grasp the plug, not the cord.
10.Keep fingers away from all moving parts. Special care is required around the sewing machine needle.
11.Always use the proper needle plate.The wrong plate can cause the needle to break.
12.Do not use bent needles.
13.Do not pull or push fabric while stitching. It may deflect the needle causing it to break.
14.Switch this sewing machine off (“O”) when making any adjustment in the needle area, such as threading the needle,
changing the needle, threading the bobbin, changing the presser foot, and the like.
15.Always unplug this sewing machine from the electrical outlet when removing covers, lubricating, or when making any
other adjustments mentioned in this instruction book.
SAVETHESE INSTRUCTIONS
Designs and specifications are subject to change without prior notice.
DANGER – To reduce the risk of electric shock:
1. An appliance should never be left unattended when plugged in. Always unplug this sewing machine from the electric
outlet immediately after using and before cleaning.
2. Always unplug before replacing a sewing machine bulb. Replace bulb with same type rated 12 V, 5 Watts.
IMPORTANT SAFETY INSTRUCTIONS
When using an electrical appliance, basic safety precautions should always be followed, including the following:
Read all instructions before using this appliance.
Janome Memory Craft 4900 Instruction Manual
Janome Sewing Machine 4900
www.toews.com
MC4900 Owners Manual/ User Guide
www.toews.com
1
NAME OF PARTS
Name of parts ................................................................. 3
Standard Accessories ..................................................... 4
Extension Table ............................................................... 5
Detaching the table ......................................................... 5
Attaching the table .......................................................... 5
GETTING READYTO SEW
Connecting the Power Supply ......................................... 6
To use start/stop button................................................... 6
To use foot control ........................................................... 6
Speed control slider ........................................................ 7
Foot control ..................................................................... 7
FUNCTION BUTTONS
Start/stop button.............................................................. 8
Reverse stitch button....................................................... 8
Auto-lock button .............................................................. 8
Up/down needle position button ...................................... 8
Screen brightness adjustment dial .................................. 9
Mode key......................................................................... 9
Monogramming key......................................................... 9
Stock/Call key.................................................................. 9
Twin needle key...............................................................9
Elongation key................................................................. 9
Turnover memory key...................................................... 9
Edit key ........................................................................... 9
Help key .......................................................................... 9
Stitch width adjustment key........................................... 10
Stitch length adjustment key ......................................... 10
Function touchpad......................................................... 10
Clear key ....................................................................... 10
Memory key................................................................... 10
Mode selection .............................................................. 11
Pattern selection ........................................................... 12
CUSTOMIZING MACHINE SETTINGS
Resumption setting ....................................................... 13
Sound setting ................................................................ 13
Language setting........................................................... 13
Window duration time setting ........................................ 13
To drop or raise the feed dog ........................................ 14
Pressure dial ................................................................. 14
Presser foot lifter ........................................................... 14
Changing presser foot................................................... 15
To remove and attach the foot holder............................ 15
Knee lifter ...................................................................... 15
Changing needle ........................................................... 16
Thread and Needle Chart .............................................17
Bobbin Winding ....................................................... 18–19
Inserting the bobbin ......................................................20
Threading the machine ................................................. 21
Built-in needle threader ................................................. 22
Drawing up bobbin thread ............................................. 23
Balancing thread tension............................................... 24
BASIC STITCHES (MODE 1)
Straight stitch ................................................................ 25
Changing sewing direction ............................................ 25
Securing a seam ........................................................... 25
Using the seam guides on the needle plate .................. 26
Turning a square corner ................................................ 26
Using the quilting guide................................................. 26
Sewing on heavy fabric ................................................. 26
Help button.................................................................... 27
Adjusting the needle drop position ................................ 28
Adjusting the stitch length ............................................. 28
To customize the preset value for the stitch length and
width.............................................................................. 29
Restoring the original setting ........................................ 29
Basting .......................................................................... 30
Lock-a-Matic stitch ........................................................ 31
Triple stretch stitch ........................................................31
Stretch stitch ................................................................. 31
Locking stitch ................................................................ 32
Saddle stitch.................................................................. 32
New sculpture stitch ...................................................... 32
Decorative stitch............................................................ 33
French knot ................................................................... 33
Zigzag stitch .................................................................. 34
Types of Overcasting Stitches.................................35–36
Overcasting with zigzag stitch....................................... 35
Multiple zigzag stitch (Tricot stitch)................................35
Overcasting stitch.......................................................... 35
Knit stitch....................................................................... 36
Double overedge stitch.................................................. 36
Overlock stitch............................................................... 36
Button sewing................................................................ 37
Variations of Buttonholes ..............................................38
Square buttonhole....................................................39-41
Double layer buttonhole ................................................ 42
Corded buttonhole......................................................... 42
Adjusting buttonhole width ............................................ 43
Adjusting stitch density.................................................. 43
Round-end buttonholes (#18) ....................................... 44
Keyhole buttonholes (#20) ............................................ 44
Adjusting buttonhole width on stitch pattern #18 .......... 44
Adjusting buttonhole width on stitch pattern #20 .......... 44
Knit buttonhole (#24)..................................................... 45
Faux chain buttonhole (#25).......................................... 45
Welted buttonhole ................................................... 46–48
Eyelet ............................................................................ 49
Zipper sewing .......................................................... 50–52
Darning ................................................................... 53–54
Tacking .......................................................................... 55
Blind hem ...................................................................... 56
DECORATIVE STITCHES
Pintucking...................................................................... 57
Quilting .......................................................................... 57
Shell tuck....................................................................... 58
Applique ........................................................................ 58
Smocking ...................................................................... 59
Fagoting ........................................................................ 59
Scallop (A)..................................................................... 60
Scallop (B)..................................................................... 60
Patchwork ..................................................................... 61
Satin stitch..................................................................... 61
Rolled hem .................................................................... 62
Cording.......................................................................... 62
Cross stitch ................................................................... 63
Decorative stitch............................................................ 63
Twin needle sewing ....................................................... 64
TABLE OF CONTENTS
Janome Memory Craft 4900 Instruction Manual
Janome Sewing Machine 4900
www.toews.com
MC4900 Owners Manual/ User Guide
www.toews.com
2
PROGRAMMING PATTERNS
Pattern combination 1 ...................................................65
Pattern combination 2 ...................................................66
Combination for a mirror image..................................... 67
Pattern elongation ......................................................... 68
Programming a pattern combination with an elongated
pattern ........................................................................... 68
Extender stitches........................................................... 69
Free-motion quilting....................................................... 70
Editing program ....................................................... 71–72
Custom stitch adjustment.............................................. 73
Programming a monogram ..................................... 74–75
Reducing the size of a monogram ................................ 76
Viewing a long text ........................................................ 77
Editing the programmed patterns.................................. 77
Deleting a letter (character)........................................... 77
Inserting a letter (character).......................................... 78
Duplicating a pattern ..................................................... 78
To store and call stitch pattern combinations ................ 79
Overwriting a stored combination.................................. 79
Recalling a stored combination ..................................... 80
Deleting a stored combination....................................... 80
Correcting distorted stitch patterns ............................... 81
CARE AND MAINTENANCE
Cleaning the hook race and feed dog ........................... 82
Inserting the bobbin holder ........................................... 82
Replacing the light bulb................................................. 83
Replacing the light bulb on the underside of the sewing
arm ................................................................................ 83
Warning Messages ................................................. 84–85
Audible signals .............................................................. 85
Troubleshooting............................................................. 86
TABLE OF CONTENTS
Janome Memory Craft 4900 Instruction Manual
Janome Sewing Machine 4900
www.toews.com
MC4900 Owners Manual/ User Guide
www.toews.com
3
NAME OF PARTS
Name of parts
qFunction keys
wLiquid crystal display
eScreen sharpness adjustment dial
rBobbin winder stopper
tBobbin winder spindle
yHole for additional spool pin
uSpool pin
iLarge spool holder
oThread tension dial
!0 Reference chart
!1 Foot pressure dial
!2 Face cover
!3 Thread cutter
!4 Needle threader
!5 Needle plate
!6 Extension table (Accessory box)
!7 Hook cover plate
!8 Hook cover release button
!9 Feed balancing dial
@0 Speed control slider
@1 Knee lifter socket
@2 Start/stop button
@3 Reverse stitch button
@4 Auto-lock button
@5 Up/down needle position button
@6 Presser foot holder
@7 Thumb screw
@8 Presser foot
@9 Needle
#0 Needle clamp screw
#1 Carrying handle
#2 Handwheel
#3 Power switch
#4 Machine sockets
#5 Drop feed dog lever
#6 Free-arm
#7 Buttonhole lever
#8 Presser foot lifter
#9 Power supply cord
$0 Foot control
#0
#1
#2
#3
#4
#5
#6
#7
#8
#9
@5
@6
@7 @8
@9
START
STOP
@2
@3
@4
q
w
e
r
t
y
u
i
o
!0
!1
!2
!3
!4
!5
!6 !7 !8 !9
@0 @1
$0
Janome Memory Craft 4900 Instruction Manual
Janome Sewing Machine 4900
www.toews.com
MC4900 Owners Manual/ User Guide

www.toews.com
4
Standard Accessories
qAssorted needles
wL: Quilting bar
eG: Blind hem foot
rF: Satin stitch foot
tD: Hemmer foot
yC: Overedge foot
uE: Zipper foot
iA: Zigzag foot (attached to the machine)
These accessories can be stored in the compart-
ment under the top cover.
*Sewing accessories are stored in the extension table.
To open, lift the cover towards you as illustrated.
qExtension table
q
we
r
t
u
i
y
o
!0
!1
!2
!3
!4
!5
!6
!7
@0
@1
@2
!8
!9
oM: Overcasting foot
!0 H: Cording foot
!1 R: Automatic buttonhole foot
!2 T: Button sewing foot
!3 P: Darning foot
!4 Bobbins
!5 Screwdriver
!6 Large spool holder (attached to the machine)
!7 Small spool holder
!8 Felt
!9 Spool stand
@0 Knee lifter
@1 Seam ripper/buttonhole opener
@2 Additional spool pin
@3 Brush
@4 Even foot and quilting bar
@5 1/4˝ seam foot
q
@3
@4 @5
Janome Memory Craft 4900 Instruction Manual
Janome Sewing Machine 4900
www.toews.com
MC4900 Owners Manual/ User Guide
www.toews.com
5
ExtensionTable
The extension table provides an extra surface for sewing
bulky materials, and can be removed for free-arm sewing.
Detaching the table
Pull the table away from the machine as illustrated.
Free-arm sewing can be used for:
Stitching sleeves, waistbands, pant legs or any tubular
garment area, darning socks as well as mending knees,
elbows or children’s wear.
Attaching the table
Push the extension table until it snaps into the machine.
qPin
wHole
qw
Janome Memory Craft 4900 Instruction Manual
Janome Sewing Machine 4900
www.toews.com
MC4900 Owners Manual/ User Guide
www.toews.com
6
To use start/stop button
Turn off the power switch, then insert the machine plug into
the machine and the power supply plug into the wall outlet.
Turn on the power switch.
GETTING READYTO SEW
Connecting the Power Supply
To use foot control
Turn off the power switch, insert the foot control plug and
machine plug into the machine, then the power supply plug
into the wall outlet in this order.
Turn on the power switch.
qPower supply cord
wMachine socket for power supply cord
eOutlet
rPower switch
tMachine socket for foot control plug
yFoot control plug
uFoot control
CAUTION
Always turn the power switch off and unplug the sewing
machine from the electrical outlet when the machine is not
in use.
NOTE:
The start/stop button cannot be used when the foot
control is connected to the machine.
q
we
r
r
q
w
e
t
y
u
Janome Memory Craft 4900 Instruction Manual
Janome Sewing Machine 4900
www.toews.com
MC4900 Owners Manual/ User Guide

www.toews.com
7
Foot control
Speed control slider
Sewing speed can be varied according to your sewing needs
with the speed control slider.
qTo increase sewing speed, slide it to the right.
wTo decrease sewing speed, slide it to the left.
Sewing speed is varied by the foot control.
The harder you press down on the foot control, the faster the
machine runs.
The machine runs at the maximum speed set by the speed
control slider when the foot control is fully depressed.
Operating Instructions:
The symbol “O” on a switch indicates the "off" position of a
switch.
For appliances with a polarized plug (one blade wider than
the other):To reduce the risk of electric shock, this plug is
intended to fit in a polarized outlet only one way. If it does
not fit fully in the outlet, reverse the plug. If it still does not
fit, contact a qualified electrician to install the proper
outlet. Do not modify the plug in any way.
*Foot control model 21371 is used with sewing machine
model MC 4900.
qw
Janome Memory Craft 4900 Instruction Manual
Janome Sewing Machine 4900
www.toews.com
MC4900 Owners Manual/ User Guide
www.toews.com
8
FUNCTION BUTTONS
Press this button to start or stop the machine.The machine
starts running slowly for the first few stitches, it then runs at
the speed set by the speed control slider.
NOTE:
•Start/stop button cannot be used when the foot control is
connected to the machine.
• If you start the machine with the presser foot up, the LCD
screen will advise you to lower the foot.
Lower the foot then restart the machine.
qq
qq
qStart/stop button
ww
ww
wReverse stitch button
(A)
START
STOP
When stitches (mode 1) (mode 2)
are selected, the machine will sew in reverse while the
reverse stitch button is pressed.
If you press the reverse stitch button when sewing any
other stitches, the machine will immediately sew locking
stitches and automatically stop.
rr
rr
rUp/down needle position button
Press this button to bring the needle up or down.The
machine will stop with the needle up or down depending on
the needle position determined by this button.
NOTE:
The needle will always stop in the up position after
sewing buttonholes, bartacks, eyelets and darning.
q
w
r
START
STOP
q
w
e
r
When stitches (mode 1) (mode 2) are
selected, the machine will immediately sew locking stitches
when the Auto-lock button is pressed, then automatically
stop.When sewing any other stitches, the machine will sew
locking stitches at the end of the current pattern and auto-
matically stop.
ee
ee
eAuto-lock button
e
Janome Memory Craft 4900 Instruction Manual
Janome Sewing Machine 4900
www.toews.com
MC4900 Owners Manual/ User Guide
www.toews.com
9
yy
yy
yMode key (see page 11)
When the power switch is turned on, the direct pattern
selection (mode 1) is set automatically.
Press the mode key to change the mode.
uu
uu
uMonogramming key (see page 11)
Press this key to change the monogram font.
tt
tt
tScreen brightness adjustment dial
Use this dial to adjust the brightness of the liquid crystal
display. If the screen is not clear, adjust the screen bright-
ness with this dial.
t
yui o
t
y
u
i
o
!0
!1
!2
!3
!0 !1 !2 !3
!2!2
!2!2
!2 Edit key (see pages 73, 77)
This key can be used for changing combinations and
monograms before sewing.In the editing mode, this key is
used to shift the cursor to the left.
!1!1
!1!1
!1 Turnover memory key (see pages 67, 68)
A mirror image of the selected pattern will be memorized.
* Programmed letters or numbers will be reduced to 2/3 of
their original size when you press the turnover memory key.
!3!3
!3!3
!3 Help key (see pages 27, 77)
Press this key to view alternative applications of certain
stitches.In the editing mode, this key is used to shift the
cursor to the right.
ii
ii
iStock/Call key (see page 29, 79)
When you press the Stock/Call key after memorizing or
editing patterns, the pattern combination will be stored.You
can also recall stored patterns by pressing the Stock/Call
key.
oo
oo
oTwin needle key (see page 64)
Press this key for twin needle sewing.
!0!0
!0!0
!0 Elongation key (see page 68)
Satin stitches can be elongated up to five times their original
length by pressing this key.
Janome Memory Craft 4900 Instruction Manual
Janome Sewing Machine 4900
www.toews.com
MC4900 Owners Manual/ User Guide

www.toews.com
10
!6!6
!6!6
!6 Function touchpad (see page 12)
•Direct pattern selection
You can select the stitch patterns from qto odirectly
in mode 1 (direct pattern selection mode).
•Number keys
Enter the 2-digit pattern number to select the desired
stitch pattern in mode 2, 3 and monogramming.
!4!4
!4!4
!4 Stitch width adjustment key
(see page 28, 29, 34)
Press “+” or “–” to change the stitch width.
!5!5
!5!5
!5 Stitch length adjustment key
(see page 28, 29, 34)
Press “+” or “–” to change the stitch length.
21 3
4
987
0
65
!8!8
!8!8
!8 Memory key (see page 29, 65, 67)
The memory key will memorize your pattern selection.
Press the memory key after you selected the stitch
pattern. (You can program up to 50 patterns in the
memory.)
!7!7
!7!7
!7 Clear key (see page 77)
When this key is pressed, the last memorized stitch or
the stitch that is above the cursor will be deleted.
Press and hold the “C” key to clear the entire pattern
combination.
If this key is pressed after sewing a pattern
combination, the sequence will be deleted.
!4
!5
!6
!7 !8
Janome Memory Craft 4900 Instruction Manual
Janome Sewing Machine 4900
www.toews.com
MC4900 Owners Manual/ User Guide
www.toews.com
11
zz
zz
zMode 1
Screen indication
You can select 10 of the most commonly used patterns
directly by pressing the pattern keys.
The LCD screen shows the following information:
qPattern number and image of the selected stitch.
wRecommended setting for needle thread tension.
eRecommended presser foot.
rStitch width or needle drop position.
tStitch length.
yRecommended foot pressure
uTwin or single needle (See page 64).
xx
xx
xMode 2 and 3
You can select stitch patterns from #01 to #99.
Patterns #01 to #10 in mode 2 are programmable patterns
equivalent to the patterns in mode 1.
cc
cc
cMonogramming mode
Press this button to change the monogram font.
q Block style letters
w Block style European letters
e Script style letters
r Script style European letters
t Broadway style letters
y Broadway style European letters
qwe
rt
u
y
q
e
t
z
x
c
Mode selection
When you switch on the machine, the direct select mode
(mode 1) is activated. Press the mode key to change the
mode.
w
r
y
Janome Memory Craft 4900 Instruction Manual
Janome Sewing Machine 4900
www.toews.com
MC4900 Owners Manual/ User Guide
www.toews.com
12
21 3
4
987
0
65
21 3
4
987
0
65
Pattern Selection
zz
zz
zMode 1
Pattern selection and screen indication
You can select the stitch patterns below directly by
pressing the pattern keys.
xx
xx
xMode 2, 3 and Monogramming
To select a pattern, enter the 2-digit number of the
desired stitch pattern with the number keys.
The LCD screen will show the pattern number, stitch image
then the main display for the selected pattern.
Example: stitch pattern 48
qPattern number
wStitch image
eMain display
*See page 65 for stitch pattern combinations.
z
x
q
w
e
Janome Memory Craft 4900 Instruction Manual
Janome Sewing Machine 4900
www.toews.com
MC4900 Owners Manual/ User Guide
www.toews.com
13
CUSTOMIZING MACHINE SETTINGS
You can customize the machine settings to your prefer-
ence.Turn on the power switch wwhile pressing the
memory key q. The machine setting window will appear.
qMemory key
wPower switch
eMachine setting window
3
4
Language setting
You can choose one of 10 languages for the screen display.
q
w
e
q
w
e
r
1
zx
c
Resumption setting
The last pattern sewn before turning the power off will be
recalled when the power is turned on again.
zPress the key to select Nomal/Resumption setting
mode.
xPress the edit or help key to select either Normal or
Resumption setting.
cPress the memory key to enable the setting.
1
2
x
q
w
e
r
c
z
Sound setting
You can set the buzzer volume.
zPress the key.The LCD screen shows the sound
setting mode.
xPress the edit or help key to select the sound setting.
cPress the memory key to enable the setting.
qMute
wMinimum
eNormal
rMaximum
2
1 English 2 Spanish 3 Finnish 4 French 5 German
6 Italian 7 Dutch 8 Portuguese 9 Russian 10 Swedish
zPress the key.The LCD screen shows language
setting mode.
xPress the edit or help key to select a language.
cPress the memory key to set the language.
Window duration time setting
A window will appear when selecting patterns, altering
stitch length or width.
The duration of window displayed can be set.
The default setting is 2 x1.0 (2 seconds).
qWindow
wx 0.5........1 second
ex 1.0........2 seconds
rx 1.5........3 seconds
zPress the key.The LCD screen shows the window
duration time setting display.
xPress the edit or help key to select the duratioin.
cPress the memory key to enable the setting.
* The opening window shows the customized settings that
you have made.
3
c
xz
4
Janome Memory Craft 4900 Instruction Manual
Janome Sewing Machine 4900
www.toews.com
MC4900 Owners Manual/ User Guide
www.toews.com
14
To drop or raise the feed dog
q Drop feed dog lever
w To drop the feed dog
e To raise the feed dog
The drop feed dog lever is located underneath the free arm
bed on the back side of the machine.
•To drop the feed dog, push the lever in the direction of the
arrow w, as illustrated.
•To raise the feed dog, push the lever in the direction of the
arrow e, as illustrated, and turn the handwheel toward
you.The feed dog must be up for normal sewing.
w
e
Pressure dial
qPressure dial
wSetting mark
ePressure dial setting
The pressure dial should be set at “3” for regular sewing.
Reduce the pressure to “2” for applique, cut work, drawn
work, basting and embroidery.
Set the pressure to “1” when sewing chiffon, lace, organdy
and other fine fabrics.
Velour and knits with a lot of stretch may also require a “1”
setting.
Turn the pressure dial qand set the desired number at the
setting w.
Presser foot lifter
qPresser foot lifter
wNormal up position
eHighest position
The presser foot lifter qraises and lowers the presser foot.
You can raise it about 1/4˝ (0.6 cm) higher than the normal
up position wfor easy removal of the presser foot, or to
help you place thick material under the foot.
q
w
e
q
q
e
w
Janome Memory Craft 4900 Instruction Manual
Janome Sewing Machine 4900
www.toews.com
MC4900 Owners Manual/ User Guide
www.toews.com
15
Changing the presser foot
qSnap-on button (red button)
wGroove
ePin
CAUTION:
Turn off the power switch before changing the foot. Always
use the proper foot for the selected pattern.The wrong foot
can cause the needle to break.
•To remove
Raise the needle to its highest position by turning the
handwheel counterclockwise. Raise the presser foot, and
press the red button qon the back of the foot holder.
•To attach
Place the selected presser foot so that the pin eon the
foot lies just under the groove won the foot holder. Lower
the presser bar to lock the foot into place.
To remove and attach the foot holder
qThumb screw
wFoot holder
ePresser bar
•To remove
Remove the thumb screw qby turning it counterclockwise
with a screwdriver.
•To attach
Match the hole in the foot holder wwith the threaded
hole in the presser bar e. Fit the thumb screw qinto
the hole.Tighten the screw qby turning it clockwise with
a screwdriver.
q
w
e
w
q
e
Knee Lifter
The knee lifter is extremely helpful when sewing applique,
patchwork and quilting since it allows you to handle the
fabric while your knee controls the presser foot.
Match the ribs on the knee lifter with the notches in the knee
lifter socket and insert the knee lifter.
qKnee lifter
wRibs
eNotches
Push the knee lifter with your knee to raise and lower the
presser foot.
NOTE:
Do not touch the knee lifter while sewing, otherwise the
fabric will not be fed smoothly.
e
w
q
Janome Memory Craft 4900 Instruction Manual
Janome Sewing Machine 4900
www.toews.com
MC4900 Owners Manual/ User Guide
www.toews.com
16
Changing the needle
qNeedle clamp screw
wNeedle clamp
CAUTION
Always make sure to turn the power switch off and
disconnect the machine from power supply before
changing the needle.
zTurn off the power switch.
Raise the needle to its highest position by turning the
handwheel counterclockwise, and lowering the presser
foot. Loosen the needle clamp screw qby turning it
counterclockwise. Remove the needle from the needle
clamp w.
xInsert a new needle into the needle clamp wwith the
flat side to the rear.When inserting the needle into the
needle clamp w, push it up as far as it goes.Tighten
the needle clamp screw qfirmly by turning it clockwise.
cTo see if the needle is good, place the flat side of the
needle onto something flat (needle plate, glass, etc.).
The gap between the needle and the flat surface should
be consistent. Never use a bent or blunt needle.
A damaged needle can cause permanent snags or runs
in knits, fine silks and silk-like fabrics.
zx
c
q
w
Janome Memory Craft 4900 Instruction Manual
Janome Sewing Machine 4900
www.toews.com
MC4900 Owners Manual/ User Guide

www.toews.com
17
FABRIC
Chiffon, Georgette, Fine Lace, Organdy
Net, Tulle
Batiste,Voile, Lawn, Pure Silk, Crepe de Chine,
Sheer Crepe, Chambray, Handkerchief Linen,
Gingham, Challis, Percale, Wool Crepe, Peau de Soie,
Taffeta, Satin, Silk Surah, Satin-backed
Crepe, Qiana
Single Knits, Jersey, Swimwear, and Tricot
Leather Suede
Flannel, Velour, Velvet, Muslin, Velveteen,
Poplin, Corduroy, Broadcloth, Linen, Chintz,
Gabardine, Felt, Terry, Burlap, Quilted Fabrics
Double Knits, (synthetic and natural) Stretch
Velour, Stretch Terry, Sweater Knits
Leather, Vinyl, Suede
Denim, Sailcloth, Ticking
Double Faced Wool, Heavy Coating, Fake Fur,
Drapery Fabrics
Leather, Suede
Canvas, Duck, Upholstery Fabrics
Topstitching for Special Finishes
TYPE of NEEDLE
Universal
Ball Point
Blue Tipped Needle
Universal
Blue Tipped Needle
Ball Point
Wedge Point
Leather Needle
Universal
Ball Point
Wedge Point
Leather Needle
Denim Needle
Universal
Wedge Point
Leather Needle
Universal
Topstitching Needle
WEIGHT
Very Light
Light
Medium
Heavy
Very Heavy
NEEDLE SIZE
9 (65)
9 (65)
11 (75)
11 (75)
12 (80)
11 (75)
11 (75)
11 (75)
14 (90)
14 (90)
14 (90)
16 (100)
16 (100)
16 (100)
18 (110)
16 (100)
14 (90)
Thread and Needle Chart
Janome Memory Craft 4900 Instruction Manual
Janome Sewing Machine 4900
www.toews.com
MC4900 Owners Manual/ User Guide

www.toews.com
18
BobbinWinding
• Removing the bobbin
qHook cover plate release button
wHook cover plate
eBobbin
Slide the hook cover plate release button qto the right,
and remove the cover plate w.
• Setting the spool of thread
qSpool pin
wLarge spool holder
eSmall spool holder
rSpool stand
Lift up the spool pin q. Place a spool of thread on the
spool pin with the thread coming off the spool as shown.
Attach the large spool holder w, and press it firmly
against the spool of thread.
q
w
e
w
q
e
q
q
wr
The small spool holder eis used with narrow or small
spools of thread.
If the thread slips off the spool and jams around the
spool pin, use the spool stand r.
Lift out the bobbin efrom the bobbin holder.
Janome Memory Craft 4900 Instruction Manual
Janome Sewing Machine 4900
www.toews.com
MC4900 Owners Manual/ User Guide
Other manuals for memory craft 4900
1
Table of contents
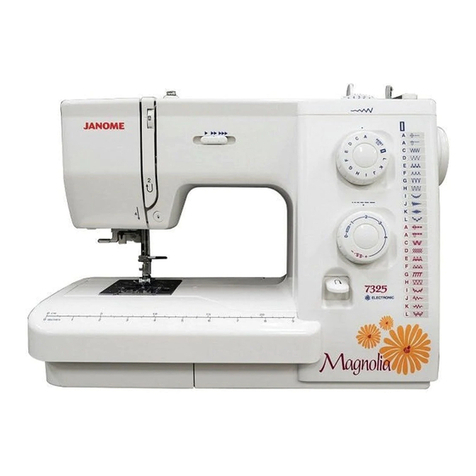
Other Janome Sewing Machine manuals

Janome
Janome Magnolia 7312 User manual

Janome
Janome HF106 User manual

Janome
Janome 521 - User manual

Janome
Janome FOUR-DBL User manual

Janome
Janome DC 4030 - User manual

Janome
Janome S-7330 User manual

Janome
Janome MC 200E - User manual

Janome
Janome MyLock 213D User manual

Janome
Janome 204D User manual

Janome
Janome MC 350E User manual

Janome
Janome JR 1218S User manual

Janome
Janome AT2000D User manual

Janome
Janome 5300QDC User manual

Janome
Janome 415 User manual

Janome
Janome Sewist 500 User manual

Janome
Janome myLock 534 User manual

Janome
Janome S-2015 User manual

Janome
Janome Skyline S7 User manual

Janome
Janome DM7200 User manual

Janome
Janome NH22 User manual