Janszen Valentina A8 User manual

2/11/2020
Valentina A8
Active Electrostatic Hybrid Loudspeaker
O
WNER
’
S
M
ANUAL

Valentina A8 Owner’s Manual
2020 Janszen Loudspeaker, Ltd.
480 Trade Road
Columbus, Ohio 43204 SA
Phone +1 614-448-1811
email support@janszenloudspeaker.com
This Owner’s Guide is available in printed form upon request.

S A F E T Y I N F O R M A T I O N
Table of ontents
SAFETY INFORMATION 1
WELCOME 5
UNPACKING 6
MOVING 8
CLEANING 9
QUICK START 10
REMOTE CONTROL 12
SETUP 15
CONNECTING AND POWERING 24
AIRLAYER 26
BACKWARD TILT 28
SETUP DETAILS
FUSE REPLACEMENT 6
SPECIFICATIONS AND FEATURES 7
FREQUENTLY ASKED QUESTIONS 42
TROUBLESHOOTING 47
WARRANTY 49

S A F E T Y I N F O R M A T I O N
1
1
Safety Information
WARNING: DO NOT EXPOSE THESE SPEAKERS TO RAIN OR
WETNESS, WHICH MAY CREATE A DANGERO S SHOCK HAZARD,
AND MAY DEGRADE OR R IN THE SPEAKERS.
WARNING: DANGERO S HIGH VOLTAGES MAY BE PRESENT INSIDE
THE SPEAKERS. TO AVOID THE RISK OF ELECTRIC SHOCK, DO NOT
REMOVE THE REAR PANELS OR GRILLS OR OTHERWISE
DISASSEMBLE THE SPEAKERS. THERE ARE NO SER SERVICEABLE
PARTS INSIDE. REFER SERVICING TO Q ALIFIED PERSONNEL.
WARNING: CHANGES OR MODIFICATIONS TO THESE SPEAKERS
NOT A THORIZED BY JANSZEN LO DSPEAKER, LTD. MAY
INVALIDATE REG LATORY COMPLIANCE AND TH S RENDER THE
SPEAKERS NS ITABLE FOR HOME SE. THIS INCL DES KEEPING
THE GRILLS INTACT.
WARNING: JANSZEN SHALL NOT BE RESPONSIBLE FOR ANY
PHYSICAL DAMAGES OR INJ RY THAT OCC RS AS A RES LT OF
MIS SE, DISASSEMBLY, OR NA THORIZED CHANGES OR
MODIFICATIONS MADE TO THESE SPEAKERS.
WARNING: CONTIN O S EXPOS RE TO LO D SO ND CA SES
HEARING DAMAGE.

S A F E T Y I N F O R M A T I O N
2
Caution:
1. Read these instructions – All safety and operating instructions should be read
before the speakers are operated.
2. Save these instructions – keep the safety and operating instructions for future
reference.
3. Heed the warnings – All warnings about these speakers should be followed.
4. Follow the instructions – All operating and use instructions about these
speakers should be followed.
5. Condensation – When moving the speakers from a cold to warm location,
such as during delivery on a cold winter day, moisture may condense on
components within. If this should occur, the speakers might not operate
properly. Consequently, after bringing the speakers in from the cold, we advise
leaving them idle for a day before connecting or powering them.
6. Water and moisture – The speakers should not be used near water – for
example, they should not be placed near a bathtub, pool, sink, lawn sprinkler,
etc., and generally should not be placed outdoors.
7. Heat and flames – The speakers should be located well away from strong
sources of heat or flames, such as fireplaces, propane heaters, stoves, etc..
. Particulates – Smoke from tobacco or cooking, aerosol or splattered grease
from cooking, and air pollution over a long period of time can have a
deleterious effect on any speakers, including these. In particular, avoid
spraying anything anywhere near the speakers.
9. Power cords and interconnecting cables – As with any power cords or
cables, they should be routed so that they are not likely to be walked on or
pinched by heavy objects. It is also important to prevent access from animals or
children that may chew or otherwise damage the power cords or cables.
10. Liquids – Care should be taken not to spill liquids onto the speakers.
11. Foreign objects – Care should be taken not to press, poke or otherwise push
foreign objects into the cloth grills, such as pencils, fingers, toy airplanes, cat
claws, etc..
12. Cleaning – Do not use abrasive cleaners. Do not spray or let anyone else spray
any sort of cleaner, polish, conditioner, or anything else on or near the grills.
Paint: For removing dirt and finger marks, the paint can withstand glass
cleaner, lighter fluid, alcohol, kerosene, or naptha. Avoid getting any of these
substances on the wood or grills. Apply any of these to a soft cloth. Wipe gently,

S A F E T Y I N F O R M A T I O N
3
because wiping hard can polish away the matte finish and leave a shiny area.
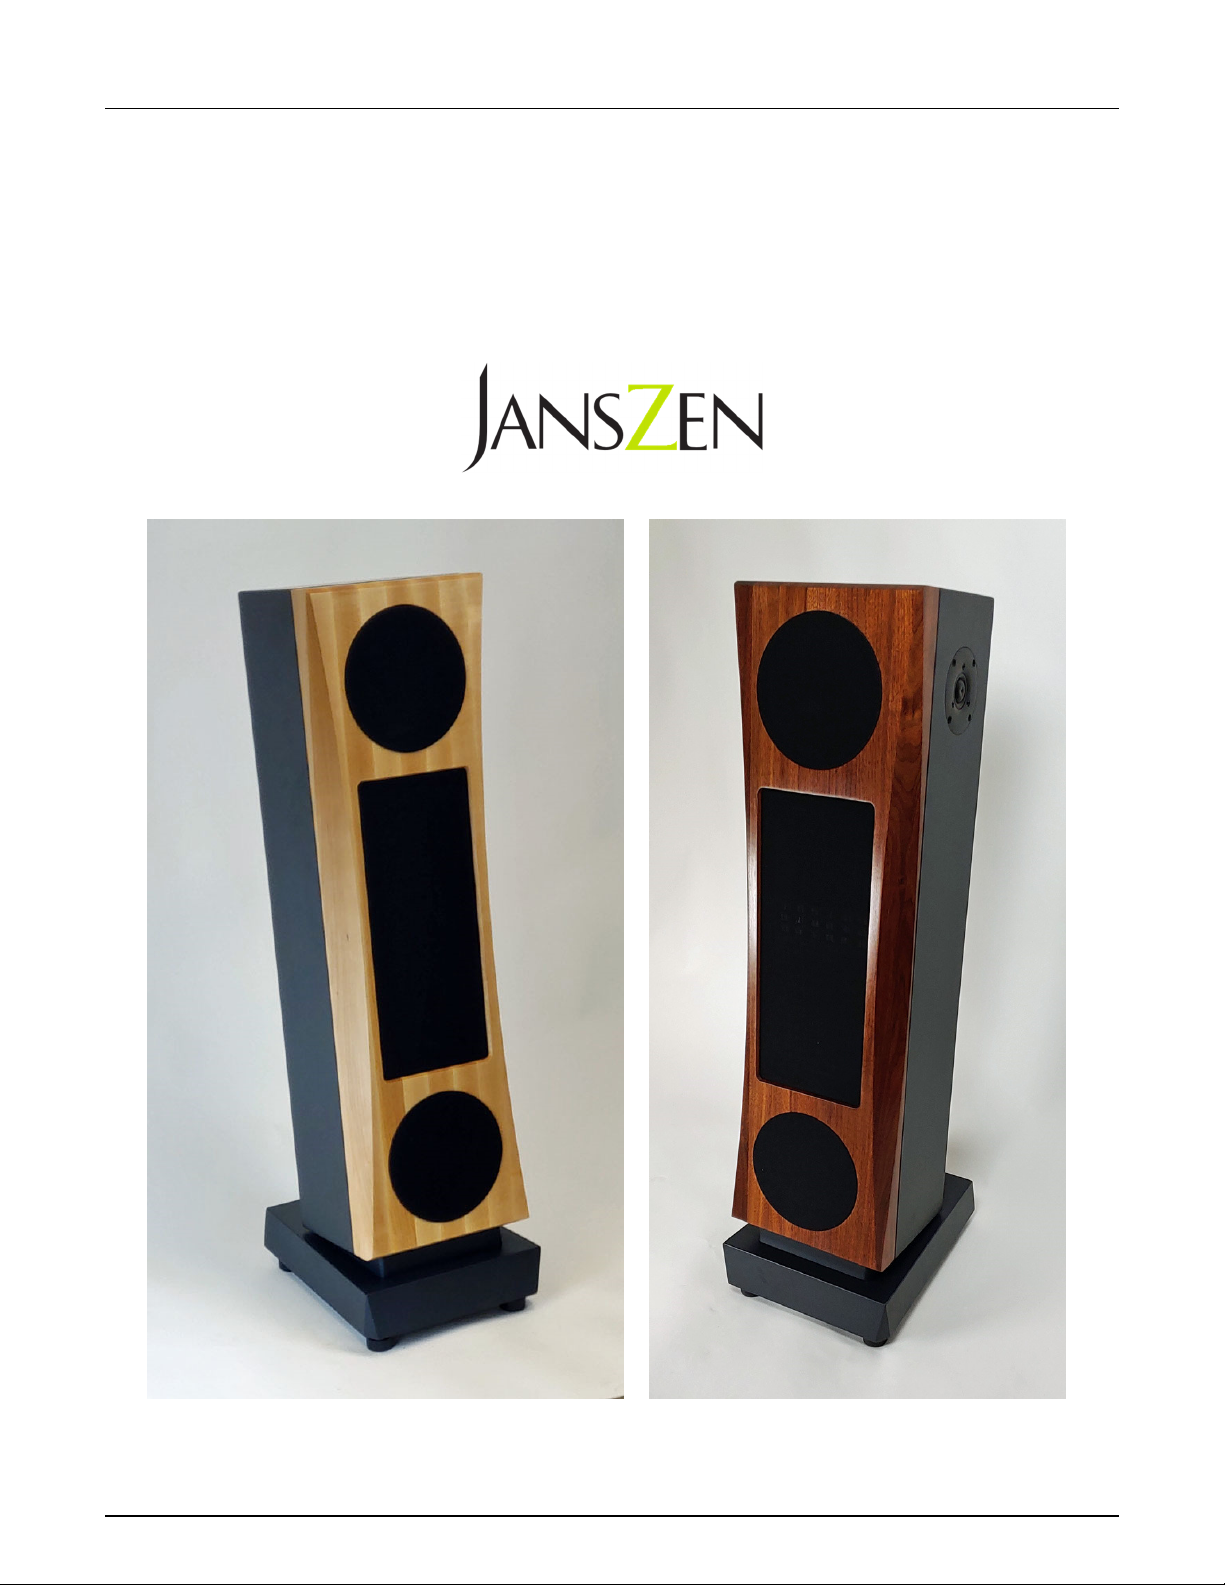
Wood: The wooden surfaces should be wiped with nothing more than a soft
cloth dampened with plain water. Do not use cleaners, polishes, conditioners,
or any other chemical preparation. The final coat of wax finish on the wood
will be removed by most of these.
Grill cloth: The grill cloth can be vacuumed.
13. YOUR EARS – Distortion and compression are what make ordinary speakers
seem loud when the volume goes up, but electrostatic speakers do not do this.
Because your Valentinas are capable of producing high sound pressure levels
(SPL) without distortion or compression, it is easy to exceed safe loudness
without noticing. As a general rule, if you can feel the bass in your belly, or if
you have to shout to be heard by a person sitting next to you, it might be too
loud.
A pair of Valentina speakers can produce a peak SPL of over 106 dB, even in a
fairly large room, 112 dB in a small room, and with some kinds of music, a
steady level over 100 dB is possible. This can damage your ears
permanently, and fairly quickly.
If you hear ringing in your ears soon after or within a day or so of listening to
loud music, you have damaged your ears, perhaps slightly, but permanently. It
is also possible to damage your ears even without hearing ringing.
It is important to know --
No one notices the usual bits of hearing loss right away after each
overexposure. It adds up over time. If you don't avoid exposure to loud
sound, then at a relatively young age, music will sound dull, or certain notes will
be missing, or you will hear constant noise in your ears, and you will have
trouble understanding what people are saying, first in noisy places like
restaurants, and then everywhere. If you think you may already have hearing
loss, it’s never too late to stop making it worse.
15 minutes is the NIOSH and CDC 2002 recommended maximum exposure
time to a steady SPL of 100 dB. The time limit is 4 hours at 85 dB. This 4
hour time limit is cut in half for each additional 3 dB in loudness: 2 hours at 88
dB, 1 hour at 91 dB, and so on. Sharp sounds, i.e., loud transients are more
damaging than steady levels, because the ears do not have time to react
defensively.
SO PLEASE BE CAREFUL and you will not hurt your ears and thus
your future enjoyment of music.
You can measure loudness with a simple sound level meter. If you wish to
check your exposure, JansZen can supply a good quality sound level meter such
as we use ourselves at modest cost. There are also apps for smart phones that

S A F E T Y I N F O R M A T I O N
4
work as sound level meters and spectrum analyzers, although they will probably
miss the high frequency extremes due to microphone quality. Follow the
instructions for the device or app to make sure your readings are valid.

W E L O M E
5
2
Welcome
ou have chosen JansZen loudspeakers!
Your Valentinas will bring you the utmost in music listening enjoyment through
their exceptional purity and naturalness in sound reproduction. While these
speakers include esoteric technology, you can rest assured that they are designed and built
with the best of advanced materials and techniques, and are ready to bring you consistent,
unwavering performance for decades to come.
Please feel free to keep in touch with us, letting us know anything you’d like to tell us
about your listening experiences, or about great source gear or music that you have found
suit you and the speakers particularly well. We’re also here to help with any setup
challenges or other questions.
Happy listening.
JansZen Loudspeaker, Ltd.
480 Trade Rd.
Columbus, Ohio 43204
+1 (614) 448-1811
info3636@janszenloudspeaker.com
Y

U N P A K I N G
6
3
Unpacking
o not allow the delivery person to leave until you are satisfied that there
has been no shipping damage.
If there is damage, please refuse the shipment, and it will automatically come
back to us for repair/replacement. The situation will be harder to handle if you notice
damage after the delivery person has left.
Carton contents
Each of the two cartons should contain one speaker and one power cord, and the carton
marked “1 of 2” should also contain the remote control and a pair of corner clips. If you
have ordered carpet spikes for self-installation, that carton will also contain both packages
of spikes. If you have ordered cables from us, those will also be packed in the first carton.
Unpacking
The following steps will get your new speakers out of their cartons and onto your floor
without mishap:
1) Move the carton marked “1 of 2” onto a carpeted area, or lay a blanket, bath
towel, or other soft material down onto the floor to use as an unpacking
surface.
2) Set the carton on its long side with the flaps up, which matches the “this side
up” markings on the sides of the carton, and slice through the tape to free
the flaps. We’ll call this side the top.
3) Remove the accessories.
4) Bend the flaps back as far as possible. se the corner clips to hold the flaps
down.
5) Roll the carton completely over onto the now folded-back flaps, so that the
open top is downward.
6) Lift the carton away and set it aside.
D

U N P A K I N G
7
7) Lift the blue foam insert away from the speaker.
8) Grasp the top end of the speaker, pressing the remaining blue foam insert
against the speaker so that the two do not separate.
9) Gently tilt the speaker up onto its top until it is vertical, then further until the
free feet touch the floor.
10) While continuing to support the speaker, remove the remaining blue foam
insert, and let the speaker down onto all its feet.
11) Tilt the speaker forward and clip the tie that holds the bag shut, then slip the
bag up and off.
12) Remove the protective film from the cabinet.
13) We advise that you retain all packing materials in case you want to sell or
return the speakers. The cartons can be folded flat, and the inserts can be
interleaved to occupy less space. When re-packing, it is critical to wrap the speaker
in stretch film before replacing the bag, or the paint will be damaged by rubbing against the
bag in transit.
Feet
If the speakers were fitted with rubber feet, and you wish to switch over to carpet
spikes:
1) Lay the speaker onto its face on a carpeted or other soft surface.
2) sing a #3 Philips screwdriver, remove the screws holding the feet in place.
3) Locate the studs in the package of spikes.
4) Screw the studs into the inserts in the speaker base. The studs have a slot at
one end to facilitate this.
5) Screw the spikes onto the studs.
6) If the spikes have been ordered for use on carpeting, as we would advise for
making firm contact with the floor, ensure that the adjustable tips are
screwed in tightly.
7) If the spikes are for use on hard floors, coin-like metal pads are included to
avoid damage to the floor, and the adjustable tips can be used to
accommodate uneven surfaces.
Grills
The speakers are designed to offer optimal sound reproduction with the grills in
place, and they also help protect the electrostatic elements, both from mechanical
damage and from collecting particulates from the air.
The grills are permanently installed. Removal or attempted removal will cause
irreparable damage.

M O V I N G
8
4
Moving
he speakers weigh about 28 kg [62 pounds], so they can be hard to move for
someone working alone. If you are unpacking these alone, here are a few
suggestions.
Large movements
The easiest way to pick one up is:
1) Ensure that your clothing presents no exposed hardware, such as a belt
buckle, snaps, rivets, buttons, etc., that could come into contact with the
speaker and scratch the paint or wood.
2) Standing to one side, tilt the speaker forward, allowing it to rest on one hand.
3) Grasp the far upper foot on the base with your other hand.
4) Lift using your knees. Do not strain your back by lifting with your back.
5) To get through doorways, rotate the speaker onto your hip or up onto the
hand that is grasping the foot.
Small movements
When fitted with rubber feet, the easiest way to move the speakers by small amounts
is to tilt it onto two feet and walk it along by rocking it back and forth onto one foot
at a time while rotating it on one foot at a time.
When fitted with carpet spikes, damage to the carpet is likely when attempting to
walk the speakers. In this case, you would do well to place a pair of wooden or
plastic slats under pairs of feet and slide the speaker along on these like a sled.
Plastic slides such as Magic Sliders are also available at hardware stores for this
purpose.
T

L E A N I N G
9
5
leaning
Wooden baffles
The final wood finish coat is wax, which will be removed by most cleaners. Wipe only
with a soft, damp cloth.
Painted and metal surfaces
These surfaces can withstand strong cleaners as well as alcohol, but do not spray
anything directly onto the speakers. Dampen a soft cloth with your solvent or
solution of choice, and wipe gently with that. Any aerosol that gets into or through
the grills can cause electrostatic panel failure.
Grill cloth
The grill cloth can be vacuumed directly with a brush attachment.
Warnings
•Do not spray anything near the grills. Any sort of cleaner or water
mist can cause electrostatic panel failure if it gets through the grill
cloth.
•The grills cannot be removed. Removal will cause damage that will
be difficult or impossible to repair.

Q U I K S T A R T
10
6
Quick Start
he interesting things about this model are its built in biamplification and signal
processing, and the low mass woofers. The amplifier unit is mounted to the inside
of the black heat sinking plate at the back of the speaker enclosure. The inputs
and signal processing circuitry are mounted to the input/output panel below the amplifier
plate.
T

Q U I K S T A R T
11
To get started as quickly as possible:
•Place the speakers so their upper rear corners are about two feet [60 cm] from the
front wall.
•Toe them in so their axes cross a foot or two [30 – 60 cm] behind your seat.
•The back tilt should be set so that the speakers are aimed at your chest. The
adjustment is made by way of thumb screws on the feet. With the feet fully
seated, the tilt is set for about an 8’ [2m] listening distance and 38” [1m] ear
height. You can just leave them this way for a first pass, unless your listening
position is substantially different.
•Connect the digital coax cable from the lower digital RCA jack (output) on the
right speaker to the upper digital RCA jack (input) in the left speaker. This will
allow the remote control to affect both speakers. The digital RCA cable must
be connected at all times for the speakers to operate correctly.
•Connect the power cords.
•Insert the battery into the remote control.
•Connect a source to one of the inputs. Digital sources are connected to the right
speaker and only the right speaker. Analog sources are connected as usual, one
left and one right.
•Power each speaker on using the rocker switch just above each power inlet.
•Press the on/off button on the remote control to set the speakers into standby –
the LED indicator on the right speaker will go dark.
•Press the on/off button again to bring both speakers out of standby – the
indicator will now be green. This ensures that the two speakers are in sync.
•Hit play on your source.
•Sound should be coming from both speakers within a couple of seconds.
•The speakers go into standby mode after 15 minutes of silence.

R E M O T E O N T R O L
12
7
Remote ontrol
he remote control is an IR type (infrared). As such, it generally requires a direct
line of sight to the right speaker to operate. In some cases, walls can be optically
reflective/dispersive enough to allow operation at odd angles, but normally the
remote has to be aimed right at the upper inboard side of the right speaker baffle to
function reliably.
The remote can control all the speaker’s main functions: on/standby, mute, volume,
preset, and input. The remote itself, like most of the electronics, is a product of Hypex,
which we modify only slightly.
•Battery: CR2023 3V Lithium button cell.
•Protocol: standard Philips RC5.
T

R E M O T E O N T R O L
13
1 On/standby
2 Volume up
3 Volume down
4 Previous input
5 Next input
6 Mute
7 Preset 1
8 Preset 2
9 Preset 3
10
Currently unassigned, but hopefully a
future firmware update will make this
button *Set auto-detect*
11
Superfluous – all functions are immediate

R E M O T E O N T R O L
14
Indicator LED and IR sensor on a left master speaker.
Status indicator. There’s an LED indicator near the top of the right speaker. It
serves the following functions:
Green nit is on
Green, flashes once IR command received
Green/red random flashing Output clipping
Green, blinking slowly Output muted, or input awaiting signal
Steady red Fault condition or DC error*
Red, blinking 1x/sec High temperature, output limited
Red, blinking 2x/sec Over temperature, output off
Off Standby
* On early shipments, a steady red indicator also meant standby, and the indicator
was never off.

S E T U P
15
8
Setup
Connections
The Valentina A8 is equipped with a variety of inputs, both analog and digital. The
speakers are factory programmed to scan the inputs and automatically detect which one is
receiving a signal. The remote can be used to manually select the input, which will
override auto-detection.
Regardless of other connections, a digital coax cable (RCA)
must be connected between the coax output on the right
speaker and the coax input on the left speaker. Otherwise, the
remote will not affect the left speaker.
The advantage of auto-detection is pretty obvious – you can connect multiple sources and
have the speakers determine which source is playing. As long as you take less than about
15 seconds to change media or select a track, the sound will start playing immediately.
Its disadvantage is that, if there’s been no signal for more than about 15 seconds, the
sound will be muted for a second or two after the signal is first applied. In that case, this
delay will cut off the first couple of seconds of the music.
This happens because, after having no signal for more than about 15 seconds, the auto-
detection function checks whether the silence has occurred because the source has
changed. It checks by scanning all six inputs, one at a time, and listening for a signal. It
takes a second or two to scan the silent inputs and then lock onto one that has a signal.
If your preference is for instant-on after you take some time to change media or select a
track, then by all means, select the active input manually using the remote. The drawback

S E T U P
16
is that it will take repeated input selection button presses until sound is heard the first time
each input change is needed. After that, however, playback will be immediate.
The Valentina A8 can accept both analog and digital inputs. There’s also a SB jack
for field programming the DSP.
Analog inputs. Both of the usual types of analog inputs are available, namely
balanced (XLR) and single-ended (RCA). Each has a second jack that can be used as
a feed-through for daisy chaining to another piece of equipment or to another
speaker.
The input impedance is quite high (44 kΩ balanced, 54 kΩ single ended), so the
speaker’s input will not significantly load down a line that’s daisy chained to
something else.
Please ignore the fact that one RCA jack’s core is red and the other’s is white. The two
jacks are connected together and thus interchangeable.
If your source has both digital and analog outputs, the digital inputs are recommended.
This will avoid an additional analog-to-digital conversion, which it stands to reason should
produce the best result.

S E T U P
17
Digital inputs. There are three types of digital input jacks: XLR, RCA, and optical.
They’re effectively equivalent, although some people have a personal preference. Each is
for one or another flavor of S/PDIF.
Notes:
1) For the purpose of operating the remote and for operation with the digital
inputs, there is a designated master and follower speaker. The standard setup
is for the right speaker to be the master.
The master speaker receives the digital input for both speakers, and plays the
data for that side. The other speaker receives the opposite channel data from
the master speaker through a digital coax (digital RCA).
2) The master speaker has the front indicator LED and remote IR receiver
embedded in its baffle. It sends the remote data across the digital RCA cable
to keep control of the two speakers in sync. For this reason, the two speakers
must be interconnected at all times.
A digital RCA cable must always interconnect the two speakers, from
the right speaker’s digital (S/PDIF) RCA output to the left speaker’s
digital input.
3) If you special ordered your speakers with the left-right roles reversed, then
reverse all handed instructions, e.g., left and right. And don’t forget to keep
the speakers interconnected with a digital RCA cable.
RCA (coax S/PDIF). The yellow-cored RCA jacks are for input and output of coax
(wired S/PDIF). It’s important to use cables meant for digital signals, not audio RCA
cables.
The upper digital RCA jack on the right speaker serves as the input for both speakers. It’s
for connection to any source’s digital RCA output. The lower digital RCA jack on the
right speaker is the output. It’s for sending the left channel audio and the remote control
data to the left speaker.
The upper digital RCA jack on the left-hand speaker is for receiving the left side audio
and also the remote control data from the right speaker.
The output jack (lower yellow RCA) on the right speaker must
always
be connected to the input jack (upper yellow RCA) on
the left speaker.
Table of contents
Other Janszen Speakers manuals