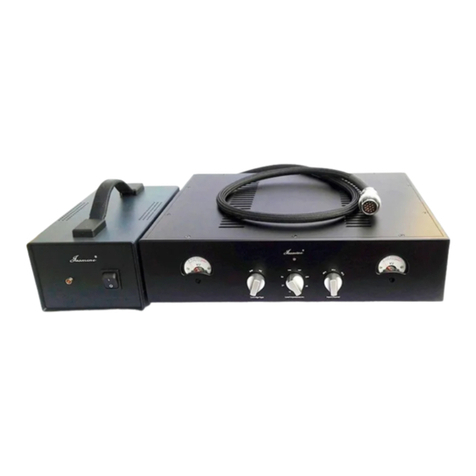
Jasmine Piano EL34-PP User manual

Jasmine Piano EL34-PP Tube Integrated
Amplifier
Owner’s Manual
J
a
s
m
i
n
e
T
u
b
e
A
m
p
s

Safety Precautions _______________
To get the best performance from your Jasmine EL34-PP Tube
Integrated Amplifier, and for your own safety, please read and
follow these important safety instructions:
Never place the Jasmine EL34-PP Tube Integrated Amplifier
near heat sources such as radiators, fireplaces, stoves, or other
appliances that produce heat. Avoid placing the Jasmine
EL34-PP Tube Integrated Amplifier where it will be subject to
direct sunlight or low temperatures.
The Tubes will be running with very high temperature, never
touch the tubes when the amplifier is running. Please keep the
tube cover fixed when you use it.
AC extension cords are not recommended for use with this
product. If an extension cord must be used, be sure it is an
approved type and has sufficient current carrying capacity for
this product.
Before cleaning the Jasmine EL34-PP Tube Integrated Amplifier,
always disconnect the power supply cord. Use a soft cloth and,
if necessary, dampen with clean water or mild cleaning agent.
Never apply water, or any other cleaner, directly to the chassis.
If you smell smoke or an abnormal smell, immediately unplug
the Jasmine EL34-PP Tube Integrated Amplifier from the power
supply and contact your Jasmine dealer.
Never attempt to service the Jasmine EL34-PP Tube Integrated
Amplifier beyond what is described in this Owner’s Manual.
Qualified service personnel should perform all repairs.
Unplug unit if it becomes wet.
Do not open unit when attached to AC outlet; dangerous
voltages may be encountered.
Replace fuse only with the exact type originally included.
Don’t upgrade the tubes by yourself whatsoever, or the
warranty is immediately voided. Incorrect upgrading will
degrade the sound quality or burn down the amplifier. If you
like to upgrade the tubes, please contact the Jasmine dealer.

Contents _______________________
A Brief of Jasmine
The Design Philosophy of jasmine
Unpacking
The Accessory Kit
Installing Tubes
Choosing a Location for the Jasmine Amplifier
Connecting to AC Power
Connecting to the Signal Source
Connecting to the Speakers
Before Power on the Amplifier
Choosing your Signal Source
Adjusting the brightness of the left panel
Power On & Off Sequence
Why need to upgrade or exchange the tubes ?
The Exchangeable Tube Type
Step One: Exchanging the Tubes
Step Two: Power on the Amplifier
Step Three: Adjusting Bias-Voltage of the Tubes
Safet
y
Precautions 2
Introduction 4
Installation 5
Connections 7
O
p
eration 9
Warrant
y
10
S
p
ecifications 11
How to ad
j
ust the bias-volta
g
e 10

Introduction _______________________
All of us at Jasmine would like to offer thanks and
congratulations to you for purchasing the Jasmine EL34-PP
Tube Integrated Amplifier. We sincerely believe that your
Jasmine EL34-PP Tube Integrated Amplifier is an intelligent
purchase decision that will bring you many years of musical
pleasure and satisfaction. While every new owner is anxious to
begin listening, we encourage you to take a few minutes to read
this manual and familiarize yourself with the full capabilities of
the Jasmine EL34-PP Tube Integrated Amplifier.
To reduce the risk of injury or damage to your Jasmine EL34-PP
Tube Integrated Amplifier, please read the safety instructions
on the first page of this manual. In addition, please pay
particular attention to the sections of this manual where the
symbol at left is shown.
Jasmine Audio was established by a group of professional
audiophile with the pure passion for the perfection of sound in
2001. The result of this passion is products with marvellous and
smooth dynamic sound combined with innovative design. No
detail on a Jasmine product is left unattended, and all
components are handpicked by experienced and qualified
engineers. Owning a Jasmine product should be seen as being
part of a very special “club”, created by enthusiasts for
enthusiasts.
Pure, Simply, Natural !
A Brief Histor
y
of Jasmine
The Desi
g
n Philoso
p
h
y
of Jasmine

Installation _______________________
This section includes information on how to unpack and
position your Jasmine EL34-PP Tube Integrated Amplifier.
After carefully unpacking your Jasmine EL34-PP Tube
Integrated Amplifier, inspect for any shipping damage and call
your dealer immediately if any is found. Do not plug your
Jasmine EL34-PP Tube Integrated Amplifier into any outlet if
you find shipping damage.
Please save all packing materials so the unit can be easily and
safely shipped if the need arises.
Included in the carton, you will find an accessory kit that
contains the following:
Four EL34 tubes
Two 6F2 tubes
AC power cord
One pair of gloves
A screw driver
Each tube is labeled, such as V1, V2, … etc. The same
label also appeared on the top side of the amp.
First of all, place the amp on a solid place, then remove
the tube cover by the screw driver. Unpacking the
tubes, and plug in the according slots.
The tubes are tested and strictly matched before
packing in the factory. To be sure you have plug the
tubes in the right place before powering on the amp.
Otherwise, will reduce the sound quality.
After all tubes are installed, Please re-fixed the tube
cover.
Un
p
ackin
g
The Accessor
y
Kit
Installin
g
Tubes

The sound quality of all high-performance digital and analog
components can be degraded by vibration. Although the
Jasmine EL34-PP Tube Amplifier uses some of the most
advanced noise-reduction circuitry available, it too will benefit
from any efforts taken to reduce vibration. For best
performance, place the Jasmine EL34-PP Tube Amplifier on a
solid, non-resonant shelf.
Choosin
g
a Location for the Jasmine Am
p
lifier

Connections _______________________
This section provides instructions to connect the Jasmine
EL34-PP Tube Amplifier to the rest of your music system.
Below is an illustration of the Jasmine EL34-PP Tube Amplifier
rear panel, showing all inputs and outputs.
VoltageMode RightSP LeftSP
Switch Terminals Terminals
ACInlet InputConnectors Dimmer
Avoid allowing static shocks to be applied to the inputs or
outputs. To prevent static shocks, touch any grounded surface,
such as the chassis of a component that is plugged into an AC
socket, before connecting or removing a cable.
Inputs and outputs can be safely connected to the Jasmine
EL34-PP Tube Amplifier when the AC power is switched off.
Check to make sure your Jasmine EL34-PP Tube Amplifier has
been set for operation at your AC line voltage. Attempting to
use your Jasmine EL34-PP Tube Amplifier at any voltage other
than that specified on the rear of the unit may cause damage
that is not covered by Jasmine’s warranty.
Jasmine AC Power Mode:
The 230V mode is suitable for using in 220 ~ 240V voltage
environment.
The 115V mode is suitable for using in 110 ~ 120V voltage
environment.
Connectin
g
to AC Power

Break-in and warm-up
Careful listeners will notice that the sound of the Jasmine
EL34-PP Tube Amplifier improves steadily after the unit is
powered-up. A new unit will undergo more dramatic changes
when power is applied for the first time. Depending on the
resolution of the system and the attentiveness of the listener,
you may find that the sound continues to improve over the first
several weeks of operation. If the power is disconnected for a
period of an hour or more, the unit will undergo similar but less
dramatic break-in.
You can directly connect your CD player, Tuner to the Jasmine
EL34-PP Tube Amplifier. But Turntable. You have to connect
your turntable to the Jasmine EL34-PP Tube Amplifier by a
phono stage , except your turntable embedded phono stage
inside.
The tube amplifier is sensitive to the output impendence. The
Jasmine EL34-PP Tube Amplifier supply two sets of speaker
terminals for using, 4 ohm and 8 ohm. Please refer to the
impendence parameters of your speakers before connecting
and choose the right terminals for connecting your speaker
cable. If the impendence of your speaker is 6 ohm, please
choosing 8 ohm terminals for connecting.
Connectin
g
to the Si
g
nal Sources
Connectin
g
to the S
p
eakers

Operation _______________________
This section describes how to operate the Jasmine EL34-PP Tube
Amplifier.
To make sure the volume switch is turned to the minimum
position before you turn on the power switch !
Please power on your signal source devices before turn on your
Jasmine EL34-PP Tube Amplifier.
Through the Selector switch on the front panel, you can select
the signal source that you like, such as CD Player, Tuner, or
turntable, … etc.
Through the Dimmer switch on the rear panel, you can
adjust the brightness of the left acrylic panel.
The correct power-on and power-off sequence will lengthen the
life of your HI-FI system.
Power On Sequence
Signal Sources --> Integrated Amplifier.
Power Off Sequence
Integrated Amplifier--> Signal Sources
Before Power On the Am
p
lifier
Choosin
g
y
our si
g
nal source
Powerin
g
On & Off Se
q
uence
Ad
j
ustin
g
the bri
g
htness of the left
p
anel

How to adjust Bias-Voltage_____________
After you exchange the power tubes ( like EL34, 6CA7 ),
you have to adjust the bias-voltage again.
The recommended Bias-Voltage is 0.40V ~ 0.43V !
Never over 0.5V, will cause the power tube burned
down.
The life time of vacuum tube depend on the quality and used
hours each day. Usually, one set of tubes can be used for 3 ~ 5
years. After you used Jasmine EL34-PP for several years and
find the sound quality degraded markedly. It’s time for
exchanging the tubes.
Some times, Audiophile like to change the different brand of
tube to obtain different sound.
6F2 = 6U8A
EL34 = 6CA7
The tubes are must pairs matched at least. The best is
four tubes matched each other.
1. Power off your Jasmine EL34-PP Tube Integrated Amplifier
2. Waiting for the tubes cooling down to the safety
temperature, pull off the tubes
3. Plug in the new tubes, V1 and V2 is one pair, V3 and V4 is
another pair
4. If you only exchanged one pair of 6F2 tubes, the
exchanging operation is finished. No necessary to execute
following steps !
Wh
y
need to u
pg
rade or exchan
g
e the tubes ?
The Exchan
g
eable Tube T
yp
e
Ste
p
One: Exchan
g
in
g
the Tubes

1. Before power on the Jasmine EL34-PP, be sure the speaker
cables are connected!
2. Carefully turn on the power switch, waiting for 5 minutes
till the tubes warmed up.
3. Using a multi-meter, setting to direct voltage 20V model
4. Finding out the adjusting switchs
Ste
p
Two: Power on the am
p
lifier

1. Connecting the negative pole of the multi-meter, and find
out the test point of each tube.
2. Using a small screw-driver to slowly adjust the adjust
switcher, till the test voltage reach the 0.40 ~ 0.43V
Repeating the steps above for each power tube. Please keep in
mind for that the bias voltage of each tube is best at same level.
Congratulation! You just updated your Jasmine Piano
EL34-PP Tube Amplifier!
Ste
p
Three: Ad
j
ustin
g
Bias-Volta
g
e of the Tubes

Warranty _______________________
Jasmine warrants that Jasmine products shall be free from
defects in materials and workmanship for:
One year for parts and labor, except tubes
The warranty period begins at the date of retail sale by an
authorized Jasmine dealer and is subject to the following
requirements and understandings:
1. This is a non-transferable warranty applicable to the
original purchaser exclusively.
2. The product must not have been modified in any manner
whatsoever, or the warranty is immediately voided.
3. The product must not have been stored in humid
environment; nor subjected to weather, water, or salt spray.
4. During the warranty period Jasmine will repair the product
to working order, or, at Jasmine’s option, replace the
defective equipment with a similar available product, at no
cost to the owner for the labor, materials, and return
shipping from Jasmine.
5. Jasmine shall not, under any circumstances, be liable for
any incidental or consequential damages arising from the
loss of property or other damage or losses due to the failure
of a Jasmine product. Jasmine will not pay for loss of use or
inconvenience caused by the failure of a Jasmine product.
Jasmine will not pay for damage caused to other audio
components because of the failure of a Jasmine product
within the limits allowed by State Law.
6. All repairs performed after the warranty period has
expired will be billed to the owner and will carry a 90 day
warranty on parts and labor.
7. The customer is responsible for shipping the unit to
Jasmine.
8. Jasmine product is only warranted in the country of
original sale.

Specifications _______________________
Output power: 43W x 2
Tubes used: 4 x EL34 , 2 x 6F2
Input Impendence: 100K ohm
Output Impendence: 4 , 8 ohm
Input ports: 3 sets of RCA
S/N: > 89dB
Freq. Response: 15Hz ~ 50KHz ( +/-1.5dB )
THD: < 1%
Voltage Model: 110 ~120V / 50~60Hz or 220 ~ 240V/
50~60Hz
Net Weight: 20Kg
Size: 16(L) x 16(W) x 8(H) inch
Power Consumption: 250W ( MAX)
@ 2004 Jasmine audio
Block B1-5C, Digital Tech. Park,
Southern Keji Rd.,
Shenzhen, GD,
China 518057
Subject to change without notice.
Table of contents
Other Jasmine Amplifier manuals

Jasmine
Jasmine LP-1.0 MM/MC User manual

Jasmine
Jasmine LP 4.0 User manual

Jasmine
Jasmine LP 2.5DU MM Phono Stage User manual

Jasmine
Jasmine LP-2.0 User manual

Jasmine
Jasmine Concerto KT88-PP User manual

Jasmine
Jasmine LP-3.0MK1 User manual

Jasmine
Jasmine LP-2.0MKII User manual

Jasmine
Jasmine Sonata EL156-SE User manual