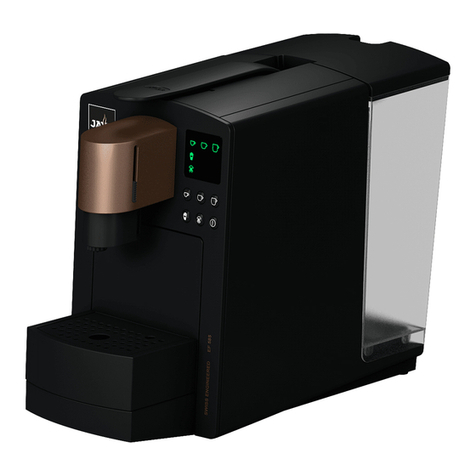
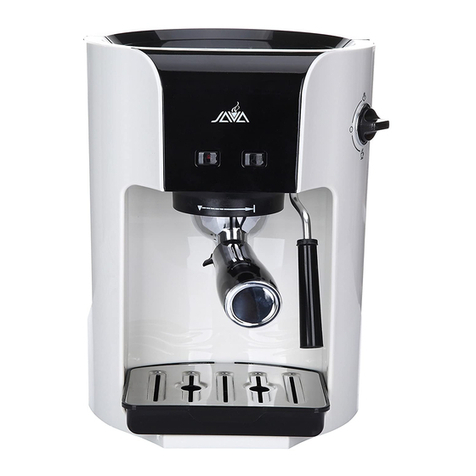
Java wsd18-060 User manual


1
WSD18Instructionsforuse
1.Safetyinformation .........................................................2
1.1Warning ................................................................2
1.2Precautions...........................................................2
2.Preparingthecoffeemachine .......................................3
2.1Checksupplyvoltage ............................................3
2.2Checkelectricalfuse .............................................3
2.3Fillwatertank.......................................................3
2.4Fillcoffeebeans....................................................3
2.5Adjustingthegrindinggear ..................................3
2.6Powerswitch ........................................................4
3.Firstuse .........................................................................4
4.Adjustingthewaterhardness........................................4
5.InstallationofClarisplusfiltercartridges ......................5
5.1Installingthefilter ................................................5
5.2Replacingthefilter ...............................................6
6.RinsingtheCoffeeMachine...........................................6
7.Adjustingthewaterquantityforcoffee ........................7
8.Drawingoff1cupofcoffee ...........................................7
9.Drawingoff2cupsofcoffee..........................................7
10.Drawingoffpre‐groundcoffee ....................................8
11.Drawingoffhotwater..................................................8
12.Drawingoffsteam .......................................................9
13.DrawingoffsteamwiththeProfessional‐Cappuccino
Frother(optional) ....................................................10
13.1ConnectingtheProfessional‐CappuccinoFrother
totheCoffeeMachine. ....................................10
13.2Drawingoffcappuccinoandhotmilkwith
Professional‐CappuccinoFrother .................... 10
13.3CleaningtheProfessional‐CappuccinoFrother 11
14.SwitchingofftheCoffeeMachine ............................. 11
15.Programming............................................................. 11
15.1Programmingthefilter..................................... 11
15.2Programmingthewaterhardness.................... 12
15.3ProgrammingthearomaINTENSIVEor
STANDARD ....................................................... 12
15.4Programmingthetemperature ........................ 12
15.5Programmingthetime ..................................... 12
15.6Programmingtheautomaticswitch‐ontime ... 13
15.7Programmingtheautomaticswitch‐offtime ... 13
15.8Cupcounter...................................................... 14
15.9Programmingthelanguage .............................. 14
15.10ProgrammingDisplay24H/AM/PM ............... 15
15.11ProgrammingthedisplayforML/OZ ............. 15
16.Maintenance ............................................................. 16
16.1Fillinginwater.................................................. 16
16.2Emptyingthecoffeegroundscontainer........... 16
16.3Driptraymissing............................................... 16
16.4Fillcoffeebeans ............................................... 16
16.5Replacingthefilter ........................................... 16
16.6Cleaningthecoffeemachine............................ 17
16.7Coffeemachinedecalcify ................................. 17
16.8Generalcleaninginstructions........................... 17
16.9Emptyingthesystem ........................................ 17
17.Cleaning..................................................................... 18

2
18.De‐scaling ..................................................................19
19.Tipsforperfectcoffee ...............................................20
20.Messages ...................................................................21
21.Problems....................................................................22
22.Legalinformation.......................................................22
23.TechnicalData............................................................23
24.PackingList ................................................................23
E
Introduction
ThankyouforpurchasingtheWSD18.Toensureperfect
functioningofyourWSD18,carefullyreadthisoperating
manualandkeepitforfuturereference.
Shouldyouneedmoreinformationorifyouencounter
particularproblemsnotspecifiedintheseoperating
instructionsinsufficientdetail,eithercontactusdirectly
orcontactyourlocalauthorizeddealer.
1.Safetyinformation
1.1 Warning
⑴Childrendonotrealizethedangersinvolvedinusing
electricappliances,forthisreasonalwayskeepaneye
onchildrenwhentheyuseelectricappliances.
⑵Thecoffeemachinemayonlybeusedbyinstructed
persons.
⑶Neveruseadefectivecoffeemachineoramachinewith
adefectivemainscable.
⑷Neverimmersethecoffeemachineinwater.
⑸Inordertoletcoffeemakerrunningatbest
performance,itshouldbeputinroomabove2hours,
andturnonthemachineuntilitstemperaturereaches
theroomtemperature.
1.2 Precautions
⑴Neverexposethecoffeemachinetoweather(rain,
snow,frost),nevertouchthemachinewhenyourhands
arewet.
⑵Placethecoffeemachineonafirm,levelbasethatis
resistanttoanywaterthatmayleak.Neverstandonhot
orwarmsurfaces(ovenhobs).Keepoutofthereachof
children.
⑶Ifyoudon’tusethemachineforalongertime(holidays,
etc.)alwaysdisconnectthemainscable.
⑷Alwaysdisconnectmainscablebeforecleaningthe

3
machine.
⑸Whendisconnectingthemainscableneverpullonthe
mainscableorthemachineitself.
⑹Neverrepairoropenthecoffeemachineyourself.Any
repairsmayonlybecarriedoutbyauthorizedservice
shopsusingoriginalsparepartsandaccessories.
⑺Thecoffeemachineisconnectedtomainssupplyviaa
mainscable.Makesurenobodycantripoverthemains
cable.Makesurechildrenandpetscannotreachthe
machine.
⑻Neverputthecoffeemachineorindividualpartsofit
intoadishwasher.
⑼Makesuretoinstallthemachineataplacewith
sufficientaircirculation,topreventoverheatingofthe
machine.
2.Preparingthecoffeemachine
2.1 Checksupplyvoltage
Thecoffeemachineispresetinthefactorytothe
correctmainsvoltage.Checkifyourlocalmainssupply
voltagecomplieswiththeinformationgivenonthetype
plateontheundersideofthecoffeemachine.
2.2 Checkelectricalfuse
Thecoffeemachineisdesignedforanelectriccurrentof
10/15amperes.Checkiftheelectricalfusehassufficient
capacity.
2.3 Fillwatertank
¾Onlyusefresh,coldwater.Neverfillinmilk,mineral
waterorotherliquids.
⑴Removethewatertankandrinseitwithcoldtapwater
thoroughly(Fig.4).
⑵Thenfillthewatertankandreinstallit.Makesureto
installthetankproperly,itmustengageaudibly.
2.4 Fillcoffeebeans
Toensurethatyourmachinewillworkperfectlyfora
longtimeandtoavoiddamage,pleasenotethatthe
grindinggearofyourcoffeemachineisnotsuitablefor
coffeebeanswhichweretreated,duringorafter
roasting,withadditives(e.g.sugar).Suchcoffee
blendsmaydamagethegrindinggear.Anyrepaircosts
resultingfromtheuseofsuchblendsarenotcovered
bywarranty.
⑴Openthebeantankcover(12)andremovethearoma
preservationcover(13).
⑵Removeanydirtorforeignmatterfromthebeantank.
⑶Fillcoffeebeansinthebeantankandclosethecover.
2.5 Adjustingthegrindinggear
Youcanadjustthegrindinggeartotheroastofyourcoffee.

4
WeRecommend:
zAfinegrindingdegree_forbrightroasts(thesmaller
thedots,thefinerthegrinding)
zAcoarsedegree_fordarkroasts(thelargerthedots,
thecoarserthegrinding)
Thegrindingdegreemayonlybeadjustedwhilethe
grindinggearisrunning.
⑴Openthebeantankcover(12)andremovethearoma
preservationcover(13).
⑵Toadjustthegrindingdegree,turntheRotarySwitch
(Fig.2)totherequiredposition.
2.6 Powerswitch
Actuatethepowerswitch(21)onyourcoffeemachine
beforeusingthemachineforthefirsttime.
Werecommendthatyouswitchoffyourcoffee
machinewiththepowerswitch(21)ifyouintendnotto
usethemachineforlongerperiodsoftime(e.g.during
holidays)
3.Firstuse
⑴Fillcoffeebeansinthebeantank(12).
⑵SwitchonthecoffeemachineusingtheON/OFFkey
(3).ThepowerLED(22)andtheilluminatedring(2)is
active.
⑶ConfirmyourselectionbypressingtheRotarySwitch(1).
DISPLAY:FILL
WATER
⑷Fillthewatertank(10)withfreshwater.
DISPLAY:OPENTAP
⑸Placeanemptycupunderthereplaceablehotwater
nozzle(16).
⑹Openthesteam/hotwaterdraw‐offtap(14)(Fig.13).
DISPLAY:FILLING
SYSTEM
DISPLAY:CLOSETAP
⑺Closethesteam/hotwaterdraw‐offtap(14).
DISPLAY:FILLING
SYSTEM
HEATING
4.Adjustingthewaterhardness
¾WaterisheatedintheCoffeeMachine.Asaresult,
calcificationoccursduringnormaluseandisindicated
automatically.BeforeusingtheCoffeeMachinefor
thefirsttimethehardnessofthewaterusedmustbe
adjusted.Usethesuppliedteststicksforthis.
¾Ifthefilterisactivated,theprogramstepWater
Hardnessnolongerappears.
¾TheCOFFEEMACHINEhas5hardnessdegreeswhich
canbeusedandaredisplayedwhileyouareadjusting
thewaterhardness.
Thedisplayedinformationmeansthefollowing:
LEVEL––Waterhardnessfunctionclosedown

5
LEVEL1waterhardnessdegree1
LEVEL2waterhardnessdegree2
LEVEL3waterhardnessdegree3
LEVEL4waterhardnessdegree4
¾WhentheCoffeeMachineleavesthefactoryitis
adjustedtoLEVEL3.
Youcanadjustanotherhardness.Todothis,proceedas
follows:
⑴DISPLAY:READY
⑵Presstheprogrammingkey(4),theprogramLED(23)
andilluminatedring(2)isactive.
DISPLAY:FILTER‐
⑶TurntheRotarySwitch(1)untilthefollowingmessageis
displayed:
HARDNESS
⑷NowpresstheRotarySwitch(1)tostartthe
programming.
DISPLAY:LEVEL3
⑸TurntheRotarySwitch(1)untiltherequiredlevelis
displayed.
Forexample,LEVEL4
⑹PresstheRotarySwitch(1)toconfirmtherequiredlevel.
DISPLAY:HARDNESS
⑺Presstheprogrammingkey(4)toquitthe
programmingmode.
DISPLAY:READY
5.InstallationofClarisplusfiltercartridges
¾IftheClarisplusfiltercartridgeisinstalledproperly,
de‐scalingofthecoffeemachineisnolongerrequired.
5.1 Installingthefilter
⑴Foldupthecartridgeholder.Installthefiltercartridgein
thewatertank,applyingagentlepressure(Fig.1).
⑵Folddownthecartridgeholderagainuntilitengages
audibly.
⑶Fillthewatertankwithcold,freshtapwaterandinstall
itagain.
⑷Presstheprogrammingkey(4),theprogramLED(23)
andtheilluminatedring(2)isactive.
DISPLAY:FILTER‐
⑸PresstheRotarySwitch(1)tostarttheprogramming.
DISPLAY:NO‐
⑹TurntheRotarySwitch(1)untilthefollowingmessageis
displayed:
DISPLAY:YES√
⑺PresstheRotarySwitch(1)toactivatethefilter
cartridge.
DISPLAY:INSERT
OPENTAP
⑻Putasufficientlylargecontainer(approx.1litre)under
thereplaceablehotwaternozzle(16).
¾Ifnotinstalledalready,inserttheClarisplusfilter.

6
⑼Openthesteam/hotwaterdraw‐offtap(14)(Fig.13).
DISPLAY:RINSING
FILTER
CLOSETAP
⑽Closethesteam/hotwaterdraw‐offtap(14),nowthe
CoffeeMachinewillheatuptocoffeetemperature.
DISPLAY:HEATING
PRESS
RINSE
RINSING
READY
¾Nowyouhaveactivatedthefilter.InProgramming
Modethewaterhardnessselectionfunctionisno
longerdisplayed.
5.2 Replacingthefilter
¾Afterdrawingoffapprox.50litresorafter2months,
thefiltercartridgewillbeusedup.Amessage
requestingyoutoreplacethefilterwillappearonthe
display.
⑴DISPLAY:READY/FILTER
⑵SwitchofftheCOFFEEMACHINEusingtheON/OFFkey
(3).
⑶Pressthemaintenancekey(7)untilthefollowing
messageisdisplayed:
DISPLAY:CHGFILTER
OPENTAP
⑷Removethewatertankfromthemachineandemptyit.
⑸Foldupthecartridgeholder.Installthefiltercartridge
inthewatertank,applyingagentlepressure(Fig.1).
⑹Folddownthecartridgeholderagainuntilitengages
audibly.
⑺Fillthewatertankwithcold,freshtapwaterand
reinstallit.
⑻Placeasufficientlylargejug(approx1litre)underthe
replaceablehotwaternozzle(16)andopenthe
steam/hotwatertap(14).
DISPLAY:RINSING
FILTER
CLOSETAP
⑼Closethesteam/hotwaterdraw‐offtap(14).
DISPLAY:HEATING
READY
E
6.RinsingtheCoffeeMachine
¾Whenthecoffeemachineisswitchedoffandhas
cooleddown,arinsingoperationisstartedwhenthe
machineisswitchedonagain.Whenthemachineis
switchedoff,arinsingoperationisstarted
automatically.
⑴SwitchonthecoffeemachineusingtheON/OFFkey
(3),thepowerLED(22)isactive.
DISPLAY:HEATING
PRESS

7
RINSE
⑵Pressthemaintenancekey(7),themaintenance
LED(24)isactive.
DISPLAY:RINSING
READY
7.Adjustingthewaterquantityforcoffee
¾TheindicatedvalueinMLisareferencevalueandmay
deviatefromtheactualvalue.
¾Ifyoupressthedraw‐offkeyfor2cups(6)the
waterquantityisdoubledautomatically.
Youcanchange/stopthewaterquantityduringthe
draw‐offoperation,too.TurntheRotarySwitch(1)
untiltherequiredMLvalueisdisplayed.
Youcanadjustthewaterquantityinstepsof5MLusing
theRotarySwitch(1).
⑴DISPLAY:READY
⑵TurntheRotarySwitch(1)untiltherequiredwater
quantityisdisplayed.
Forexample,120ML
8.Drawingoff1cupofcoffee
Youhavethepossibilityofincreasingthestrengthof
thecoffeeatanytimeinthegrindingprocessby
pressingthe1‐cupdraw‐offkeyagain.
ForExample:bypressingthe1‐cupdraw‐offkey
threetimesyougetstrongcoffee.
STRONG
¾Youcanchooseamongthreestrengthsatthepushof
abutton.Thelongeryoupressthedraw‐offkeyfor1
cup(5),thestrongeryourcoffeewillbe(Display:
MILD/NORMAL/STRONG).
¾Youcanadjustthewaterquantitybeforethedraw‐off
operationusingtheRotarySwitch(1).
⑴DISPLAY:READY
⑵Putacupundertheadjustablecoffeespout(17).
⑶Pressthedraw‐offkeyfor1cup(5)untiltherequired
strengthisdisplayed:
MILD
180ML(waterquantitylastadjusted)
Theilluminatedring(2)isactive.
⑷TurntheRotarySwitch(1)againtoselectthewater
quantityindividually:
ForExample:160ML
ForExample:MILD
⑸Yourproductisbeingprepared.
DISPLAY:READY
9.Drawingoff2cupsofcoffee
¾Selectingthecoffeestrengthisnotpossiblewhen
drawingoff2cupsofcoffee.Youwilldrawoff2mild
cupsautomatically.
¾Youcanadjustthewaterquantitybeforethedraw‐off
operationusingtheRotarySwitch(1).Theadjusted

8
value(ML)refersto1cup.
⑴DISPLAY:READY
⑵Pressthedraw‐offkeyfor2cups(6).
DISPLAY:2CUPS
120ML(waterquantitylastadjusted)
Theilluminatedring(2)isactive.
⑶TurntheRotarySwitch(1)againtoselectthewater
quantityindividually:
ForExample:210ML
2CUPS
⑷Yourproductisbeingprepared.
DISPLAY:READY
10.Drawingoffpre‐groundcoffee
¾Neveruseinstantcoffeeorquick‐coffee.We
recommendthatyoualwaysusepowderfromfresh
coffeebeansor,pre‐ground,vacuum‐packedcoffee.
Neverfillinmorethan2portionsofpowder.The
pre‐groundcoffeetankisnotstoragetank.Makesure
thatthepre‐groundyouuseisnottoofine.
Thismaycauseblockingofthesystem.Inthiscasethe
coffeeonlydripsoutofthecoffeespout.
¾Ifyouhavefilledintoolittlepowder,themessage
ADDMOREPOWDERwillbedisplayed.TheCoffee
Machinestopstheoperationandreturnsto"readyfor
drawoff"mode.
¾Attentions:Somemodeldoesn’thavethisfunction.
⑴DISPLAY:READY
⑵Put1or2cupsundertheadjustablecoffeespout(17).
⑶Openthecoverofthefillerfunnelforpre‐groundcoffee
(11).
DISPLAY:FILL
POWDER
⑷Fill1or2levelspoonfulsofpre‐groundcoffeeinthe
fillerfunnelforpre‐groundcoffee(11)(Fig.11)and
closethecover.
DISPLAY:CUPBUTTON
SELECT
⑸Presstherequireddraw‐offkeyfor1cup(5)or2
cups(6)
DISPLAY:120ML(waterquantitylastadjusted)
Theilluminatedring(2)isactive.
DISPLAY:POWDER
⑹TurntheRotarySwitch(1)againtoselectthewater
quantityindividually:
ForExample:210ML
POWDER
⑺Yourproductisbeingprepared.
DISPLAY:READY
11.Drawingoffhotwater
¾IfyoudonotchangethesettingsusingtheRotary
Switch(1),thewaterquantitylastadjustedwillbe
drawnoffautomatically.

9
Donotreplacethereplaceablehotwater
nozzle(16)(seeFig.5)directlyafterdrawingoffwater,
becausethenozzleishotafterthedraw‐offoperation.
¾Atthestartofthewaterdraw‐offoperationtherecan
besplashingavoiddirectcontactwiththeskin!
⑴DISPLAY:READY
⑵Placeacupunderthereplaceablehotwaternozzle(16).
⑶Openthesteam/hotwaterdraw‐offtap(14)(Fig.13).
Theilluminatedring(2)isactive.
Forexample,140ML
WATER
⑷AdjusttherequiredwaterquantitybyturningtheRotary
Switch(1).
Forexample,200ML
WATER
⑸Iftherequiredwaterquantityisreached,thefollowing
messageisdisplayed:
DISPLAY:CLOSETAP
⑹Closethesteam/hotwaterdraw‐offtap(14).
DISPLAY:READY
12.Drawingoffsteam
Toensureperfectoperation,cleanthe2‐stage
frothingjet(15)regularly.Screwthenozzleoffas
describedin.Holdthenozzleatthetopandatthe
bottomendandscrewitapart(Fig.18).Thoroughly
rinsethe3partsunderrunningwater.
¾Makesurethenozzlehasengagedproperly.Ifthe
nozzleiscloggedwithdriedmilkorhasnotbeen
attachedproperly,itmightsuddenlycomeoffduring
operation.
¾Duringfrothingsomewaterwillescapethesystem
beforetheactualfrothingprocess.Thisdoesnotaffect
theresult,e.g.whenfrothingmilk.
¾Atthestartofthesteamdraw‐offoperationtherecan
besplashingThe2‐stagefrothingjetbecomeshot.
Avoiddirectcontactwiththeskin!
¾Steamcanbeusedforheatingliquidsandfrothing
milkforcappuccino.Makesurethatthereplaceable
2‐stagefrothingjet(15)ispushedupwardswhen
liquidsareheated.Tofrothliquids,pushthe2‐stage
frothingjetdownwards,turningitslightly.
⑴DISPLAY:READY
⑵Pressthesteampre‐selectionkey(8).
DISPLAY:HEATING
STEAM
READY
⑶Todrawoffsteam,openthesteam/hotwaterdraw‐off
tap(14)(Fig.13).
Theilluminatedring(2)isactive.
⑷Youcanadjustthesteamdraw‐offtimeindividuallyby
turningtheRotarySwitch(1)untiltherequiredSECare
displayed.
Forexample,35SEC

10
⑸Ifyoudonotchangethesteamdraw‐offtimesettings
usingtheRotarySwitch(1),themachinewillusethe
settingslastadjusted.
⑹Duringthesteamdraw‐offoperation,themessage
STEAMisdisplayed
⑺Whenthesteamquantityisreached,themessage
CLOSETAPisdisplayed
⑻Closethesteam/hotwaterdraw‐offtap(14).
DISPLAY:READY/STEAMREADY
¾AslongasSTEAMREADYisonviewinthedisplay,the
machineisreadytodispensesteam.
13.DrawingoffsteamwiththeProfessional‐Cappuccino
Frother(optional)
¾TheProfessional‐CappuccinoFrotherisoptionally
available.Contactyourauthorizeddealer.
13.1 ConnectingtheProfessional‐CappuccinoFrotherto
theCoffeeMachine.
⑴Disassemblethereplaceablehotwaternozzle(Fig.5)or
thereplaceable2‐stagefrothingjet(Fig.6).
⑵MounttheProfessional‐CappuccinoFrother(Fig.7)
⑶Pressonesideofthehoseintotheopeningbehindthe
dial(Fig.10)
¾Theoptionallyavailablemilkcontainercanbeusedfor
suckinginmilk.
13.2 Drawingoffcappuccinoandhotmilkwith
Professional‐CappuccinoFrother
⑴Fillthemilkcontainerwithmilkorimmersethehosein
themilkdirectly.
⑵PlaceacupundertheProfessional‐CappuccinoFrother
(Fig.8)
⑶Pressthesteampre‐selectionkey(8).
DISPLAY:HEATING
STEAM
READY
⑷Todrawoffsteamopenthesteam/hotwaterdraw‐off
tap(14)(Fig.13).
Theilluminatedring(2)isactive.
⑸Youcanadjustthesteamdraw‐offtimeindividuallyby
turningtheRotarySwitch(1)untiltherequiredSECare
displayed.
Forexample,35SEC
⑹Ifyoudonotchangethesteamdraw‐offtimesettings
usingtheRotarySwitch(1),themachinewillusethe
settingslastadjusted.
⑺Forcappuccinoturntheselectorswitch(1)(Fig.9)to
area(2).
⑻Forhotmilkturntheselectorswitch(1)(Fig.9)toarea
(3).
⑼Nowplacethecupwiththecappuccinofrothorthehot
milkunderthecoffeespoutanddrawofftheproductof

11
yourchoice.
13.3 CleaningtheProfessional‐CappuccinoFrother
TheProfessional‐CappuccinoFrothermustbecleaned
aftereachdraw‐offoperation.
⑴Fillwaterinacontainerandimmersethehoseinit.
⑵Drawoffsteamuntilthewater/steammixtureisclean.
⑶Ifnecessary,disassembletheProfessional‐Cappuccino
Frotherandthoroughlyrinsetheflowregulatorwith
water(Fig.16&17).
Forpropercleaning,usethemachineAutoCappuccino
CleaningAgent.Thisisavailableatyourauthorized
dealer.Dailycleaningisrecommended.
14.SwitchingofftheCoffeeMachine
Toensureperfectoperation,pleaseswitchyourCoffee
Machinetostandbymodewiththe(3)symbolfirst.
Thenswitchthemachineoffwiththepowerswitch(21).
⑴DISPLAY:READY
⑵SwitchoffthecoffeemachineusingtheON/OFFkey
(3).
DISPLAY:RINSING
⑶Anautomaticrinsingoperationisstarted.
15.Programming
¾Whenyourcoffeemachineleavesthefactoryitis
adjustedsuchthatyoucandrawoffcoffeewithout
havingtochangeanysettings.However,youcan
programmevariousparametersindividually.
Youcanprogrammethefollowingstages:
zFilter
zHardness
zAroma
zTemp
zTime
zUnitOn
zUnitOff
zCupsmade
zLanguage
zDisplay
¾Programmingkey(4)
Usetheprogrammingkey(4)toopenorquitthe
programmingmode(nosavingofvalueseffected).
¾Rotaryswitch
TurntheRotarySwitchtochangetheadjustedvalues
ortoselectthenextprogrammingstep.
PresstheRotarySwitchtocheckthevaluesadjusted
ortosavethevaluesselected.
15.1 Programmingthefilter
RefertoChapter5.1“Insertingthefilter”.

12
15.2 Programmingthewaterhardness
RefertoChapter4“Adjustingthewaterhardness”.
15.3 ProgrammingthearomaINTENSIVEorSTANDARD
¾Whenthemachineleavesthefactory,thearomaisset
toIntensive.Ifrequesteditcanalsobesetto
Standard.
⑴DISPLAY:READY
⑵Pressprogrammingkey(4)untilFILTERappears.The
programLED(23)andtheilluminatedring(2)isactive.
⑶TurntheRotarySwitch(1)untilAromaisdisplayed.
DISPLAY:AROMA
⑷PresstheRotarySwitch(1).
DISPLAY:STANDARD
⑸TurntheRotarySwitch(1)untilthefollowingmessageis
displayed:
DISPLAY:INTENSIVE
⑹Toconfirmthenewaromasettings,presstheRotary
Switch(1).
DISPLAY:AROMA
⑺Presstheprogrammingkey(4)toquitthe
programmingmodeorselectthenextprogramming
itemusingtheRotarySwitch(1).
DISPLAY:READY
15.4 Programmingthetemperature
⑴DISPLAY:READY
⑵Pressprogrammingkey(4)untilFILTERappears.
TheprogramLED(23)andtheilluminatedring(2)is
active.
⑶TurntheRotarySwitch(1)untilTemperatureis
displayed.
DISPLAY:TEMP
⑷PresstheRotarySwitch(1).
DISPLAY:HIGH
⑸TurntheRotarySwitch(1)tochangethetemperature
fromHIGHtoNORMAL(orviceversa).
DISPLAY:NORMAL
⑹Toconfirmthenewsettings,presstheRotarySwitch(1).
DISPLAY:TEMP
⑺Presstheprogrammingkey(4)toquitthe
programmingmodeorselectthenextprogramming
itemusingtheRotarySwitch(1).
DISPLAY:READY
15.5 Programmingthetime
¾Youmustprogrammethetimeifyouwanttousethe
automaticswitch‐onfunction.
⑴DISPLAY:READY
⑵Pressprogrammingkey(4)untilFILTERappears.
TheprogramLED(23)andtheilluminatedring(2)is
active.
⑶TurntheRotarySwitch(1)untilTIMEisdisplayed.

13
DISPLAY:TIME
⑷NowpresstheRotarySwitch(1)tostartprogramming
thetime.
DISPLAY:‐‐:‐‐
⑸TurntheRotarySwitch(1)toadjustthehours..
DISPLAY:12:‐‐
⑹PresstheRotarySwitch(1)toconfirmthehoursettings
andtoactivatetheminutes.
DISPLAY:12:‐‐
⑺TurntheRotarySwitch(1)toselecttheminutes.
DISPLAY:4:05
⑻Toconfirmthenewsettings,presstheRotarySwitch(1).
DISPLAY:TIME
⑼Presstheprogrammingkey(4)toquitthe
programmingmodeorselectthenextprogramming
itemusingtheRotarySwitch(1).
DISPLAY:READY
Ifthemachineisdisconnectedfrompowersupply,the
timemustbeprogrammedagain.
15.6 Programmingtheautomaticswitch‐ontime
¾Youmustprogrammethetime(Chapter15.5)ifyou
wanttousetheautomaticswitch‐onfunction.
⑴DISPLAY:READY
⑵Pressprogrammingkey(4)untilFILTERappears.
TheprogramLED(23)andtheilluminatedring(2)is
active.
⑶TurntheRotarySwitch(1)untilMACHINEONis
displayed.
DISPLAY:UNITON
⑷NowpresstheRotarySwitch(1)tostartprogramming
theswitch‐ontime.
DISPLAY:‐‐:‐‐
⑸TurntheRotarySwitch(1)toadjustthehours.
DISPLAY:12:‐‐
⑹PresstheRotarySwitch(1)toconfirmthehoursettings
andtoactivatetheminutes.
DISPLAY:12:‐‐
⑺TurntheRotarySwitch(1)toselecttheminutes.
DISPLAY:12:45
⑻Toconfirmthenewswitch‐ontime,presstheRotary
Switch(1).
DISPLAY:UNITON
⑼Presstheprogrammingkey(4)toquitthe
programmingmodeorselectthenextprogramming
itemusingtheRotarySwitch(1).
DISPLAY:READY
15.7 Programmingtheautomaticswitch‐offtime
¾Youmustprogrammethetime(Chapter15.5)ifyou
wanttousetheautomaticswitch‐offfunction.
⑴DISPLAY:READY
⑵Pressprogrammingkey(4)untilFILTERappears.
TheprogramLED(23)andtheilluminatedring(2)is

14
active.
⑶TurntheRotarySwitch(1)untilUnitoffisdisplayed.
DISPLAY:UNITOFF
⑸NowpresstheRotarySwitch(1)tostartprogramming
theswitch‐ontime.
DISPLAY:‐‐:‐‐
⑹TurntheRotarySwitch(1)toadjustthehours.
DISPLAY:12:‐‐
⑺PresstheRotarySwitch(1)toconfirmthehoursettings
andtoactivatetheminutes.
DISPLAY:12:‐‐
⑻TurntheRotarySwitch(1)toselecttheminutes.
DISPLAY:12:45
⑼Toconfirmthenewswitch‐ontime,presstheRotary
Switch(1).
DISPLAY:UNITOFF
⑽Presstheprogrammingkey(4)toquitthe
programmingmodeorselectthenextprogramming
itemusingtheRotarySwitch(1).
DISPLAY:READY
15.8 Cupcounter
Youcancheckhowmanycupsofthefollowingcoffee
productsweredrawnoff:
a)1cup
b)2cups
c)Powdercoffee(Forthemachineswithoutthis
function,thisplacewillshow“0”.)
⑴DISPLAY:READY
⑵Pressprogrammingkey(4)untilFILTERappears.
TheprogramLED(23)andtheilluminatedring(2)is
active.
⑶TurntheRotarySwitch(1)untilCUPSMADEisdisplayed.
DISPLAY:CUPSMADE
⑷NowpresstheRotarySwitch(1)tostartprogramming
theitemCUPSMADE
⑸Thetotalnumberofdrawnoffproductsisdisplayed.
ForexampleTOTAL100
⑹Pressoneofthedraw‐offkeystolearnthenumberof
draw‐offoperationsfortheindividualproducts(1
cup,2cups,powder)
Forexample,pressdraw‐offkeyfor1cup20
⑺Thenumberofpre‐groundcoffeedrawnoffcanbe
checkedbyopeningthefillerfunnelforpre‐ground
coffee.
⑻Toquit,presstheRotarySwitch(1).
DISPLAY:CUPSMADE
⑼Presstheprogrammingkey(4)toquitthe
programmingmodeorselectthenextprogramming
itemusingtheRotarySwitch(1).
DISPLAY:READY
15.9 Programmingthelanguage
¾Thisitemhas10languagesmenu,pleasefollowthe

15
belowinstructionstochoosethelanguageyouwant.
⑴DISPLAY:READY
⑵Pressprogrammingkey(4)untilFILTERappears.
TheprogramLED(23)andtheilluminatedring(2)is
active.
⑶TurntheRotarySwitch(1)untilLANGUAGEappears.
⑷NowpresstheRotarySwitch(1)tostartprogramming
theitemLANGUAGE.
⑸TurntheRotarySwitch(1)until
e.g.CZECHappears.
⑹PresstheRotarySwitch(1)tosavetheselected
language.
DISPLAY:JAZYK
⑺Presstheprogrammingkey(4)toquitthe
programmingmodeorselectthenextprogramming
itemusingtheRotarySwitch(1).
DISPLAY:READY
15.10 ProgrammingDisplay24H/AM/PM
¾Youcanselectthetimeformat(24‐hourformator
12‐hourformat)basedonyourpersonalpreferences.
⑴DISPLAY:READY
⑵Pressprogrammingkey(4)untilFILTERappears
TheprogramLED(23)andtheilluminatedring(2)is
active.
⑶TurntheRotarySwitch(1)untilDISPLAYappears
⑷PresstheRotarySwitch(1)
ML/OZappears
⑸TurntheRotarySwitch(1)until24H/AMPMappears
⑹PresstheRotarySwitch(1)
e.g.24H
⑺Selectasettingofyourchoice.
⑻PresstheRotarySwitch(1)tosavethesetting.
DISPLAY:DISPLAY
⑼Pressprogrammingkey(4)toquittheprogramming
modeorselectthenextprogrammingitemusingthe
RotarySwitch(1).
DISPLAY:READY
15.11 ProgrammingthedisplayforML/OZ
¾Youcanselecttheunit(MLorOZ)fortheamountof
water.
⑴DISPLAY:READY
⑵Pressprogrammingkey(4)untilFILTERappears
TheprogramLED(23)andtheilluminatedring(2)is
active.
⑶TurntheRotarySwitch(1)untilDISPLAYappears
⑷PresstheRotarySwitch(1)
ML/OZappears
⑸PresstheRotarySwitch(1)
e.g.ML
⑹Selectasettingofyourchoice.
⑺PresstheRotarySwitch(1)tosavethesetting.

16
DISPLAY:DISPLAY
⑻Presstheprogrammingkey(4)toquitthe
programmingmodeorselectthenextprogramming
itemusingtheRotarySwitch(1).
DISPLAY:READY
16.Maintenance
16.1 Fillinginwater
⑴DISPLAY:FILL
WATER
¾Ifthisinformationisdisplayed,drawingoffproductsis
nolongerpossible.RefillwaterasdescribedinChapter
2.3.
DISPLAY:READY
⑵Thewatertankshouldberinseddailyandrefilledwith
freshwater.Onlyfillinfresh,coldwater.Neverfillin
milk,mineralwaterorotherliquids.
16.2 Emptyingthecoffeegroundscontainer
⑴DISPLAY:EMPTY
GROUNDS
¾Ifthismessageappearsonthedisplay,youcanno
longerdrawoffcoffee.Youmustemptythecoffee
groundscontainerfirst(Fig.14).
⑵Carefullytakeoutthedriptray,itisfilledwithwater.
DISPLAY:NOTRAY
⑶Inserttheemptyandcleantriptrayagain.
DISPLAY:READY
Theredwaterlevelindicatorappearswhenthedrip
trayisfull.
16.3 Driptraymissing
⑴DISPLAY:TRAY
MISSING
⑵Ifthisinformationisdisplayed,thedriptray(20)isnot
installedproperlyorwasnotinstalledatall.
⑶Insertthedriptray(20).
DISPLAY:READY
16.4 Fillcoffeebeans
⑴DISPLAY:FILL
BEANS
⑵RefillbeansasdescribedinChapter2.4.
¾ThemessageFILLBEANSwilldisappearafteryoudraw
offyournextcupofcoffee.
Werecommendthatyoucleanthebeantankregularly
beforerefillingbeans,usingadrycloth.Before
cleaningthetank,switchoffthecoffeemachine.
16.5 Replacingthefilter
¾Afterdrawingoff50litres,thefiltercartridgewillbe
usedup.Amessagerequestingyoutoreplacethe

17
filterwillappearonthedisplay.
RefertoChapter5.2«Replacingthefilter».
16.6 Cleaningthecoffeemachine
After200draw‐offoperationsorafter160rinsing
operations,thecoffeemachinemustbecleaned.A
messageappearsonthedisplay,tellingyoutostartthe
cleaningprogramme.Youcanstilldrawoffcoffeeorhot
water/steam.However,werecommendthatyoushould
cleanthemachine(Chapter17)withinthenextfew
days.
DISPLAY:READY
CLEAN
16.7 Coffeemachinedecalcify
Duringoperation,themachinewillcalcify.Thedegree
ofscalingdependsonthehardnessofthewaterinyour
region.Themachinewillinformyouwhende‐scalingis
required.Youcanstilldrawoffcoffeeorhot
water/steam.However,werecommendthatyoushould
de‐scalethemachine(Chapter18)withinthenextfew
days.
DISPLAY:READY
CALCIFIED
16.8 Generalcleaninginstructions
⑴Neverusescratchingobjects,pancleaners,cleaning
spongesorcausticchemicalstocleanthemachine.
⑵Wipeoffthecaseontheinsideandoutsideusingasoft,
moistcloth.
⑶Cleanthereplaceablehotwaternozzleaftereachuse.
⑷Afterheatingmilk,drawoffsomehotwater,toclean
theinsideofthereplaceable2‐stagefrothingjet,too.
⑸Disassemblethe2‐stagefrothingjetforpropercleaning
(Fig.6).
⑹Thewatertankshouldberinseddailyandrefilledwith
freshwater.
⑺Ifthewatertankshowssignsofscaling,removethe
scalingusingacommercialde‐scalingsolvent.Takeout
thewatertank(Fig.4).
⑻RemovetheClarisfiltercartridge,ifinstalled,before
descalingthewatertank.
16.9 Emptyingthesystem
Precondition:coffeemachineswitchedoff
¾ThisoperationisrequiredtoprotecttheCOFFEE
MACHINEagainstfrostdamageduringtransports.
⑴Placeacontainerunderthereplaceablehotwater
nozzle(16).
⑵Pressthesteampre‐selectionkey(8)untilthe
followingmessageisdisplayed:
DISPLAY:OPENTAP
EMPTYING
Table of contents
Other Java Coffee Maker manuals