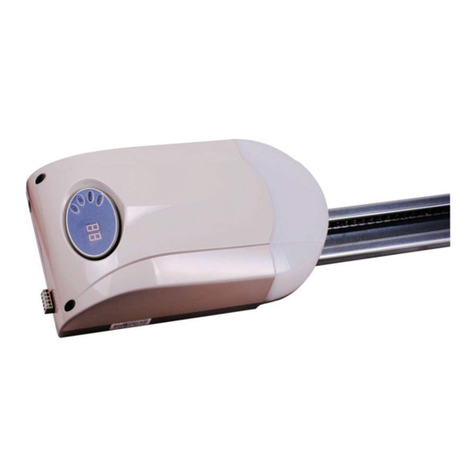
Jay-tech 1200 V4 Instruction Manual

1200 V4 Installation & User Manual
WARNING
Please read the manual carefully before installation and use. The installation of your
new door opener should be carried out by a technically qualified or licensed person.
Attempting to install or repair the door opener without suitable technical qualification
may result in severe personal injury, death and / or property damage.

CONTENTS
Important safety recommendations····························································- 1 -
Basic function introduction·······································································- 5 -
Special function introduction·····································································- 5 -
Installation recommendations···································································- 6 -
Installation ···························································································- 7 -
Installation (steel track)···········································································- 7 -
Assemble the Track(optional)···································································- 9 -
Battery backup Assembly (optional)···························································- 9 -
Basic function setting and applying·························································· - 10 -
Special function, optional parts introduction and application ·························· - 13 -
Manual disengagement········································································· - 14 -
Maintenance ······················································································ - 14 -
Final notes························································································· - 15 -
Important information for the user···························································· - 15 -
Packing list ························································································ - 16 -
Technical Specifications········································································ - 16 -
Common Fault & Solutions ···································································· - 16 -

- 1 -
Important safety recommendations
FAILURE TO COMPLY WITH THE FOLLOWING SAFETY
RECOMMENDATIONS MAY RESULT IN SERIOUS PERSONAL
INJURY, DEATH AND / OR PROPERTY DAMAGE.
1.PLEASE READ CAREFULLY AND ADHERE TO ALL
SAFETY AND INSTALLATION RECOMMENDATIONS.
2.The opener is designed and manufactured to meet Australian
Standards AS/NZS 60335-2-95 when installed correctly.
3.Unqualified personnel or those persons, who do not know the
occupational health and safety standards being applicable to
automatic garage doors, must in no circumstances carry out
installations or implement systems.
4.WARNING: Important safety instructions. Follow all instructions
since incorrect installation can lead to severe injury. Persons
who install or service the equipment without observing all the
applicable safety standards will be responsible for any damage,
injury, cost and expense or claim whatsoever any person
suffered as a result of failure to install the system correctly and
in accordance with the relevant safety standards and
installation manual whether directly or indirectly.
5.For additional safety we strongly recommend the inclusion of
Photo Beam. Although the opener incorporates a pressure
sensitive Safety Obstruction Force system, the addition of
Photo Beam will greatly enhance the operating safety of an
automatic garage door and provide additional safety.
6.Make sure that the garage door is fully open & stationary before
driving in or out of the garage.
7.Make sure the garage door is fully closed & stationary before
leaving.
8.Keep hands and loose clothing off the opener and garage door
all the time.
9.The Safety Obstruction System is designed to work on
STATIONARY objects only. Serious personal injury, death and /

- 2 -
or property damage may occur if the garage door comes into
contact with a moving object
10. Do not allow children to play with the appliance or its
controls, including remotes.
11. Waste electrical products should not be disposed of with
household waste. Please recycle where facilities exist. Check
with your local authority or retailer for recycling advice.
12. If the supply cord is damaged, it must be replaced by the
manufacturer, its service agent or similarly qualified persons in
order to avoid a hazard.
13. WARNING: Important safety instructions. It is important for
the safety of persons to follow all instructions. Save these
instructions.
14. This appliance can be used by children aged from 8 years
and above and persons with reduced physical,sensory or
mental capabilities or lack of experience and knowledge if they
have been given supervision or instruction concerning use of
the appliance in a safe way and understand the hazards
involved. Children shall not play with the appliance. Cleaning
and user maintenance shall not be made by children without
supervision.
15. Watch the moving door and keep people away until the door
is completely opened or Closed.
16. Take care when operating the manual release since an open
door may fall rapidly due to weak or broken springs, or being
out of balance.
17. Frequently examine the installation, in particular check
cables, springs and mountings for signs of wear, damage or
imbalance. Do not use if repair or adjustment is needed since a
fault in the installation or an incorrectly balanced door may
cause injury.
18. Each month check that the drive reverses when the door
contacts a 50 mm high object placed on the floor. Adjust if
necessary and recheck since an incorrect adjustment may
present a hazard, for drives incorporating an entrapment

- 3 -
protection system depending on contact with the bottom edge
of the door.
19. Drives, shall be supplied with a label suitable for permanent
fixing with a warning sign to keep children away when the door
is moving, having a height of at least 60 mm. Drives shall be
supplied with a label suitable for permanent fixing that
describes how to use the manual release.
20. Information concerning the adjustment of the door and drive.
21. The garage door opener emission sound pressure level of
the drive is LpA ≤ 70 dB(A).
22. WARNING: the drive shall be disconnected from its power
source during cleaning, maintenance and when replacing parts.
23. The installation instructions shall include details for the
installation of the drive and its associated components.
24. If necessary, call for authorised service.
25. For drives supplied without a door, the installation
instructions shall indicate the type, size and mass of the garage
door leaf for which the drive is intended to be used and the
position(s) where the drive can be installed.
26. Before installing the drive, remove all unnecessary ropes or
chains and disable any equipment, such as locks, not needed
for powered operation. Before installing the drive, check that
the door is in good mechanical condition, correctly balanced
and opens and closes properly.
27. Install the actuating member for the manual release at a
height less than 1.8 m. If removable, the actuating member
should be stored in direct vicinity of the door.
28. Install any fixed control at a height of at least 1.5 m and
within sight of the door but away from moving parts.
29. Permanently fix the labels warning against entrapment in a
prominent place or near any fixed controls.
30. After installation, ensure that the mechanism is properly
adjusted and that the drive reverses or the object can be freed
when the door contacts a 50 mm high object placed on the floor
(for drives incorporating an entrapment protection system
depending on contact with the bottom edge of the door).

- 4 -
31. Necessary information for the safe handling of a drive
weighing more than 20 kg. This information shall describe how
to use the handling means, such as hooks and ropes;
32. The drive must not be used with a door incorporating a
wicket door (unless the drive cannot be operated with the
wicket door put in the safe position);
33. After installation, ensure that parts of the door do not extend
over public footpaths or roads.
34. Description of intended operation of the entrapment
protection system, when incorporated in or supplied with the
drive;
35. If applicable, that the drive is intended to be installed at least
2.5m above the floor or other access level;
36. If applicable, that the drive is not to be used with doors
having openings exceeding 50 mm in diameter or having edges
or protruding parts a person could grip or stand on;
37. After installation, ensure that the entrapment protection
system operates as intended;
38. A list of all components included in the drive when delivered
not assembled.
Regarding the installation of the door opener, please refer to
the below paragraphs in this manual.

- 5 -
Basic function introduction
1. PTC Fuse inside the transformer, to protect the overload of the transformer.
2. O/S/C button on the display board. Make adjustment, maintenance and emergent opening or closing easier.
3. Copper worm gear inside the motor. With higher impact-resistance strength.
4. Multiple highlight LED, makes the lighting effect even better.
5. Multifunctional external terminal, can connect to various external device, like: photo beam(optional), wall
switch(optional), and so on.
6. LED displayer, easy to adjust.
7. Use rolling code transmitter, with billions of codes, won’t be coincident code or pirated code.
8. Soft start, soft stop. Minimize start-up load on garage door opener and garage door. With strong power and low
noise.
9. During operation, the opener makes real-time detection of resistance to ensure precise positioning.
10. With Auto-close function, the time is adjustable.
11. Self locking function. When power off, can lock the door by hand after disengaging the clutch.
12. With strong lifting force.
13. Safety reverse function. The door will reverse to full open when it is overload during closing. The safety reverse
force is adjustable. Can use photo beam(optional) to make safety protection.
14. Backup battery interface available in case of power failure or low voltage.
15. Original opening & closing force self-learning.
16. Low-voltage protection. The process will not perform any action of opening and closing when voltage is too low. The
door panel and controller won’t be damaged.
17. Metal chassis.
18. Opener rail type: steel rail with chain, steel rail with belt, steel sectional rail with chain, steel sectional rail with belt,
aluminum rail, aluminum sectional rail.
Special function introduction
The following functions are made to order in accordance with the special needs of customers:
1. External Fuse
2. Burglar alarm
3. Flash light
4. Pass door protection

- 6 -
Installation recommendations
Remember there are specific standards that have to be strictly followed regarding the safety rules of electrical
installations and automatic gates and doors.
As for the legal requirements and standards that must be adhered to, please take notice of the following points to
ensure maximum safety and reliability of your installation.
1. Before installing, check the surrounding environment. Carefully evaluate any hazards which could cause physical
damage (transiting vehicles, parts of trees falling etc.), possible contact with persons’ bodies (insects, leaves, etc.),
flooding hazards, or any other exceptional events.
2.Check the main voltage numbers is the same as the numbers that are given on the rating plate and in this manual.
3. Check and make sure if there is suitable electrical protection against short circuits/power spikes and proper earthed
on the main supply.
Remember the unit having main voltage running through it (electrocution hazard, fire hazard).
4. Take care with the control unit; the parts may be subject to damage if the control unit is abused.
5. Make sure that you have all the necessary materials, and they are suitable for this kind of use.
6. Read all the instructions thoroughly, and make sure they are understood before attempting to install the opener.
7. Before starting the installation carefully analyze all the risks relating to automating the door. Verify that the door is
automated in a sound condition and that the mechanisms are in good working order. Observe the safety margins and
minimum distances.
8.Carefully evaluate the safety devices to be installed and the right place to install them; always install an emergency
stop device for power interruption to the opener if it is required.
9. Once the risks have been analyzed, install the opener and relative safety devices, emergency stop and/or
photoelectric cells.
Important note: As for additional safety rules, we recommend the fitting of Photo Electric safety beams on all
installations.
10. While installing the opener, strictly follow all the instructions given in the instruction manual. If some points or
procedures in this manual are not very clear, do not install the unit until all doubts have been cleared up with our
technical department.

- 7 -
Installation
1) Read the instruction carefully.
2) Make sure the door structure is solid and suitable to be motor driven.
3) Make sure when the door is moving, there are no friction point.
4) The door must be properly balanced and must be easily lowered and raised by hand.
Referring to Fig. 2 for recommended installation
1) Track 5) O/S/C button
2) 24V DC flash light (optional) 6) Power socket
3) Wall switch (optional) 7) Door opener
4) Photo beam (optional)
Maintaining a minimum gap of 30mm between the top panel and the bottom of rail (Fig. 3).
Make sure the track is horizontal and vertical to the shaft. Make sure the connection of hanging bracket F and ceiling is
firm enough (Fig. 4).
Warning: Make sure the opener is affixed to solid ceiling and not to plasterboard. Failure to have a safe and secure
fixing will lead to opener falling, and can cause serious persons and /or property damage.
Installation (steel track)
Fig.3
Fig.4

- 8 -
1. Fixing the wall bracket(B) to the wall 2cm-15cm over the shaft or intermediate bracket ,and should be center
horizontally. (depending on the actual installation space).
2. Fixing the steel track to the wall bracket using axis pin Φ8x80 (C) and cotter pin. (Fig. 5)
3. Fixing garage door opener to the track by U bracket(E). Then fasten using Φ6 flat washer,Φ6 spring washer and
M6 nut.·
4. Fixing the hanging bracket(F) to the edge of the opener as in Fig. 5 using M6x16 carriage bolt(before fastening, cut
off any excess hanging bracket).
5. Fixing the opener on ceiling by hanging bracket.
Notice: Make sure the track is horizontal and vertical to the shaft. Make sure the connection of hanging bracket and
ceiling is firm enough.
6. Fix the door bracket(A) to the top edge of the door(should be in the middle and under the wall bracket)
7. Connect the bent arm(G) to the door bracket using a Φ8x25 axle pin and cotter pin as shown in Fig.5.
8. Install the shuttle(D) to the track using 4pcs of M6x20 screws(Fig.6), tie the clutch cord. Connect the straight arm(H)
to the clutch using a Φ8x25 axle pin as shown in Fig.5.
9. Connect the bent arm and straight arm using M8 outer hexagon bolt(before connecting, adjust the suitable length
of bent arm and straight arm).
10. Release the clutch, try to open and close the door by hand. Make sure there is no resistance between door panel
and track.
11. Connecting the opener with power and adjusting the operation.
Notice: Make sure the opener’s voltage is in accordance with the local voltage. Connect the opener to a properly
earthed power supply.
Assemble the Track(optional)
Fig.6
Fig.5

- 9 -
Battery backup Assembly (optional)
Assemble the battery using battery bracket, washers and nuts supplied (Fig. 9, Fig.10).
Fig.9
Confirm the type of the rail you have
bought according to Fig7.
Fig.7
Install the rails according the
stepsog Fig8:
A. Connect the rails by the sleeve;
B. Follow the steps in the picture to
connect the rails
C. Move the pulley to the top end
of the rail after the rails are
connected
D.Strecth the screw bolt of the
pulley into the hole on the rail.
Install the spring, washer, and
adjusting nut. Adjust the nut to
asuitable position, the installation
of the rails finished.
Fig.8
2 IN 1
4 IN 1
3 IN 1
Fig.10

- 10 -
Basic function setting and applying
1. Matching the receiver and transmitter
Fig. A
(The opener is supplied with
pre-coded transmitters.)
2. Travel limit setting Opening & closing force self-learning
Press and hold on “SET” button for 3 seconds until the LED
flashes “1”. Press “SET” button again for 1 second . “1”
should now display as steady (not flashing).
Then adjust the up limit by pressing “UP” button.
Fine-tuning “UP” or “DOWN” button to determine the final up
limit position (the LED flashes “n”or “u”during opening or
closing), then press “SET” button, the display turns into “2”
automatically.
Adjust the down limit by pressing “DOWN” button.
Fine - tuning “UP” or “DOWN” button to determine the final
down limit position (the LED flashes “n”or “u”during opening
or closing), then press “SET” button.
If the opener stops and LED flashes “H”or “C”, this indicates
there’s no hall signal or the opener is overloaded.
The opener will operate a cycle automatically to remember
the limit positions and the original opening & closing force,
then return to standby mode.
During learning, if the door stops unusually, and flashes “H”,
“C”, “O”. “L”for 5 seconds, this indicates there’s no hall
signal, overload, overtime or wrong limit setting.
Coding Transmitters:
Press and hold on “Code” button for 1 second until the led
dot is on (Fig A). Press button on transmitter once, the dot
will go off, press the same transmitter button again and the
dot will flash fast for 8 times, and then return to standby
mode. The transmitter is now coded into the receiver.
Repeat the above steps to code more transmitters.
The receiver has the capacity to store 20 transmitters.
If the led display flashes “F” and returns to standby mode
(after you have pressed the Code button), this indicates
that the memory storage is full (20 transmitters).
Follow the steps below to delete all transmitters that are
stored in the receiver memory:
Press and hold on “CODE” button for more than 8
seconds until the LED flashes “C”, all the stored codes are
deleted.
Only the matched switch on the transmitter is available.
If failed to match the transmitter within 20 seconds, then
it will return to standby mode automatically.

- 11 -
3. Safety reverse force adjustment
4.Photo beam setting
5. Auto-close setting
Press and hold on “SET” button for 3 seconds until the
LED flashes “1”. Press “UP”or “DOWN”button until
LED flashes “2”, then press “SET”button. It’s now under
force adjustment mode. The LED displays the current
set force.
Press “UP” button to increase the force and “DOWN”
button to decrease the force. The maximum force is 9
and the minimum is 1. Press “SET” button to confirm,
then the opener returns to standby mode.
The default setting of safety reverse force is 5.
Press and hold on “SET” button for 3 seconds until the
LED flashes “1”. Press “UP” or “DOWN” to increase or
decrease, adjust the LED to flash ”4”, then press “SET”
button to enter into auto-close setting, the LED displays
the current setting.
Press “UP” or “DOWN” button to adjust the auto-close
time. Press “UP” button once, the auto-close time will
increase 1 minute, the maximum time is 9 minutes.
Press “DOWN” button once, the auto-close time
decrease 1 minute. The auto-close function will be
turned off when the LED displays “0”. Press “SET”
button to confirm, the opener returns to standby mode.
The auto-close function can only be available when the
door is fully open and the photo beam function is on.
The default setting is “o”
Press and hold on “SET”button for 3 seconds until the
LED flashes “1”. Press “UP”or “DOWN”button until the
LED flashes “3”, press “SET”button. It’s now under
photo beam setting mode. The LED displays the current
setting.
Press “UP”button, the LED displays “1”, the Photo
beam Function is available. Press “DOWN”button, the
LED displays “0”to cancel this function. Press “SET”
button to confirm. The opener returns to standby mode.
The default setting of photo beam is “0”.
Notice: Close the photo beam function when you don’t
use photo beam sensor.

- 12 -
6. Lock door setting
(Only when the lock door function is
available, the setting will proceed.
The “lock” key can not be matched)
7. Half-open setting
(Only when the half-open function is
available, the setting can proceed.
The half-open key on the transmitter
can not be matched)
8. Open/Stop/Close Terminal
Press and hold on “SET” button for 3 seconds until the
LED flashes “1”. Press “UP” or “DOWN” button to
increase or decrease. Adjust the LED to flash “5”, press
“SET” button to enter into lock door setting. The LED
displays the current setting.
Press “UP” button, the LED displays “1”, the lock door
function is on. Press “DOWN” button, the LED
displays”0”, the lock door function is off. Press “SET”
button to confirm, the opener returns to standby mode.
When the lock door function is on and the door is fully
closed, the opener will lock the door automatically. And
then the door can only be opened by transmitter after
unlocked by the “lock” key(S2) on the transmitter. (If not
unlocked by the S2 button on the transmitter, the light will
flash twice when press the open key on the transmitter)
The default setting is: invalid.
Press and hold on “SET” button for 3 seconds until the
LED flashes “1”. Press “UP”or “DOWN”button to
increase or decrease. Adjust the LED to flash “6”. Press
“SET”button to enter into half-open setting. The LED
displays the current setting.
Press “UP”or “DOWN”button to increase or decrease.
When the LED displays ”1”, the half-open height is 30cm.
When the LED displays “2”, the half-open height is 60cm.
When the LED displays “3”, the half-open height is 90cm.
When the LED displays “0”, the half-open function is off.
Press “SET”button to confirm, the opener returns to
standby mode.
If the half-open function is on, only when the door is fully
closed, the door can half-open by the “S1”key on the
transmitter. If the door is at other position, the “S1”key
will not work.
The default setting is : invalid.
For connecting a wired touch switch to this terminal
(Fig.11),or other external receiver

- 13 -
Special function, optional parts
introduction and application
1. External Fuse (optional)
Protect the overload of the opener.
2. Burglar alarm (optional)
Track in real time the close condition of the door. If the door is pried under the abnormal situation, it will alarm loudly.
3. Photo beam/switch control connection (Fig.11, Fig.12)
4. Flash light (optional)
There are corresponding interfaces for this function and provide 24v-35v flash light
voltage. Connect the flash light with DC 24v-28v, current≤100mA. When use AC 220V
power flash lights, please match an adapter, and wiring as required(Fig.13).
5. Pass door (SD) protection (optional)
This function ensures that the door can’t be opened unless the small pass door is closed.
The door panel won’t be damaged. Connect according to Fig.14 .
Fig. 11
Fig. 12

- 14 -
Fig. 13 Fig. 14
Manual disengagement
The opener is equipped with a manual release cord to disengage shuttle and move door by hand while holding the
handle down (Fig 15). Pull on the handle to disengage the shuttle. To re-engage the door simply run opener in
automatic mode or move door by hand until the trolley engages in the chain shuttle.
In some situations that a pedestrian door is not in state, it is recommended that an external disengagement device
should be fitted (Fig 16).
Maintenance
Fig.16
Fig.15

- 15 -
No particular maintenance is required for the logic circuit board.
Check the door at least twice a year if it is properly balanced, and all working parts are in good
working condition.
Check the reversing sensitivity and adjust if it is necessary.
Make sure that the safety devices are working effectively (photo beams, etc.)
Notice: An inadequately maintained door can affect the life of the automatic opener due to incorrect loads, and
will void the warranty.
Final notes
This manual is only used by technical persons who are qualified to carry out the installation.
It is important for the installer to show their clients correct operation using of the opener including the using of manual
disengagement cord.
Inform the owner about the need of a regular and accurate maintenance, especially regarding a regular check of
the safety and reversing devices.
Important information for the user
Once the opener has been installed, the user must be informed about how it works and all the risks that can arise if it is
used improperly. The user must avoid placing himself/herself in dangerous situations such as standing within the door’s
operating range when it is moving.
Do not let children play near the door, and keep the remote controls out of their reach.
All services, repairs or checks must be carried out by professionally qualified persons, and noted on a maintenance
register kept by the user.
IMPORTANT NOTE: In the case of a malfunction the user must call an authorized installer and should not attempt to
repair it by yourself.

- 16 -
Packing list
Item
Quantity
Door opener
1
Track
1
Shuttle components kit
1
Transmitter
2
Transmitter bracket
1
Certificate of approval
1
Warning label
1
Release cord(with caution paper and cord pendant)
1
Door bracket
1
Wall bracket
1
“U” bracket
2
Hanging bracket
2
Bent arm
1
Straight arm
1
Fastener kit
1
Technical Specifications
Model
600N
800N
1000N
1200N
Rated door area
≤9.0 sqm
≤12.0 sqm
≤15.0 sqm
≤18.0 sqm
Rated lifting force
≤60 kgs
≤80 kgs
≤100 kgs
≤120 kgs
Rail
Steel / Aluminum
Steel / Aluminum
Steel / Aluminum
Steel / Aluminum
Drive
Chain / Belt
Chain / Belt
Chain / Belt
Chain / Belt
Motor
24V / 100W
24V / 120W
24V / 140W
24V / 160W
Input voltage
110V –270V
110V –270V
110V –270V
110V –270V
LED
24V / 14pcs LED bulbs
Transformer
105℃Temperature detect switch
Radio frequency
433.92 MHz or other on request
Coding format
Rolling code (7.38x10¹⁹ combinations)
Standard transmitter
2pcs
Code storage capacity
20 different codes
Working temperature
-40℃- +50℃
Safety protection
Soft start & Soft stop, photo beam as optional, flash light as optional
Common Fault & Solutions

- 17 -
Fault
appearance
Fault cause
Solutions
Opener without any
action
1. Power supply
2. Plug wire is loose
1. Check the power supply to openers.
2. Carefully open the motor cover, check all plug wire on control boards.
Opener doesn’t work,
LED displays “-”
Faulty learning of “UP”or “DOWN”
travel limit
Learn “UP”and “DOWN”travel limit again follow the manual
The door can only open,
can not close
In operation with photo beam.
Or photo beam function is available but
with no photo beam connected.
Check photo beam, move away the obstruction.
Cancel the photo beam function if there’s no photo beam connected. (follow the
instruction manual)
Open and close action is
reversed
Reversed connection of the positive
and negative of motor wire to the
control board.
*Power off firstly, open the motor cover and reverse the positive and negative of
motor wire on the control board. Re-set the travel limit.
Door auto reverse to full
open before closing
completely
In operation with safety reverse
function. Obstruction or door
maintenance required
1. Check the door springs and for any obstructions
2. Re-set the travel limit.
3. Increase the force value of safety reverse.
Transmitter doesn’t work
1. Flat battery
2. Antenna is loose or not well
extended
3. Interference around nearby
1. Replace new battery
2. Extend the antenna on the opener
3. Eliminate signal interference ( door bells, baby monitor, alarm etc)
Can not match new
transmitters
1. Memory is full
2. New transmitters are not compatible
with opener
1. Press and hold on “CODE” button for more than 8 seconds until the LED flashes
“C”, delete all stored codes, then match new transmitters again.
2. Choose our transmitters only.
LED displays “C”, opener
does not work
1. Motor plug wire is loose
2. Control board is damaged
1. Re-insert motor plug wire
*2. Replace new control board
LED displays “H”, opener
does not work
1. Motor is damaged
*1. Replace new motor
LED displays “H”after
opener operates several
centimeters only
1. Hall element wire plug loose
between hall element and control
board.
2. Hall element or control board is
damaged
1. Check the wire plug
*2. Check the hall element
*3. Replace control board
Note: Only the qualified professional person can carry out the maintenance marked with “*”.

- 18 -
PRODUCT WARRANTY For 7 years from the date of installation, this product will be repaired, or replaced
free of charge, if defective in material or workmanship.
ADDITIONAL WARRANTY ON PARTS Replacement parts for any defective parts on this product will be furnished, free
of charge. Any costs for professional installation are included.
WARRANTY RESTRICTION This Garage Door Opener Warranty does not cover light bulbs or fuses, which are
expendable parts, or repair parts necessary because of operator abuse or negligence, including the failure to adjust
and operate this garage door opener according to instructions contained in the owners’ manual. This warranty also
does not cover any problems caused by interference or impact damage and does not cover remote controls.
This warranty remains valid providing the door has been serviced at least every 2 years by any professional garage
door company since the installation of this opener. Proof of service will be requested and failure to produce this may
void your warranty.
Warranty is void if damage or premature wear to the opener is sustained by a broken, unbalanced, worn or damaged
garage door.
Original purchase receipt / Invoice is required to process a warranty claim.
If a technician is requested to attend and rectify the issue and it is reasonably deemed to be caused by other factors
other than a product fault the customer agrees that they may be charged a call out fee, plus any parts required to
complete the repair. Liability –Australia only
Under no circumstances shall the Seller be liable for consequential, incidental or special damages arising in
connection with the use, or inability to use, the Unit. In no event shall the Seller's liability for damages or injury arising
from breach of law or contract or for negligence, exceed the cost of repairing or replacing the Unit or refunding the
purchase price of the Unit. Under Division 2 Part V of the Trade Practices Act, 1974, certain warranties and conditions
(Implied Terms) are implied into contracts for the supply of goods or services if the goods or services are of a kind
ordinarily acquired for personal, domestic or household use or consumption. Liability for breach of those Implied Terms
cannot be excluded or limited and the limitations and exclusions above do not apply to the Implied Terms. Except for
the Implied Terms and the warranties set out above, the Seller excludes all warranties and conditions implied by
statute, at law, in fact or otherwise.
Our goods come with guarantees that cannot be excluded under the Australian Consumer Law. You are entitled to a
replacement or refund for a major failure and compensation for any other reasonably foreseeable loss or damage. You
are also entitled to have the goods repaired or replaced if the goods fail to be of acceptable quality and the failure does
not amount to a major failure.
If you believe you have a faulty product you may submit a warranty request by contacting the company listed below.
Table of contents
Other Jay-tech Garage Door Opener manuals
Popular Garage Door Opener manuals by other brands

Chamberlain
Chamberlain Whisper Drive Security+ HD900D owner's manual

Craftsman
Craftsman 139.53662SRT2 owner's manual

Automatic Technology Australia
Automatic Technology Australia GDO-8 v1 EasyRoller II installation instructions

Craftsman
Craftsman 139.5398511 owner's manual

Automatic Technology
Automatic Technology GDO-9v2 SecuraLift installation instructions

Wayne-Dalton
Wayne-Dalton ThermoMark 5150 installation instructions