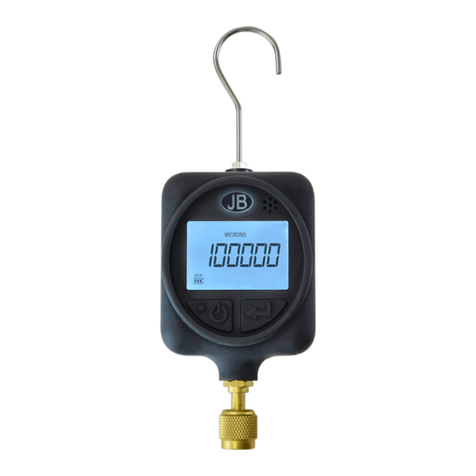
JB HVG-001 User manual

OPERATING MANUAL
DIGITAL VACUUM GAUGE
HVG-001

2
SPECIFICATIONS
Vacuum Reading Range
Working Temperature
Power Supply
Dimensions
Shipping Weight
Warranty
100,000 to 10 microns
+32°F to 120°F (+0°C to 48.9°C)
Three AA batteries
9" length x 3.25" width x 1.5" depth
.86lbs(.39kg)
12 months
FEATURES
Power Button
Battery Status Indicator
Display Screen
1/4" SAE Female Flare Fitting
Hook
Enter Button
Battery Cover (back)
Unit Selection
Audible and
Visual Alarm

3
OPERATING INSTRUCTIONS
Power Settings
To power on, press and hold the POWER button for two seconds.
To power off, press and hold the POWER button for three seconds.
Note: Power save feature will automatically power off the gauge after 30 minutes to conserve battery life.
Main Menu Settings
To access the main menu user settings, press and hold ENTER button for three seconds.
Alarm Settings
To enable the Low Limit Alarm, press and hold the ENTER button for three seconds to access the main menu.
Press and hold ENTER button for an additional three seconds to select the “LO--AL” sub menu options.
Scroll through available sub menu options by pressing the ENTER button.
Press and hold ENTER button for an additional three seconds to store and enable the selected alarm setting.
Press POWER button twice to exit and return to main display screen and normal operation mode.
To silence an active alarm, press any button to disable.
Display Screen Start Up
Press and hold POWER button for two seconds to power gauge on. If unit display does not light up, check for
correct battery installation. Startup display will show “JB”, “JUST BETTER”, VER XXX (Version), a loading menu,
followed by either the micron value or the over range indicator “oooooo.”
The loading menu indicates the unit is in initial warm up state. It may take up to 30 seconds for the unit to go
into normal operation mode.
The unit will display “oooooo” when it is at atmospheric pressure, or at a pressure over 100,000 microns. This
indicates an over range condition. When the pressure is at 100,000 microns or lower, the gauge will display
the value.
Loading Menu – Warm up mode Atmospheric Pressure –
Normal operation mode

Battery Status Indicator
When the startup sequence is complete, the BATTERY STATUS INDICATOR will show current battery life status.
While the unit is on, the status is updated once every second. Battery voltage status is as follows:
When the battery voltage drops below 2.4 volts, the battery outline will flash and the unit will beep once per
minute to alert the low battery condition. When battery voltage falls below 2.1 volts, the shutdown timer is
activated. If voltage stays below 2.1 volts for thirty seconds, the HVG-001 will beep once and power off.
Battery Replacement
If unit display does not light up after holding POWER button for two seconds, check for correct battery installation.
1. Remove battery cover from back of unit (phillips screwdriver required).
2. Insert three AA alkaline batteries.
3. Replace battery cover.
Battery Status Indicator
3.5v or above 3.0 ~ 3.5v 2.7 ~ 3.0v 2.4 ~ 2.7v 2.1 ~ 2.4v

MENU SETTINGS
Accessing Main Menu and Sub Menu Settings
1. Press and hold ENTER button for three seconds to access main menu settings.
2. Press ENTER button to cycle through all main menu options. Available main menu options:
•“UNIT”
•“LO--AL”
•“B-LITE”
•“BEEP”
•“HI RES”
•“AU-OFF”
3. To select a main menu option, press and hold the ENTER button for three seconds. You are now in the
sub menu of your selection. Press the ENTER button to cycle through the sub menu options.
4. To select a sub menu option, press and hold the ENTER button for three seconds to store the selection. Unit
will display “STORED” and save your selection. Each time the HVG-001 powers on, stored user settings will
be retrieved.
5. To exit the sub menu, press the POWER button once to return to the main menu.
6. To exit the main menu and return to normal operation mode, press the POWER button again.
Note: When scrolling through menu settings, the POWER button acts as the cancel/exit button.
Unit Selection (UNIT)
The available unit selections are: Microns, PSIA, inHg, Pascals, Torr, mTorr and mBar.
Factory default setting is “MICRONS”.
When the UNIT menu is active, a constant pressure value equivalent to 1000 microns is displayed using the
currently selected units (e.g.: 133.31 for Pascals). The current unit selection is shown at the top of the screen.
1. Press the ENTER button to scroll through available options.
2. To select and store an alternate option as a new setting, press and hold the ENTER button for three seconds
on the selected option. Unit will display “STORED” and save your selection.
3. Press POWER button once to cancel and return to main menu. Press POWER button twice to exit and return
to normal operation mode.

6
Low Alarm Setting (LO--AL)
The Low Alarm setting determines the pressure level for which an alarm will be sounded.
Available alarm settings: OFF, 50, 100, 250, 500, 1000, 1250, 1500, 2000 microns.
Factory default setting is “500” microns.
The available alarm setting values will be displayed in the current unit selection setting. For example, if your
current unit selection setting is in Pascals, your available settings will be: 7, 14, 33, 66, 133, 166, 200, and
266, the Pascal equivalents of the 50 – 2000 micron range values.
The “ALARM”, “LOW” icons will be displayed on the main screen to indicate the Low Alarm setting is active.
From the LO--AL sub menu:
1. Press the ENTER button to scroll through available options.
2. To select and store an alternate option as a new setting, press and hold the ENTER button for three seconds
on the selected option. Unit will display “STORED” and save your selection.
3. Press POWER button once to cancel and return to main menu. Press POWER button twice to exit and return
to normal operation mode.
Back Light Persistence (B-LITE)
Back Light Persistence determines the number of seconds that the back light will stay on after the last button activity.
Available settings are: OFF, 10, 15, 30, 45, 60, and 90 seconds.
Factory default setting is “30” seconds.
From the B-LITE sub menu:
1. Press the ENTER button to scroll through available options.
2. To select and store an alternate option as a new setting, press and hold the ENTER button for three seconds
on the selected option. Unit will display “STORED” and save your selection.
3. Press POWER button once to cancel and return to main menu. Press POWER button twice to exit and return
to normal operation mode.
Key-press Feedback (BEEP)
Key-press Feedback determines whether an audible sound is heard each time a button is pressed.
Available settings are: ON, OFF.
Factory default setting is “ON”.
From the BEEP sub menu:
1. Press the ENTER button to scroll through available options.
2. To select and store an alternate option as a new setting, press and hold the ENTER button for three seconds
on the selected option. Unit will display “STORED” and save your selection.
3. Press POWER button once to cancel and return to main menu. Press POWER button twice to exit and return
to normal operation mode.

7
Display Resolution (HI RES)
The Display Resolution menu determines whether pressure will be shown at high resolution. High resolution
means that pressure is shown as-is, in one unit increments. When the setting is OFF, the reading display is
rounded.
Available settings are: ON, OFF.
Factory default setting is “OFF”.
From the HI RES sub menu:
1. Press the ENTER button to scroll through available options.
2. To select and store an alternate option as a new setting, press and hold the ENTER button for three seconds
on the selected option. Unit will display “STORED” and save your selection.
3. Press POWER button once to cancel and return to main menu. Press POWER button twice to exit and return
to normal operation mode.
Note: Even if high resolution display is selected ON, pressure values above 1000 microns will be rounded off
according to the current display pressure.
Auto Shutdown (AU-0FF)
To conserve battery life, the DV-22N will power off automatically after 30 minutes of inactivity.
Available settings are: OFF, 10, 15, 30, 45, 60, or 90 minutes.
Factory default setting is “30” minutes.
From the AU--OFF sub menu:
1. Press the ENTER button to scroll through available options.
2. To select and store an alternate option as a new setting, press and hold the ENTER button for three seconds
on the selected option. Unit will display “STORED” and save your selection.
3. Press POWER button once to cancel and return to main menu. Press POWER button twice to exit and return
to normal operation mode.
Note: Even if auto-shutdown has been deactivated, a low battery condition will power off the HVG-001.
Connection Instructions
It is recommended to connect the HVG-001 gauge hose directly to either the high or low side of the system
for the most accurate reading.
To check for a leak using the vacuum pump blank-off valve: a metal hose, o-ring coupler or copper tubing must
be used. Standard hoses permeate and will not hold a vacuum. The gauge reading will increase naturally due
to equalization of pressure. Reading should hold for a minimum of five minutes—a continual increase may
indicate a leak within the system.
MAINTENANCE
Cleaning Vacuum Sensor
1. Fill brass sensor fitting with a few drops of isopropyl alcohol.
2. Cover the opening with a finger and gently shake to allow alcohol to rinse the sensor.
3. Pour out alcohol and allow sensor to dry for 20 minutes before using gauge.
Table of contents
Other JB Measuring Instrument manuals
Popular Measuring Instrument manuals by other brands

AEMC
AEMC SL261 user manual

geo-FENNEL
geo-FENNEL Selection PRO FL 40-PowerCross Plus SP user manual

Vympel
Vympel CONG Prima 2M operating manual

Ultraflux
Ultraflux Uf 821 user manual

Agilent Technologies
Agilent Technologies 8753ET user guide

PCB Piezotronics
PCB Piezotronics IMI SENSORS 608A11/030BZ Installation and operating manual