Jebao AL Series User manual

Aquarium Light
AL、AK Series
User’s Manual
Caution:
1. Do not look directly to the LEDS when you plug in the power or the light
is on due to high power and brightness of the LEDs.
2. Please use in ventilated environment. Do not use in narrow environment.
3. Please make sure the fan function work normally when the light is in use.
Clean the fan and light body routinely with brush or air blower.
4. Time program stops if you manually set the light.
5. Only the owner’s account can control the light. You can log in to your
account in different devices to control the light.
Products and APP are subject to change along with the technical improvements.
Please refer to the actual product and APP.

1. Product Introduction
AL、AK series Aquarium Light can perfectly imitate the natural light under the
sea. It creates a natural living environment for fish, corals and other marine
creatures in your tank. AL、AK series Aquarium Light is composited of 6 sets of
LEDS, including white (cold white and warm white), royal blue, blue, violet
(violet and ultra violet). You may control the brightness of each LED set to
vividly mimic the light environment under the sea, which also brings you an
enjoyable visual effect.
2. Product Specification
AK-70
LEDs
Watt
White
LED
Blue 1
LED
Blue 2
LED
Violet
LED
Green
LED
Red
LED
Total
W
13
14
14
14
8
9
70
AK-80
LEDs
Watt
White
LED
Blue 1
LED
Blue 2
LED
Violet
LED
Green
LED
Red
LED
Total
W
17
20
20
14
6
5
80
AL-90
LEDs
Watt
White
LED
Blue 1
LED
Blue 2
LED
Violet
LED
Green
LED
Red
LED
Total
W
19
22
21
15
8
7
90
AL-120
LEDs
Watt
White
LED
Blue 1
LED
Blue 2
LED
Violet
LED
Green
LED
Red
LED
Total
W
25
27
20
27
12
9
120
AL-150
LEDs
Watt
White
LED
Blue 1
LED
Blue 2
LED
Violet
LED
Green
LED
Red
LED
Total
W
33
40
40
20
12
9
150
AL-200
LEDs
Watt
White
LED
Blue 1
LED
Blue 2
LED
Violet
LED
Green
LED
Red
LED
Total
W
38
64
43
30
17
14
190
Note: The above watt is the sum of power consumption of LEDs, control panel,
fan and power adaptor.

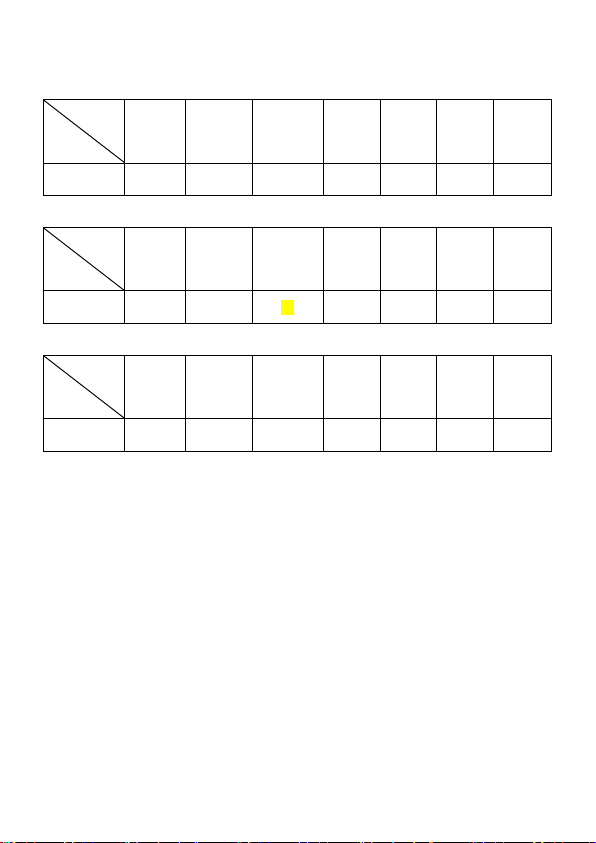
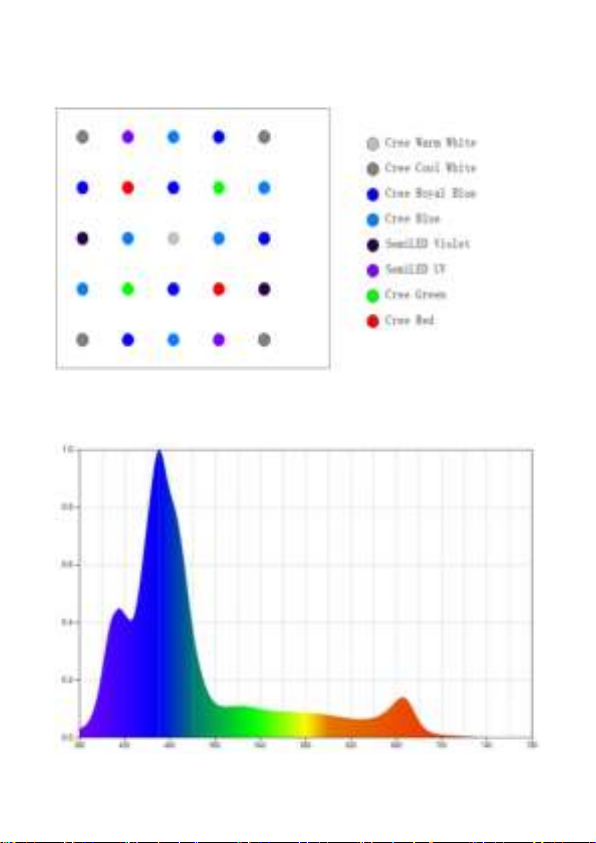
3. LED Diagram
AK-70
AL-120
AK-80, AL-90, AL-150, AL-200
4. LED Spectrum Diagram
5. Product Installation
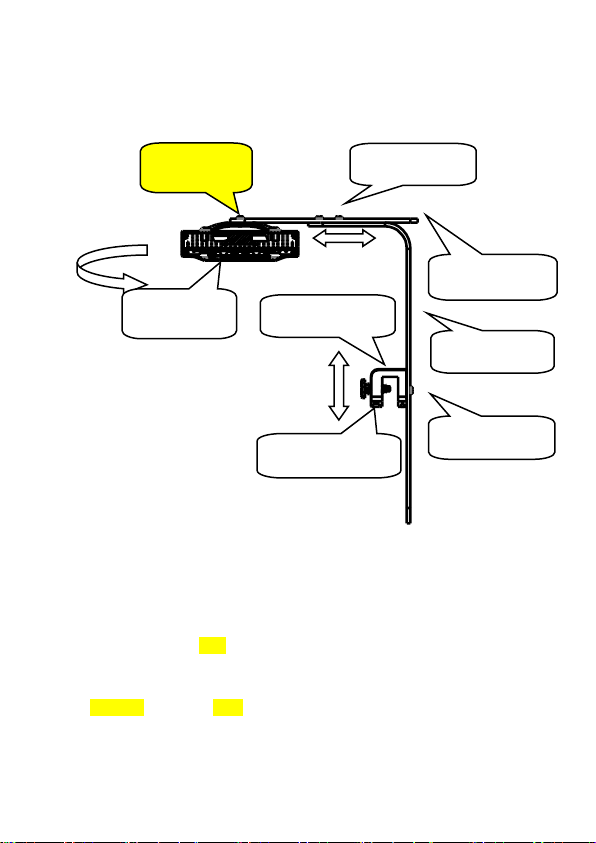
5.1. AL-90,AL120,AL-150,AL-200
Installation Steps:
1) Connect the Bracket Part 1 and the Mounting Base with the Bracket
Screw.
2) Fix the Mounting base to the tank with Clamping Screw.
3) Connect Bracket Part 1 and Bracket Part 2 with the Bracket Screw.
4) Attached the Light body to the Bracket Part 2 and fix it by tighten the
Light Screw
Clamping Screw
Mounting Base
Bracket Screw
Bracket Part 1
Bracket Screw
Bracket Part 2
Light body
Light Screw

5.2 AK-70, AK-80
Installation Steps:
1) Connect the Bracket Part 1 and the Mounting Base with the Bracket Screw.
2) Fix the Mounting base to the tank with Clamping Screw.
3) Connect Bracket Part 1 and Bracket Part 2 with the Bracket Screw.
4) Attached the Light body to the Bracket Part 2 and fix it by tighten the Light
Screw.
Light body
Clamping Screw
Mounting Base
Bracket Screw
Bracket Part 1
Bracket Part 2
Light Screw
Bracket Screw
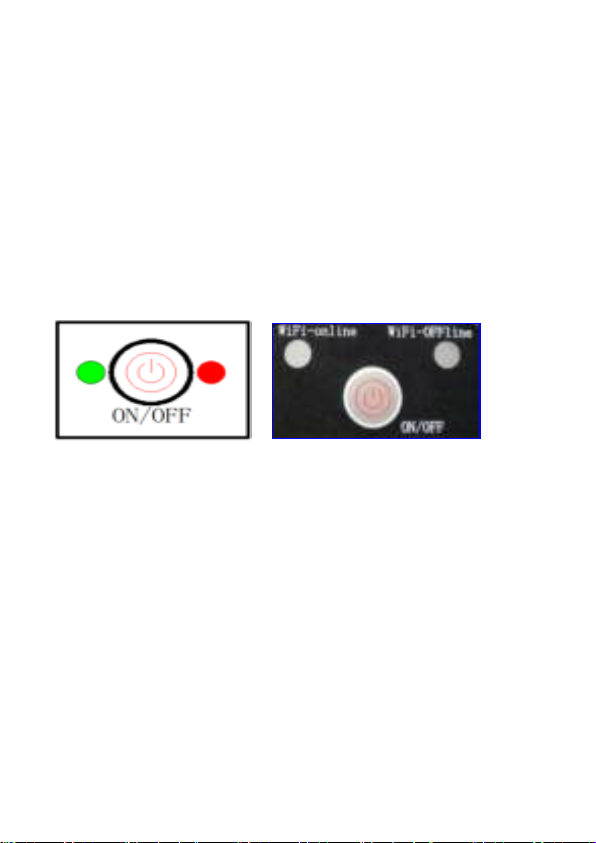
6. Wi-Fi Indication Light and ON/OFF Button
AK-70, AK-80
AK Series: Wi-Fi Indication Light is located in the lower front part of the light
seen as a white spot. On/Off Button is located on the opposite side of the Wi-Fi
indication light on the upper part of the light as seen as a transparent button.
AL Series:
AL90 AL120, AL150, AL200
6.1 Explanation of Wi-Fi Indication Light
A. Wi-Fi indication light flashing alternately in green and red while the light is
on smart configuration mode.
B. Wi-Fi indication light is flashing simultaneously in green and red while the
light is on AP configuration mode.
C. Wi-Fi indication light is green when the light is connected to the cloud server.
D. Wi-Fi indication light is red when the light is connected to the router but not
connected to the cloud server.

6.2 Instruction
1) Press ON/OFF Button to turn on or off the light, or adjust brightness
manually. The brightness changes from 0%-10%-25%-50%-80%-100%
each time.
2) Press Wi-Fi button for about 5 seconds and the Wi-Fi indication light starts
flashing alternately in green and red. The light is into smart configuration
mode.
3) Press Wi-Fi button for about 10 seconds and the Wi-Fi indication light
starts flashing simultaneously in green and red. The light is into AP
configuration mode.
4) The Wi-Fi indication light is green color when connection is successful.

7. APP Download and Instruction
7.1 Download
The APP, named “Jebao Aqua”, is available in App Store for
IOS system users and Google Play for Android system users to
download. The User can search Jebao Aqua in either App Store or
Google Play to download the application. Alternately user may
scan the barcode on the package or user’s manual to download the
application. (Note: Scan function in certain countries or areas may
not be able to read the barcode properly.)
IOS system
1, APP Store download
Please search” Jebao Aqua” name, then download theAPP
2, Please scan the below barcode to download

Android System
1, Application market download
People can download the “ Jebao Aqua” APP in Google
play and PP Assistant
2, Scan the below barcode and download the APP
PS: APP may have difference from the instruction due to the
upgrade. Please see the APP as the final version. Scan function in
certain countries or areas may not be able to read the barcode
properly.

7.2 User registration, login and password reset
7.2.1 Account registration
Login Page
①Open Jebao Aqua App and tap Create new account.
②Fill in the information as required and tap Create account;
③After registration, return to the login page and enter the
account and password to log in.
Note: Phone number registration is valid for mainland China only.
7.2.2 Reset Password

Tap Forget Password on the login page. Enter your email address
and tap Send link. Check your email and follow the instructions to
reset your password.
7.3 APP Instructions
7.3.1. Main page
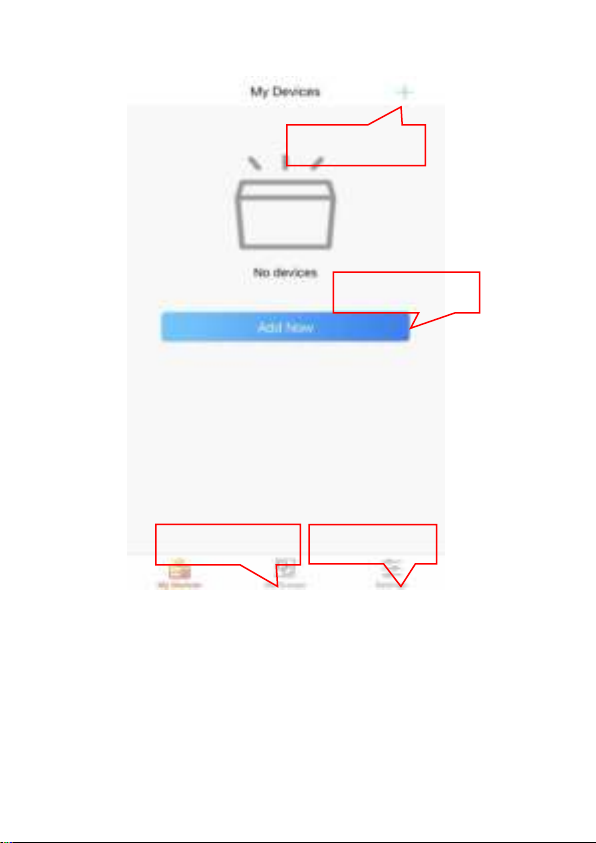
7.3.2 Add new light
Go to My Groups.
Go to Settings.
Add new devices.
Add new devices.

Tap Add Now or + sign on the upper right-hand side to add your
devices, tap Aqua lights (local).
Configuration mode: Make sure your phone is connected to 2.4G
band Wi-Fi before configuration. There are two types of
configuration modes, Smart configuration and AP configuration
Tap My Devices.

modes. Choose one mode to link your device.
①Smart Configuration:Press Wi-Fi button for about 5
seconds and the Wi-Fi indication light starts blinking
alternately in green and red. The Device is in smart
configuration mode.
Check Device is in smart configuration mode and tap Next to start
smart configuration.
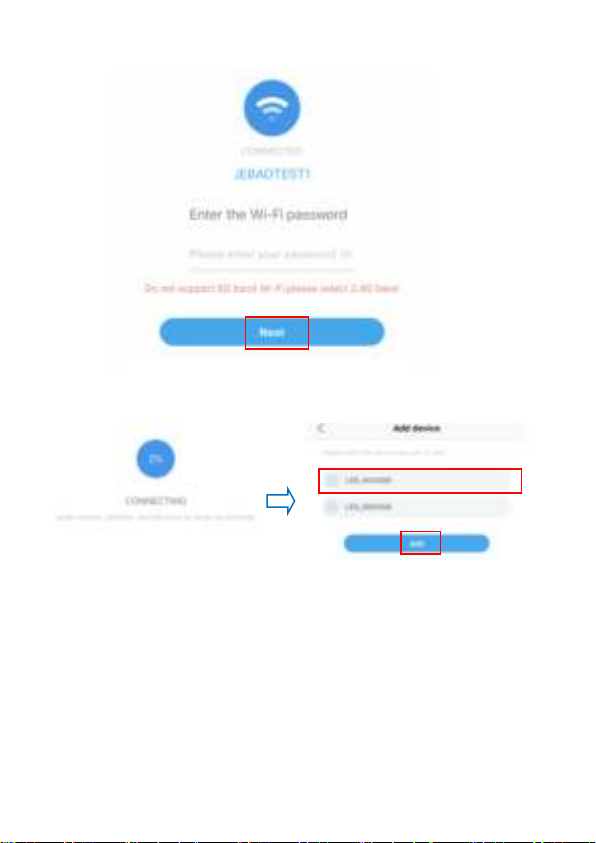
Follow the instructions. Enter Wi-Fi password and tap Next.
Make sure your device, phone, and router are as close as possible
during the configuration progress. The page will display all the
devices. Choose the device you want to add and tap on the device
name, then tap Add.
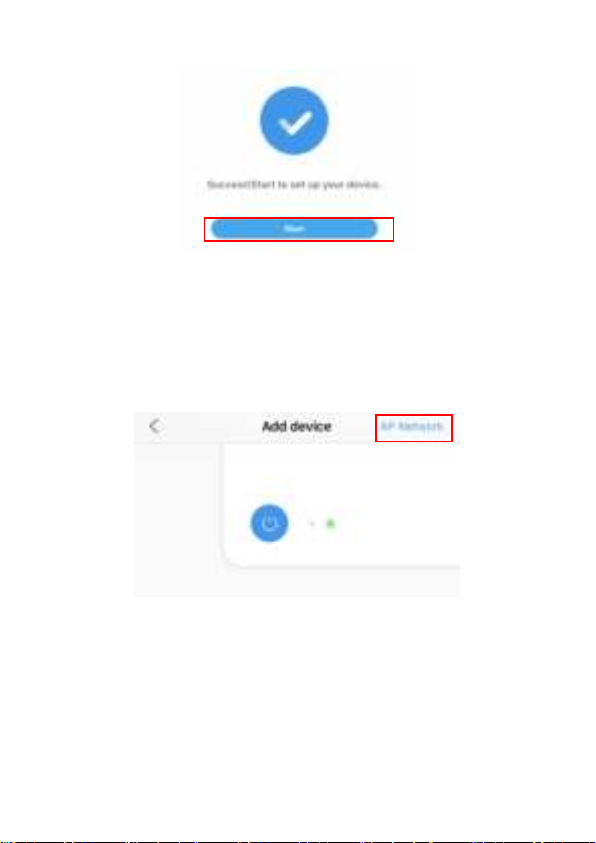
Tap Start to start using your device.
②AP distribution network:Press Wi-Fi button for about
10 seconds and green and red light starts blinking simultaneously.
The Device is in AP configuration mode.
Tap AP Network in the upper right corner of add device page to
enter into AP configuration.

Check Device is in AP configuration mode and tap Next.
Enter the Wi-Fi password and tap Next.

Note: Due to different operating systems, IOS and Android will
operate differently in the following details.
A. IOS: After entering the Wi-Fi password, you need to manually
switch the Wi-Fi of the phone to "Jebao_WiFi-xxxx", the specific
operation is as follows.
Tap Go to settings.
This manual suits for next models
1
Table of contents


