manuals.online logo
Brands
  1. Home
  2. •
  3. Brands
  4. •
  5. Jenn-Air
  6. •
  7. Oven
  8. •
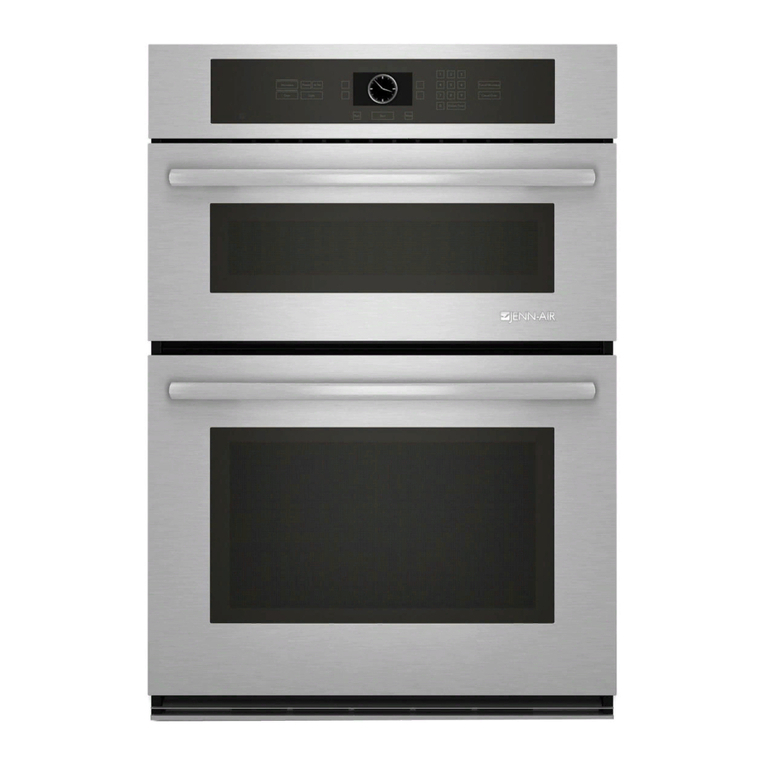
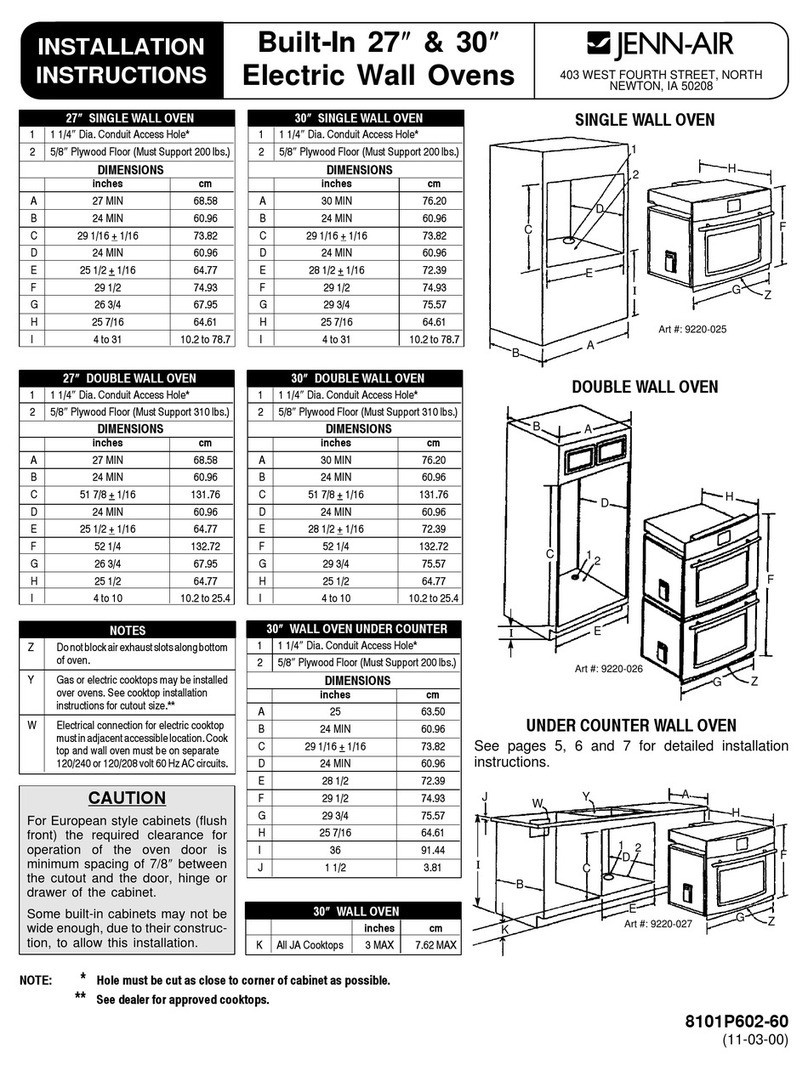
  9. Jenn-Air 209630 User manual

Jenn-Air 209630 User manual

Other Jenn-Air Oven manuals

Jenn-Air Pro-Style PRD3030 User manual

Jenn-Air

Jenn-Air Pro-Style PRD3030 User manual

Jenn-Air JMW2430D User manual

Jenn-Air

Jenn-Air JMW2430D User manual

Jenn-Air JJW3430LM01 User manual

Jenn-Air

Jenn-Air JJW3430LM01 User manual

Jenn-Air SU146 User manual

Jenn-Air

Jenn-Air SU146 User manual

Jenn-Air ProStyle JJW9830DDP User manual

Jenn-Air

Jenn-Air ProStyle JJW9830DDP User manual

Jenn-Air WM27160 User manual

Jenn-Air

Jenn-Air WM27160 User manual

Jenn-Air JIVR /8530 User manual

Jenn-Air

Jenn-Air JIVR /8530 User manual

Jenn-Air JJW9527 Guide User manual

Jenn-Air

Jenn-Air JJW9527 Guide User manual

Jenn-Air JMW2427WB00 User manual

Jenn-Air

Jenn-Air JMW2427WB00 User manual

Jenn-Air EXPRESSIONS W27400 User manual

Jenn-Air

Jenn-Air EXPRESSIONS W27400 User manual

Jenn-Air SVD48600P User manual

Jenn-Air

Jenn-Air SVD48600P User manual

Jenn-Air W2451 User manual

Jenn-Air

Jenn-Air W2451 User manual

Jenn-Air JBS7524BS User manual

Jenn-Air

Jenn-Air JBS7524BS User manual

Jenn-Air JMW3430DS User manual

Jenn-Air

Jenn-Air JMW3430DS User manual

Jenn-Air JJW8630DDQ User manual

Jenn-Air

Jenn-Air JJW8630DDQ User manual

Jenn-Air JJW8630DDQ User manual

Jenn-Air

Jenn-Air JJW8630DDQ User manual

Jenn-Air JJW2827DS User manual

Jenn-Air

Jenn-Air JJW2827DS User manual

Jenn-Air JJW7530DDB19 User manual

Jenn-Air

Jenn-Air JJW7530DDB19 User manual

Jenn-Air W30100 User manual

Jenn-Air

Jenn-Air W30100 User manual

Jenn-Air JGW9130ADW User manual

Jenn-Air

Jenn-Air JGW9130ADW User manual

Jenn-Air ELECTRIC WALL OVEN User manual

Jenn-Air

Jenn-Air ELECTRIC WALL OVEN User manual

Jenn-Air JJW8127 User manual

Jenn-Air

Jenn-Air JJW8127 User manual

Jenn-Air JGW8130 User manual

Jenn-Air

Jenn-Air JGW8130 User manual

Jenn-Air JJW8530DDS User manual

Jenn-Air

Jenn-Air JJW8530DDS User manual

Popular Oven manuals by other brands

Brandt FC 222 user manual

Brandt

Brandt FC 222 user manual

aumate TOA20M04N-1E instruction manual

aumate

aumate TOA20M04N-1E instruction manual

Maytag CWE4100AC - 24" Single Electric Wall Oven Dimension Guide

Maytag

Maytag CWE4100AC - 24" Single Electric Wall Oven Dimension Guide

Kernau KBO 1076 S PT B instruction manual

Kernau

Kernau KBO 1076 S PT B instruction manual

Bosch HB 37 N Series User manual and installation instructions

Bosch

Bosch HB 37 N Series User manual and installation instructions

Electrolux EOD5420AA user manual

Electrolux

Electrolux EOD5420AA user manual

Mx Onda MX-HC2183 instruction manual

Mx Onda

Mx Onda MX-HC2183 instruction manual

Daewoo F6EV19SM2 Service manual

Daewoo

Daewoo F6EV19SM2 Service manual

Blodgett MT3870 Specifications

Blodgett

Blodgett MT3870 Specifications

GE ZET2F owner's manual

GE

GE ZET2F owner's manual

GE JK3000DF3WW owner's manual

GE

GE JK3000DF3WW owner's manual

eka EKF 523 NT Operating and instruction manual

eka

eka EKF 523 NT Operating and instruction manual

AEG Electrolux E3191-5 user manual

AEG Electrolux

AEG Electrolux E3191-5 user manual

Pratica Rocket Express quick start guide

Pratica

Pratica Rocket Express quick start guide

Viking Professional VGSO260T user guide

Viking

Viking Professional VGSO260T user guide

FM RX203 instruction manual

FM

FM RX203 instruction manual

Bosch HBN331 9B Series instruction manual

Bosch

Bosch HBN331 9B Series instruction manual

NEFF B95M42N0MK Instructions for use

NEFF

NEFF B95M42N0MK Instructions for use

manuals.online logo
manuals.online logoBrands
  • About & Mission
  • Contact us
  • Privacy Policy
  • Terms and Conditions

Copyright 2025 Manuals.Online. All Rights Reserved.

I
i .......
__2 27"WALL OVEN DESCRIPTION 12 30" WALL OVEN DESCRIPTION ..........
+ , 1/4" Dim Conduit Access Hole*1 1/4" Dia Conduit Access Hole*
5/8" Plywood Floor (MustSupport 142lbs) 5/8" Plywood Fioor (Must Support 142lbs) ...........
DIMENSIONS DIMENSIONS
in cm incm
A 27 MIN 68.58 MIN A 30 MIN 76.20 MIN ..............
B 24 MIN 60.96 MIN B24 MIN 60.96 MIN
O 277/16±1/16 69.69 ±.16 C 277/16±1/16 69.69 ±.16
D 23 1/2 MIN 59.69 MIN D 23 1/2 MIN 59.69 MIN ..............
E 251/2±1/16 64.77 ±,16 E 283/16±1/16 71.60 ±.16
F 273/4 70.49 F 27 3/470.49 .........
G 26 3/4 67.95 G 293/4 75,57........
24 7/16 62.07 H 24 7/16 62.07
II4to3310.2to83,8 I 4to33 10.2 to83.8 .........
i
! ................
......!
iS........................
........................ i.....
' "Z
i ...........................
...............
• 1 1/4" Dia ConduitAccess Hole--*-- 1 1 1/4" DiaConduit Access Hole*
2 5/8" Plywood Floor (Must Support 250 Ibs) 2 5/8" Plywood Floor (Must Support 250 Ibs)
DIMENSIONS DIMENSIONS
...... in cm in cm
A 27 MIN 68.58 MIN A 30 MIN 76.20 MIN
B 24 MIN 60.96 MIN B 24 MIN 60.96 MIN
C 49 5/8 4-1/16 126.05 4-.16 C 49 5/84-1/16 126.05 ±.16
..... D 23 1/2 MIN 59.69 MIN D23 1/2 MIN 59,69 MIN
....... E 25 1/24-1/16 64.77 ±.16 E 283/16±1/16 71.60 ±.16
49 15/16 126.84 F 49 15/16 126.84
...... ; _{_E' 26 3/4 67,95 G 293/475.57
IJ24 7/16 62.07 H 24 7/16 62.07
............: _1_ 4 to 12 10.2to 30.5 [ 4 to 12 10.2to 30.5
................. :.................................................................................................................................................... ......................................
...................... _ ............... .................................................................
UNDERCOUNTER INSTALLATION
..........................................
.... _ ...... i .................
........................ i ..........................
!
27"WALL OVEN DESCRIPTION 30"WALL OVEN DESCRIPTION
1 1/4" Dia Conduit Access Hole*1 1 1/4" Dia ConduitAccess Hole*
5/8" Plywood Floor (Must Support 142 Ibs) 2 5/8" Plywood Ftoor (Must Support 142 [bs)
-i,,l
DIMENSIONS DIMENSIONS _-......
............ in cm incm
............ 2563.50 A 25 63.50
24 MIN 60.96 MIN B 24 MIN 60.96 MIN
...... 277/16 ±1/16 69.69 ±.16 C 27 7/16 ±1/16 69.69 ±.16
23 1/2 MIN 69.69 MIN D 23 1/2 MIN 59.69 MIN
25 1/2±1/1664.77±.16 E 28 3/16±1/16 71.60 ±.16
............ 27 3/4 70.49F27 3/4 70.49
26 3/4 67.95 G 29 3/4 67.95
.......... 247/16 62.07 H 24 7/16 62.07
........ : 36 91.44I 36 91.44
1 1/2MIN 3.81 MIN J 1 1/2 MIN 3.81 MIN
NOTES NOTES
............. DO not blockair intake slots alongbottom Z Do not block air intake slots along bottom
of oven ofoven
........ Gasor electric cooktopsmay beinstalled overYGas or electric cooktops maybeinstalledover
ovens.See cook'top installationinstructions forovens. See cook'topinstallation instructionsfor
cutout size.cutout size.
Electrical connection for electric cooktop must be W Electrical connection for electriccook'top mustbe
in adjacent accessiblelocation. Cooktop and inadjacent accessible location. Cooktop and
..... _ wall ovenmust be on separate 120/240 or 120/wall oven must be onseparate 120/240 or120/
208 volt 60 HzAC circuits. 208 volt 60 HzAC circuits.
__** JENN-AIR 27" WALL OVEN .30"WALL OVEN ....
COOKTOPS in cmin cm
K 4 Burner Gas 2 7/8 MIN 7.3 MIN -2 1/8 MiN 5.4 MIN
ii
K Electric 31/8 MIN 7.9 MIN 31/8 MIN 7.9 MIN
Hole must becut as close to comer of cabinet aspossible.
See Dealer for approved cooktops....
............. )9/R1
ElectricalConnections
Unit to be properlycircuitprotected and wired accordingto
local electrical code and National Electrical Code.
hookuFC. _It is advisable that the electrical wiring and "'_
accomplished by a competent electrician.
120/240 VAC or 120/208 VAC 60 Hz. See serial plate on
front of unit for power requirements.
1. Cut holein cabinet to mount oven. Cutout in cabinet Theneutral of this unitis grounded to theframethrough the
should be level and straight,green or solid grounding wire. (The green and the white
wires are twisted together at the termination of the conduit.)
Note: Thereare no provisions to level the unit after it is If local conditions do not permit grounding of the neutral,
installed.An oven that is not level could cause untwistthe greenwireand connectthe green wireto ground
poor baking results, in accordancewith local codes.Connect the whiteneutral
to the service neutral.
2.Install plywood floor as shown above.The chart below recommended theminimum circuit
3. Attach unit to the cabinet with four No. 8xl/2" screws protection and wire size if the appliance is the only unit on
supplied with unit inside of envelope containing these the circuit.
instructions. Pre-drill holes in cabinet for attachment
screwsusing 1/8" drill. Ovenmounting holesare
provided in side trim. RECOMMENDEDMINIMUM
K.W,RATING CIRCUITPROTECTIONWlRESIZE
4. See instructionsbelow for electrical hook-up. ONSER_LPLATE IN_PERS (AWG)
0- 4.820 12_'_
5 =.e User's Manualfor operating instructions.4.9- 6.930 10
7.0- 9.9 40 8
10.0-11.9508
Installing Bottom Trim Piece 12,0-14.9 60 6
Service
Interruptthesourceofelectricityto the unitwhen attempting
to repairor service the oven.Failureto dothis couldresult
in a dangerous or even fatal shock.
IMPORTANT-SAVE FOR LOCALELECTRICALINSPECTOR'SUSE
PartNo,209630A