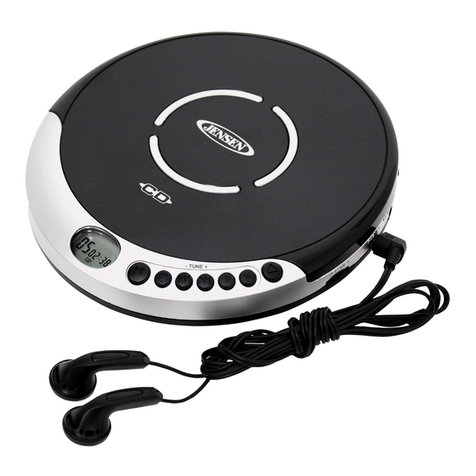
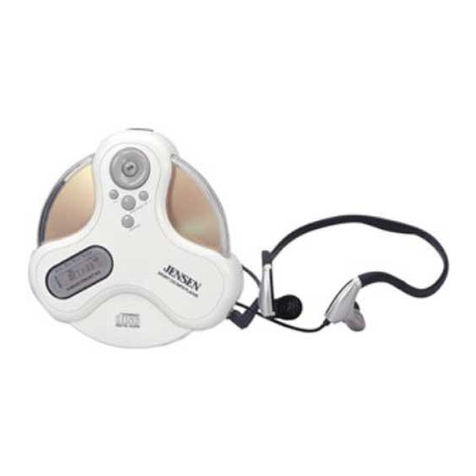
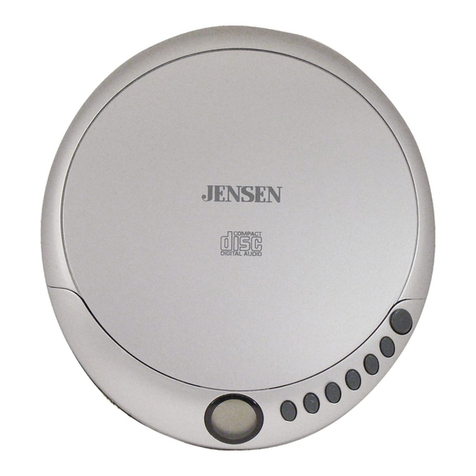
Jensen CD-26 User manual

MODEL CD- 26
PERSONAL CD PLAYER
INSTRUCTION MANUAL
DEAR JENSEN CUSTOMER
Selecting fine audio equipment such as the unit you've just purchased is only
the start of your musical enjoyment. Now it's time to consider how you can
maximize the fun and excitement your equipment offers. This manufacturer and
the Electronic Industries Association's Consumer Electronics Group want you to
get the most out of your equipment by playing it at a safe level. One that lets
the sound come through loud and clear without annoying blaring or distortion
and, most importantly, without affecting your sensitive hearing.
Sound can be deceiving. Over time your hearing "comfort level" adapts to
higher volumes of sound. So what sounds "normal" can actually be loud and
harmful to your hearing. Guard against this by setting your equipment at a safe
level BEFORE your hearing adapts.
To establish a safe level:
•Start your volume control at a low setting.
•Slowly increase the sound until you can hear it comfortably and clearly, and
without distortion.
Once you have established a comfortable sound level:
•Set the dial and leave it there.
Taking a minute to do this now will help to prevent hearing damage or loss in
the future. After all, we want you listening for a lifetime.
We Want You Listening For a Lifetime
Used wisely, your new sound equipment will provide a lifetime of fun and
enjoyment. Since hearing damage from loud noise is often undetectable until it
is too late, this manufacturer and the Electronic Industries Association's
Consumer Electronics Group recommend you avoid prolonged exposure to
excessive noise.
Customer's Record:
The serial number of this product is found on its bottom cover. You should note
the serial number of this unit in the space provided as a permanent record of
your purchase to aid in identification in the event of theft of loss.
Model Number: CD-26
Serial Number: ____________________
Please read this Instruction Manual carefully before
using the unit and retain it for future reference
EN-1

CLASS 1 LASER PRODUCT
SAFETY PRECAUTIONS
1. As the laser beam used in this compact disc player is harmful to the eyes, do
not attempt to disassemble the casing.
2. Stop operation immediately if any liquid or solid object should fall into the
cabinet. Unplug the unit and have it checked by qualified personnel.
3. Do not touch the lens or poke at it. If you do, you may damage the lens and
the player may not operate properly.
4. Do not put anything in the safety slot. If you do, the laser diode will be ON
when the lid is still opened.
5. If the unit is not to be used for a long period of time, make sure that all power
sources are disconnected from the unit. Remove all batteries from the battery
compartment, and unplug the AC adaptor from the wall outlet. Make it a
practice to remove the AC adaptor by grasping the main body and not by
pulling the cord.
6. This unit employs a laser. The use of controls or adjustment or performance of
procedures other than those specified herein may result in exposure to
hazardous radiation.
COMPLIANCE WITH FCC REGULATIONS
WARNING
This equipment has been tested and found to comply with the limits for a Class B
digital device, pursuant to Part 15 of the FCC Rules. These limits are designed to
provide reasonable protection against harmful Interference in a residential
installation. This equipment generates, uses and can radiate radio frequency
energy and, if not installed and used in accordance with the instructions,maycause
harmfulinterferencetoradiocommunications.However, there is no guarantee that
interference will not occur in a particular installation. If this equipment does cause
harmful interferenceto radioortelevisionreception, whichcan bedetermined by turning the
equipment off and on, the user is encouraged to try to correct the interference by
one or more of the following measures:
This product contains a low power laser device.
• Reorient or relocate the receiving antenna.
• Increase the separation between the equipment and receiver.
• Connect the equipment into an outlet on a circuit different from
that to which the receiver is connected.
• Consult the dealer or an experienced radio technician for help.
WARNING
Changes or modifications to this unit not expressly approved by the party
responsible for compliance could void the user’s authority to operate the
equipment.
1. This product does not contain a separate Power On / Off switch. After
inserting a disc and installing batteries / AC adaptor, simply press the Play
button to switch on and play a disc.
2. In order to maximize battery life and provide optimum playing time this product
incorporates an Auto Power Off function. The power to the player will
automatically switch off approximately 30 seconds after a disc has finished
playing or when the CD lid is opened.
IMPORTANT NOTE
CLASS 1 LASER PRODUCT
APPAREIL LASER DE CLASSE 1
PRODUCTO LASER DE CLASE 1
CAUTION
INVISIBLE LASER RADIATION
WHEN OPEN AND INTERLOCKS
DEFEATED.
AVOID EXPOSURE TO BEAM
EN-3
EN-2

1. SKIP/SEARCH DOWN Button 8. VOLUME - BUTTON
2. SKIP/SEARCH UP Button 9. VOLUME UP BUTTON
3. MODE BUTTON 10. OPEN BUTTON
4. PROG (PROGRAM) BUTTON 11. PHONE JACK
5. LCD DISPLAY 12. DC JACK
6. NIGHT LIGHT 13. BATTERY COMPARTMENT
7. STOP BUTTON (POWER OFF)
LOCATION OF CONTROLS POWER SOURCE
This CD player operates on two 1.5V DC ‘AA’ size (UM-3) alkaline batteries (not
included) or with anAC adaptor with an output of 4.5VDC/700mA (not included).
To install batteries into the player
1. Open the battery compartment cover located on bottom of cabinet.
2. Insert two 1.5V DC ‘AA’size (UM-3) alkaline batteries (not included) into the
Battery Compartment following the polarity markings as indicated on the
bottom cabinet.
3. Close the battery door and completely slide it back to its original position.
Battery care
i. Be sure that the batteries are installed correctly. Wrong polarity may
damage the unit.
ii. (a) Do not mix old and new batteries.
(b) Do not mix alkaline, standard (carbon-zinc) or rechargeable
(nickel-cadmium) batteries.
iii. If the unit is not to be used for an extended period of time, remove the
batteries. Old or leaking batteries can cause damage to the unit and
may void the warranty.
iv. Never attempt to charge “Non-rechargeable” batteries.
v. Do not dispose of batteries in fire, batteries may explode or leak.
Using an adaptor (not included) to power the player
1. Before connecting the adaptor to the player, make sure that the AC voltage of
the adaptor corresponds to your local AC outlet voltage. The polarity of the
adaptor must match to the polarity markings next to the DC jack on the player.
2. Plug the 4.5VDC/500mAAC-DC adaptor into an AC outlet.
3. Insert the DC plug into the jack on the player.
NOTE: When the adaptor is connected, the batteries will be automatically
disconnected and the player will now operate on the adaptors power.
Once the adaptor is unplugged the player will automatically switch to
back to battery power.
EN-4 EN-5

Connect the plug of the stereo earbuds (included) into the PHONES socket.
CAUTION
•AVOID EXCESSIVE VOLUME LEVELS FOR LONG PERIODS OF TIME
WHEN USING THE HEADPHONES. PROLONGED USE AT HIGH LEVELS
MAY IMPAIR YOUR HEARING.
•Do not use earphones while operating a motorized vehicle, as it
may create a traffic hazard and is illegal in many areas.
NOTE: This unit can also play 3 inch (8cm) single CDs without an adaptor. Do not
use a CD single adaptor for these smaller discs.
1. Press the CD LID OPEN button to release the CD lid.
2. Insert a disc with the label side facing up.
3. Close the CD Lid. A click will be heard when it locks into
place.
4. Press the PLAY/PAUSE button once to start playing.
5. The display will show the total number of tracks and
playing time. The player will then start playing the first track.
6. Adjust the volume by pressing the VOLUME +/- Buttons.
Locating a Particular Track
Locating a Particular Point in a Track
Note: Low level audio will be heard during the search process to assist in
locating the correct point in the track.
Turning Power On and Off
EARPHONES CONNECTION
BASIC OPERATION
To turn ON and OFF, press the following buttons after a disc is inserted into the
player.
To turn ON: Press PLAY/PAUSE button (playback starts)
To turn OFF : Press STOP button once for standby mode.
Press STOP button again to turn off the power.
Auto power-off function
When the unit is stopped (Standby mode) for approximately 30 seconds, the
power is automatically turned off.
To Remove the Disc
1. Press the CD LID OPEN button to open the CD compartment lid.
2. Hold the edge and gently press the center pivot as illustrated, then pick up the
disc.
CAUTION: WAIT FOR THE DISC TO STOP SPINNING BEFORE PRESSING
THE OPEN BUTTON.
LCD DISPLAY INFORMATION
When the button is pressed at initial start up
•The display will show “- -“ and then the total number of tracks and total playing
time. The disc will start playing and the display will show the first track number
and instant playing time.
•To review the total number of tracks and total playing time of the disc, press
the STOP button once.
To skip back to the beginning of the
current or a previous track Press once or repeatedly.
To skip to the beginning of following
tracks Press once or repeatedly.
To search back at a high speed Press & hold
To search forward at a high speed Press & hold
EN-7
EN-6

During PLAY mode
•The track number and instant playing time are displayed.
During PAUSE mode
•When the track playback is paused, the playing time flashes.
Battery Low Indicator
A flashing battery indicator flashes in the display when the batteries need to
be changed.
NORNAL PLAYBACK
The whole disc is played and the player will stop after the last track is finished.
Every time the MODE button is pressed, the corresponding mode appears
in the display window, in the following sequence:
REPEAT 1 In stop or playback mode press the MODE Button once.
REPEAT 1 When shown on the LCD display, the current track on the
disc will be repeated.
REPEAT ALL In stop or playback mode press the MODE Button twice.
REPEAT ALL When shown in the LCD display, all tracks on the disc will
be repeated.
To cancel the Repeat Function, press the MODE Button repeatedly until
“REPEAT1” or “REPEAT ALL” disappears.
INTRODUCTARY SCAN
To play the first 10 seconds of each track on the disc.
1. In STOP mode press the MODE button three times, “INTRO” is displayed.
2. Press button to start INTRO play from track number 01.
3. If INTRO mode is selected during play, INTRO will start flashing in the display.
•Press button. INTRO stops flashing and INTRO play starts from track 01.
•Press to start INTRO play from next track.
•Press to start INTRO play from current track.
•To cancel INTRO play, press again. Playback continues on current track.
RANDOM
Enables all the tracks on the disc to be played in a Random sequence.
1. In STOP mode press the MODE button four times, RANDOM Indicator,
“RANDOM”, will be displayed.
2. Press button. Atrack is selected at random and playback begins.
3. If RANDOM mode is selected during play, “RANDOM” will appear and flash in
the LCD Display.
VARIOUS PLAYBACK MODES
4. Press button once. “RANDOM” stops flashing and RANDOM
playback begins.
5. Press the MODE Button again to return to normal play mode.
Programs can be set in either the STOP or normal play mode.
PROGRAMMED PLAY
1. Press the PROG button once, PROG No. 01 appears.
PROG and Track No. 00 start flashing in the display.
2. Press or to select the desired track.
3. When the desired track is displayed, press the PROG button to register. The
PROG No. changes to 02. Track No. returns to 00 and flashes together with
PROG.
4. Repeat steps 2 and 3 to program more tracks.
Up to 20 tracks can be programmed into the memory.
5. Press to start the programmed play.
6. Normally all the programmed tracks will be played through once and then stop.
However, you may use the REPEAT function to repeatedly play a certain track
(Repeat 1) or all tracks in the program (Repeat All).
7. To erase the program, press the STOP Button twice.
EN-8 EN-9

Cleaning the Cabinet
Wipe with a soft cloth. If the cabinet is very dirty, dampen the cloth with a weak
solution of neutral detergent and water, and then wipe clean.
Cleaning the Lens
A dirty lens will cause sound skipping and, if the lens is very dirty, the CD may not
work. Never touch the lens with your finger or press down on the lens assembly.
Damage may occur or you may scratch the lens. Open the disc cover and clean
the lens as follows:
Dust or Dry Particles
Using a camera lens brush/blower, blow on the lens a couple of times, wipe it
lightly with the brush to remove dust. Then, blow on the lens once more.
Cleaning the Disc
When a disc becomes dirty, clean it with a
cleaning cloth. Wipe the disc from the
centre out.
Note
Do not use solvents such as benzene petrol, thinner, commercially available
cleaners or anti-static spray intended for analogue discs.
TROUBLESHOOTING GUIDE
PLAYER MAINTENANCE Should you experience difficulties in the use of this player please refer to the
following chart or call 1-800-777-5331 for Customer Service.
Problem Points to Check
Player fails to function
Disc may be inserted upside down
Disc not mounted correctly on chuck
Dirty or defective disc
Dirty pick up lens
Player lid not closed
Moisture/Condensation, allow player to warm up to
room temperature for 60 minutes
AC power to adaptor switched off
Weak batteries
Auto switch off has occurred
No sound from Headphones Headphone plug is not firmly inserted into the Phones
socket.
Intermittent sound
Dirty or defective disc
Dirty pick up lens
Player is subject to excessive vibration or shock
Low battery power
Poor Headphone connection
DISC CLEANING AND TROUBLESHOOTING GUIDE
EN-10 EN-11

90 DAY LIMITED WARRANTY AND SERVICE
VALID IN THE U.S.A ONLY
SPECTRA MERCHANDISING INTERNATIONAL, INC. warrants this unit to be free from
defective materials or factory workmanship for a period of 90 days from the date of original
customer purchase and provided the product is utilized within the U.S.A. This warranty is
not assignable or transferable. Our obligation under this warranty is the repair or
replacement of the defective unit or any part thereof, except batteries, when it is returned to
the SPECTRA Service Department, accompanied by proof of the date of original consumer
purchase, such as a duplicated copy of a sales receipt.
You must pay all shipping charges required to ship the product to SPECTRA for warranty
service. If the product is repaired or replaced under warranty, the return charges will be at
SPECTRA’s expense. There are no other express warranties other than those stated herein.
This warranty is valid only in accordance with the conditions set forth below:
1. The warranty applies to the SPECTRAproduct only while:
a. It remains in the possession of the original purchaser and proof of purchase is
demonstrated
b. It has not been subjected to accident, misuse, abuse, improper service, usage outside
the descriptions and warnings covered within the owner’s manual or non-SPECTRA
approved modifications
c. Claims are made within the warranty period
2. This warranty does not cover damage or equipment failure caused by electrical wiring
not in compliance with electrical codes or SPECTRA owner’s manual specifications, or
failure to provide reasonable care and necessary maintenance as outlined in the owner’s
manual.
3. Warranty of all SPECTRAproducts applies to residential use only and is void when
products are used in a nonresidential environment or installed outside the United States.
This warranty gives you specific legal rights, and you may also have other rights which vary
from state to state. TO OBTAIN SERVICE please remove all batteries (if any) and pack the
unit carefully and send it prepaid by insured parcel post or UPS to SPECTRA at the
address shown below. IF THE UNIT IS RETURNED WITHIN THE WARRANTY PERIOD
shown above, please include a proof of purchase (dated cash register receipt) so that we
may establish your eligibility for warranty service and repair of the unit without cost. Also
include a note with a description explaining how the unit is defective. Acustomer service
representative may need to contact you regarding the status of your repair, so include your
name, address, phone number and e-mail address to speed the process.
IF THE UNIT IS OUTSIDE THE WARRANTY PERIOD, please include a check for $8.00 to
cover the cost of repair, handling and return postage. All out of warranty returns must be
sent prepaid.
It is recommended that you contact SPECTRA first at 1-800-777-5331 or by e-mail at
the model you have may be discontinued and SPECTRA reserves the right to offer
alternative options for repair or replacement.
To register your product, visit the link below on the website to enter your information.
Printed In China
SPECTRA MERCHANDISING INTERNATIONAL, INC.
EN-12 EN-13
http://www.spectraintl.com/wform.htm
4230 North Normandy Avenue,
Chicago, IL60634, USA.
1-800-777-5331
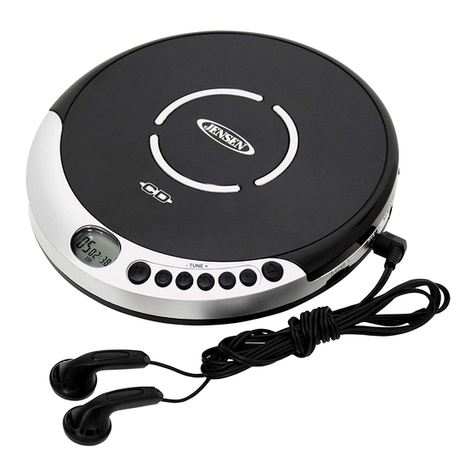
Table of contents
Other Jensen CD Player manuals

Jensen
Jensen MP5000 - GUIDE User manual

Jensen
Jensen MCD5070 User manual

Jensen
Jensen XCH 6RF Instruction sheet

Jensen
Jensen JBS-500 User manual

Jensen
Jensen CD615X User manual

Jensen
Jensen CD-476 User manual

Jensen
Jensen CD-560 User manual

Jensen
Jensen CD-600 User manual

Jensen
Jensen JMC-670 User manual

Jensen
Jensen JMC-326 User manual

Jensen
Jensen CD-60C User manual

Jensen
Jensen XCH 6RF User manual

Jensen
Jensen CD-470C User manual

Jensen
Jensen CD-470A User manual

Jensen
Jensen CD-472 User manual

Jensen
Jensen RF10DC Operating instructions

Jensen
Jensen CD-475 User manual

Jensen
Jensen CD-575 User manual

Jensen
Jensen CD-470 User manual

Jensen
Jensen CD-490 User manual