Jet SPACE BALLZ User manual

Fax Number: 1-386-255-1589
SPACE BALLZ SERVICE MANUAL
Toll Free Number: 1-877-5JET-CORP
Service Email: Service@JennisonGames.com
Phone Number: 1-386-255-1599
www.JENNISONGAMES.com
For Additional Information or for an Electronic Copy of This Manual Visit Our Website
Jennison Entertainment Technologies Corporation
822 South Nova Road •Daytona Beach, Florida 32114 •U.S.A.
VERSION 1.0

TABLE OF CONTENTS
14
Warnings, Cautions, & Notices
FCC Compliance
10
11
12
Electrical Requirements
Installation Instructions
7
8
9
RoHS Compliance
Cabinet Dimensions
4
43
Main Board Inputs
49
45
Page
Section
Page
42
Safety Notifications
Epilepsy Warning
13
4
2
3
41
Table of Contents
Section
46
State of New Jersey Software
47
Adjusting the Payout Percentages
48
44
44
42
43
Installing the Vertical Riser
Preparing the balls
Powering the Unit On
Entering the Software
15
Changing Cost Per Credit
Changing Cost Per Ticket
Setting Credits Required
Setting Mercy Tickets
Setting Game Score Values
Setting Bonus Score Values
Setting System Pass code
Changing # of Balls Per Play
Changing # of Balls Per Credit
Changing # of Balls Per Bonus
37
39
40
40
40
41
34
35
36
37
Program Setup
Checking the Software Version
Viewing Audit Information
Resetting Audit Information
16
20
21
22
24
24
28
29
Adjusting the Volume
Exiting the Software
Main Board Outputs
51
Additional Input / Output Charts
53
Troubleshooting Guide
54
31
Inspecting for Shipping Damage
Removing Units From Crates
Properly Lifting Units From Crate
Preparing Section # 3
Lifting Section # 3
Attaching section # 3
Preparing section # 4
Lifting Section # 4
Attaching Section # 4
Connecting Electrical Wires
Connecting the Speaker Wires
Attaching the Control Center
Jennison Entertainment Technologies Space Ballz Service Manual Page 2

SAFETY NOTIFICATIONS
Through out the use of this manual, certain areas require special attention for the
safety of the service personal. Please take note of the following notifications and
be certain to read the information contained within. Failure to follow the given
information could lead to personal injury or property damage. Follow all
instructions contained within this manual and do not make any modifications to
the game without first contacting Jennison Entertainment Technologies.
ATTENTION
Attention boxes are in BLUE. These messages are provided in
cases where service personal must follow directions provided
by J.E.T.
NOTICE
Notices are given in GREEN boxes. These messages are
provided for the operator's convenience.
CAUTION
Caution messages are marked in YELLOW boxes. Failure to
follow these caution messages could result in damaging the
unit.
WARNING
All warnings will be marked in ORANGE boxes. Failure to
follow these warnings could lead to damage to the unit and or
personal property.
DANGER
All danger messages are marked in RED boxes. Failure to
adhere to these messages could result in personal injury or
injury to others.
Jennison Entertainment Technologies Space Ballz Service Manual Page 3

If you or any of your relatives have a history of seizures or epilepsy,
consult a doctor before playing.
A very small percentage of people may experience a seizure when
exposed to certain visual images, including flashing lights or patterns that
may appear in video games. Even people who have no history of seizures
or epilepsy may have an undiagnosed condition that can cause these
"photosensitive epileptic seizures" while watching video games.
These seizures may have a variety of symptoms, including
lightheadedness, altered vision, eye or face twitching, jerking or shaking of
arms or legs, disorientation, confusion, or momentary loss of awareness.
Seizures may also cause loss of consciousness or convulsions that can lead
to injury from falling down or striking nearby objects.
Immediately stop playing and consult a doctor if you experience any of
these symptoms. Parents should watch for or ask their children about the
above symptoms - children and teenagers are more likely than adults to
experience these seizures.
The risk of photosensitive epileptic seizures may be reduced by taking the
following precautions:
Play in a well-lit room
Do not play when you are drowsy or fatigued
EPILEPSY DANGER
EPILEPSY WARNING
Jennison Entertainment Technologies Space Ballz Service Manual Page 4

DO NOT attempt to assemble Space Ballz without another
adult to assist in the assembly. J.E.T. recommends at least
three people for assembly.
DANGER
DO NOT move the game without the help of another adult.
Only pull on the main cabinet while moving. Never attempt to
move the game with the control cabinet.
DO NOT attempt to remove or modify the rear door safety
switch. The switch is designed to protect you from moving
parts should you need access to the back.
DANGER
DO NOT remove the game from its shipping pallet or skid
without first reading the entire installation guide in this
manual!
DANGER
DO NOT remove the front cabinet glass without first reading
the removal instructions. Do not attempt to remove the glass
without at least two people.
DANGER
SPACE BALLZ SAFETY, CAUTIONS, & NOTICES
DANGER
DO NOT perform repairs or maintenance on the game with
the power ON. Always turn the power OFF and unplug the
unit from the wall before servicing.
DANGER
Jennison Entertainment Technologies Space Ballz Service Manual Page 5

This unit is suitable for INDOOR use only. The should not be
placed in damp environments or in areas within close
proximity to the ocean.
WARNING
CAUTION
Only qualified service personal should service Space Ballz.
Contact J.E.T. first with any questions before replacing any
part.
WARNING
If the power cord is damaged - replace it with a new one. DO
NOT attempt to use a damaged or repaired power cord.
WARNING
Always plug the game into a grounded circuit and verify the
total voltage draw on the circuit does not exceed its capacity.
CAUTION
Use appropriate care when servicing the game and ensure
that all removed components are away from facility guests
and children.
SPACE BALLZ SAFETY, CAUTIONS, & NOTICES
Set the 115/230 VAC selector switch on all power supplies for
the correct line voltage at the installation site. Check that all
power supplies, fans, and fluorescent lamps are rated for the
same line voltage.
WARNING
Jennison Entertainment Technologies Space Ballz Service Manual Page 6

FCC COMPLIANCE
The Federal Communications Commission requires that all amusement
machine devices used in commercial applications comply with guidelines
for the amount of interference the internal components produce. Space
Ballz complies with this requirement and the following statement is
posted on all units.
This equipment has been tested and found to comply with the limits for a
Class “A” digital device, pursuant to Part 15 of the FCC rules. These limits are
designed to provide reasonable protection against harmful interference
when the equipment is operated in a commercial environment.
Canadian Emissions Statement
(According to Industry Canada Notice ICES-003, Issue 4)
This Class “A” digital apparatus meets all requirements of the
Canadian Interference-Causing Equipment Regulations.
Cet appareil numérique da la classe “A” respecte toutes les
exigences du Réglement sur le matériel brouilleur du Canada.
Jennison Entertainment Technologies Space Ballz Service Manual Page 7

RoHS COMPLIANCE
The RoHS Directive stands for "the restriction of the use of certain hazardous substances in electrical and
electronic equipment". This Directive bans the placing on the European Union market, new electrical and
electronic equipment containing more than agreed levels of lead, cadmium, mercury, hexavalent chromium,
polybrominated biphenyl (PBB) and polybrominated diphenyl ether (PBDE) flame retardants.
Jennison Entertainment Technologies has taken steps to comply with this directive while sourcing the parts
for all machines. If available to the industry, these certified components were used in the construction on
Space Ballz.
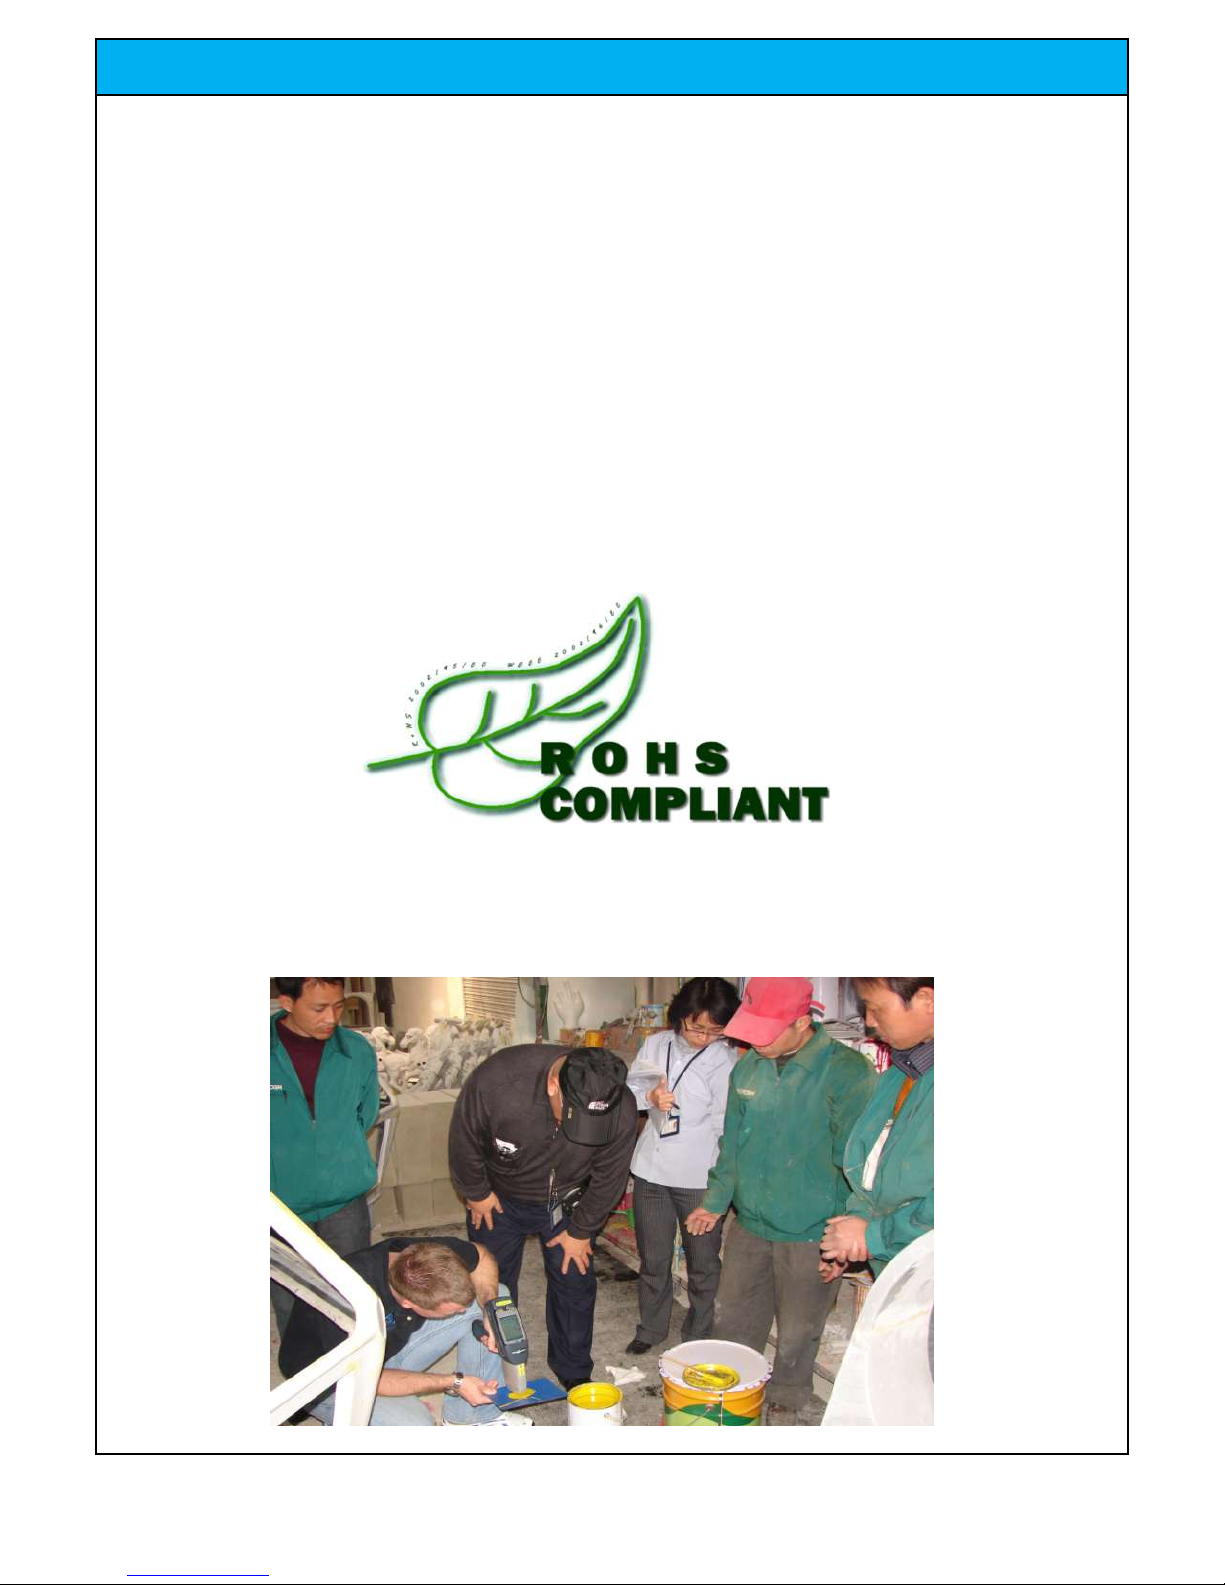
As of January 2011, Jennison Entertainment Technologies has tested all components used in the
manufacturing of Space Ballz™. All components have been found to be within the standards set forth for
RoHS compliance by the European Union. Test reports are available and will be provided upon request.
To verify that your machine has RoHS Compliant parts, look for the following logo on the information sticker
on the back of all our units.
With our unique testing equipment, Jennison Entertainment Technologies can test components from ANY
SUPPLIER from ANY COUNTRY where we source our parts. The tools we utilize allow us to spot check
suppliers who have also self declared their components to be compliant ensuring you and your guests
safety.
Jennison Entertainment Technologies Space Ballz Service Manual Page 8

DIMENSION INFORMATION
WEIGHT
HEIGHT
WIDTH
LENGHTH
SPACE BALLZ CABINET DIMENSIONS
INCHES
MM
INCHES
MM
INCHES
MM
POUNDS
KG
56"
1423
57"
1448
102"
2591
1200
1219
85"
2159
1000
454
SPACE BALLZ SHIPPING DIMENSIONS - SKID # 2
544
SPACE BALLZ SHIPPING DIMENSIONS - SKID # 1
LENGHTH
WIDTH
HEIGHT
WEIGHT
INCHES
MM
INCHES
MM
INCHES
MM
POUNDS
KG
DANGER
DO NOT ALLOW ANYONE TO GET UNDER THE UNIT WHILE IT
IS BEING LIFTED. NOTE THAT THE CABINET GLASS IS NOT
SECURED TO THE MACHNIE
96"
2439
48"
1219
60"
1524
800
363
Space Ballz ships on two 4' x 8' skids. The main cabinet ships on one and the control center, top section # 3,
and top section # 4 ship on the other. The skid that the main cabinet is on has been designed so that a
forklift can lift the unit off. There is enough clearance under the game, where forks can comfortable fit. We
do NOT recommend removing this game from the skid without the use of a forklift! The front glass is not
secured to the cabinet. Be sure to hold this while removing the unit!
LENGHTH
WIDTH
HEIGHT
WEIGHT
INCHES
MM
INCHES
MM
INCHES
MM
POUNDS
KG
96"
2439
48"
Jennison Entertainment Technologies Space Ballz Service Manual Page 9

ELECTRICAL REQUIREMENTS
SPACE BALLZ ELECTRICAL REQUIREMENTS
VOLTS
HERTZ
AMPS
DOMESTIC POWER REQUIREMENTS
FOREIGN POWER REQUIREMENTS
120 VAC
250 VAC
60 HZ
50 HZ
6.0 AMPS (MAX)
2.5 AMPS (MAX)
DANGER
DO NOT OVERLOAD ANY CIRCUIT WITH THE ADDITION OF
SPACE BALLZ. ENSURE THAT THE OUTLET HAS PROPER
VOLTAGE BEFORE TURNING ON THE UNIT
DANGER
IF YOU CHOOSE TO CONVERT YOUR UNIT TO A DIFFERENT
LINE VOLTAGE THAT IT WAS AT INITIAL TIME OF DELIVERY,
YOU MUST CHANGE THE FLUORESCENT LIGHTING AND ALL
FANS. YOU MUST ALSO SELECT THE NEW INPUT AC
VOLTAGE ON ALL POWER SUPPLIES
Jennison Entertainment Technologies Space Ballz Service Manual Page 10

THIS INSTALLATION MANUAL HAS BEEN DESIGNED IN COLOR COORDINATED SECTIONS. EACH COLOR HAS
A DIFFERENT MEANING AS SEEN IN THE FOLLOWING CHART. FAILURE TO FOLLOW THIS MANUAL IN ITS
ENTIRITY COULD LEAD TO SERIOUS BODILY INJURY. IF THERE IS ANY DOUBT DURING THE INSTALLATION OF
THIS UNIT - CONTACT JENNISON ENTERTAINMENT TECHNOLOGIES OR YOUR DISTRIBUTOR PRIOR TO
CONTINUING. NEITHER J.E.T. OR YOUR DISTRIBUTOR IS RESPONSIBLE FOR ANY DAMAGE CAUSED DURING
IMPROPER INSTALLATION PROCEDURES.
RED SECTIONS
RED SECTION AREAS REQUIRE 2 OR MOR PEOPLE MINIMUM TO SAFELY COMPLETE - EACH
PERSON SHOULD BE ABLE TO LIFT 170 POUNDS EASILY. THESE SECTIONS SHOULD NEVER BE
ATTEMPTED TO BE COMPLETED BY LESS THAN 2 PEOPLE.
YELLOW SECTIONS
YELLOW SECTION AREAS REQUIRE CAUTION TO SAFELY COMPLETE.
BLUE SECTIONS
BLUE SECTION AREAS CAN BE SAFELY COMPLETED BY ONE PERSON WORKING BY
THEMSELVES. THE INSTALLAER SHOULD STILL EXERCISE CAUTION WHEN WORKING AROUND
GUESTS.
THOUGHOUT THE TEXT IN THIS MANUAL - THERE ARE SEVERAL REFERENCES TO SECTION NUMBERS. THE
ABOVE DIAGRAM SHOULD BE REFERENCED DURING INSTALLATION IN ORDER TO DETERMINE WHAT
SECTION THE INSTRUCTIONS ARE REFERENCING.
INSTALLATION
Main Body
Section # 2
Upper Monitor
Section # 4
Upper Claw
Section # 3
Control Center
Section # 1
Jennison Entertainment Technologies Space Ballz Service Manual Page 11

INSTALLATION INSTRUCTIONS
NOTICE
PACKAGING AND PALLET MAY BE DIFFERENT THAN
SEEN IN PHOTO
Check Box When This Step is Complete
Step # 1
Inspect the main cabinet for shipping damage
Inspect the game packaging for any damage during shipment. Please
note that you must notate any damage to the equipment on the Bill
of Lading during the delivery process. Any claims for damage must be
made directly with the shipping or freight company. Jennison
Entertainment Technologies and (or) the distributor the equipment
was purchased through, is NOT RESPONSIBLE for any damage
received during shipping and CANNOT help with the filing of the
damage claim.
Check Box When This Step is Complete
PACKAGING AND PALLET MAY BE DIFFERENT THAN
SEEN IN PHOTO
NOTICE
PACKAGING AND PALLET MAY BE DIFFERENT THAN
SEEN IN PHOTO
Inspect and remove the Control Section (Section # 1) from the pallet.
Be careful when removing the foam packaging as there is acrylic
below that can easily be scratched when using a utility knife or razor
blade.
Inspect the two crates containing Section 3 and Section 4. These
crates are stacked on top of each other. Notate any damage to the
crate on the Bill of Lading BEFORE the Freight Carrier departs. Cut
and remove the metal banding holding the crates to the skid.
Step # 1-B
Inspect the control panel for shipping damage
Step # 1-A
Inspect the upper sections for shipping damage
NOTICE
Jennison Entertainment Technologies Space Ballz Service Manual Page 12

INSTALLATION INSTRUCTIONS
Step # 2
Check Box When This Step is Complete
Step # 2-B
Removing section # 3 from the crate properly
Lift Section # 3 out of the wooden crate by lifting on the metal
support bars as seen in the photo to the right. PLEASE SEE STEP # 2-C
BEFORE PROCEDING.
WARNING
2 PEOPLE REQUIRED - 150 POUNDS
Step # 2-A
Opening the upper section crates
Remove the support bars (If Applicable) and then carefully remove
any top packaging. Remove enough of the packaging to access the
metal cross bars.
NOTICE
PACKAGING AND PALLET MAY BE DIFFERENT THAN
SEEN IN PHOTO
Check Box When This Step is Complete
Remove and open the upper sections
Remove and separate the two crates. Remove the wooden tops (If
Applicable). Be careful when using a hammer to open the crate -
there are sensitive electronic components and glass pieces within
each crate.
NOTICE
PACKAGING AND PALLET MAY BE DIFFERENT THAN
SEEN IN PHOTO
Check Box When This Step is Complete
Jennison Entertainment Technologies Space Ballz Service Manual Page 13

Step # 2-C
How NOT to lift section # 3 out of the crate
DO NOT lift like shown in the photo to the right. Lifting the unit by
placing your hand on the bottom of the unit could damage the LED
Board installed in this area. There is no safe hand hold there. Instead
pull the unit out like shown in Step # 2-B and then place a hand on
the bottom of the metal cabinet.
CAUTION
DO NOT LIFT AS SHOWN IN PHOTO
Check Box When This Step is Complete
Step # 2-D
INSTALLATION INSTRUCTIONS
Safely place section # 3 on the floor
Carefully place Section # 3 on the ground in a safe area away from
customers. Be very careful about the acrylic edge on the front of the
section. This section is fragile and does extend out further than the
bottom of the cabinet. If you cannot safely place this as seen in the
photo - lay the entire unit on its back. (Glass Facing Up)
WARNING
2 PEOPLE REQUIRED - 150 POUNDS
Check Box When This Step is Complete
Step # 3
Inspecting the right cabinet LED lights
1) Ensure that the 4-Pin Molex connector located on the upper left of
the cabinet (Section # 2) is properly connected and seated. There is
no way to access this connector after the top two sections are
installed.
NOTICE
THERE IS NO WAY TO ACCESS THIS CONNECTOR
AFTER THE TOP IS INSTALLED
Check Box When This Step is Complete
Jennison Entertainment Technologies Space Ballz Service Manual Page 14

DANGER
THE TWO PEOPLE WHO WILL INSTALL THIS SHOULD
BE ABLE TO LIFT THAT AMOUNT OF WEIGHT ABOVE
THEIR HEADS FOR AN EXTENDED PERIOD OF TIME.
Extend the handles as seen in the photo to the right. When lifting
Section # 3, you want to have one hand on the handle and the other
hand under the front lip. This is the safest way to lift the unit without
damaging the acrylic glass. Note that the handles may either be
mounted vertically as seen in the photo or horizontal. SECTION # 3
WEIGHS APPROX. 150 POUNDS.
Check Box When This Step is Complete
Step # 5-A
Inspecting the mounting holes for section # 3
There are four holes located on top of Section # 2 (Main Cabinet).
The bolts that are welded onto Section # 3 will go into these four
holes. The two people who will lift the upper section will have to
guide the unit into these four holes while lifting the weight of the
unit.
Check Box When This Step is Complete
INSTALLATION INSTRUCTIONS
Step # 4
Inspecting the left cabinet LED lights
1) Ensure that the 4-Pin Molex connector located on the upper right
part of the cabinet (Section # 2) is properly connected and seated.
There is no way to access this connector after the top two sections
are installed.
NOTICE
THERE IS NO WAY TO ACCESS THIS CONNECTOR
AFTER THE TOP IS INSTALLED
Check Box When This Step is Complete
Step # 5
Preparing section # 3 for installation
Jennison Entertainment Technologies Space Ballz Service Manual Page 15

Check Box When This Step is Complete
DANGER
SECTION # 3 WEIGHS APPROX. 150 POUNDS. THE
TWO PEOPLE WHO WILL INSTALL THIS SHOULD BE
ABLE TO LIFT THAT AMOUNT OF WEIGHT ABOVE
THEIR HEADS FOR AN EXTENDED PERIOD OF TIME. IF
TWO PEOPLE CANNOT SAFELY LIFT THE SECTION -
SEEK ADDITIONAL ADULT HELP BEFORE INSTALLING
ONTO THE GAME!
Each person should take a side and lift initially as shown in the
picture to the right. Be careful not to put too much pressure onto the
acrylic which extends out below the bottom of the metal cabinet.
Test the weight of the unit before proceeding.
DANGER
SECTION # 3 WEIGHS APPROX. 150 POUNDS. THE
TWO PEOPLE WHO WILL INSTALL THIS SHOULD BE
ABLE TO LIFT THAT AMOUNT OF WEIGHT ABOVE
THEIR HEADS FOR AN EXTENDED PERIOD OF TIME.
The safest place to lift section # 3 onto the main cabinet (Section # 2)
- is from the rear of the game. This will prevent any resting of the
section on the large piece of glass on the front of the main cabinet.
You will need either two step stools or two ladders. This will help in
getting the unit high enough to guide it into the mounting holes.
Take note not to exceed the weight capacity of the ladder or stool.
DANGER
SECTION # 3 WEIGHS APPROX. 150 POUNDS. THE
TWO PEOPLE WHO WILL INSTALL THIS SHOULD BE
ABLE TO LIFT THAT AMOUNT OF WEIGHT ABOVE
THEIR HEADS FOR AN EXTENDED PERIOD OF TIME.
Safely walk the piece around the back of the game. Make sure that
there are no customers around this area.
Check Box When This Step is Complete
Step # 5-D
Preparing the proper placement of section # 3 - Cont.
Step # 5-B
Testing the weight of section # 3
INSTALLATION INSTRUCTIONS
Check Box When This Step is Complete
Step # 5-C
Preparing the proper placement of section # 3
Jennison Entertainment Technologies Space Ballz Service Manual Page 16

DANGER
At the same time - each person should carefully climb either the step
stool or the ladder until they have reached a height where the bolts
can be guided into the mounting holes. Make sure you have a proper
grip before ascending the ladder and never stand under the weight.
SECTION # 3 WEIGHS APPROX. 150 POUNDS. THE
TWO PEOPLE WHO WILL INSTALL THIS SHOULD BE
ABLE TO LIFT THAT AMOUNT OF WEIGHT ABOVE
THEIR HEADS FOR AN EXTENDED PERIOD OF TIME. IF
TWO PEOPLE CANNOT SAFELY LIFT THE SECTION -
SEEK ADDITIONAL ADULT HELP BEFORE INSTALLING
ONTO THE GAME!
1) After getting the unit above the main cabinet - adjust your hold on
the unit as needed. Do not let go of the unit. If you must set it down
for any reason - make sure it is resting on the four bolts and not the
acrylic glass. Do not allow it to sit on these bolts for an extended
period of time.
CAUTION
DO NOT ALLOW THE ACRYLIC TO TAKE ANY WEIGHT
OF THE UPPER SECTION. IT CANNOT TAKE THE
WEIGHT AND WILL BREAK.
2) Check to make sure that the wire harness is plugged into the LED
connector on the left and right. Do not let go of the unit to adjust
this.
CAUTION
DO NOT ALLOW THE ACRYLIC TO TAKE ANY WEIGHT
OF THE UPPER SECTION. IT CANNOT TAKE THE
WEIGHT AND WILL BREAK.
If you must rest for any reason. Make sure the unit is resting on the
four bolts. Check to make sure none of the bolts are either close to
the mounting holes or close to the edge of the game. These bolts
were not designed to hold weight in this manner - do not keep the
unit in this position for an extended period to time and do not
release you grip on the top at any point!
Step # 5-G
Lifting section # 3 into place - Cont.
Check Box When This Step is Complete
Step # 5-E
Lifting section # 3 into place
Check Box When This Step is Complete
Step # 5-F
Lifting section # 3 into place - Cont.
Check Box When This Step is Complete
INSTALLATION INSTRUCTIONS
1
2
Jennison Entertainment Technologies Space Ballz Service Manual Page 17

CAUTION
DO NOT ALLOW THE ACRYLIC TO TAKE ANY WEIGHT
OF THE UPPER SECTION. IT CANNOT TAKE THE
WEIGHT AND WILL BREAK.
The hardest part while installing Section # 3 is aligning the acrylic on
the upper section with the glass on the lower cabinet section. Before
you lower Section # 3 onto the cabinet - ensure that the acrylic
sleeve fits on top of the glass. You may need a third person to assist
you here in guiding which way the section needs to be oriented.
Check Box When This Step is Complete
Step # 5-J
Lifting section # 3 into place - Cont.
Check Box When This Step is Complete
Lifting section # 3 into place - Cont.
Hold the section as shown in the picture to the right and guide it
close to the mounting holes. You should be able to see where the
bolts line up to the mounting holes.
Check Box When This Step is Complete
Step # 5-I
Lifting section # 3 into place - Cont.
Get the unit as close to the mounting holes as possible. Take care not
to damage the acrylic glass on the front while guiding the piece into
position.
Step # 5-H
INSTALLATION INSTRUCTIONS
Jennison Entertainment Technologies Space Ballz Service Manual Page 18

IF NEEDED - SEEK HELP OF A THIRD PERSON
Check Box When This Step is Complete
Step # 5-L
Checking the seem of the acrylic and cabinet glass
Check Box When This Step is Complete
When the acrylic is aligned properly with the glass - the top should
drop smoothly into place creating a perfect seem.
WARNING
DO NOT REST THE TOP SECTION ON THE ACRYLIC - IT
WILL BREAK
Check Box When This Step is Complete
Step # 5-M
Checking the overall appearance
After Section # 3 is installed on top of Section # 2 - step back and
check the alignment of the entire structure.
Step # 5-K
Lifting section # 3 into place - Cont.
Carefully guide the acrylic onto the cabinet glass while lowering the
unit into the mounting holes. Let the unit down naturally - do not
force it. If it will not go smoothly into place - pull it up and then try
again. A third person can help guide the acrylic into place or tell the
installers which way they need to orient the piece.
WARNING
INSTALLATION INSTRUCTIONS
Jennison Entertainment Technologies Space Ballz Service Manual Page 19

Check Box When This Step is Complete
Tightening the nuts for section # 3
Use the provided tool (Metric # 17 Wrench) to tighten the nuts on all
four bolts.
CAUTION
WHEN USING A TOOL TO TIGHTEN THE NUTS - BE
CAREFUL OF THE LED LIGHT CONNECTORS LOCATED
ON THE ACRYLIC PLAYFIELD.
Check Box When This Step is Complete
Step # 6
Removing section # 4 from crate
Open the second crate containing Section # 4. Remove the unit from
the crate and carefully place it on the ground. Remove the foam
packaging. Use the provided tool and remove all the screws holding
the front acrylic. Be sure to keep these screws in a safe place and put
the acrylic panel somewhere where it wont get scratched.
WARNING
SECTION # 4 CONTAINS A 32" FLAT SCREEN TV - DO
NOT DROP THIS SECTION
Step # 5-N
Installing nuts to hold section # 3
Locate the provided nuts, washers, and lock washers. Open the rear
access door and look up to your right. You will see the two bolts
from Section # 3 sticking through the mounting holes. Screw each
nut onto the bolts using both the washers and lock washers. Repeat
the same thing for the two bolts on the left side (from the rear) of
the cabinet.
Check Box When This Step is Complete
Step # 5-O
INSTALLATION INSTRUCTIONS
Jennison Entertainment Technologies Space Ballz Service Manual Page 20
Table of contents
Popular Game manuals by other brands

Performance Games
Performance Games BladeRush Assembly instructions

Beleduc
Beleduc Hobby Instruction

Roberto Sport
Roberto Sport SUMMER COVER quick start guide

Lancaster
Lancaster SOC054_047P Assembly instructions

Radica Games
Radica Games CUBE WORLD I5039 instruction manual

Tiger Electronics
Tiger Electronics 92-004 instructions

Hasbro
Hasbro Candy Land Game instructions

Bay-Tek
Bay-Tek SMOKIN TOKEN troubleshooting guide

Radica Games
Radica Games Tetris Tower 3D 74033 instruction manual

Fundex Games
Fundex Games Chairs User instructions

Bandai
Bandai DemonSlayer instruction manual

Blue Orange
Blue Orange Where's Squeaky quick start guide