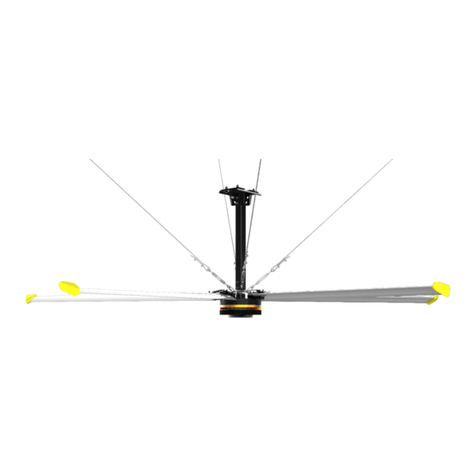
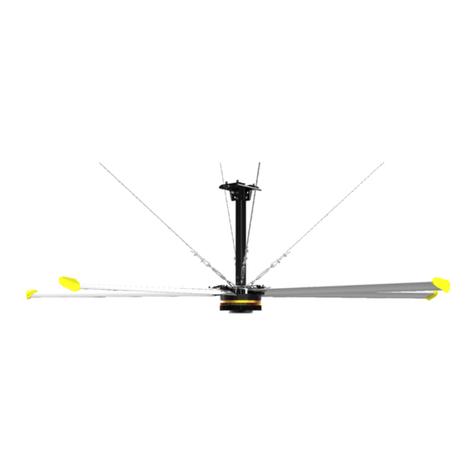
JetBlack Diamond HVLS User manual

Diamond HVLS Ceiling Fan
Install & User Manual

Table of Contents
Introduction............................................................................................................................................................3
About Jet Black Fan Systems......................................................................................................................3
Our Products..........................................................................................................................................................3
SAFETY INSTRUCTIONS.................................................................................................................................. 4
Recommended Safety Gear.........................................................................................................................5
What is in the packing case .........................................................................................................................5
Packing List.............................................................................................................................................................6
Equipment & Tools needed ..........................................................................................................................7
Fan Diagram & Control Panel......................................................................................................................8
Preparing the Work Site.................................................................................................................................9
Fan Installation...................................................................................................................................................10
Electrical Installation.......................................................................................................................................18
Install Appendix ................................................................................................................................................20
Trouble Shooting and Error Codes......................................................................................................... 21
Maintenance ........................................................................................................................................................21
Limited Warranty............................................................................................................................................. 22
Contact Information.......................................................................................................................................24

Introduction
Congratulations on your purchase of the Jet Black Fan Systems Diamond Series
HVLS ceiling fan system, the best choice for cost-effective air circulation in high
volume enclosed spaces. While our ceiling fans provide cooling in the summer,
they also provide a homogeneous temperature by circulating the warmer air that
collects near the ceiling in the winter, downward; in short, Jet Black Fan Systems
HVLS Ceiling Fans efficiently help keep facilities and areas cooler in the summer
and warmer in the winter. Jet Black Fan Systems HVLS Ceiling Diamond Series
Fans are powerful, dependable and built to last for years to come.
About Jet Black Fan Systems
Jet Black Fan Systems is a trading division of Punchbowl Packaging, NZ. We are
also the only NZ business exclusive in the supply of HVLS fans and work directly
with the customers, and with HVAC businesses. We are a family owned business
based in sunny Franklin. We understand the pain of working in large hot spaces,
which gives us a hands-on understanding of what it takes to find the right
solution for you.
Jet Black Fans Systems was born out of finding a solution for keeping our staff
and customers happy and comfortable in our family kiwifruit packhouse and a
local Gymnastics club that doubled as a sauna for 4 months of the year. After a
lot of research, testing and careful consideration we identified Kale Fans as the
right partner to deliver the proven, high quality cooling solution we needed –in
the form of HVLS (High Volume Low Speed) fans.
All fans go through testing and compliance before they hit the market. Our fans
all have NZ / Australia compliance certification, and we are registered ERAC
EESS. Sdocs and EMC available upon request.
Our Products
➢Engine & Eurus HVLS Ceiling Fans 4.9m –7.3m Diameter
➢Diamond HVLS Ceiling Fans 2.4m –4.2m Diameter
➢Airpole, Freestanding HVLS Fans 2.4m –4.2m Diameter, 3m Tall
➢Airmove, Wall Mounted HVLS Fans 2.0m Diameter
➢Airfree, Portable HVLS Fans 2.0m Diameter

SAFETY INSTRUCTIONS
Read the instructions before operation of the equipment and store in safe place
for the future use.
a. This equipment is not intended for use by persons (including children) with
reduced physical, sensory or mental capabilities, or lack of experience and
knowledge, unless they have been given supervision or instruction
concerning use of the equipment by a person responsible for their safety.
b. Children should be supervised to ensure that they do not play with the
equipment.
PROHIBITIONS
To reduce the risk of fire, electric shock, or injury to persons, observe the following:
a. Installation work and electrical wiring must be done by qualified person(s)
in accordance with all applicable codes.
b. When cutting or drilling into wall or ceiling, do not damage electrical
wiring and other hidden utilities.
c. The installation of Diamond Series HVLS Fan must be in accordance with
the requirements specified in this installation manual and with any
additional requirements set forth by the NZECP, and all local codes. Code
compliance is the responsibility of the end user.
d. The fan controllers contain high voltage capacitors which take time to
discharge after removal of mains supply. Before working on the fan
controller, ensure isolation of main supply from line inputs at the fan
controller board. Wait three minutes for capacitors to discharge to safe
voltage levels. (notes: the displayer blackness is not the mark that the
voltage has reached the safety level). Failure to do so may result in injury or
death.
e. Do not connect the fan to a damaged or hazardous power source. Only
qualified technician should attempt to resolve electrical malfunctions.
Contact Jet Black Fan Systems for questions regarding the electrical
installation of the fans.
f. Risk of fire, electric shock or injury to persons during cleaning and
maintenance. Disconnect the fan system from the power supply before
servicing.
g. Do not insert foreign objects between rotating fan blades.
CAUTION
a. Guy cables must be installed as per the instructions provided in this
manual, failure to do so may result in damage or injury and will void the
product warranty.
b. Do not bend the fan blades when installing or servicing the fan.

c. The installation of this fan requires the use of some power tools. Follow the
safety procedures found in the owner’s manual for each of these tools.
d. The HVLS fan you have purchased is for indoor use only unless otherwise
specified by Jet Black Fan Systems. Do not expose fan to direct water
contact. Improper use or handling of the Diamond Series HVLS Fan may
cause damage or injury and will void the product warranty.
e. Jet Black Fan Systems product warranty will not cover equipment damage
or failure that is caused by improper handling & installation.
Recommended Safety Gear
Safety Gear:
Hard Hat
Safety Glasses
Work Gloves
Steel Tipped Work Shoes
IMPORTANT NOTE
Persons entering the work zone should always wear a hard hat, safety glasses,
work gloves and steel tipped work shoes.
What is in the packing case
NOTE
For multiple fan orders, ensure that all components of each fan are kept together.
Components are not interchangeable. For any missing parts required for
installation please contact Jet Black Fan Systems.
The Diamond Series HVLS ceiling fan components are delivered in two packaging
cases as shown below.
Packing case 1

Packing case 2
NOTE: Pictures above are not to scale.
Packing List
Item
Description
QTY
1
Down Rod
3
2
Fan Blades
8
3
Threaded Rods
2
Item No
Description
QTY
1
Cardan Joint
1
2
Cardan Joint Flange
1
3
Slip Disc
1
4
Fan Controller
1
5
Fan Motor
1
6
Mounting Plate
1
7
Shims
2
8
Clamping Plates
2
9
Top Mounting Plate (for Square Beam)
1
10
Motor Top Cover
1
11
Motor Bottom Cover
1
13
Wingtails
8
14
Connecting Arms
8
15
Blade Retainers
8
17
Guy Cable
30m

Hardware:
Item
No
Description
QTY
23
M4 X 10mm : Philip Screws
8
24
M5 X16mm : HexBolts andFlat Washers+ Lock
8
25
M8X16mm:SocketheadBoltsandFlatWashers
17
26
M8X18mm:SocketheadBoltsandFlatWashers
8
27
M8 X 25mm : Socket head Bolts
8
28
M10 X 20mm : Socket head Bolts and Flat
24
29
M10 X 35mm : Socket head Bolts, Nuts, Flat &
4
30
M16 X 55mm : Hex Bolts, Nuts, Flat & Lock
4
31
M16 : Nuts, Flat & Lock Washers
0
32
Turnbuckles & shackles
4
33
Wire Clamps
18
34
Fan Controller Hardware Set
1
Equipment & Tools needed
Equipment:
Scissor Lift or other lifting equipment having a flat Base and minimum lift
capacity for 2 Persons + additional 80KG
NOTE:
a. Use of lift equipment must be in accordance with the safety instructions
prescribed by the lift equipment manufacture, local and national safety
codes that may be applicable at the location of install.
b. It is recommended that a work zone be clearly marked below the fan
installation location by use of safety cones and warning tape to alert
persons entering the zone to be vigilant and cautious of potential
accidental falling items or risk of lift equipment injury.
General Tools for Mechanical Installation
S.No
Description
1
Standard socket and ratchet set
2
Standard allen key Set
3
Standard Phillips and Flat Head screwdriver set
4
Level Gauge
5
3/16” Steel Wire Rope cutter
Tools for Electrical Installation
S.No
Description
6
Standard Phillips and Flat Head Screwdriver set
7
Flat Head Screwdriver size: 1/8 X 4
8
Electrical wire and cable stripper
9
Multimeter
Specific Tools:

S.No
Tool Description
1
24mm Socket or Spanner
2
8mm or 5/16” Allen key
3
17mm Socket or Spanner
4
6mm Allen key
5
8mm Socket or Spanner
NOTE:
This list of suggested tools is not exhaustive. Additional tools may be necessary.
Fan Diagram & Control Panel
Control Box
Power Switch
Speed Control
Lock
Display window

Preparing the Work Site
IMPORTANT NOTE:
Do not mount the fan to single purling, trusses, or bar joists. Mount the fan only
to a structural element such as an I-Beam, square tubing, concrete beam, or
other load bearing structure. It is recommended to seek structural engineering
advice where the building is older than 10 years or if there is doubt on the
structure seismic rating / capability.
Square Beam Structure
H –Beam Steel Structure Concrete
Structure

a. If using a square tubing arrangement it is recommended to have this
advised by a structural engineer
b. Consult a structural engineer to ensure that the structural beams,
tubes/plates are rated to uphold the respective fan weights.
c. Fan installation area must be free of obstructions such as lights, cables,
sprinklers, or other structures. The fan blades should have at least 200mm
of clearance from any obstructions.
d. Adhere to the safety requirements in the table below when selecting the
fan location.
e. The fan should be visible from the location of the wall controller. The
mounting structure must be able to withstand the torque forces
generated by the fan.
Safety Requirement
Minimum Distances
Clearance
Minimum 200mm from fan blade vertical and horizontal.
The fan installation area must be free of obstructions such as
light, cables, sprinklers, or other building structure.
Blade height
At least 3 meters above the floor
HVAC equipment
Check directly with HVAC unit supplier if special clearance is
required
Fan spacing
3 x fan diameter from centre-to-centre, unless instructed
otherwise
Fan Installation
1. Preparing the Mounting Assembly
1.1 Install the Cardan Joint and Cardan Joint Flange on the Mounting Plate
using the M10 x 35mm hardware as shown in figure below.
NOTE: Do not tighten the M10 hardware completely.
1.2 Slide the Slip Rod on the Cardan Joint and insert four M10 x 20mm bolts.
Slightly tighten the M10 Bolts.
1.3 Insert and fully tighten the #10-32 Screw to fix the Slip rod onto the Cardan
Joint. Remove the pre tensioned M10 Bolts.

NOTE: The M10 Bolts are installed in this step only to align the holes on Slip rod
and cardan joint. Ensure to remove the M10 hardware after installing the screw.
NOTE: The mounting details shown in this section is for I-Beam only. See
Appendix A for Square Beam and Square Tube. Contact Jet Black Fan Systems if
mounting structure is different.
2. Preparing the Fan Motor Assembly
2.1 Remove the Slip Rod from the Fan motor shaft by uninstalling the #10-32
screw. Install the connecting arms on the fan motor by overlaying them on
each other in a circular pattern, as per below pic.
NOTE: The connecting arms must be oriented with the bent portion
facing right and up as shown in the figure.
NOTE: The hardware for the common holes between connecting
arms are longer in length (25mm) and must not be swapped with the
shorter hardware(16mm).
2.2 Insert the Motor Top Cover onto the motor shaft. Position the
cover to leave about 1/4” clearance from the motor and slightly
tighten the Hose Clamp screw. Ensure that the cover is balanced
before tightening the Hose Clamp Screw.
* Connecting arms not shown for clarity

2.3 Slide the Slip Disc on the Motor shaft and position it to leave about 1 ½”
clearance from the Fan Motor Cover. Insert and slightly tighten the M8 x
16mm screw to fix the Slip Rod onto the motor shaft.
2.4 Reinstall the Slip Rod removed in step 2.1 and insert four M10 x
20mm bolts. Slightly tighten the M10 Bolts. Insert and fully
tighten the #10-32 Screw to fix the Slip rod on the Motor Shaft.
Remove the pretensioned M10 Bolts.
* Connecting arms not shown for clarity
NOTE: The M10 Bolts are installed in this step only to align the holes on
Slip Rod and Motor Shaft. Ensure to remove the M10 hardware after
installing the screw.
3. Fan Installation
3.1 Fix the mounting plate assembly to the mounting structure using
Clamping Plates, Shims and M16 x 55mm hardware as shown in the figure
below.
NOTE: The mounting details shown in this section is for I-Beam only. Refer to
Install Appendix to install the mounting plate assembly on square beam or
square tubing.
NOTE: Use proper lifting methods to prevent fan motor damage and
personal injury.
NOTE: Do not pull the motor power cable with excessive force which
may cause the plugs to disconnect.

3.2 Lift the fan motor assembly completed in step 2.4 to the ceiling. Insert the
motor power cable through the cardan joint and carefully pull it through
the gap between the mounting structure and mounting plate assembly.
3.3 Carefully slide and connect the Down Rod onto the Cardan
Joint using the M10 X 20mm hardware.
3.4
By carefully inserting the motor power cable through it, install
the Down Rod on the motor assembly using the M10 x 20mm
hardware.
(3.3) Mounting Structure not shown
* (3.4) Some components not shown for clarity
3.5 Slide the Slip Disc and the Motor Top cover upwards to touch the
Down Rod and avoid excessive gap. Fully tighten the respective
hardware. Ensure that the Motor Top Cover is balanced before
tightening the hose clamp screw.

* Connecting arms not shown for clarity
3.6
Using a levelgauge, check and ensure that the fan assembly is levelled
in the X and Y axis and completely tighten the pre-tensioned M10 x
35mm hardware between the
Cardan Joint flange and the
Mounting Plate.
3.7 Install the Motor Bottom Cover on the Fan motor with the
supplied M5 X 16 mm hardware.
*Motor Top Cover not shown for clarity

4. Installing Turnbuckles and Guy Cables
NOTE:
Guy cables are intended to provide stability to the fan system during operation.
Guy cables must be installed as per the instructions provide in this manual; failure
to do so may result in damage or injury and will void the product warranty.
4.1 Connect the wire rope links and turnbuckles to the holes on the slip disc.
4.2 Making the Guy Cable Loop-1:
Prepare Guy Wire Loop-1 at one of the guy cables using a Wire Thimble and three
Wire Rope Clips. Install the first wire rope clip adjacent to the wire thimble
followed by the second and third wire rope clips at 3”-3.5” apart from each other.
Dead end of the guy cable should not extend more than 2” out from the third
wire rope clip. Be sure that all the wire rope clips are tightened properly and
installed correctly.

Wire Rope Clip
Below is a diagram showing proper clip installation, it is imperative that you
install the saddle on the live end of the wire rope.
4.3 Connect the supplied Turnbuckles and Guy Cable loop-1 to the eye-bolts of
the Slip Rod as shown in the below figure.
4.4 Attach beam clamp to the mounting structure. The guy cable should be at
approximately 45° from the centre axis of the fan (see below illustration). Place
the beam clamp accordingly.
NOTE: Eye Bolts or Eye Screws may be provided and advised to use for your
particular job, depending on the structure and area. If in doubt please refer back
to Jet Black Fan Systems directly to check.
NOTE: If you are in a high seismic area you are advised to consult a structural
engineer to check the seismic load capacity of connecting parts.
4.5 Attaching Guy Cable Loop 2:
Insert wire thimble into the 5/16” eye bolt and route the second end of the
guy cable through the wire rope clips and wire thimble to make second
Loop. Refer to Step 4.2 for detailed instructions of Guy Wire Loop. Loosely
tighten the guy cable by pulling the dead end of the guy cable.

NOTE: Do not tighten guy cable until all the remaining guy cables have been
installed.
NOTE: After routing, cut off any excess cable on dead end.
NOTE: If longer length guy cable is required, please contact Jet Black Fan
Systems for spec required.
4.6 Repeat Steps 4.1 to 4.4 to install the remaining 3 Guy Cables.
4.7 Evenly tighten guy cables by turning all the Turnbuckles. The guy cables
should be taut.
CAUTION: Over tightening of the guy cables may result in unbalanced fan.
4.8 Check the levelling of the fan motor to ensure that it is levelled. Levelling of
the fan can be achieved by precisely adjusting the tension in all four guy cables
by turning the Turnbuckles.
Installing Fan Blades
5.1 Install the Fan Blade tails on each of the fan blades using the M4 x 10mm
screws.
5.2 Carefully slide each of the fan blades (with Fan Blade tail attached)
onto the connecting arms and install the safety links and the fan blades
with the M8 hardware as shown in the figure.
NOTE: The fan blades should be installed alternatively to balance the load on the
guy cables.
NOTE: It is recommended not to fully tighten the hardware until all fan blades
and blade retainers have been installed on the connecting arms.

*Motor Top Cover & Bottom Cover not shown for clarity
5.3 Install all the 8 fan blades onto the connecting arms and
fully tighten all the pre-tensioned hardware.
Electrical Installation
IMPORTANT NOTES
Refer Safety Instruction on page 3 before proceeding.
Exercise caution and common sense when powering the fan.
Do not connect the fan to a damaged or hazardous power source.
Do not attempt to resolve electrical malfunctions or failures on your own.
Contact Jet Black Fan Systems if you have any questions regarding the electrical
installation of this fan.
Diameter
2.4M
3.0M
3.6M
4.2M
Weight
31KG
35KG
38KG
41KG
KW input
0.15
0.2
0.3
0.4
Input Voltage
240V / 1P
240V / 1P
240V / 1P
240V / 1P
Full Load Current
0.9A
1.3A
1.5A
1.8A
Noise Level
<41dB
<40dB
<49dB
<49dB
Max speed
120RPM
100RPM
90RPM
80RPM
Air displacement (m3/hour)
273,000
331,800
393,600
453,000

Mounting the Fan controller
Mount the wall controller through the mounting holes and the hardware set
included in the Fan Controller Hardware set.
Fan Controller Schematic & Specification of parameters for control system
Refer to the control box booklet and inside door for schematic and further
information.
Sequence of Operation(s)
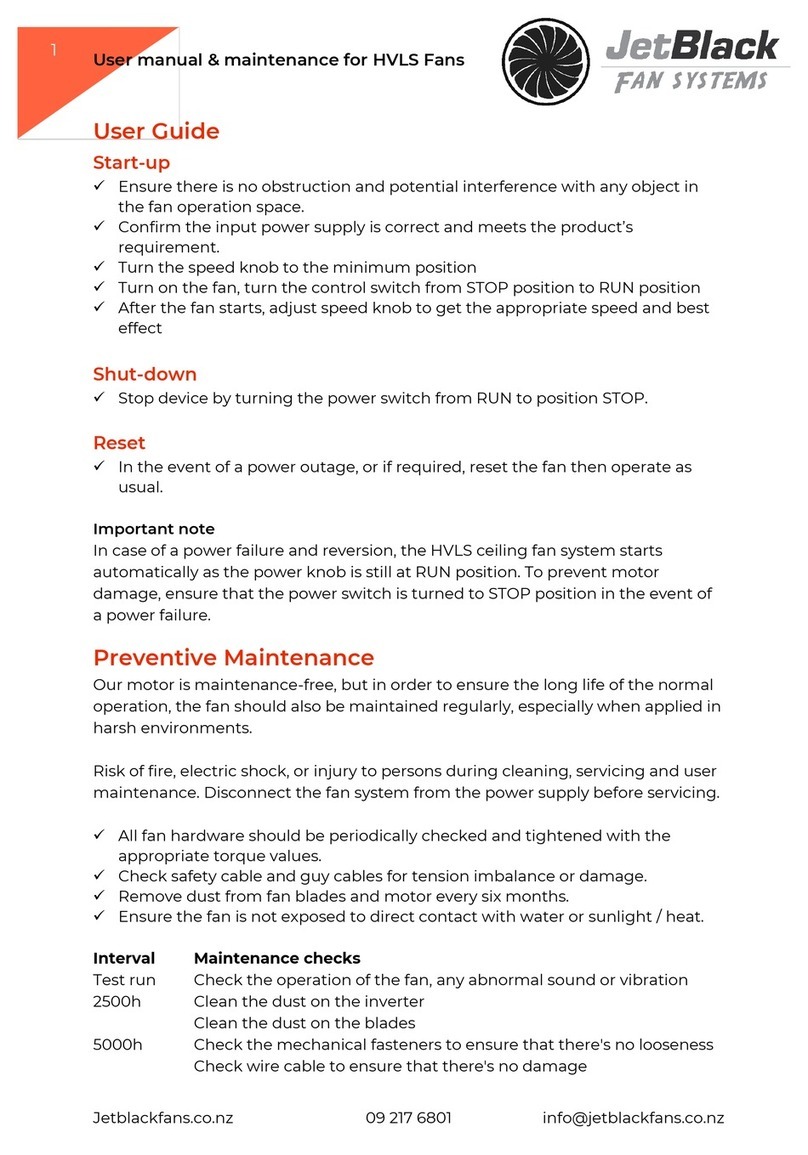
Start-up:
1. Ensure there is no obstruction and potential interference with any object in
the fan operation space.
2. Confirm the input power supply is correct and meets the product’s
requirement.
3. Turn the speed knob to the minimum position
4. Turn on the fan, turn the control switch from STOP position to RUN
position
5. After the fan starts, adjust speed knob to get the appropriate speed and
best effect
Shut-down:
1. Stop device by turning the power switch from RUN to position STOP.
2. Gradually increase or decrease the speed of the fan using the speed
control knob.
IMPORTANT NOTE:
Power outage is prohibited during the fan normal operation.
In case of a power failure, the Diamond Series HVLS ceiling fan system starts
automatically as the power knob is still at RUN position. To prevent motor
damage, ensure that the power switch is turned to STOP position in the event of
a power failure.
NOTE: Once fan is operating and ready for use, please show the customer how to
use and where to access the “sequence of operation”in this manual.

Install Appendix
General Arrangement
Mounting Details for Square Beam
Note:
Installer must cut the threaded rods to required length.
Mounting Details for Square Tube
NOTE: Jet Black Fan Systems advise to engage a Structural engineer to check
your structural beams, and sizes of square tube required for your site.
This manual suits for next models
1
Table of contents
Other JetBlack Fan manuals
Popular Fan manuals by other brands

Greenheck
Greenheck IGX Series Installation, operation and maintenance manual

Ebmpapst
Ebmpapst K3G310-RR05-N1 operating instructions

Concept2
Concept2 VS5013 manual

Cool Air
Cool Air MK-TF0003 instruction manual

Ebmpapst
Ebmpapst M4Q045-CF01-01 operating instructions

Ebmpapst
Ebmpapst W4E400-CP14-71 operating instructions

S&P
S&P HTB-150 N IP55 installation manual

Ebmpapst
Ebmpapst R2E146-AW07-05 operating instructions

Monte Carlo Fan Company
Monte Carlo Fan Company 3TSR52XXD Series owner's manual

Hitachi
Hitachi RPI-1.5FSRE Installation & operation manual

Ebmpapst
Ebmpapst R3G400-RS03-H8 operating instructions

Venmar
Venmar PRO225 Installation and user manual