After pressing mode setting key, these settings can be made in sequence:
Temperature Unit, Warning Temperature, High Temperature Warning, Multi-lingual Voice, Volume.
After powering on, please press upward adjustment key to turn on the machine, the screen will appear, and the red LED will light up
and turn off automatically. Press upward adjustment key and hold for 6 seconds to shut down the machine.
Button and Function Description :
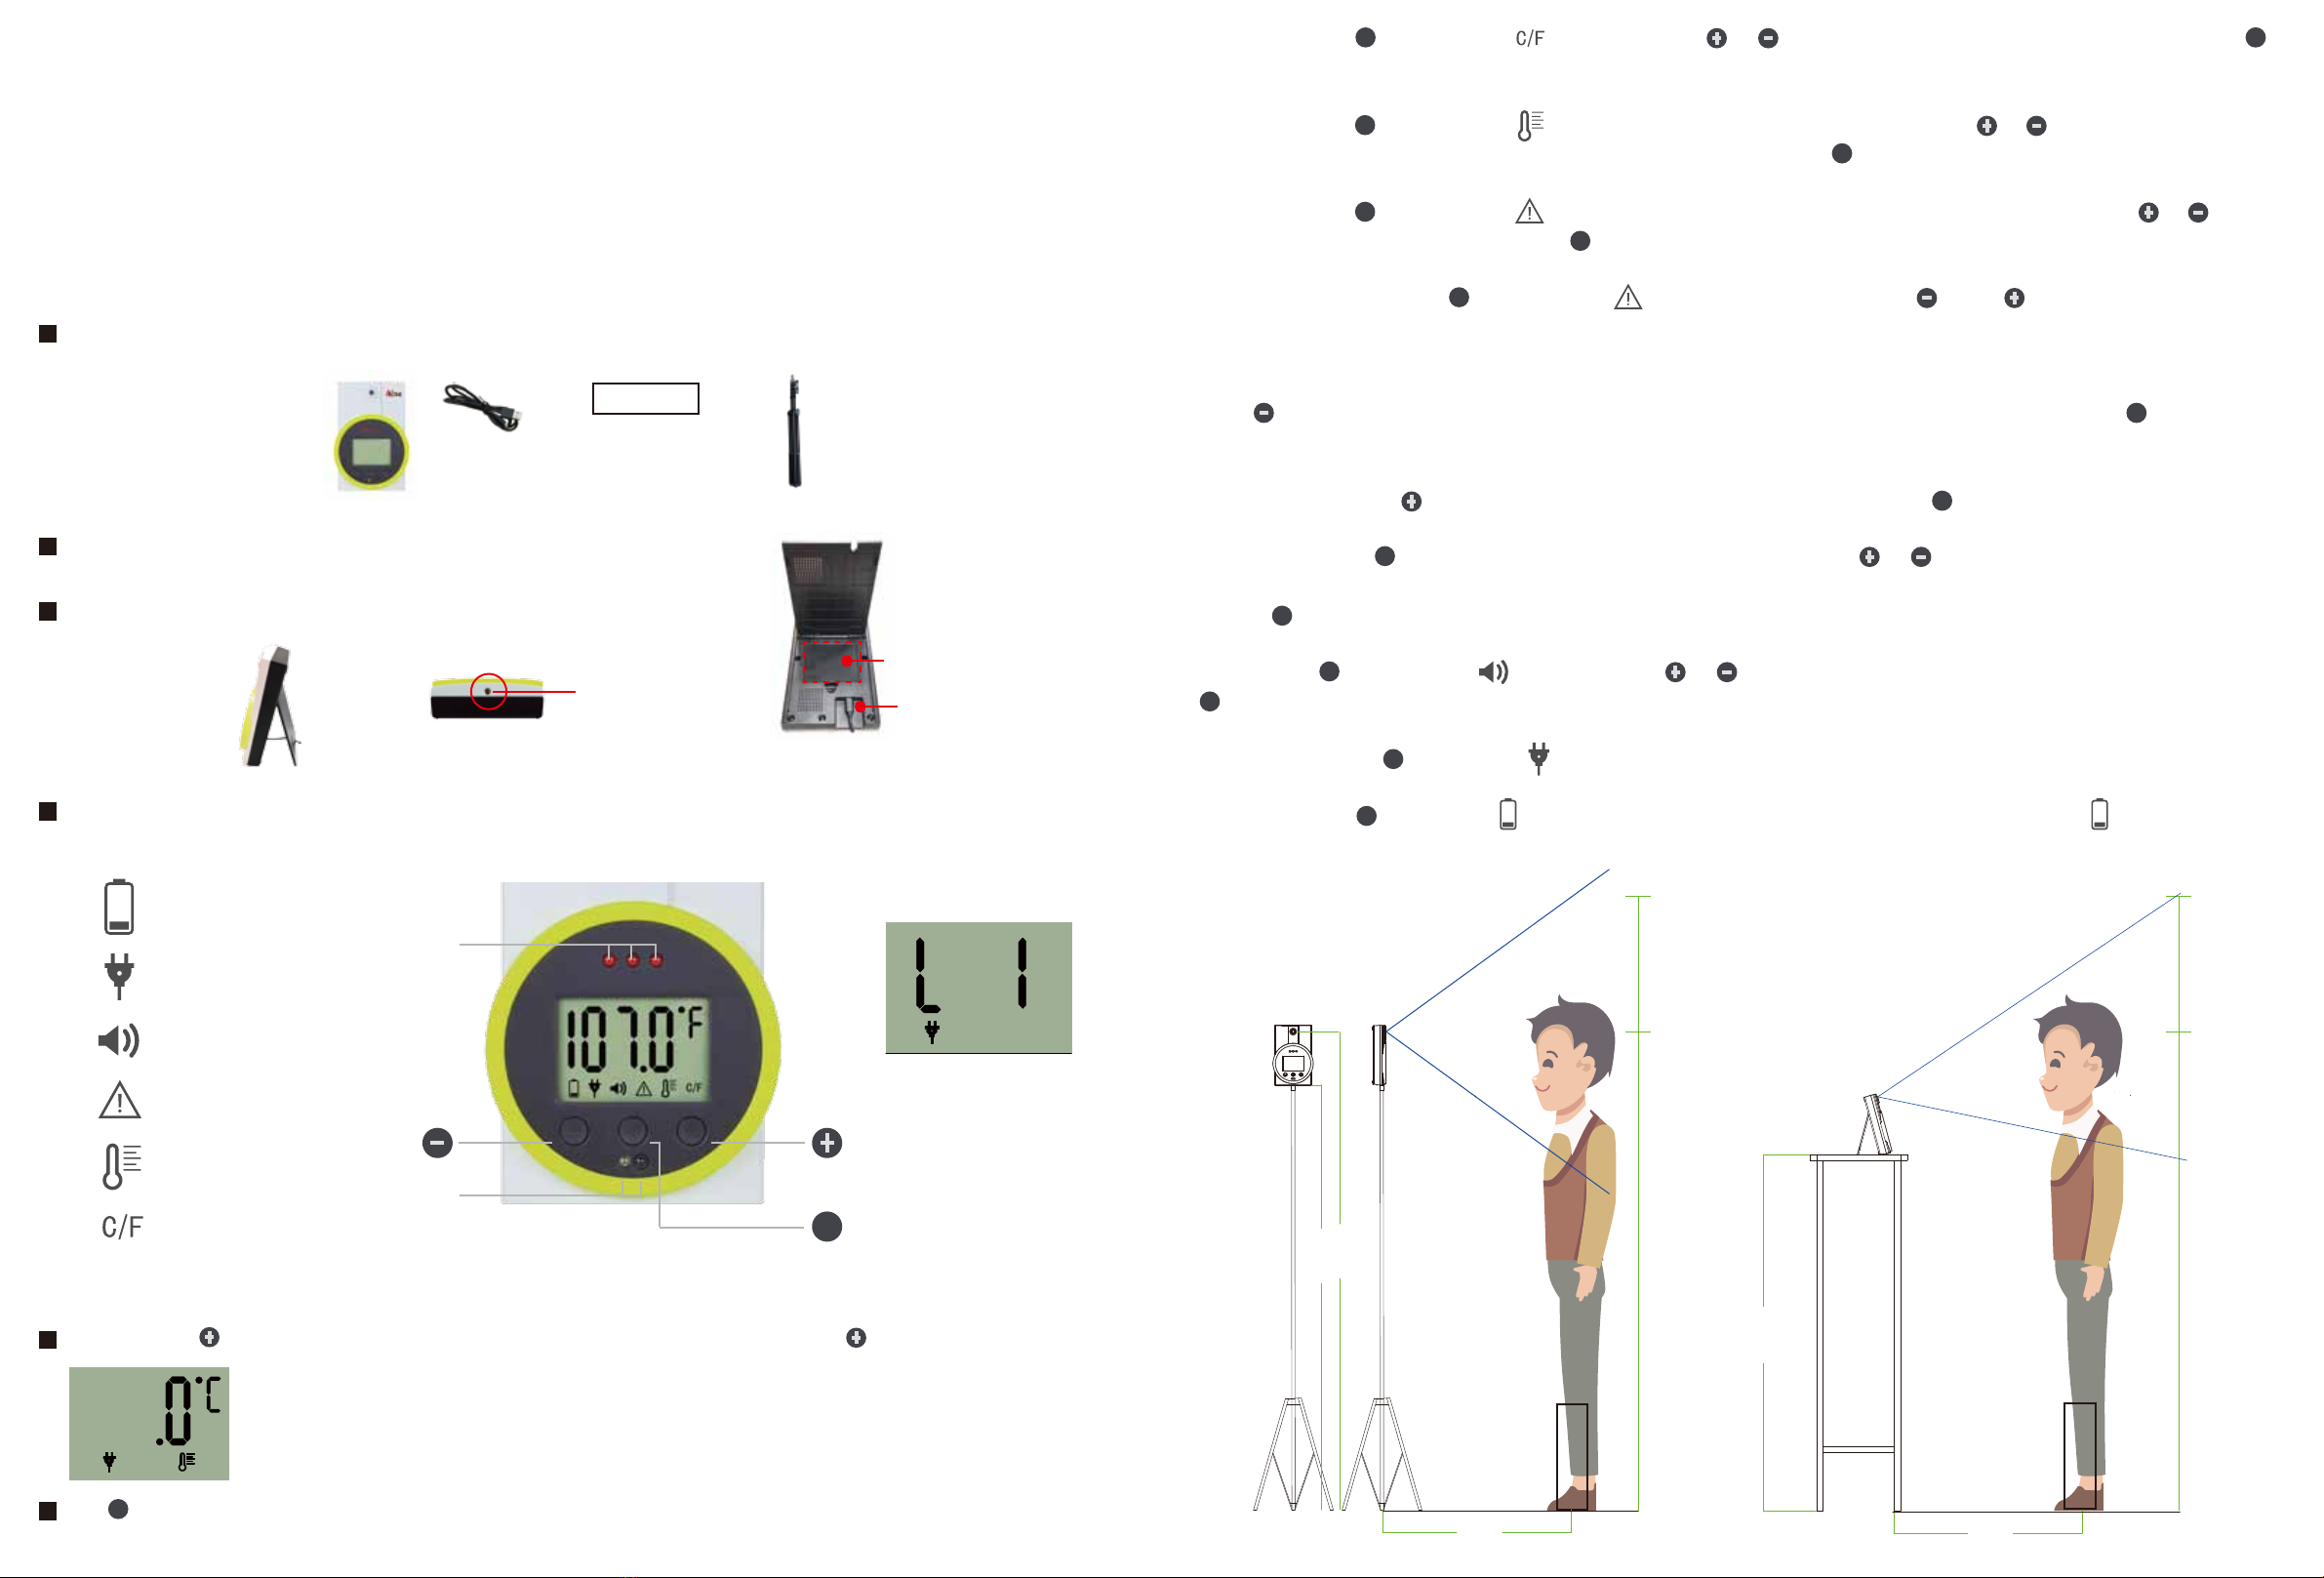
Out-of-the-box inspection:
(A) AiSEMI simple Main Body x1
(B) Type-C to USB Cable x1
(C) Positioning Sticker x1
(D) Tripod x1 (Optional)
(E) 5V_1A USB Adapter (Excluded)
With array-typed thermopile module sensor and integrated prime lens, the AiSEMI simple can measure surface skin temperature accurately
when used correctly. Please install the AiSEMI simple on the optional Tripod or placed on the table. Power on the system with a 5V_1A USB
charger (Alkaline Batteries are only for backup). Position the person being evaluated at 50cm distance directly facing the AiSEMI simple for
1-3 seconds when used. Distance will affect the result of temperature measurement.
Please keep the system in a room with no draft (movement of air). For best results, avoid direct sunlight and away from radiant heat or AC
vent. Please make sure that there is no 940nm light source in front of this product, such as sunlight, TV screen light, or camera with night
vision function, etc.
If the body temperature exceeds 37.5°C or 99.5°F, AiSEMI simple will turn on a red light with a warning sound.
*To obtain accurate temperature measurement, please turn on the AiSEMI simple 15 minutes before being used to warm it up so the
temperatures between system and the room temperature balance out.
* Please place the AiSEMI simple at 130cm height. Avoid strong lighting and away from radiant heat or AC vent.
* Position a floor sign at a fixed distance 50cm from the AiSEMI simple system, directly facing the camera before measurement.
AiSEMI simple
Temperature Measurement System Manual
Downward
Adjustment Key Upward
Adjustment Key
SET
Mode Setting Key
IR Receiver
Battery Mode
DC Mode
Volume
High Temp. Warning
Warning Temp.
Temp. Unit
High Temp.
Warning Light
Multi-lingual Voice
Battery Compartment
(for 4*AA batteries)
Type-C Cable
(A) (B) (C)
Put Your Feet Here
請 站 在 此 處
(D)
(Fixed distance 50cm
from the system)
SET
Turn (A) over, lift the back cover, connect (B) Type-C power cable or alternatively install batteries (4* AA Alkaline Batteries) for use.
(A) can be placed on the table (at a height of about 110cm) or installed on the tripod (D) (at a height of about 130cm.)
Tripod screw hole
(1/4 inch)
1. Temperature Unit : One-click to Temperature Unit icon. Press or to select the unit of °C (Celsius) or °F (Fahrenheit).
After setting, press again or wait 5 seconds for it to finish automatically.
2. Warning Temperature : Double-click to Warning Temperature icon. This is the warning value of high temperature. Default is
37.5°C (99.5°F). Press or to select the warning value. When the temperature exceeds this value, AiSEMI simple will turn on a red
light and give off a warning voice. After setting, press again or wait 5 seconds for it to finish automatically.
3. High Temperature Warning : Three-click to High Temperature Warning icon. This is to turn on/off the red LED light and voice
reminder of high temperature. Press or to turn on or turn off. After setting, press again or wait 5 seconds for it to finish
automatically.
3-1. Temperature Measurement Sensitivity Value Adjustment:Three-click to High Temperature Warning icon, first press and
hold (without letting go) and then press , then the sensitivity value (factory setting is 130) will be displayed on the screen and
then let go. The user can adjust the value according to their needs.
3-2. Increase Sensitivity:Some materials of clothing may absorb near-infrared rays, which may cause component test delay or distance
measurement error. If this occurs, the sensitivity setting value can be increased.
Press to decrease the value, the lower the value, the higher the sensitivity. The higher the sensitivity, the longer the measurement
distance is allowed, and vice versa. After setting, press again or wait 5 seconds for it to finish automatically. During the adjustment
process, user can carry out temperature measurement to see whether it conforms to the user environment until it is satisfied. *It is
recommend that the subject stand at 50cm from the machine to avoid temperature measurement errors.
3-3. Decrease Sensitivity:Press to increase the value, the higher the value, the lower the sensitivity. After setting, press again
or wait 5 seconds for it to finish automatically.
4. Multi-lingual Voice Prompts : Four-click to Multi-lingual Voice Prompts. When L 1 appears on the screen, press or to select
language. The default language order is:
English (L1), Chinese (L2), French (L3), German (L4), Japanese (L5), Spanish (L6), Portuguese (L7), and Korean (L8). The default recognition
voice is ‘Hello’. After setting, press again or wait 5 seconds for it to finish automatically.
5. Volume : Five-click to Volume icon. Press or to adjust the volume level, 1 is mute, 5 is the loudest. After setting,
press again or wait 5 seconds for it to finish automatically.
6. DC Mode : Six-click to Power icon. This is the symbol that appears when the device uses DC power. (Please prepare your
own USB charger above 5V_1A.)
7. Battery Mode : Seven-click to Battery icon. This is the symbol that appears when the device uses batteries. If the battery voltage
<4.6V, the battery symbol will flash, and it is recommended to replace the battery. It will automatically shut down after a beep sound
(1 second) when the battery voltage <4.2V.
SET
SET
SET
SET
SET
SET
SET
SET
SET
SET
SET
SET
SET
SET
SET
1300
1500
1500
1900
500
Put Your Feet Here
請 站 在 此 處
Unit: mm
(Fixed distance 500mm from the system)
1100
500
Put Your Feet Here
請 站 在 此 處
Unit: mm
1500
1900
(Fixed distance 500mm from the system)
印刷尺寸420x285mm
對摺2次,英文在外
正面