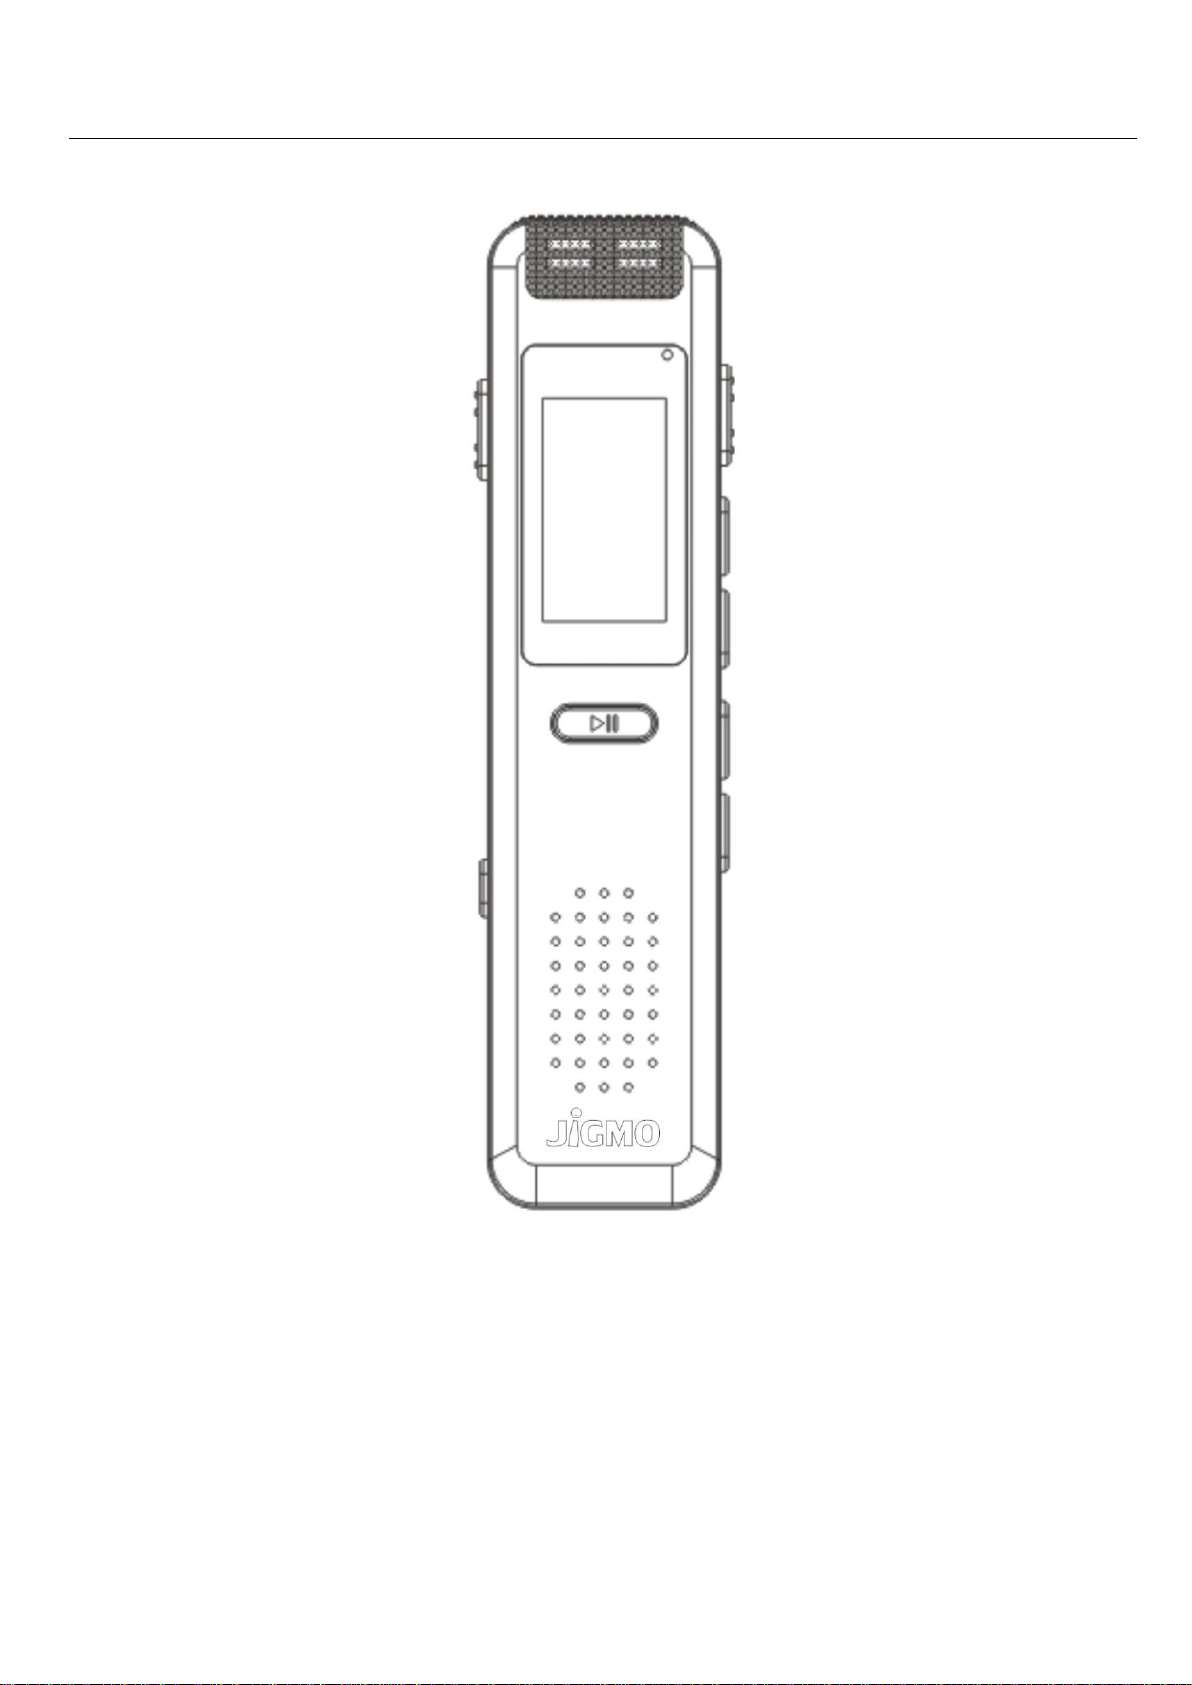
JVR-32 Voice Recorder
7
off without saving your recording first, your
file will be lost).
TIP: If you want to make several recordings at
short notice, simply keep the recorder in REC
mode and use the PLAY button to pause and
resume the recording as required. Remember to
keep saving your files every few pauses.
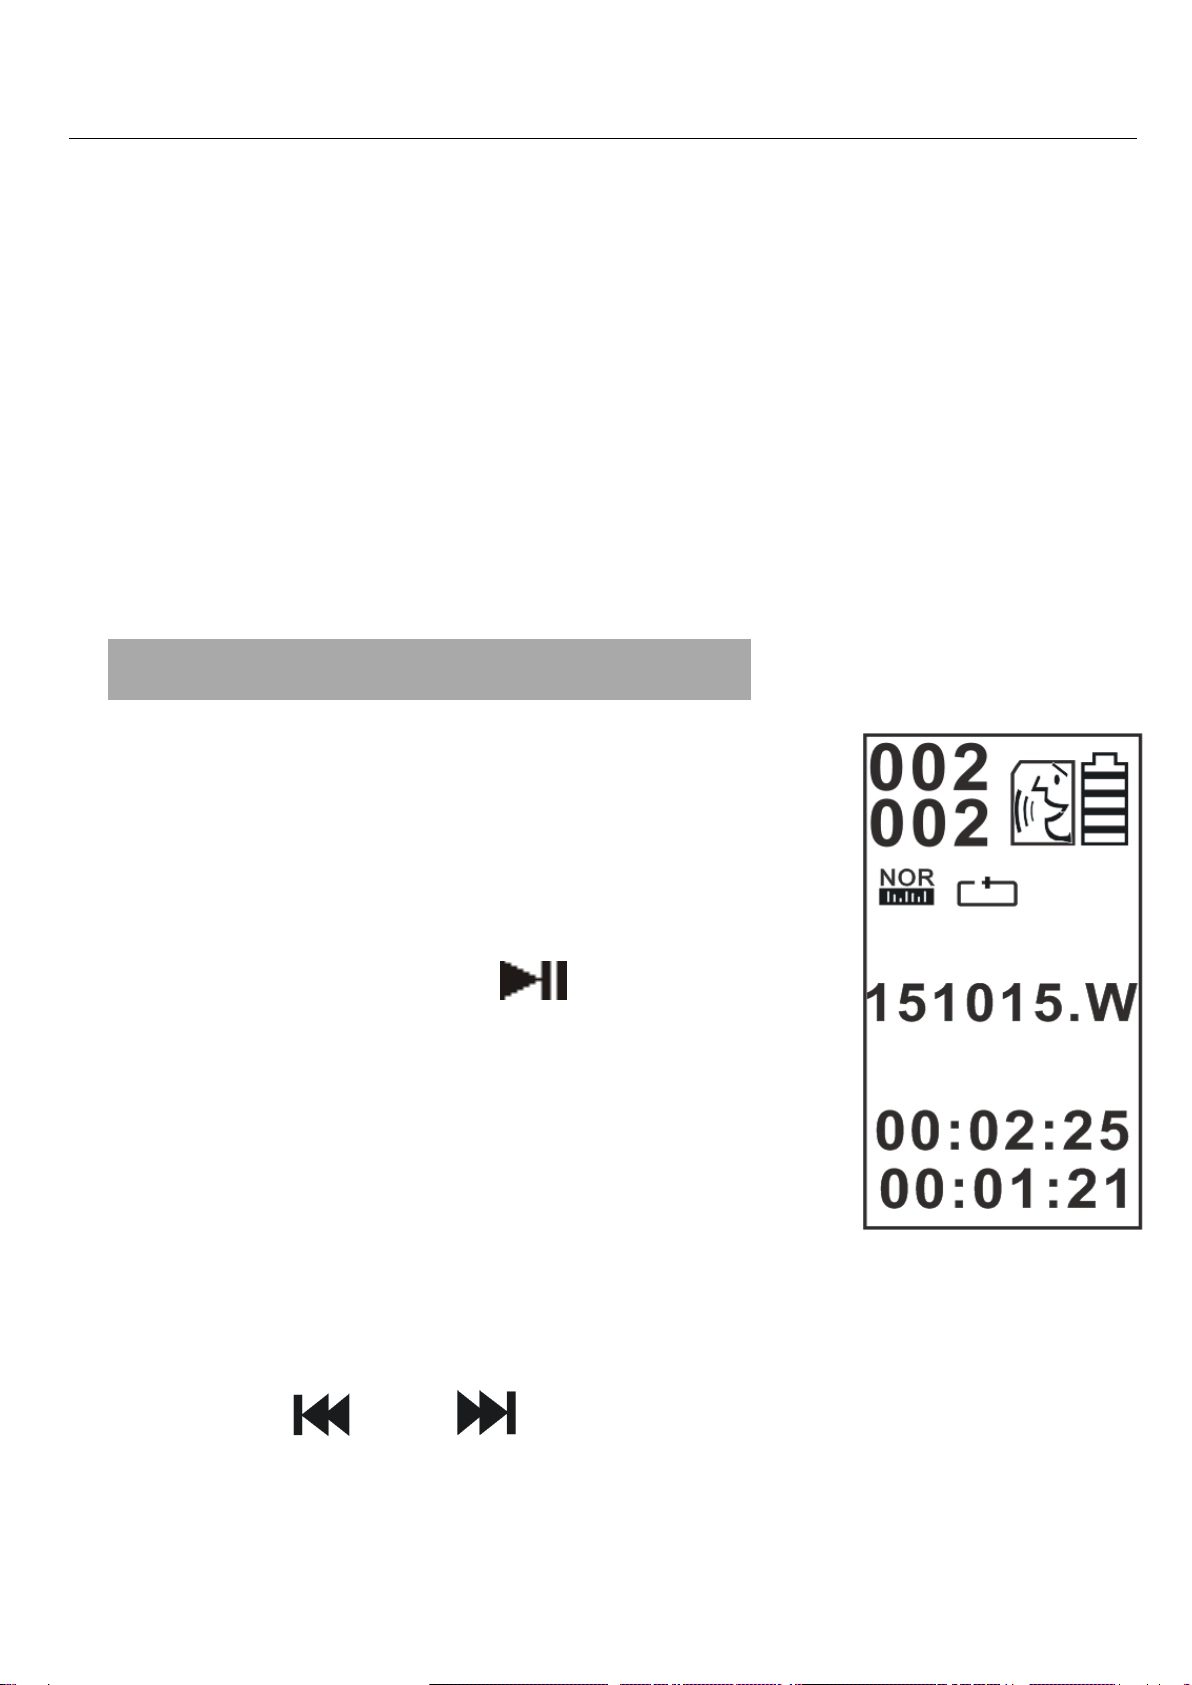
7. Playing Your Recording
Once your file is saved to the
device, you will see it as a file
name with numbers (please see
image on right).
Press PLAY or “ ” to play your
recording or a music file. The file
starts playing and you can hear
it over the built-in speaker or
earphones.
Press “M” on the side of the device to switch
between the Recorder Mode or MP3 mode.
Press “ ” or “”button to select the file you
want to play, and then press PLAY to start