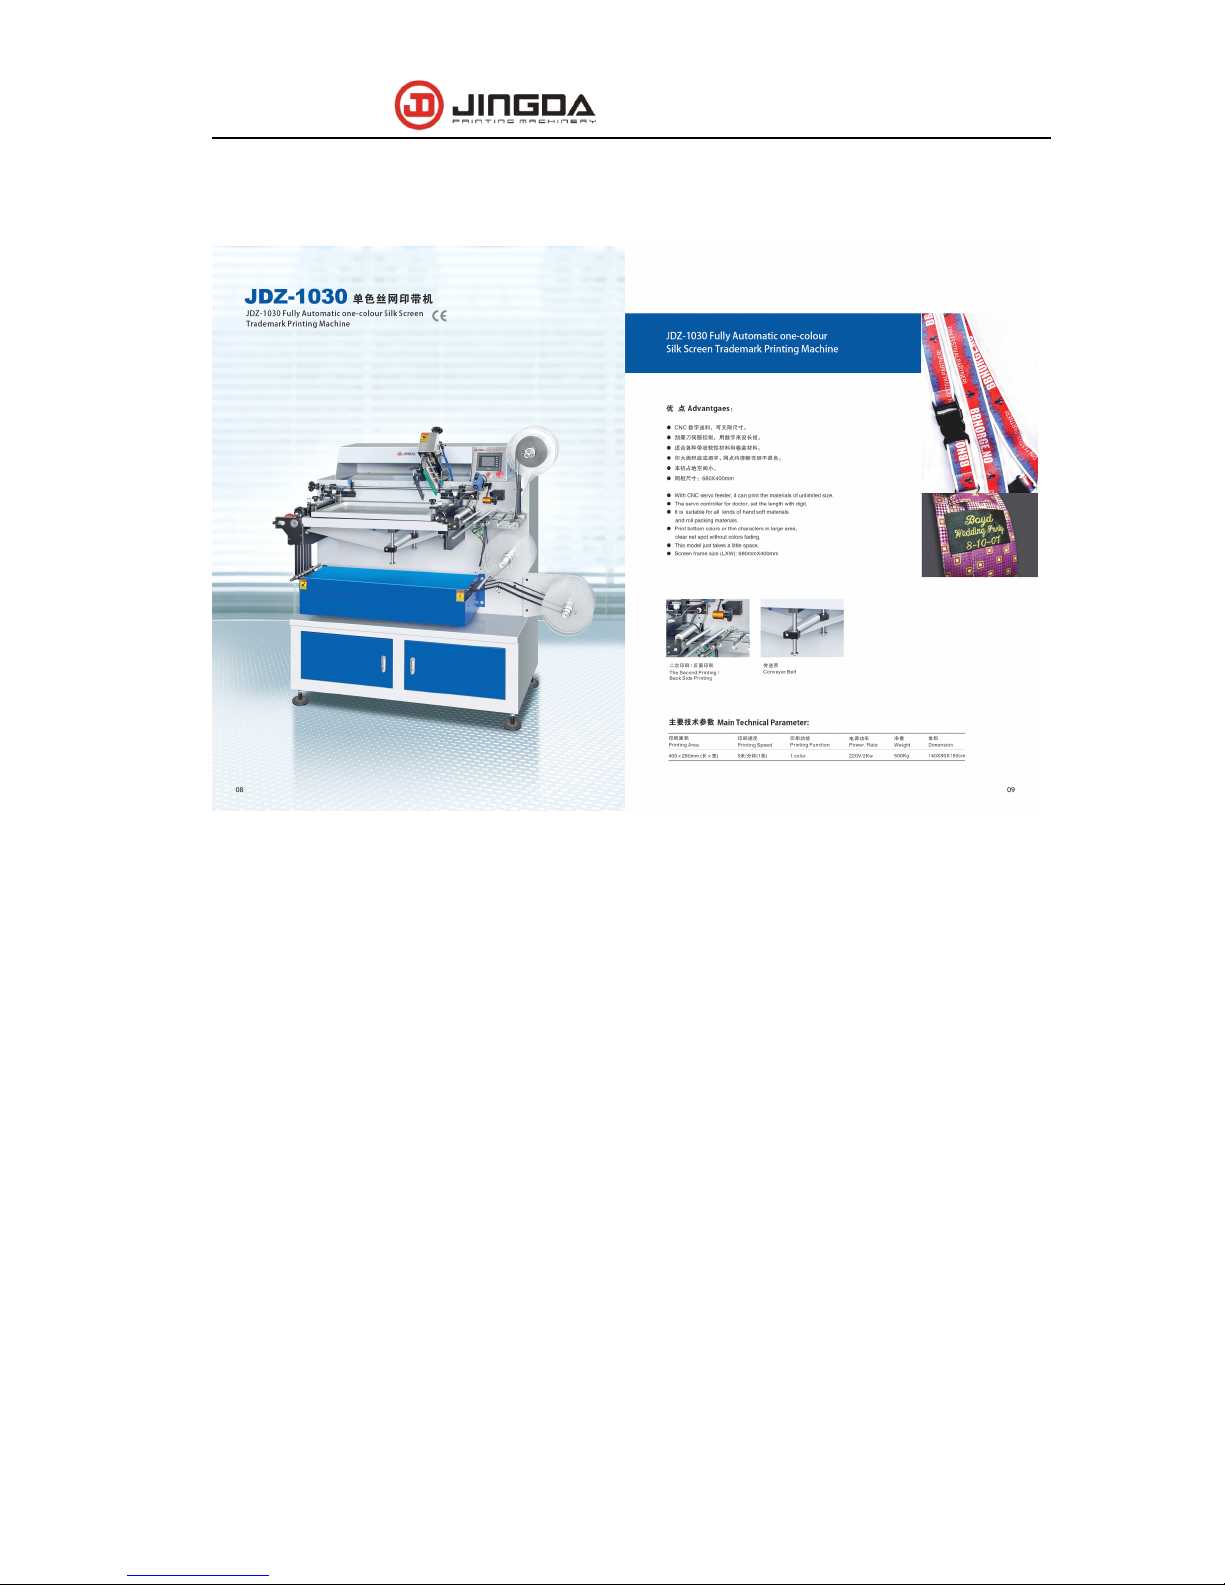
JD Screen Label Printing Machine Series
7
otherwise it will cause the machine out of shape.
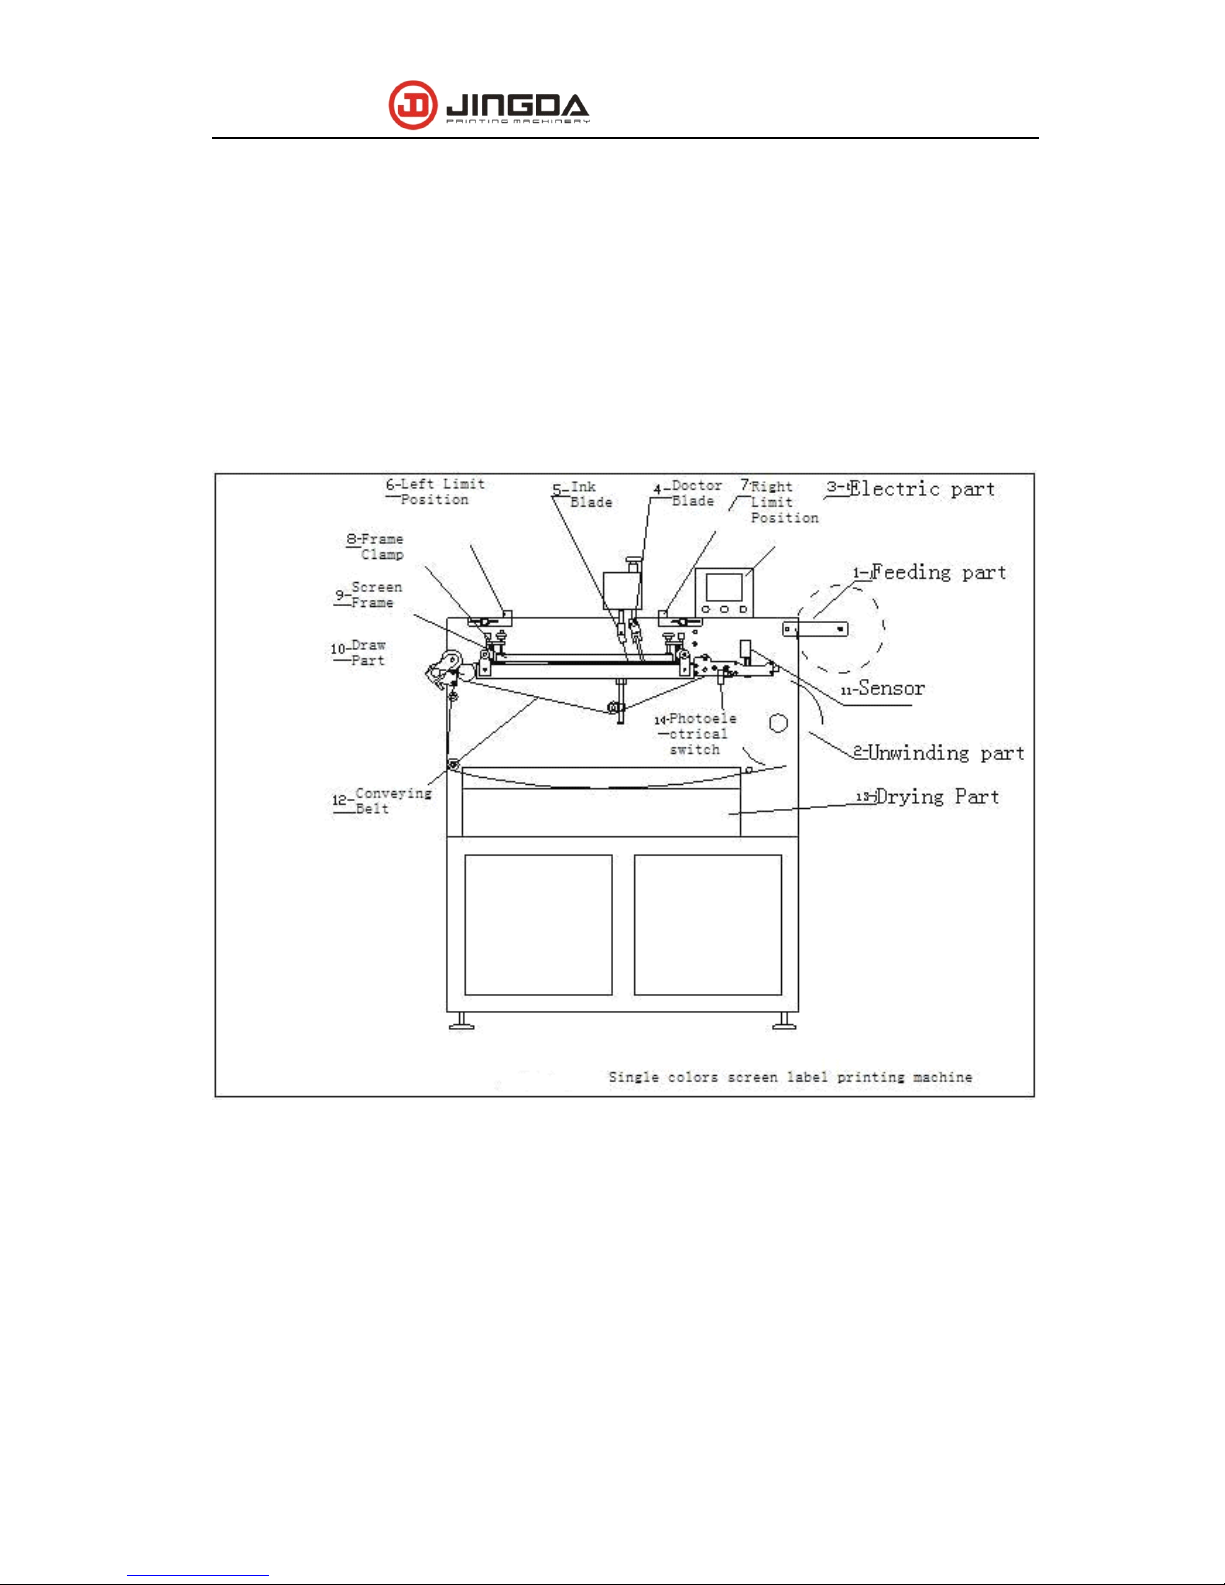
2.4 C onveying belt system
There are two methods to convey the belt, when cleaning or replacing the belt or
coating glue, press the button ON, the conveying belt will move successively to the right,
press the button OFF, it will stop.
2.5. Bridge oven and unwinding shaft
W hen finishing printing,, through the bridge oven, it is delivered to the last oven to
the unwinding, heat it till the temperature is up to 80
℃
. T he unwinding shaft must be
operated till the machine starts. Adjust the tension to control its friction and switch .
A fter knowing its basic parts, then we will introduce how to operate and the switch role.
C onnect the power, the indicating lights are on. W hen starting the machine, if the air
source doesn ’ t work, the machine can not work. F irstly, clean the vacuum room by
blowing, then press the button ON for conveying belt. T hen do the coating glue evenly.
After coating, press the button OFF, the belt stops moving to the right.
2.6 Feeding
P ut the machine into the feeding frame then position it, press the ON switch, press the
button OFF switch to make the frame fixed. Adjust the blade position to 1mm front to the
design. (Open it on the page of the touch-screen, make it sure then press it). T hen set the
length of the scratch blade. A fter that, adjust the pressure and angle for blade as well as
position of the inking blade. T he pressure of the blade is adjusted by the cylinder nut. I ts
pressure should not be too high. I ts angle scope is from 80*45 degree. When the materials
is not blocked the photoelectric switch , photo electric switch should be covered with
material or the machine can not be start ed off . there are two photoelectrical switches, may
choose not to work and work.
3
3
3
3
.
Cautions
Cautions
Cautions
Cautions and
and
and
and upkeep
upkeep
upkeep
upkeep
3.1 Cautions
1. Do not use petrol to clean the belt, all above mentioned happens, we have no
responsibility.
2. PLC dada and program controller set: before out of the factory all the data of converter
and program controller are well set. D o not change it at random. I f due to changing the
data by users to cause the parts damaged, we don ’ t guarantee to repair. (Users change
the data and program , all the revised data will be recorded) if the users want to change
the data, please contact suppliers.
3. Do not use petrol to clean the belt, all above mentioned happens, we have no
responsibility.
4. PLC dada and program controller set: before out of the factory all the data of converter
and program controller are well set. D o not change it at random. I f due to changing the
data by users to cause the parts damaged, we don ’ t guarantee to repair. (Users change
the data and program , all the revised data will be recorded) if the users want to change
the data, please contact suppliers.
Routinely maintain
1. Linear shaft and linear bear shaft: the guide orbit is the key to ensure the frame moving
correctly, so check it and add the oil regularly to ensure it lubricated.
2. Worktable: due to the worktable dirty or something oil etc substance, it will affect the