manuals.online logo
Brands
  1. Home
  2. •
  3. Brands
  4. •
  5. Joape
  6. •
  7. Fan
  8. •
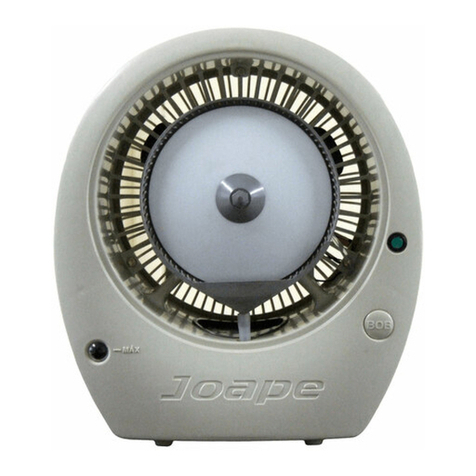
  9. Joape EcoJet Cyclone User manual

Joape EcoJet Cyclone User manual

Email: [email protected]
Phone: +1 305-713-4424
Miami Lakes, FL 33014
th
14100 NW 60 Ave
your equipment. If you have any quesons, please contact SouthBee
Customer Assistance by emailing [email protected]om or at 305-713-4424
during work hours, Monday to Friday from 9-5pm
EcoJet
EcoJet
EcoJet
EcoJet
EcoJet
Evaporave systems demand the exchange of air, operang where there
is air circulang.
WE RECOMMEND THE REPLACEMENT OF THE WHITE PLASTIC
SPINNING DISC ON THE FRONT OF THE FAN EVERY TWO
YEARS TO INSURE PERFORMANCE OF YOUR MISTING FAN
EcoJet
EcoJet
If the device gets rain and/or wet please wait unl it is completely dry to
run again.
EcoJet
* The wall mount fans come with the boom reservoir plug packed in a
plasc bag. Please screw the plug into the threaded drain hole and ghten.
EcoJet
EcoJet
1 wheel that moves in all direcons (and has a brake when you put the lever
down to keep the Reservoir from moving). The installaon must be like this:
Use these 4 screws for installation of the
fan over the water tank. 2 are for the
front and 2 are for the back
like packing foam and straighten the water pump hose. Place the water pump
with its hose inside the water tank. Carefully li the fan and place it one the
Step 4: Unbox the water reservoir and place it over the base. Line up the holes
in the base and reservoir. You will need the pieces from the plasc bag:
Step 5: Remove the nut and washer from the bolt on the stopper. Insert the
bolt into the hole in the base, put the washer and the screw nut on the bolt
from the boom.
Step 8: Plug the power cord to electricity, turn the fan on, and adjust the mist
flow using the knob on the back or side.
NOTE: Make sure the drain plug on the back boom of the reservoir is ght
Always move the water tank carefully, pushing the tank in a way that
prevents accidents. Ideally the tank should be moved when the reservoir
fan is empty, as the water adds considerable weight
Step by Step – How to assemble the “shorty” water tank
This “shorty” reservoir fan is shipped in 2 boxes:
- 1 box with the fan
- 1 box with the reservoir on wheels
Step 3: Connect the water hose to the threaded water connecon on the side of
the tank and confirm that the water is flowing into the tank through the
entrance and floater. In case the water is not flowing, adjust the floater in a way
that the water doesn't get obstructed
Step 2: Verify if the drain plug is ghten to avoid leaks.
Step 1: Unpack the reservoir from its box as well as accessories that came with it
(in case of any). Remove all packaging protecve material and place the water
tank on the floor.
Water hose connecon
Step 5: Insert the water pump with all its tubing into the reservoir through the
top of the tank and place the fan “sing” on the tank.
Step 4: Unpack the misng fan from its box. Remove all packaging protecve
material.
Use these 4 screws for installation of the
fan over the water tank. 2 are for the
front and 2 are for the back
Step 6: Align the holes and insert the rear screws and front screws into the tank.
Use the rear metal plate to connect both parts (one in the equipment and the
other in the tank) so this can be used for adjusng its angle in the future.
Step 7: Complete the water filling and check the water level at the back of the
equipment.
Step 8: Turn on the equipment and adjust the amount of mist you want on the
side of the fan.
& Cleaning
or side of the fan - clockwise to reduce mist, counter clockwise to increase
mist.
In air-condioned environments, use the EcoJet system to increase the
relave humidity of the air.
EcoJet
EcoJet
Unlike regular air-condioning equipment, the EcoJet fan should not be
used in closed rooms or areas. Excessive humidity can result.
If unused for 10 days we suggest the tank (wall mount) or reservoir be
emped and cleaned with a mild soluon of sodium hypochlorite (bleach).
Aer cleaning, remove the drain plug on the boom, drain all the water
out, then reinsert the plug. Run the fan a few minutes with clean water to
thoroughly rinse before using the fan again for cooling. IMPORTANT: make
sure all the bleach soluon has been run through the fan reservoir before
using it again for cooling.
disc of the fan.
Use only water-based fragrances should be added to reservoirs or tanks.
8 - Fan blades
Verify if there's no air inside the
water tubing that is prevenng
water to flow. Turn the
equipment on and off repeatedly
and/or pump the air out to allow
water flowing.
For reservoir fans, check if the
water pump is connected to the
water line. For the wall mount
fans, check the boom of the
fan and verify the pump tubing
connecon to the mist valve.
GFI electrical outlet is “tripping”
with the use of fan
On/Off Switch is not working Contact EcoJet customer service
for a new switch
Make sure the outlet and its
power grid has enough power
capacity to feed the fan.
White plasc spinning disc is
damaged
WE RECOMMEND THE
REPLACEMENT OF THE WHITE
PLASTIC SPINNING DISC IN
FRONT OF THE EQUIPMENT
EVERY 2 YEARS FROM DATE OF
PURCHASE TO MAINTAIN THE
IDEAL PERFORMANCE OF YOUR
MISTING FAN.
Contact EcoJet customer service
for a new disc
Motor(s) doesn't seem to work
Revise power switch, electrical
connecons and loose wires and
carefully make sure everything is
ghtened
15
1. All returns must be handled by the retailer your fan was purchased from. Call them
directly with your purchase informaon.
1. Customers needing replacement parts for fans over 1 year old from date of purchase
should contact EcoJet directly at the contact info provided below.
Retail Sales Returns
Parts
EcoJet fans and pumps need to be rounely cleaned per user manual instrucons to work
properly and not void the warranty.
EcoJet
EcoJet
EcoJet
EcoJet
EcoJet
EcoJet
EcoJet
EcoJet
EcoJet
EcoJet
come and
Customer will contact distributor directly.

This manual suits for next models

9

Other Joape Fan manuals

Joape Cassino User manual

Joape

Joape Cassino User manual

Joape EcoJet BOB User manual

Joape

Joape EcoJet BOB User manual

Joape Fortaleza User manual

Joape

Joape Fortaleza User manual

Joape Bob User manual

Joape

Joape Bob User manual

Popular Fan manuals by other brands

Hunter 23683 Parts guide

Hunter

Hunter 23683 Parts guide

Venmar 1.3 HE installation manual

Venmar

Venmar 1.3 HE installation manual

stori Prologue installation guide

stori

stori Prologue installation guide

P.Lindberg 9059117 Original user manual

P.Lindberg

P.Lindberg 9059117 Original user manual

Vortice ANGOL K R Instruction booklet

Vortice

Vortice ANGOL K R Instruction booklet

Savoy 52-771-5TK-13 owner's manual

Savoy

Savoy 52-771-5TK-13 owner's manual

Canarm CF1770 instruction manual

Canarm

Canarm CF1770 instruction manual

Hunter 25745 Parts guide

Hunter

Hunter 25745 Parts guide

Bahamas Breeze FW40-F3 owner's manual

Bahamas Breeze

Bahamas Breeze FW40-F3 owner's manual

Field Controls 4592700 instructions

Field Controls

Field Controls 4592700 instructions

S&P HR100V Homeowner's guide

S&P

S&P HR100V Homeowner's guide

Progress Lighting AirPro P2538 installation manual

Progress Lighting

Progress Lighting AirPro P2538 installation manual

miseno MBF080AWH installation instructions

miseno

miseno MBF080AWH installation instructions

PMX HVRA-4D quick start guide

PMX

PMX HVRA-4D quick start guide

AREBOS AR-HE-LZBV55W manual

AREBOS

AREBOS AR-HE-LZBV55W manual

Beper VE.112 use instructions

Beper

Beper VE.112 use instructions

Goobay 49645 manual

Goobay

Goobay 49645 manual

Phaesun Cool Breeze 12 manual

Phaesun

Phaesun Cool Breeze 12 manual

manuals.online logo
manuals.online logoBrands
  • About & Mission
  • Contact us
  • Privacy Policy
  • Terms and Conditions

Copyright 2025 Manuals.Online. All Rights Reserved.