13
I25 I24 I23 I22 I21 I20 I19 I18 I17 I16 I15 I14 I13 I12 I11 I10 I9 I8 I7 I6 I5 it fr en de
Removing and cleaning the squeegee
Cleaning the vacuum channel
Cleaning the machine
Storage / parking of machine (machine is idle)
Store the machine with the tank cap slightly open, by:
• Lift up the carrying handle and close the tank lid until it slightly sits on the
carrying handle.
Service, maintenance and care
The machine's maintenance is pre-condition for trouble-free running and a long
life.
Service intervals
TASKI machines are built to the highestqualitystandards.This is supported by
internationallyrecognisedquality controlprocedures.Electricaland mechanical
parts are subject to wear or aging if used for long periods of time.
Service centre
Should you contact us due to a malfunction or for placing an order, please
always state the type, description and the serial number of your machine.
You can find this information on the name plate of your machine, and the
address of your nearest TASKI partner can be found on the last page of this
manual.
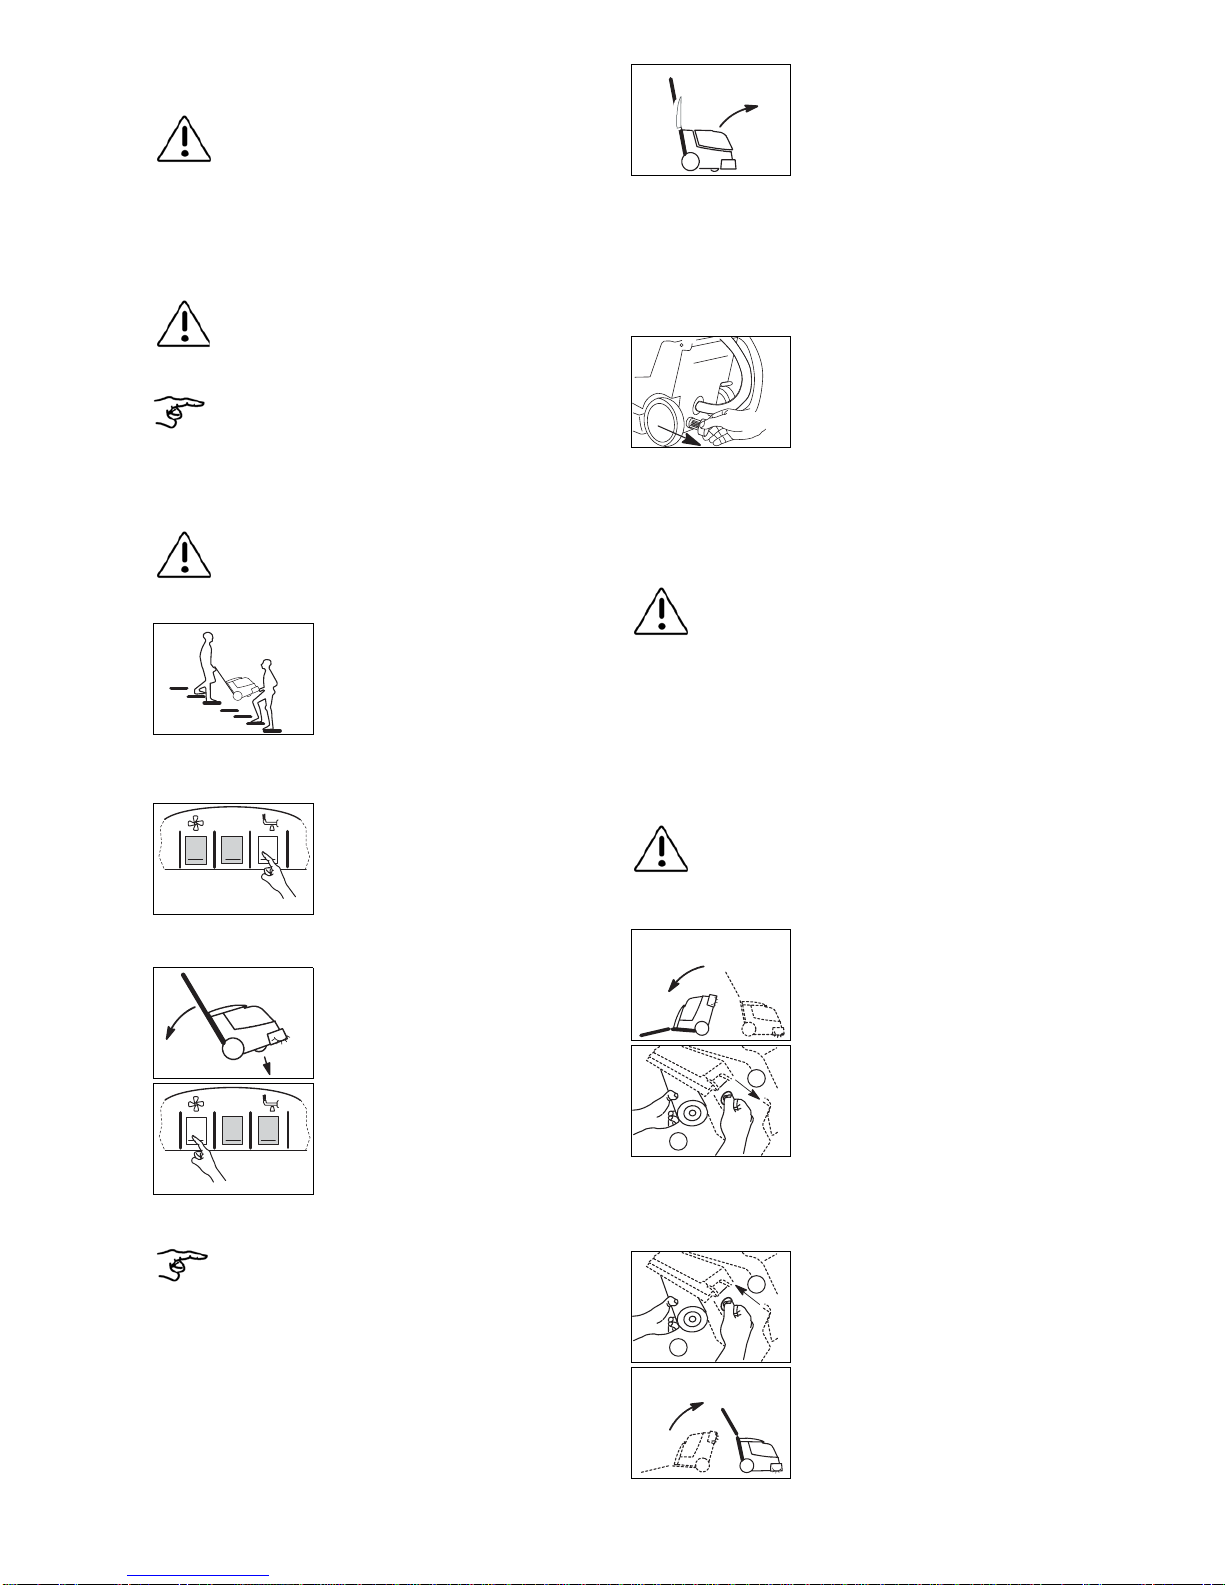
Caution:
The tanks must be empty before you remove the tool!
• Switch the machine off and pull the power supply cord out of the mains
socket. • Tilt back the machine until the handle rests on
the floor.
• Loosen the fastening screw and pull the
squeegee away from the coupler.
Repeat the proceedure witht the rear squeegee.
• Clean the squeegee with water using a brush.
Optimal result can only be obtained with clean and intact blades!
• Fit the squeegee on to the catch as shown.
• Then push the squeegee up, making sure it is
pressed into the suction opening, and then
tighten the fastening screws.
• Slowly return the machine to its uprightposition.
• Switch the machine off and pull the power supply cord out of the mains
socket. • Remove the Servicing lid, by loosening the
knurled nuts.
Caution:
Danger of injury due to sharp objects.
Personal safety is covered by appropriate national regulations!
• Remove any loose dirt by hand.
• Clean the vacuum channel with a cloth or brush.
Do not use sharp or pointed objects for cleaning.
1
2
1
2
Caution:
Never clean the machine with high water pressure or a water
hose.
The ingress of water into the machine might cause considerable
damage to mechanical or electrical parts.
• Wipe down the machine with a damp cloth.
We recommend disconnecting the plug from the mains socket
during storage / parking of the machine.
This allows the tank to dry out. As a result, the
formation of mould and unpleasant smells can
be reduced.
Caution:
Only TASKI branded spare parts must be used, otherwise
warranties and liabilities will be omitted!
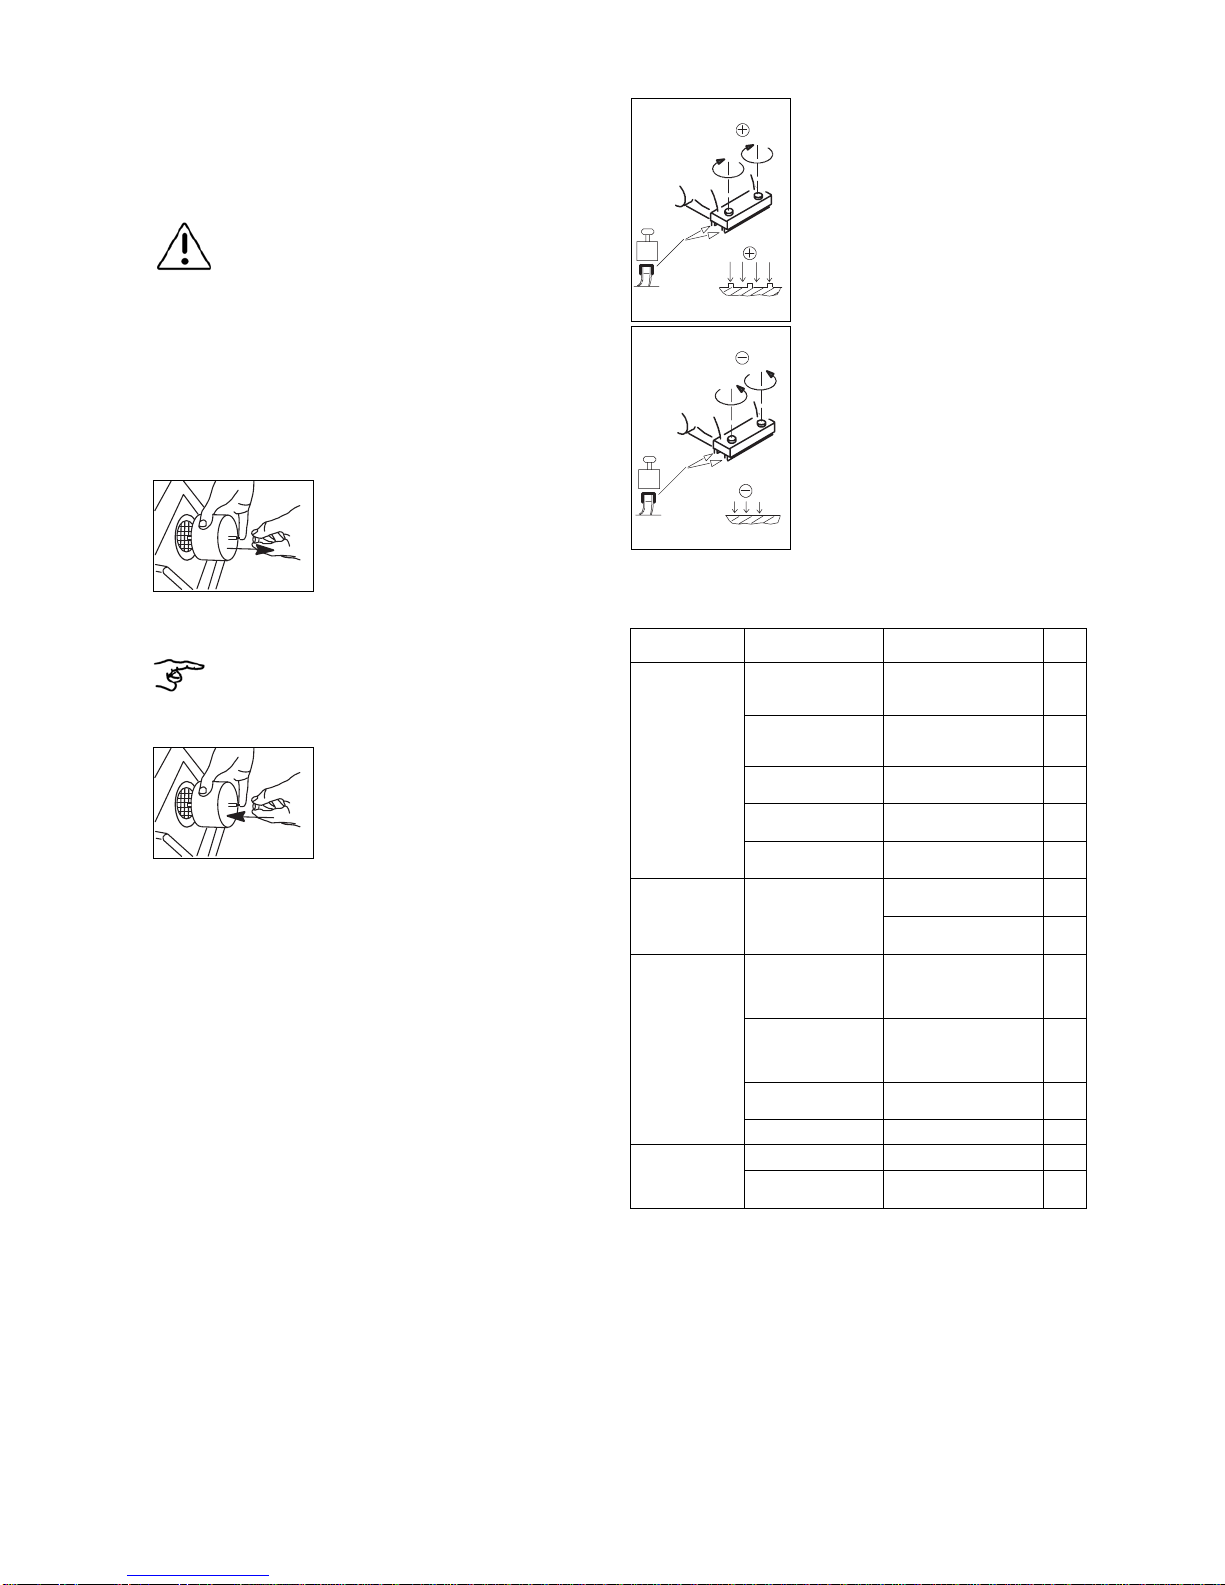
Symbols:
◊= after use, ◊◊ = every week, ◊◊◊ = every month
Activity ◊◊◊◊◊◊page
Drain and clean the tanks 12
Clean squeegee, check whether the blades are worn
and replace if necessary 13
Clean the tank lid seal, check for cracks and replace if
necessary
Wipe down the machine with a damp cloth 13
• In order to maintainoperational reliability andavailability for use, the service
must be carried out after 250 working hours or at least once a year.
Underroughorextreme workingconditionsand/ orinsufficientmaintenance,
shorter intervals may be necessary.