Jolog SRA07 User manual

SRA07
Hangzhou Jolog Robot Technology Co., LTD


Thank you for purchasing, wish you have
a happy experience.
Contents
2. Safety Instruction..................... 4-6
3. Product Formation.................... 7-8
4. Product Installation.................... 9
5. Product Usage……………...11-13
6. Product Maintenance…........14-17
2.1 Use Notes
2.2 Safety Precautions
2.3 About Child Safety
2.4 About Battery
2.5 Wireless Device Warning
2.6 Usable Scope
3.1 Main Body and Accessories
3.2 Accessories Introduction
4.1 Main Body
4.2 Charging Station
4.3 Installation of “Huiba” App
5.1 Main Body
5.2 Remote Control
5.3 Charging Station
5.4 Charging Methods
6.1 Clean the Main Body
6.2 Clean the Dustbin
6.3 Clean the Main Brush
6.4 Clean the Side Brush
6.5 Clean the Front Wheel
6.6 Clean the Left Wheel and
Right Wheel
6.7 Clean the Sensors
6.8 Clean the Trailing Bar Assembly
6.9 Others
7. General Error ..………………. 18
8.Technical Parameters………... 19
Alarm and Prompt Facility
1.7 General Error
2.7
1. “Huiba”App Operation Guide... 2-3
Attachment: …………………... 20-23
“Huiba”App Operation Guide
Warning: ………........……..……... 24
- 01- Product website: xshuairobot.com

1. “Huiba”App Operation Guide
1.1
*App can read 10 countries language ,including English,German,French,
Spanish,Chinese,Russian,Portuguese,Japanese,Hebrew,Italian.
*Scan the QR Code below or search “ Huiba ” in App Store or Google Play.
IOS Google Play
Download & Install “ Huiba” App
Step 1. Enter mobile phone No..
Step 2. Input passwords after receiving verify code.
Step 3. Finish registration.
1.2 Register
Huiba
- 02 -
Product website: xshuairobot.com

1.3 Add The Robot
1. Enter into App "Huiba", click "+" on home page to get into add robot
interface, operating based on guiding steps on the App interface.
2. If you want to add multiple robots, click"+" in the upper right corner of the
contacts, operating based on guiding steps on the App interface.
- 03 - Product website: xshuairobot.com

2.2 Safety Precautions
2.1 Use Notes
Please observe the following safety precautions before using the product:
* Read the User Manual carefully, and use the product according to the
* Keep the User Manual carefully for the f
instruction. uture reference.
* If you want to send the product to others, please send it together with the User
Manual.
* Any error operation may damage the product or cause serious personnel injury.
Please use the original adapter, battery and charging station, otherwise
it will damage XSmart and cause fire because of electric shock and high
voltage.
Caution
2. Safety Instruction
- 04 -
Product website: xshuairobot.com
If you find that the main body and accessories are damaged, is not
allowed to disassemble maintenance or remould the XSmart. Please do
not use the XSmart and contact with the after-service department.
Do not touch the battery socket and XSmart when your hands are wet,
otherwise it will cause electric shock.
Do not use the XSmart in the place without guard railing, otherwise it will
damage the XSmart and cause personal injury.
Do not bend the power cord overly or place weight on it, otherwise it
may cause power cord damage, fire or electric shock.
Do not approach cigarette,lighter,match and other heat objects or
combustible materials such as the gasoline to XSmart.
Do not put your clothes or any place of your (hair,finger and so on) into
the main brush and wheels, or it will cause personal injury.

* The machine should not be used alone by
children.
* Forbid the children playing the packing bag,
otherwise it will cause smother.
2.3 About Child Safety
Attention
Please turn off the power
switch if you do not use the
XSmart, otherwise it will
damage the battery.
OFF/ON
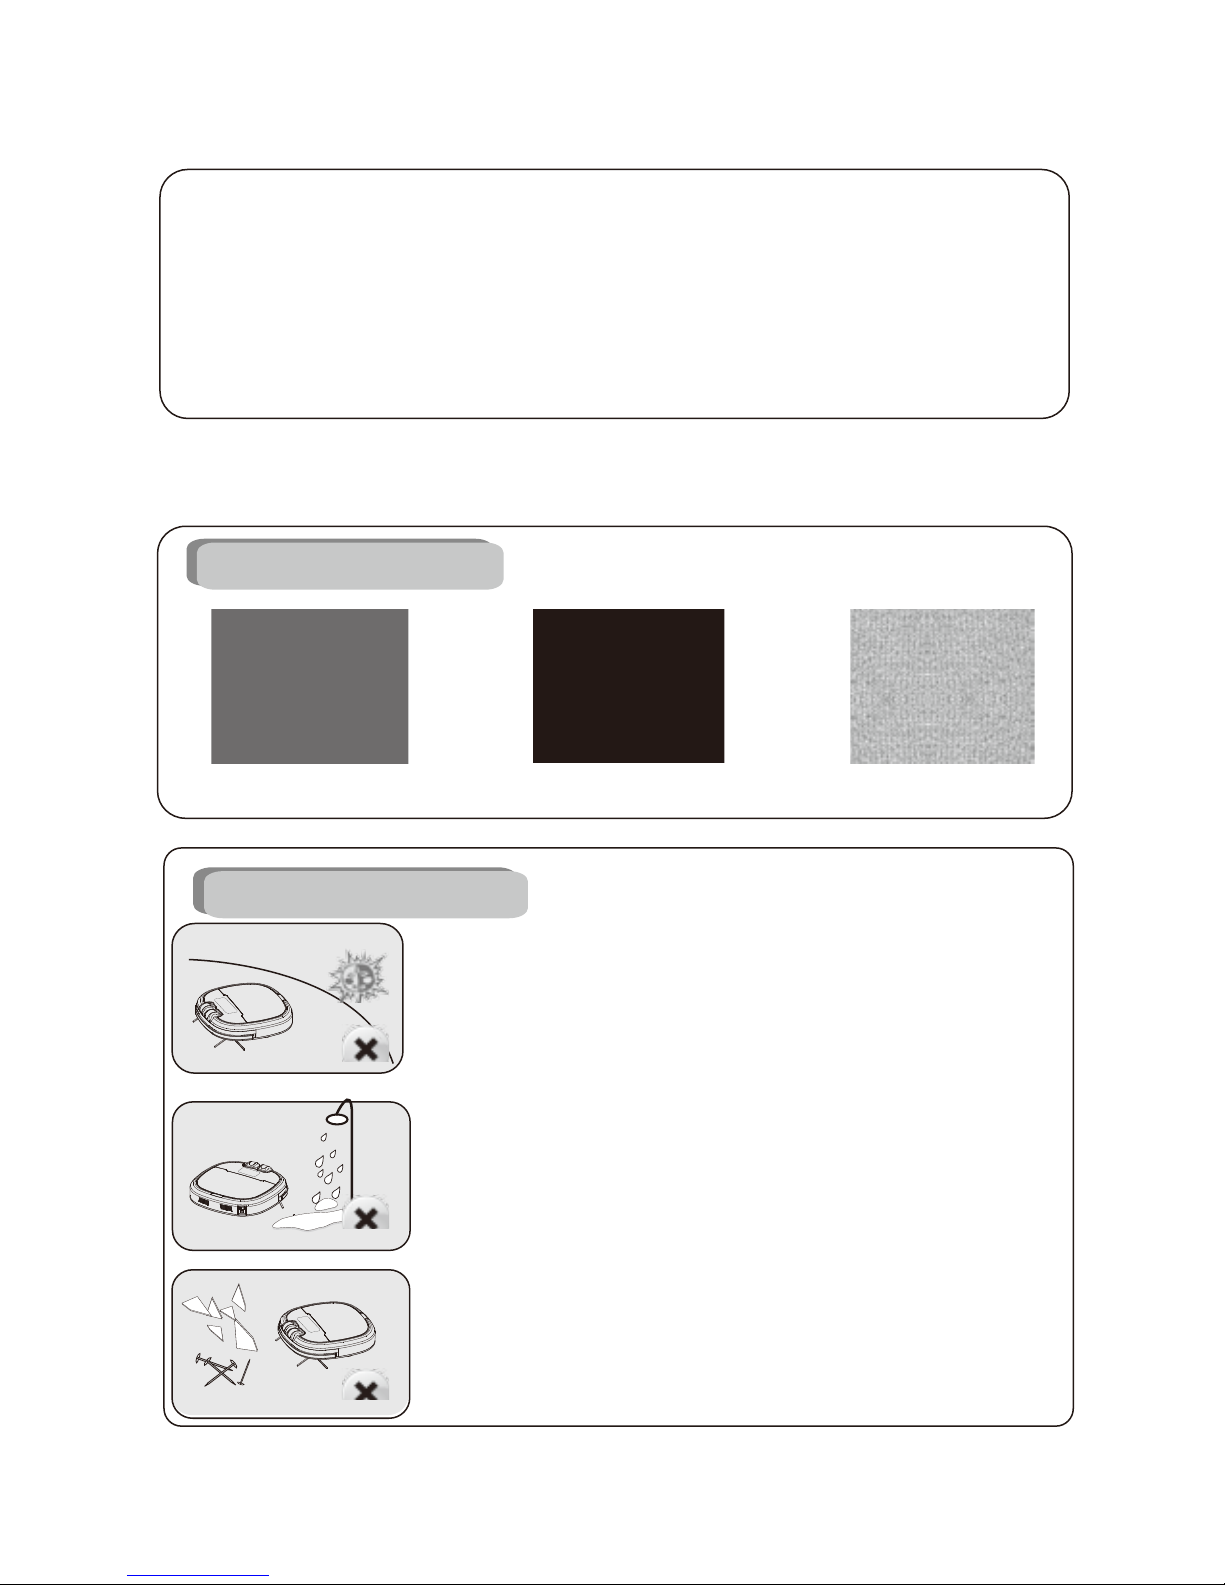
This product is only used
indoor. Water, oil or other liquid
shall be prevented from
damaging the XSmart.
If the machine is not used
for a long time, please char-
ge the battery fully, then
take it in shade place, keep
the bottom of cleaner dry.
Please clean up the wire in
the wire in the floor, or it will
hinder the working of the
machine.
It's better to place charging
station against the wall and
flat ground.
Please remove all the fragile
objects.
Do not cover the signal
window of the charging
station, otherwise XSmart
auto-charging will be invalid.
2.4 About Battery
1. XSmart will only be used with the original battery.
2. Please turn off the power switch before taking out
the battery .
3. The battery must be taken out before abandoning it.
Please charge the battery
about 5 hours for first using.
Please wipe the camera
a soft cloth when it is blur.
Please cut off the power sup-
ply plug when non-used for a
long time.
Danger!
Electric shock!
4
5. The battery includes hazardous substance, please put it to
recycle site according to original environmental protection
regulations.
. If the battery is leak, please do not touch the liquid, you
should wipe the liquid with dry cloth, and put the battery to
recycle bin or maintenance point, do not throw it at random.
- 05 - Product website: xshuairobot.com

2.6 Usable Scope
2.5 Wireless Device Warning
The robot is suitable to the following environment:
*Not suitable to be used in the extreme hot or cold environment.
*Do not use XSmart in the place without guard railing, otherwise
it will damage XSmart and cause personal injury.
*Do not use XSmart in the following environment: wet, inflamm-
able, explosive and easily corrosive.
*Do not let XSmart clean the flaming cigarette butts, matches
and so on.
*Do not let XSmart suck the toner from laser printer and copier,
otherwise it will cause fire.
*Do not let XSmart suck sharp objects, such as glass sheet, piton
and so on, otherwise it will damage XSmart.
Applicable Scope
Inapplicable Scope
- 06 -
Tile CarpetWooden Floor
This device contains transmitter module,
FCC ID:2ALWG-SRA07
This device complies with Part 15 of the FCC rules . Operation
is subject to the following two conditions:
(1) This device may not cause harmful interference.
(2) This device must accept any interference received, including
interference that may cause undesired operation.
Product website: xshuairobot.com

.
3.1 Main Body and Accessories
Main Body
Battery
Water Tank Mop
Remote control
suction
components Side Brush Clean Brush
Adapter
Charging Station
3. Product Formation
User Manual
3.2 Accessories Introduction
- 07 -
Side Brush
Charge Jack
Power Switch
Front View
Dust Box Button
Camera
Optical Window
Sensors Window
Mechanical induction bar
Top Cover
Product website: xshuairobot.com
AUTOHOME
SPOT
ZIGZAG
VACUUM
EDGE
OK

Trailing Bar
Assembly Mop
Bottom View
Ground Detection Sensors
Battery Pack
Right Wheel Left Wheel
Middle Bristle Brush
Front Wheel
Charging Electrodes
- 08 -
Product website: xshuairobot.com
4.Product Installation
4.1 Main Body
1. If you do not use the machine, please turn off the power switch, or else it will damage the battery.
2. If the machine is not used for a long time, please charge the battery fully, then take it out and put
it in shade place, keep the bottom of cleaner dry.
3. The battery should be charged about 5H, if the machine is not used for a long time or the first time.
When the battery is used up for 3-4 times, which will make t he battery best efficient.
4. You should use the original battery, or else it will cause damage and accident.
Caution:
Danger! Electric shock.
OFF/ON

Danger!
Electric shock!
- 9 -
4.2 Charging Station
2.Connect charging station to
power socket.
3.Do not cover the signal
window of the docking sta-
tion, otherwise the function
of auto-charging will be in-
valid.
1.Put charging station on the
flat floor against the wall and
tfelehtnom5.0dnam3fo
from the charging sation in
keep any obstacles away
and right.
3.For more information, please refer to Chapter 1, "Huiba App Operation Guide".
This App is just apply to smartphone.
3
1.The system version requirements for smartphones are as follows.
Android system must be 4.0 or above,IOS system must be 8.0 or above.
2.Two options for App downloading:
A-Search "Huiba" in App store or Google Play.
B-Scan the below QR code.
4.3 Installation of “Huiba”App
IOS Google Play
Huiba
Product website: xshuairobot.com
0.5m
0.5m
3m

Buttons' InstructionIcon
Press this button and release, and then hear "tip", the volume of the
machine will increase.
Press this button for 10 seconds until you hear the "tip-tip" and rele-
ase, the machine will enter the time setting mode, the number of the
week will be flashing, press " " button to increase the number,
press" " button to reduce the number; Press " " button to make
the hour decade digits flashing, press " " button to increase the
number, press " " button to reduce the number, and so on, time
set-up succeed.
Press this button and release, and then hear "tip", the volume of the
machine will increase.
Auto button:
Press this button and release, and then hear the "tip", the robot enter
the " " shape cleaning mode, and then click again, the machine
will pause cleaning.
Press this button for 10 seconds until you hear "tip-tip" and then
release, wifi indicator flashes, the machine finishes wifi signal firing.
Wi-Fi configuration light:
When the white light flashes, the machine completes the WiFi
signal launch, when the white light is normally bright, the devices
addition of the machine is successful.
Recharging button:
Press this button and then hear "tip", machine in standby mode or
operation mode will automatically search for the charging seat, and
then click again, the machine will stop searching.
Camera light:
Normal Light shows that the camera is on.
5.1 Main Body
5.Product Usage
- 10 -
Volume Buttons Auto Button
Recharge Button
Camera light
Wi-Fi configuration light
Hour decade Week digit
Minute unit
Hour unit Minute decade
Battery
VOL VOL AUTO HOME
+
VOL
+
-
VOL
-
VOL
-
VOL
-
HOME
HOME
HOME AUTO
AUTO
Product website: xshuairobot.com

4. Turn on the power switch and pr-
ess the “+” or “-” to change the vo-
lume.
2.
XSmart will automatically return to its
docking station for self-recharging when
the battery is low. Connect the App on
smart phone, Robot can be controlled to
charging.
3. Turn on the power switch and press
the “AUTO” button, XSmart will start
cleaning. Press it again, XSmart will
stop cleaning.
VOL VOL AU TO HOME
+
-
VOL VOL AU TO HOME
+
-
Make sure the robot has enough power,
turn on the power switch, wait for 25
seconds hear the "tip", the program starts,
in standby mode.
Standby
Auto
Cleaning
Auto
Charging
Volume
control
5. Press
the “AUTO” button, Xsmart
enter the “ ”shape path of cleaning
mode.
Zigzag
Cleaning
- 11 - Product website: xshuairobot.com
OFF/ON

Product website: xshuairobot.com
5.2 Remote Control
1.“POWER” button
Under the operating mode,the machine stops cleaning by pressing this button.
2.“OK” button
A.Under the standby mode,the machine starts advanced zigzag cleaning by pressing this button.
B.Under the operating mode,the machine stops cleaning by pressing this button.
3.Direction buttons
A.“ ”Up
Under the standby mode or operating mode,the machine moves forward by pressing this button.
B.“ ”Down
Under the standby mode or operating mode,the machine moves backward by pressing this button.
C.“ ”Left
Under the standby mode or operating mode,the machine rotates to the left by pressing this button.
D.“ ”Right
Under the standby mode or operating mode,the machine rotates to the right by pressing this button.
4.“HOME” button
Under the standby mode or operating mode,the machine retunes to charging dock for recharging
its battery by pressing this button.
5.“AUTO” button
Under the standby mode or operating mode,the machine starts zigzag mode by pressing this button.
6.“SOPT” button
Under the standby mode or operating mode,the machine starts cleaning mightily by pressing this
button.
7.“ZIGZAG” button
Under the standby mode or operating mode,the machine starts zigzag mode by pressing this button.
8.“EDGE” button
Under the standby mode or operating mode,the machine starts cleaning along the edge by
pressing this button.
9.“VACUUM” button
Under the standby mode or operating mode,the machine starts strong suction power by pressing
this button.
!Note:
1.Please assemble two pieces of batteries before use.
2.If the remote control is not in use for a long time,please take out its batteries.
- 12 -
AUTOHOME
SPOT
ZIGZAG
VACUUM
EDGE
OK
1
4 5
6 7
8 9
23

5.4 Charging Methods
5.4.1 Manual Charging:
5.3 Charging Station
2
3
1
4
Danger!
Electric shock.
No obstacle
here.
NO
3
4
1
2
Name
Charging indicator
Signal window
Charging
electrodes
DC socket
Function
When the adapter is connected power supply, the red indicator light
is on. When the Xsmart is in charge, the blue light is on.
Emitting signal is the unique way to conduct to recharge with charg-
ing station, so the signal window should be clean regularly to ensure
the sensitivity and accuracy.
The charging electrodes should well contact with electrodes,
otherwise the charging will fail .
Output end jack of adapter.
Usage:
1.Install the charging station according to the method from page 8, as shown on the top right
photo.
1. Charge the XSmart with an adapter:
Connect the plug between the XSmart
and the adapter, then insert the socket.
2. Connect the plug between the adapter and charging
station, then put the XSmart behind the charging
station,put the charging electrodes on the charging
station directly, finally connect the power socket .
Charging Station Instruction
Danger! Danger! Electric shock.
- 13 - Product website: xshuairobot.com

5.4.2 Auto charging
6.1 Clean the Main Body
6.2 Clean the Dust Box
6.2.1 Removing Dust Box
1. Before cleaning the main body, please turn off the power switch and
take out the power plug.
2. Please wipe the main body with water and neutral detergent, and make
sure the mop is dry, do not put the water into robot.
3. Do not wash robot with oil.
4. Do not make the water into the speaker hole.
1. Lift the cover and remove
the dust box
1. Rinse the dust box
2. Remove the filter 3. Dust out
6.2.2 Clean the Dust Box
6. Product Maintenance
Please clean the XSmart regularly
according to the usage.
Tips:
1.Auto-charging by smart phone App:
Firstly install the app, then open the
controlling interface, click the “charge”
button and XSmat will find the
charging base in the effective scope.
2. Auto charging:
When the battery power is low during
the cleaning, XSmart will emit the sound
“tip-tip”, the main brush will also stop
working, and XSmart will go back to the
charging station automatically.
3. Auto-charging:
XSmart will return to
charging station for
charging after press
the HOME button.
Product website: xshuairobot.com
trash can
VOL VOL AUTO HOME
+
-
- 14 -

6.2.3 Clean the filter
6.2.4 Clean the HEPA
6.3 Clean the Main Brush
6.3.1 Assemble and Disassemble the Main Brush
1.Pat the HEPA 2.Install the HEPA
3.Please push the buckle to open the main
brush lock,
3.As shown on the above photo,push the buckle
strongly ,and fill it up.
4.Grasp the middle bristle brush and fill it up.
trash can
PULL
- 15 - Product website: xshuairobot.com
1.Remove the HEPA
2.Use the brush to brush the filter
PULL

6.3.2 Clean the Middle Bristle Brush
2.Please clean the hair and cloth wrapped
around the side brush.
6.4 Clean the Side Brush
1.Take out the screw with a
screwdriver on the side brush. 2.Take out the side brush,clean
the hair on the side brush,then
clean the entanglement in the
slot.
3.Put the side brush in the hole,
lock the screw on the side brush.
1.Please follow the above pictures illustrate to
clean the main brush by clean brush.
1. Clean with the clean brush, do not clean with water.
(Tips: Please clean the wheels regularly if hair and a strip
of cloth twine in the axle of the wheels.)
6.6 Clean the Left Wheel and Right Wheel
6.5 Clean the Front Wheel
1. Clean the front wheel with the clean brush.
Product website: xshuairobot.com - 16 -

6.7 Clean the Sensors
6.9 Others
Please take out the battery and store it in shadow and
dry places when it is not in use.
Please turn off the power when it is not in use.
Please wipe the sensor window by dry
cloth or clean it by brush.
6.8 Clean the Trailing Bar Assembly
Please assemble and disassemble the trailing bar assembly according to the above photo.
6.8 Clean the Mop
Tips: The trailing bar assembly is an accessory that is suitable to the flat floor, please use it
according to the house environment.
1.Pull the mop from the mop plate,then wash it
by water.
2.Put it on the velcro properly and then press it.
- 17 - Product website: xshuairobot.com
OFF/ON

7.General Error
7.1 Alarm and Prompt Facility
7.2 General Error
1. If the machine stops working, the display will show the error code.
2.Please check the display failure prompt, according to the following tips to clear the exception.
Faults performanceError Code Solution Remarks
Obstacles on the sensors
window.
Obstacles on the sensors
window.
E1
E2
Clean the ground detection
sensor.
Clean the Wall detection
sensor.
Clean the ground detection
sensors regularly.
Clean the wall detection
sensors regularly.
Driving wheel off the ground
E3
E4
Place the machine on the
ground. Keep the machine on the
ground.
1.Can not work
2.Cannot automatically charge.
1.Driving wheel block.
2.Hair and a strip of cloth twine
in the wheels.
2.Hair and a strip of cloth twine
in the Side brush.
Please check and clean the
debris on the driving wheel.
Please check the hair and cloth
wrapped around the side brush.
Clean the wheels regularly.
E5
E6
1.The Side brush while blocking. Clean the Side brush
regularly.
Charge the XSmart manually.
Connect the battery cable.
The battery is not connected.
E7
Battery replacement.The battery is damaged.
E8
Check the mechanical induction
bar.
Mechanical induction bar are
stuck.
E9
Please keep XSmart
charging after working
everytime.
No.
1
Faults Solution
Walk back all the time
2
3
4
XSmart does not work
Unable to auto-recharge
Unable to recharge
Product website: xshuairobot.com - 18 -
1. It is better to avoid robot working in the strong bright environment.
2. It is better to avoid robot working in the black carpet.
3. Check the ground sensors to see if any dust or dirt covered the sensor
window.
1. Check whether the power switch is on.
2. Check whether XSmart is enough power, if not, please charge the XSmart.
1. Check whether the LED indicator of docking station is on.
2. Check whether there are obstacles between XSmart and recharging station.
3. When the battery power is low, please charge XSmart artificially.
1. Check if the battery is installed correctly. If yes,please turn on the power
switch to see if the display is on.
2.If the appearance of the battery is deformed, damaged and so on, please
stop using XSmart and call our customer servicer.
Table of contents