Joy-it RB-TFT3.2 User manual

3
3.2“ / 3.5“ Touch-Display
for Raspberry Pi

Published: 16.08.2019 Copyright by Joy-IT 3
3.2“ / 3.5“ Touch-Display
Dear customer,
Thank you very much for choosing our product.
In the following we will show you what has to be observed during commissioning and use. Should you
encounter any unexpected problems during use, please feel free to contact us.
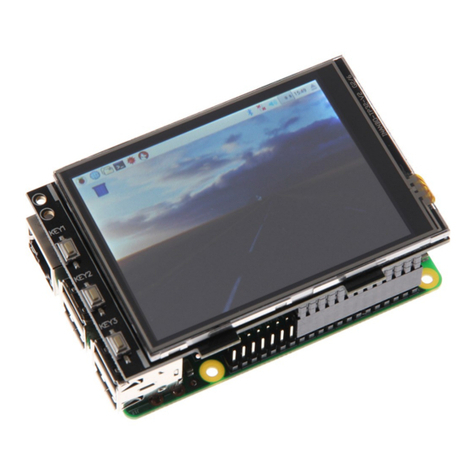
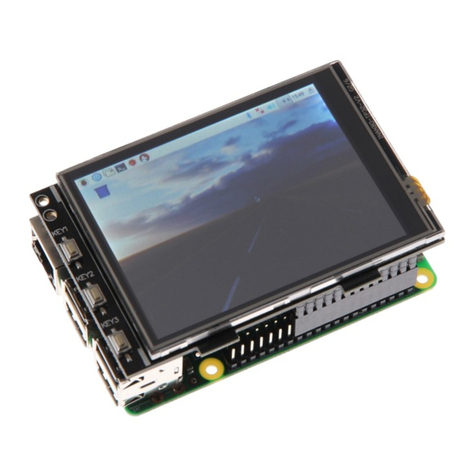
Plug the 3.2"/3.5" TFT display onto the Raspberry Pi so that it is plugged onto the rst 26 pins of the GPIO
connector. Aer that the backlight of the display should already light up.
1. OVERVIEW
3.2“ Display 3.5“ Display
Controller XPT2046
Resoluon 320x240 480x320
Colors 65.536
2. CONNECTION

Published: 16.08.2019 Copyright by Joy-IT 4
3.2“ / 3.5“ Touch-Display
Install the FBTFT image on your SD card using the "Win32 Disk Imager" program, which you can download
from the following links:
For RB-TFT3,2 ": Downloads 3,2" display
For RB-TFT 3.5 ": Downloads 3.5" display
3. INSTALLING THE SOFTWARE

Published: 16.08.2019 Copyright by Joy-IT 5
3.2“ / 3.5“ Touch-Display
Manuelle Installation
Do you already use another Raspbian Jessie Image and want this with the 3.2 "/3.5"
Extend touchscreen TFT, then you can install the FBTFT modules later on your system. For this the le
"cong.txt" has to be edited rst.
Open a terminal window on your Raspberry Pi and follow the instrucons:
Depending on your display, add the following lines at the beginning of the opened le:
For the 3.2 "TFT:
For the 3.5 "TFT:
For the Raspberry Pi4 an extra adjustment has to be done. To do this, the command dtoverlay = vc4-ms-
v3d has to be commented out in the cong.txt under the point [pi4], this should look like this:
sudo nano /boot/config.txt
dtparam=spi=on
dtoverlay=joy-IT-Display-Driver32b-overlay:rotate=270,swapxy=1
dtparam=audio=on
max_usb_current=1
hdmi_force_hotplug=1
config_hdmi_boost=7
hdmi_drive=1
hdmi_ignore_edid=0xa5000080
dtparam=spi=on
dtoverlay=joy-IT-Display_Driver35a-overlay:rotate=270,swapxy=1
dtparam=audio=on
max_usb_current=1
hdmi_force_hotplug=1
config_hdmi_boost=7
hdmi_drive=1
hdmi_ignore_edid=0xa5000080
[pi4]
# Enable DRM VC4 V3D driver on top of the dispmanx display stack
#
#dtoverlay=vc4-fkms-v3d <---- This setting must be commented out with a #
max_framebuffers=2

Published: 16.08.2019 Copyright by Joy-IT 6
3.2“ / 3.5“ Touch-Display
Now save the le with the key combinaon CTRL + O, conrm with Enter and leave the editor with the
combinaon CTRL + X. Now the le "cmdline.txt" has to be edited:
In this case, the following command must be added at the end of the already exisng rst line:
Save the le, exit the editor and create the le "99-calibraon.conf":
The following lines must be added to the le:
This le is also terminated and saved with "Ctrl + X" followed by "Y" and "Enter". Finally, the le "/usr/
share/X11/xorg.conf.d/99-turbo.conf" has to be edited. To do this, enter the following command:
And change the following line there ...
... so that you change "0" to "1" and the line looks like this:
This le is also terminated and saved with "Ctrl + X" followed by "Y" and "Enter".
sudo nano /boot/cmdline.txt
fbcon=map:10
sudo nano /usr/share/X11/xorg.conf.d/99-calibration.conf
Section "InputClass"
Identifier "calibration"
MatchProduct "ADS7846 Touchscreen"
Option "Calibration" "160 3723 3896 181"
Option "SwapAxes" "0"
EndSection
sudo nano /usr/share/X11/xorg.conf.d/99-fbturbo.conf
Option "fbdev" "/dev/fb0"
Option "fbdev" "/dev/fb1"

Published: 16.08.2019 Copyright by Joy-IT 7
3.2“ / 3.5“ Touch-Display
Now the required "drivers" are downloaded and installed. Here, the Raspberry Pi must be connected to
the Internet. Enter each of the following three commands in the console and conrm each with "Enter".
Commands for the 3.2 "LCD:
Commands for the 3.5 "LCD:
Now you have to install a package for the touch funcon and copy a le:
Restart your Raspberry Pi now:
At the edge of the 3.2 "display are also three buons.
These can be controlled and used via the GPIO.
When pressing a buon, the applied signal is pulled to ground (Acve_LOW).
The buons are connected as follows:
cd /tmp
wget anleitung.joy-it.net/upload/joy-IT-Display-Driver-32b-overlay.dtb
sudo cp joy-IT-Display-Driver-32b-overlay.dtb /boot/overlays/joy-IT-Display-Driver-
32b-overlay.dtbo
cd /tmp
wget anleitung.joy-it.net/upload/joy-IT-Display_Driver-35a-overlay.dtb
sudo cp joy-IT-Display_Driver-35a-overlay.dtb /boot/overlays/joy-IT-Display_Driver-
35a-overlay.dtbo
4. VERWENDUNG DER KNÖPFE
sudo reboot
sudo apt-get install xserver-xorg-input-evdev
sudo cp -rf /usr/share/X11/xorg.conf.d/10-evdev.conf /usr/share/X11/xorg.conf.d/45-evdev.conf
TFT Raspberry Pi
Key 1 GPIO12
Key 2 GPIO16
Key 3 GPIO18

Published: 16.08.2019 Copyright by Joy-IT 8
3.2“ / 3.5“ Touch-Display
Calibraon for the 3.2 "display:
If calibraon of the touchscreen is necessary, this can be done with the following
Steps are performed. First, the calibraon tool needs to be downloaded.
To do this, open a terminal window and enter the following command:
Now restart your Raspberry Pi so that the touch display is recognized correctly:
Now the calibraon can be started with the following command:
There are now four consecuve points lit, which must be pressed to calibrate the display. Subsequently,
four calibraon values are output in the terminal. To save the calibraon, the seng must be saved to a
le.
Create a new folder:
Now create the le in which the sengs must be saved:
The entry should look like the following example (the values aer "Calibraon" may dier from your
values):
5. TOUCHSCREEN KALIBRIERUNG
sudo apt-get install -y xinput-calibrator
DISPLAY=:0.0 xinput_calibrator
sudo reboot
sudo mkdir /etc/X11/xorg.conf.d
sudo nano /etc/X11/xorg.conf.d/99-calibration.conf
Section "InputClass"
Identifier "calibration"
MatchProduct "ADS7846 Touchscreen"
Option "Calibration" "171 3720 3899 196"
Option "SwapAxes" "0"
EndSection

Published: 16.08.2019 Copyright by Joy-IT 9
3.2“ / 3.5“ Touch-Display
Calibraon for the 3.5 "display:
If calibraon of the touchscreen is necessary, this can be done with the following
Steps are performed. First, the calibraon tool needs to be downloaded.
To do this, open a terminal window and enter the following command:
Now restart your Raspberry Pi so that the touch display is recognized correctly:
Now the calibraon can be started with the following command:
There are now four consecuve points lit, which must be pressed to calibrate the display. Subsequently,
four calibraon values are output in the terminal, which are stored in the le
"99-calibraon.conf" must be entered.
Open the le:
Enter the values in the following line here:
"MinX" corresponds to the rst value, "MaxX" to the second value, "MinY" to the third value, and "MaxY"
to the fourth value. Aer saving the le and reboong, the new calibraon data will be applied.
5. TOUCHSCREEN KALIBRIERUNG
sudo apt-get install -y xinput-calibrator
DISPLAY=:0.0 xinput_calibrator
sudo nano /usr/share/X11/xorg.conf.d/99-calibration.conf
“Option "Calibration" "215 3947 3901 244"
sudo reboot
Published: 16.08.2019 Copyright by Joy-IT 10
3.2“ / 3.5“ Touch-Display
In order to be able to output the image signal simultaneously on the TFT display and on the HDMI output,
addional steps must be carried out. The rst step is to compile and install the Framebuer-Copy program
using the following commands.
For the program to start when boong up the Raspberry Pi, this must be in the le
"/Etc/rc.local" will be added.
Add here before statement "exit 0" a new line with the following content:
Now, in the "/boot/cong.txt" following text block under the previously added sengs, starng on the
following page, must be added.
In this, the resoluon, which is output from HDMI and Display, can be adjusted by commenng out the
respecve triple block of "hmdi_group", "hdmi_mode" and "hdmi_cvt":
(In the following example, the resoluon is 800x600 default)
6. GLEICHZEITIGE VERWENDUNG VON LCD UND HDMI
cd /tmp
sudo apt-get install -y cmake
git clone https://github.com/tasanakorn/rpi-fbcp
mkdir -p rpi-fbcp/build
cd rpi-fbcp/build
cmake ..
make
sudo install fbcp /usr/local/bin/fbcp
sudo nano /etc/rc.local
fbcp &

Published: 16.08.2019 Copyright by Joy-IT 11
3.2“ / 3.5“ Touch-Display
For 4: 3 resoluons:
hdmi_ignore_edid=0xa5000080
hdmi_force_hotplug=1
###########################################################################
#### Resolution settings - relevant group must be commented on ####
##### 4:3 ######
## Settings for 320x240 (native resolution of the 3.2"TFT-Displays) ##
#hdmi_group=2
#hdmi_mode=87
#hdmi_cvt=320 240 60 1 0 0 0
## Settings for 640x480 ##
#hdmi_group=2
#hdmi_mode=87
#hdmi_cvt=640 480 60 1 0 0 0
## Settings for 720x540 ##
#hdmi_group=2
#hdmi_mode=87
#hdmi_cvt=720 540 60 1 0 0 0
## Settings for 800x600 ##
hdmi_group=2
hdmi_mode=87
hdmi_cvt=800 600 60 1 0 0 0
## Settings for 1024x768 ##
#hdmi_group=2
#hdmi_mode=87
#hdmi_cvt=1024 768 60 1 0 0 0
################################

Published: 16.08.2019 Copyright by Joy-IT 12
3.2“ / 3.5“ Touch-Display
For 16: 9 resoluons:
In the last step, the le "/usr/share/X11/xorg.conf.d/99-calibraon.conf" has to be edited again. Open the
le with the following command:
And change the following line there ...
... so that you change "1" back to "0" as in the original state (this is absolutely necessary in
framebuer copy mode):
hdmi_ignore_edid=0xa5000080
hdmi_force_hotplug=1
###########################################################################
#### Resolution settings - relevant group must be commented on ####
##### 16:9 #####
## Settings for 1280x720 ##
#hdmi_group=2
#hdmi_mode=87
#hdmi_cvt=1280 720 60 3 0 0 0
## Settings for 1600x900 ##
#hdmi_group=2
#hdmi_mode=87
#hdmi_cvt=1600 900 60 3 0 0 0
## Settings for 1920x1080 ##
#hdmi_group=2
#hdmi_mode=87
#hdmi_cvt=1920 1080 60 3 0 0 0
###############################

Published: 16.08.2019 Copyright by Joy-IT 13
3.2“ / 3.5“ Touch-Display
Symbol on electrical and electronic equipment
This crossed-out dustbin means that electrical and electronic appliances do not belong in the household
waste. You must return the old appliances to a collecon point. Before handing over waste baeries and
accumulators that are not enclosed by waste equipment must be separated from it.
Return opons
As an end user, when you purchase a new device, you can return your old device (which essenally fulls
the same funcon as the new one purchased from us) free of charge for disposal. Small appliances with
no external dimensions greater than 25 cm can be disposed of in normal household quanes
independently of the purchase of a new appliance.
Possibility of return at our company locaon during opening hours
Simac GmbH, Pascalstr. 8, D-47506 Neukirchen-Vluyn
Possibility of return near you
We will send you a parcel stamp with which you can return the device to us free of charge. Please contact
us by e-mail at Service@joy-it.net or by telephone.
Informaon on packaging
If you do not have suitable packaging material or do not wish to use your own, please contact us and we
will send you suitable packaging.
7. INFORMATION- AND TAKE-BACK OBLIGATIONS

Published: 16.08.2019 Copyright by Joy-IT 14
3.2“ / 3.5“ Touch-Display
We are also there for you aer the purchase. If you sll have quesons or problems, we are also available
by e-mail, telephone and cket support system.
E-Mail: service@joy-it.net
Ticket-System: hp://support.joy-it.net
Phone: +49 (0)2845 98469 – 66 (9:30 - 17:00 o‘clock)
For further informaon please visit our website:
www.joy-it.net
8. SUPPORT
Other manuals for RB-TFT3.2
1
This manual suits for next models
1
Table of contents
Other Joy-it Monitor manuals

Joy-it
Joy-it RB-LCD10-2 User manual

Joy-it
Joy-it VIEW 15 User manual

Joy-it
Joy-it RB-TFT1.8 User manual

Joy-it
Joy-it RB-LCD-20x4 User manual

Joy-it
Joy-it RB-TFT3.5 User manual

Joy-it
Joy-it RB-LCD-16x2 User manual

Joy-it
Joy-it RB-LCD5 User manual

Joy-it
Joy-it SBC-LCD01 User manual

Joy-it
Joy-it 1656364 User manual

Joy-it
Joy-it RB-LCD-10B User manual