joyami JW1 User manual

joyami JW1 Cordless wet & dry vacuum cleaner
User Manual
For your safety and good experience, please read user manual carefully
before you use the product, and keep it properly for future use.
C
M
Y
CM
MY
CY
CMY
K

Product Introduction..............................................................18
Important Safeguards............................................................18
Recycling.....................................................................................20
Remove the rechargeable battery...................................20
Product Description.............................................................21
List of Accessories................................................................22
Functions of Keys..................................................................22
Introduction to LED Panel.................................................23
Install the Product.................................................................23
Remove the handle, main body, and battery pack..23
Dismantle and install the handle.......................................24
Dismantle and install the battery pack..........................24
Dismantle and install the clean water tank..................24
Dismantle and install the dirty water tank....................24
Dismantle and install the rolling brush...........................25
Install the charging base......................................................25
Charge the product................................................................25
Start to use...............................................................................25
Inspection before use...........................................................25
Fill the clean water..................................................................26
Turn on..........................................................................................26
Self-cleaning..............................................................................26
17
Cleaning & Maintenance.....................................................27
Maintain the main body.........................................................27
Maintain the foot......................................................................27
Clean the dirty water tank...................................................27
Clean the float,filter elementand filter net...................27
Install the dirty water tank...................................................28
Clean the rolling brush..........................................................28
Clean the charging base.......................................................28
Storage.........................................................................................28
Clean water tank alarm calibration..................................29
Fault Code..................................................................................29
Troubleshooting.....................................................................30
Basic Parameter......................................................................31
After-sale Service..................................................................31
CONTENTS
C
M
Y
CM
MY
CY
CMY
K

18
Thank you for purchasing and using joyami products!
Important Safeguards
Please read this operation manual carefully before using the product and its accessories, and keep it properly for future
use. Accessories attached with packaging differs from different products.
Danger
·The product is for home use only. Do not use it in outdoor, off-ground, commercial or industrial scenes.
·Do not touch the power plug or any live part of the product with wet hands.
·Do not take in flammable materials or uncooled ash.
·Do not immerse the product or its adapter in water or other liquid or rinse them under the tap.
Warning
·Before connecting the product to a power supply, check that the local voltage is consistent with the voltage indicated
on the power adapter.
·Check the product before using it. Stop using the product if it or its adapter is damaged. Make sure to replace it with
an original replacement.
·The power adapter contains a transformer. Do not cut off the power plug from the adapter to replace it with other
one; otherwise, serious consequences may occur.
·Please take good care of children. Don’t play the product for fun.
·Remove the power plug from the socket before cleaning or maintaining the product.
·If you do not use the product for a period of time, unplug the power adapter.
·When storing the product for more than one month (without use or charging), ensure that the battery is at least 50%
full. Storing the product after the battery is used up can cause irreversible damage to the battery.
·Remove the power adapter before storing the product.
·Do not move the floor brush on the power cord of other products or other cables; otherwise, it may cause danger.
·Do not sway up and down, violently collide, tilt or horizontally place the product, to avoid dirty water against flowing
into the motor.
·Do not use the product near a heat source, such as fireplaces, heaters, and radiators which are working.
·Do not fill acid or alkali solution or substances which are harmful to the environment into the product to prevent the
corrosion of the product.
·Do not take in high temperature substances such as unextinguished cigarette ends, matches and ashes, ultrafine
substances such as lime, cement, wood chips, gypsum powder, ash, and charcoal powder, dangerous substances
such as solvent and detergent, chemical substances such as acid substance and detergent, or other substances with
uncertain physical properties.
·Do not take in detergent, kerosene, gasoline, alcohol, paint, or perfume. These liquids may cause short circuit, fire or
explosion of the product.
·Do not use the product to take in large objects such as peanut shells, popcorn, or paper balls. These may cause
blockage of and affect use of the product.
·Do not use the product to take in color matching agent or toner used in laser printers or copiers. These substances
may cause fire or explosion.
·Do not use the product to take in sharp objects such as glass fragments, small toys, pins, paper clips, stones, and
large pieces of paper. These may cause blockage of and affect use of the product.
·Do not apply any scented products to the filter of the product, because their chemicals are known to be inflammable
and can cause fire of the product.
·Do not use the product to clean stains with strong grease, strong viscosity or strong dyeing, such as shoe polish,
paint and pigment. The product isn’t applicable to these stains.
·Do not disassemble or assemble the product by yourself, to avoid any damage or danger to it.
·Immediately stop using the product and make a call to joyami after sales for professional maintenance in
case of current leakage, overtemperature and abnormal noise of the motor, overheating, abnormal noise, peculiar
smell, and weak suction.
·Do not sway up and down, violently collide, tilt or horizontally place the product, to avoid dirty water against flowing
into the motor.
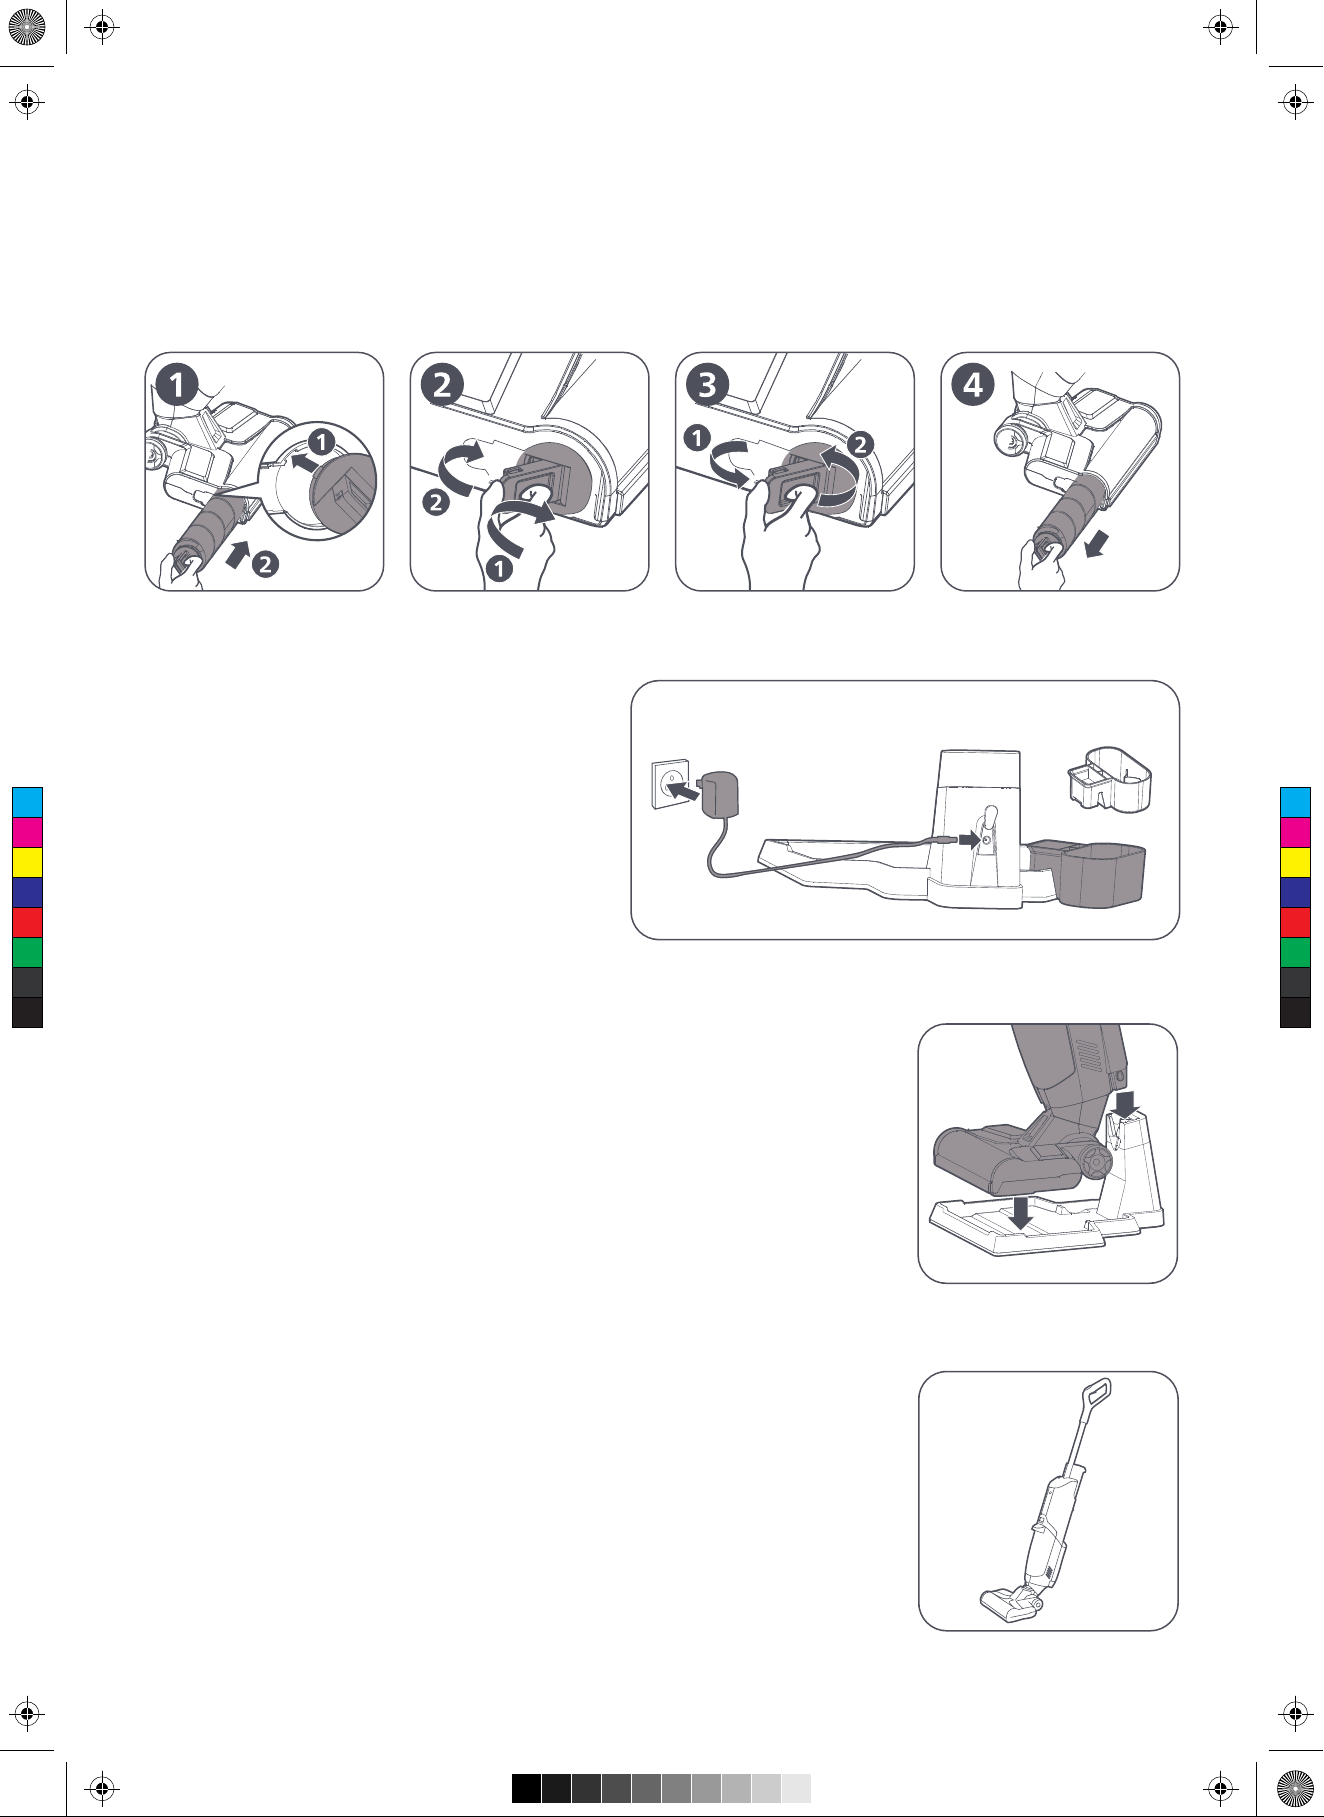
·Do not use the product when its rolling brush, clean water tank, dirty water tank or filter element is not installed properly.
·When the product fails, do not repair it by yourself. Please make a call to our after-sales department for help.
·Please use the product as instructed in the operation manual. Any loss caused by improper use shall be borne by
users themselves.
C
M
Y
CM
MY
CY
CMY
K

19
Precautions
·Only use the charger specially provided by our company for charging; otherwise, other types of chargers may cause
battery failure or extreme thermal effect.
·Do not unplug the product by pulling the power cord. To unplug the product, remove the charging plug from the
product and the adapter from the power socket.
·Replace the rolling brush only after powering off the product.
·Do not use any accessories or parts produced by other manufacturers or not specifically recommended by joyami.
Use of such accessories or parts will void the warranty of the product.
·Because the product cleans with water, the floor will be wet and slippery for a period of time after cleaning.
·To prevent damage, do not fill wax, oil, floor maintenance products or non-water dilutive floor cleaning agent into the
water tank.
·Do not mix different types of floor cleaning agents. After using a kind of floor cleaning agent, empty and rinse the
water tank before filling another kind in the water tank. To prevent damage to the product, do not use non-transparent
or galactoid floor cleaning agent.
·Store and use the product in a dry place; otherwise, a damp place will affect the insulation and service life of
electrical appliances.
·Do not fill hot water with a temperature of over 60℃to avoid deformation of the water tank.
·Check the condition of the suction nozzle regularly. In case of blockage, unblock it in time to avoid the reduction in
suction caused by blockage.
·After using the product, timely clean up the dirty water tank to avoid suction drop and the motor’s heating caused by
obstruction, thus affecting the service life of the product.
·It is recommended to use floor cleaning agent reasonably. If excessive floor cleaning agent is used, more foam will be
generated during use and may penetrate into the motor and cause danger. Please follow the instructions about the
proportion of floor cleaning agent. It is recommended to use joyami special cleaning agent for cleaning.
·If you do not use the product for a long time, turn off the power supply, and disconnect the plug from the charging
socket.
Safety Instructions on Battery
·Use the product only for its intended purposes and follow the general instructions and safety instructions on battery
specified in this operation manual. Misuse of the product may cause electric shocks, scalds, fires and other hazards
or injuries.
·Charge, use and store the product at a temperature between 6℃and 40℃.
·Unplug the product after it is fully charged.
·Do not burn the product or its battery, nor expose it to direct sunlight or high temperatures, for example, in a hot car
or near a hot stove. If it overheats, the battery may explode.
·If the product abnormally overheats, gives a bad smell, discolors, or takes longer than usual to charge, stop using or
charging it, and contact our after-sales department for help.
·Do not place the product or its battery in a microwave oven or on an induction cooker.
·The product contains a replaceable rechargeable battery pack. Do not open the battery pack or use other battery
packs in the product. If the battery pack is soaked in water, do not use it any more.
·When handling the battery, make sure your hands, the product and its battery are dry.
·To prevent the battery from heating up or emitting toxic and harmful substances, do not modify, pierce or damage
the product or its battery, nor dismantle, short circuit, overcharge or reverse charge the battery.
·To avoid accidental short circuit after the battery is removed, do not make the battery terminal contact metal objects
such as coins, hairpin and rings.
·Do not wrap the battery in aluminum foil. Before discarding the battery, tape the battery terminal or put the battery
in a plastic bag.
·If the battery is damaged or leaks, avoid it against contacting skin or eyes. In case of contact, rinse skin or eyes
immediately with clean water and seek medical advice.
·Do not rinse the battery pack with water.
C
M
Y
CM
MY
CY
CMY
K

20
Electromagnetic Field (EMF)
The product complies with all applicable standards and regulations relating to exposure to electromagnetic fields.
Recycling
·When disposing of the product, do not put it together with general household garbage, but send it to the recycling
center designated by the government for environmental protection.
·Follow your country’s/region's regulations on recycling electrical and electronic products and rechargeable batteries
by category. Proper disposal of the product can avoid adverse environmental and human health consequences.
Remove the rechargeable battery
Remove the rechargeable battery before discarding the product. Disconnect the product from the power supply and
exhaust the battery before removing the battery.
When you open the product with a tool or discard the rechargeable battery, take necessary safety protection measures.
C
M
Y
CM
MY
CY
CMY
K

21
Follow the following steps to remove the rechargeable battery.
1. Disconnect the power supply of the product and allow the product to continue running until the motor stops rotating.
2. Press the buttons on both sides of the battery pack and pull the battery pack downwards to remove it.
Product Description
On/Off Key
Switch Key
Spray Key
Handle
Clean Water
Tank
Screen
Battery Pack
Dirty Water
Tank
Dirty Water
Tank Switch
Rolling Brush Latch
Soft Rubber Scraper
Infrared Inducer
UV Light
Small RollerRoller
Mute Key
Self-cleaning Key
Foot
C
M
Y
CM
MY
CY
CMY
K

22
List of Accessories
Functions of Keys
Charging Base
On/Off Key
Press once the On/Off key to turn on the product, and again to turn it off.
The Standard stage is default when the product is turned on.
Self-cleaning Key
·Connect the charging base to the power supply, and place the product
into the charging base in the charging mode. Slightly press the Self-cleaning
key for self-cleaning.
·After cleaning is completed, the product automatically enters the charging mode;
·After the product is fully charged, it automatically powers off and enters the
charging protection mode.
Tip: After self-cleaning is completed, please clean the dirty water tank in time to
avoid peculiar smell.
Mute Key
Press the Mute key to start/stop the voice promptly.
Switch Key
The Standard stage is default when the product is turned on.
Press once the Stage key to switch the product to the Strong stage.
Spray Key
When the product is working, press the Spray key to intermittently or
continuously spray water.
Tip: There are two spraying flows for matching with the Standard and Strong stages, respectively.
Power Adapter Rolling Brush
Holder
Multi-function
Rolling Brush
Long-handle
Cleaning Brush
C
M
Y
CM
MY
CY
CMY
K

23
Remove the handle, main body, and battery pack
Introduction to LED Panel
Install the Product
The squares on the right side of the battery capacity indicate the battery capacity, and every square
represents 1/12 of the total battery capacity.
It displays the usage time in the form of “minute: second (XX:XX)”.
The suction and spraying flow of the product is in the Auto Mode.
The suction and spraying flow of the product is in the Turbo Mode.
When the icon lights up, it means that the product has started the sterilization function.
The flash icon indicated that the product detects Clean water shortage. If you needs to spray water,
fill more fresh water timely.
The dirty water tank is full, clean its interior timely.
Press the Self-cleaning key at the top of the screen when charging the product. The icon flashes after the
product enters the self-cleaning mode.
C
M
Y
CM
MY
CY
CMY
K

24
Dismantle and install the handle
Installation: Insert the handle to the corresponding
hole in the main body. If a click sound is heard, it
means the handle is properly installed. (as shown
in Figure 1)
Tip: Install the handle in a correct orientation.
Dismantlement: Insert a properly sized screwdriver
or tool into the small hole in the back of the handle
to easily remove the handle. (as shown in Figure 2)
Dismantle and install the battery pack
Installation: Place the battery pack in the battery
slot and push it upwards gently. If a click sound is
heard, it is installed successfully. (as shown in
Figure 1)
Dismantlement: Press the buttons on both sides of
the battery pack and pull the battery pack
downwards to remove it. (as shown in Figure 2)
Dismantle and install the clean water
tank
Installation: Align the limit slots on both sides of the
water tank with those of the main body, and gently
push the water tank downwards. If a click sound is
heard, it is installed successfully. (as shown in
Figure 1)
Dismantlement: Hold the main body and pull the
clean water tank upwards to remove it. (as shown
in Figure 2)
Dismantle and install the dirty water
tank
Installation: Place the bottom of the dirty water
tank with the opening of the main body, and gently
push it inwards. If a click sound is heard, it is
installed successfully. (as shown in Figure 1)
Dismantlement: Hold the main body, press down
the latch, and gently push the dirty water tank
outwards to remove it. (as shown in Figure 2)
Screwdriver
Small hole
C
M
Y
CM
MY
CY
CMY
K

25
Start to use
Dismantle and install the rolling brush
Installation: Align the bayonet on the rolling brush latch with the slot, push the rolling brush to the bottom to make it fully
contact the rolling brush shaft by turning it clockwise to the bottom, and close the latch. If a click sound is heard, it is
installed successfully. (as shown in Figures 1 & 2)
Dismantlement: Pull the side latch of the rolling brush outwards, hold the latch, and turn it counterclockwise to the
bottom to take it out slowly.(as shown in Figures 3 & 4)
Install the charging base
·Insert the round DC port of the adapter into the
charging socket on the back of the charging base,
and the other end of the adapter into the power
socket.
·Hang the rolling brush holder on the right side of
the charging base. (as shown in the right figure)
Charge the product
Place the product in the charging base to start charging. (as shown in the right
figure)
Tip: Please use the original power adapter for charging the product. After the
product is fully charged, it automatically powers off and enters the charging
protection mode.
Inspection before use
Check whether the handle, clean water tank, dirty water tank, battery and rolling
brush are installed properly before use. (as shown in the right figure)
Rolling Brush Holder
DC Charging Port
Clean Water
Tank
Handle
Dirty Water
Tank
Battery Pack
Rolling
Brush
C
M
Y
CM
MY
CY
CMY
K

26
Fill the clean water
Fill the clean water tank with clean water, tightly
screw the cover, and then install the clean water
tank.
Turn on
Step on the bottom cover, hold the handle and pull it backwards to tilt the main
body to a proper angle, and press the On/Off key to start working. (as shown
in the right figure)
Self-cleaning
Place the product in the charging base for charging , and ensure that there is sufficient water in the clean water tank,
which is not lower than the self-cleaning water level. Press the Self-cleaning key to start self-cleaning, and the product
will automatically enter the charging state after cleaning is completed. (as shown in Figures 1, 2 & 3)
Tip:
1. Do not use bubble cleaning agent in the cleaning process, to avoid "Faulty alarms" of the dirty water tank and water
inflow of the fan caused by a large amount of foam;
2. Carefully observe the dirty water tank in the cleaning process, to avoid "Faulty alarms” caused by suspended objects
blocking the sensor;
3. Do not push and pull the product quickly in the cleaning process, to avoid water intake of the fan;
4. Before cleaning, open the filter cotton on the top cover of the dirty water tank and check whether there is dirt, to
avoid blockage of the air duct which affects the detection of full water;
5. Turn off the power supply of the product before charging it.
6. After self-cleaning, immediately clean the dirty water tank, to prevent peculiar smell.
Max Water
Level
Self-cleaning
Water Level
Self-cleaning
Water Level
Self-cleaning Key
C
M
Y
CM
MY
CY
CMY
K

27
Cleaning & Maintenance
Maintain the main body
For daily maintenance, gently wipe the main body with dry cloth. Do not rinse
the main body with water.
Clean the dirty water tank
Remove the dirty water tank, open the top cover,
and rinse the interior of the dirty water tank with
clean water.
Clean the float,filter element and
filter net
Remove the filter screen from the top cover of the
dirty water tank, and rinse the float and filter
element and filter net with clean water. After
cleaning, place them on the air vent to dry them.
(as shown in the right figure)
Tip:
1. Users are recommended to replace the filter net
every six months.
2. It takes longer time to dry the filter net. Use
two filter nets alternately.
3. Do not touch the filter net surface with hands,
brushes or sharp objects, to avoid damage to the
filter net.
Maintain the foot
Before maintenance, turn off the power supply, and remove the battery, clean
water tank and dirty water tank.
Wipe the roller, scraper and infrared induction lamp with wet cloth. (as shown
in the right figure)
Before maintenance, remove the power plug from the socket, turn off the power supply, and remove the battery from
the product.
filter net
C
M
Y
CM
MY
CY
CMY
K

28
Install the dirty water tank
Put dry filter and filter net into the top cover of the dirty water tank, and then install the top cover on the dirty water
tank. Finally, tightly install the dirty water tank back to the main body.
Clean the rolling brush
Remove the rolling brush as described in the "Dismantle and install the rolling
brush" on Page 9, clean away the hair or debris on the brush head with the
cleaning tool provided together with the product, and then clean the brush
with water. After cleaning is completed, install the rolling brush as described
in the "Dismantle and install the rolling brush" on Page 11.
Tip: After cleaning is completed, it is recommended to dry the rolling brush
before using it again. It is recommended to replace the rolling brush every
six months.
Clean the charging base
Remove the power adapter before maintenance. Wipe the charging base with
wet cloth, but not wipe the adapter near the charging port with wet cloth. Use
the charging base only after it dries.
Storage
Clean the clean water tank, dirty water tank and
rolling brush, dry them, and then store them
separately. Fully charge the battery, remove the
battery and place it separately. To avoid damage
to the battery, fully charge the battery at least
every three months. Store the battery at a dry and
ventilated place where there is no direct sunlight.
C
M
Y
CM
MY
CY
CMY
K

29
Fault Code
Clean water tank alarm calibration
1. Turn off the power,dismantle the clean water tank;
2. Turn on the power,press the “Spray Key” until the clean water shortage indicator is flashing, then turn off the power.
3. Press “On/Off Key” and “Switch Key” at the same time until the display blinks twice.
Fault Code Cause Solution
FF:01
FF:02
FF:03
FF:04
FF:05
FF:06
FF:07
FF:08
FF:09
FF:10
FF:12
Too high discharging temperature
Too high charging temperature
Too low charging temperature
Overcurrent at the rolling brush
The dirty water tank is not installed properly
Overvoltage when the product is charged
Overcurrent when the product is charged
NTC open circuit/short circuit
The line breaks in the battery pack
Too low voltage in the battery pack
Too big voltage difference in the battery pack
Replace the charger
Replace the charger
Replace the battery pack
The battery pack is at a high temperature. Wait until
the battery pack’s temperature drops before
charging it again
The battery pack is at a high temperature. Wait until
the battery pack’s temperature drops before
charging it again
The battery pack is at a high temperature. Wait until
the battery pack’s temperature drops before
charging it again
Check whether there is any foreign matter at the
rolling brush, and clean it away, if any
Install the dirty water tank properly before using the
product again
Spray Key
On/Off Key
Switch Key
C
M
Y
CM
MY
CY
CMY
K

30
Troubleshooting
This chapter summarizes some common problems occurring in the use of the product. If you cannot solve a problem
according to the following information, please contact our after-sales service personnel or the customer service center
in your country/region.
Fault Cause Solution
The product cannot
be charged properly
The main body cannot contact
the charger correctly Check the charger and the port on the main body
The floor brush cannot
spray water properly
There is water in the
vent outlet
The floor brush cannot
spray water properly
The LED displays The battery is at a too high Wait until the battery’s temperature drops before
Indicater of clean water
flashes,but the clean
water tank is full
FF:01
There is not enough
water in the dirty water
tank, but the product
gives a warning for full
water
The clean water tank is not
installed properly
No filter net is installed in the
dirty water tank
There is not enough water in
the clean water tank
The clean water tank is not
installed properly
Install a filter net as described in the “Install the
dirty water tank” on Page 28
Remove the filter net and dry it at a ventilated
place as described in “Clean the float/filter
element/filter net” on Page 27. Install the filter net
as described in the “Install the dirty water tank” on
Page 28
Install the clean water tank properly
The main body
does not work
The dirty water reaches the max
level in the dirty water tank Clean the dirty water tank
The rolling brush is intertwined Clean the floor brush
The rolling brush is not installed
Fill water in the clean water tank
Install the clean water tank properly
Install the rolling brush as described in the "Dismantle
and install the rolling brush" on Page 25
The filter net is blocked
The filter net is too damp
Clean the filter net
Naturally dry the filter net and then use it again
Not calibrated
temperature
Please refer to Page 29,and readjust machine according
to "Clean water tank alarm calibration"
using it again
The product shakes
heavily
The rolling brush is not
installed properly
Install the rolling brush as described in the
"Dismantle and install the rolling brush" on Page 25
C
M
Y
CM
MY
CY
CMY
K

31
Basic Parameter
After-sale Service
Please visit the official website at http://tokitglobal.com,if you need after-sales service or other information, or
encounter any problem.
Product name Multi-surface dry wet vacuum cleaner Product model B61-B
Rated voltage DC 25.2V Rated frequency 150W
Charging voltage DC 30V
Rated Input of Adapter 100-240V~ 50-60Hz 0.8A MAX
Charging current 0.8A
C
M
Y
CM
MY
CY
CMY
K
Table of contents