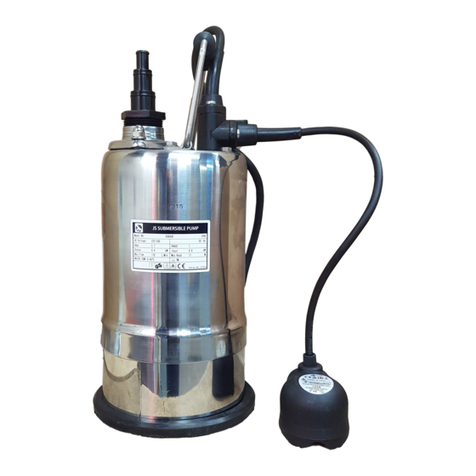
JS Pump JS100 User manual

'CE
-I-
Submersible Pump
Installation
and Operating
Instructions
Models
JSIOO
JSIOOA
JSISO
JSISOA
JSZSO JS250A
JS400
JS400A
J5420
JS420A
JS530
..JS630A
JS750
JS750A
JSI500 JSI500A
JSIOOSV JSIOOSVA
JSI50SV JSI50SVA
JS250SV JS250SVA
JS400SV JS400SVA
JS650SV JS650SVA
JS750SV JS750SVA
JSI 500SV JSI 500SVA
JS750S JS760SA
JSI500S JSISOOSA
IJS760SK JS750SKA
,JSI500SK JSI500SKA
JSIOOMA
JSISOMA
.JS2SOMA
JS400MA
JS42OMA
JSI OOSVMA
JSI 5OSVMA
JS2SOSVMA
JS400SVMA
GS750 GS750A
GSI200 681200A
GSI500 GSISOOA
RSIOO
RSIOOA
RS250 .R8250A
RS400
RS400A
RS550 RS550A
RSGSO RS650A
RS750
RS750A
RS1 500
RSI500A
RSD150 RSDI50A
RSD250 - RS-D250A
RSD400 RSD400A
RS400AL
RS75OAL
RSIOOMA
RS25OMA
RS400MA
RSDI5OMA
RSD2SOMA
RSD400MA

!
DON'T OPERATE
KEEP PLUG DRY.
FOR SAFETY PUT
IF PUMP SUBM-
POWER BREAKER.
ERSED BY SAND.
Installation & Operating Instructions
Range of Sumbersible Pumps are suited for the small to medium De-watering (or recir-
culating) applications.
They are extremely quiet in operation which makes them ideal for applications within residential
areas for sullage pits, pool emptying, waterfalls and general drainage.
Other ideal applications are:
Lift Wells
Car Park Sumps
Basements
Cable Pits, etc.
This. Submersible Pump has been factory checked prior to delivery; however, please
check for any damage during transport.
Sales and service is available from Pumps or Authorised Dealers.
Do Not
•
Lift the pump by the motor lead
•
Run the pump dry
•
Attempt electrical repairs
•
Run the pump with the motor fully exposed for long periods
•
Install the pump on soft or loose ground
CAUTION:
ft
%
-
'4
DON'T LIFT OR
CARRY THE PUMP
BY POWER CABLE.
Installation
The Pump is completely submersible and should be placed on a solid fiat surface
(if not available sit the pump on timber or house bricks) in the vertical position. Automatic
versions should be placed in a sump which has adequate dimensions so as not to restrict
the movement of the float switch.
AUTOMATIC PUMP has been factory set to provide the correct ON-OFF switching mode.
Always use the biggest diameter hose possible, a better flow is obtained and the pump will
work easier. All hose can be obtained from our factory if required.
This pump is not a slurry pump, It cannot pump stones.
18TH EDITION lEE REGULATIONS. ALWAYS USE A POWER BREAKER WITH
OUTSIDE ELECTRICITY. IF IN DOUBT CONSULT AN APPROVED NICEIC
ELECTRICTIAN.

Fault Checks
(A)
Pump will not start:
(1) MANUAL TYPE
•
Power switched ON
•
Blown fuse (consult an electrician)
•
If * extension lead fitted check connection
•
Impeller jammed
•
Thermal cut out switch has not reset (5 minutes)
•
If pump does not start from new then the seal has possibly stuck due to the length of time it has been standing
since it was manufactured. In this case, remove bottomm strainer and turn the impellor nut clockwise with a pair
of pliers, this will release the initial friction on the. seal and once the power is connected will allow the pump to
work.
(2) AUTO TYPE (WITH FLOAT SWITCH)
•
Check all in (1) above
•
Float switch jammed against sump side wall
•
Insufficient liquid to place the float switch in the ON position i.e. higher than the horizontal
•
If fitting an extension lead a QUALIFIED ELECTRICIAN should be consulted to ensure correct rating is
provided.
If float switch is faulty a qualified electrician should replace. Float switches are available from your local Supplier.
(B) Pump will start but does not pump:
•
Insufficient liquid in sump
•
Strainer blocked
•
Impeller blocked
•
Impeller damaged
•
Entrained air present
•
Excessive back pressure
(C) Pump will not stop:
(1) MANUAL TYPE
•
Must be switched off at the power supply
(2) AUTO TYPE (WITH FLOAT SWITCH)
•
Float switch is prevented from moving to the fulyl down position
•
Float switch may be faulty
Do not run dry as this will damage the seal and reduce the life of the pump.
With simple cleaning and regular examination this pump should give many years of service.
For a full spares and repair service on any of our pumps send pump properly packed and post paid to
(D) • Do not dispose of electrical appliances as unsorted municipal waste, use separate collection facilities.
•
Contact your local government for information regarding the collection systems available.
•
If electrical appliances are disposed of in landfills or dumps, hazardous substances can leak into the
groundwater and get into the food chain, damaging your health and well-being.
•
When replacing old appliances with new once, the retailer is legally obligated to take back your old appliance
for disposal at least for free of charge.
(E) • Don't used in swimming pool.
•
Pollution of the liquid could occur due to leakage of lubricants.
•
pumps for outdoor fountains, garden p9nds and similar places have tobe supplied through a RCD
(operating current < 30 mA).
•
The supply cord connot be replaced, if the cord is damaged the appliance should be scrapped.
(F) • This appliance is not intended for use by persons (including children) with reduced physical, sensory or mental
capabilities, or lack of experience and knowledge, unless they have been given supervision or instruction
concerning use of the appliance by a person responsible for their safety.
•
Children should be supervised to ensure that they do not play with the appliance.
•
If the supply cord is damaged, it must be replaced by the manufacturer, its service agent or similarly qualified
persons in order to avoid a hazard.
•
The pump must not be used when people are staying in the water.
•
The pump must supplied through a residual current device (RCD) with a rated residual operating current < 30 mA.
•
Pollution of the liquid could occur due to leakage of lubricants,

07
PUMP HOUSING
07-1
0 RING
08
OIL CHAMBER COVER
08-I
0 RING
05
IMPELLER
06
KEY
II
PLUG
161-1
ORING
02
A
-
r
ljl
ao
10-
0001
00
o
l -
0
110
NI
.1
DESCRIPTION
STRAINER / STAND (5/5K)
01
BOTTOM PLATE) CUSHION
STAND COVER (GI
01-2
01-3
STAND SLEEVE (CS)
01-4
STRAINER (NO HOLES)
DID
01D
CHECK FLAP VALVE
OID-4
RUBBER CUP
SUCTION COVER
NUT
(FOR
17)
02
03
WASHER (FOR 17)
04
AGITATOR! GRINDER (GS)
05W
05W-2
GRINDER RING
05W-S
GRINDER RING HOLDER
LIP SEAL (BOTTOM)
FOR
08
09
SHAFT SLEEVE
10
MECHANICAL SEAL
13
BEARING (BOTTOM)
14
MOTOR CASING
16
PUMP OUTER CASING
lB
a
NO.
DESCRIPTION
17
ROTOR SHAFT
18
STATOR COIL
19
GOVERNOR SWITCH
198
GOVERNOR SWITCH PLATE
20
REARING (UP)
21A
BOTTOM SEARING HOLDER
21A-1
ORING
21B
MOTOR UPPER COVER
23
OVERLOAD PROTECTOR
24
CONDENSER (TO RUN)
26
UPPER COVER
26-1
0 RING
26W
UPPER COVER (FOR 161)
26W-2
UPPER COVER (FOR 161 CABLE COVER)
27
CABLE GLAND
27-1
0 RING
28
RUBBER SLEEVE
31
CABLE
34
HANDLE (EYEBOLT)
34-I
GASKET
37
LUBRICANT OIL
38
DISCHARGE OUTLET
38E
ELBOW
aBE-I
GASKET
38F
38F-1
FLANGE (THREAD INSIDE)
GASKET
sv
is
_ gO
4
s-ett
- d, .
cpa,_.IdI_.I 1t!
e

K
a
iir" F1WAV
ra ra
Ir
!l
4
A
,
V
I
_
S, SK
GS
O.
N
DESCRIPTION
01
STRAINER / STAND
(5/5K)
01-2
BOTTOM PLATE/CUSHION
01-3
STAND COVER (OS)
01-4
STAND SLEEVE (OS)
OlD
STRAINER (ND HOLES)
OID-3
CHECK FLAP VALVE
OID-4
RUBBER CUP
02
SUCTION COVER
03
NUT (FOR I7)
04
WASHER (FOR 17)
05
IMPELLER
05W
AGITATOR (GRINDER (OS)
05W-2
GRINDER RING
05W-3
GRINDER RING HOLDER
06
KEY
07
PUMP HOUSING
07-1
ORING
08
OIL CHAMBER COVER
08-I
ORING
09
LIP SEAL (BOTTOM) FOR 08
10
SHAFT SLEEVE
11
PLUG
13
MECHANICAL SEAL
14
BEARING (BOTTOM)
16
MOTOR CASING
161
PUMP OUTER CASING
161-1
ORING
NO.
DESCRIPTION
I?
ROTOR SHAFT
18
STATORCOIL
19
GOVERNOR SWITCH
19B
GOVERNOR SWITCH PLATE
20
BEARING (UP)
21A
BOTTOM BEARING HOLDER
21A-1
ORING
21B
MOTOR UPPER COVER
23
OVERLOAD PROTECTOR
24
CONDENSER (TO RUN)
26
UPPER COVER
26-1
ORING
26W
UPPER COVER (FOR 161)
26W-2
UPPER COVER (FOR 16i CABLE COVER)
27
CABLE GLAND
27-1
ORING
28
RUBBER SLEEVE
31
CABLE
34
HANDLE (EYEBOLT)
34-1
GASKET
31
LUBRICANT OIL
38
DISCHARGE OUTLET
38E
ELBOW
38E-1
GASKET
38F
FLANGE (THREAD INSIDE)
38F-I
GASKET

RS
RSD
NO.
DESCRIPTION
NO.
DESCRIPTION
01
STRAINER / STAND (5/5K)
17
ROTOR SHAFT
01-2
BOTTOM PLATE! CUSHION
18
STATOR COIL
01-3
STAND COVER (GS)
19
GOVERNOR SWITCH
01-4
STAND SLEEVE (GS)
19B
GOVERNOR SWITCH PLATE
OlD
STRAINER (NO HOLES)
20
BEARING (UP)
OID-3
CHECK FLAP VALVE
21A
BOTTOM BEARING HOLDER
01D
RUBBER CUP
21A-1
ORING
02
SUCTION COVER
218
MOTOR UPPER COVER
03
NUT (FOR IT)
23
OVERLOAD PROTECTOR
04
WASHER (FOR 17)
24
CONDENSER (TO RUN)
05
IMPELLER
26
UPPER COVER
05W
AGITATOR! GRINDER (GS)
26-1
ORING
OSW-2
GRINDER RING
26W
UPPER COVER (FOR 161)
OSW-3
GRINDER RING HOLDER
26W-2
UPPER COVER (FOR 161 CABLE COVER)
06
KEY
27
CABLE GLAND
07
PUMP HOUSING
27-1
ORING
07-1
ORING
26
RUBBER SLEEVE
08
OIL CHAMBER COVER
31
CABLE
P os_i
ORING
34
34-1
HANDLE (EYEBOLT)
09
LIP SEAL (BOTTOM) FOR 08
GASKET
10
SHAFT SLEEVE
37
LUBRICANT OIL
11
PLUG
38
DISCHARGE OUTLET
13
MECHANICAL SEAL
38E
ELBOW
14
BEARING (BOTTOM)
3BE-1
GASKET
16
MOTOR CASING
3SF
FLANGE (THREAD INSIDE)
161
PUMP OUTER CASING
3SF-I
GASKET.
161-1
0 RING

EU Declaration of Conformity
CE
For the following equipment:
Product:
Type designation:
Manufacturers name:
Manufacturers Address:
Submersible Pump
RS-, RST-, JS-, JST-, OS, GST-,
Puddle Buddy (RSD-series)
Joung Shin Electric Corp.
No. 83-9 Dapiantou
Sanzhi District
New Taipei City 252
Taiwan, R.O.C.
Herewith confirms to comply with the requirements set out in the council directives:
2006/42/EC,
2006/95/EC, 2004/1
08/EC
On the approximation of the laws of the member states relating to the electromagnetic
compatibility
For the evaluation of the compliance with these directives the following harmonized standards
were applied:
EN809
EN60335-1
EN60335-2-41
EN61000-6-3
EN61000-6-1
EN55014
EN60555
Responsible for making this declaration is the authorised representative within the EU:
Company Name:
W. Robinson & Sons (EC) Ltd.
Company Address:
Hainault Business Park
35-41 Fowler Road
Ilford, Essex IG6 3WR
United Kingdom
Name, Surname:
G.W. Robinson
Position:
Director
Date:
Ilford, Essex 28/12/2012
Company Stamp and authorised signature:
W. Robinson & Sons (EC) Ltd.
Hainault Business Park
35-41 Fowler Road
Ilford, Fccx 106 3WR
United Kingdom
This manual suits for next models
77
Table of contents
Other JS Pump Water Pump manuals
Popular Water Pump manuals by other brands

Grundfos
Grundfos CM SP Service instructions

Current Tools
Current Tools 292 Operating, Maintenance, Safety and Parts Manual

MasterCraft
MasterCraft 62-3518-4 owner's manual

EINHELL
EINHELL GC-WW 1046 N Original operating instructions

vidaXL
vidaXL 41172 manual

Masterflex
Masterflex I/P MFLX77603-20 operating manual

Craftsman
Craftsman 390.304692 owner's manual

Flotec
Flotec FP4200 Series owner's manual

SPERONI
SPERONI SVM 90 BR instruction manual

Curtis
Curtis DYNA-FOG MINI-PRO 8HP 3 Series OPERATION, MAINTENANCE AND SPARE PARTS MANUAL

WilTec
WilTec 61541 Operation manual

HELIX
HELIX CTI-CRYOGENICS CRYO-TORR 100 Installation, operation and servicing instructions