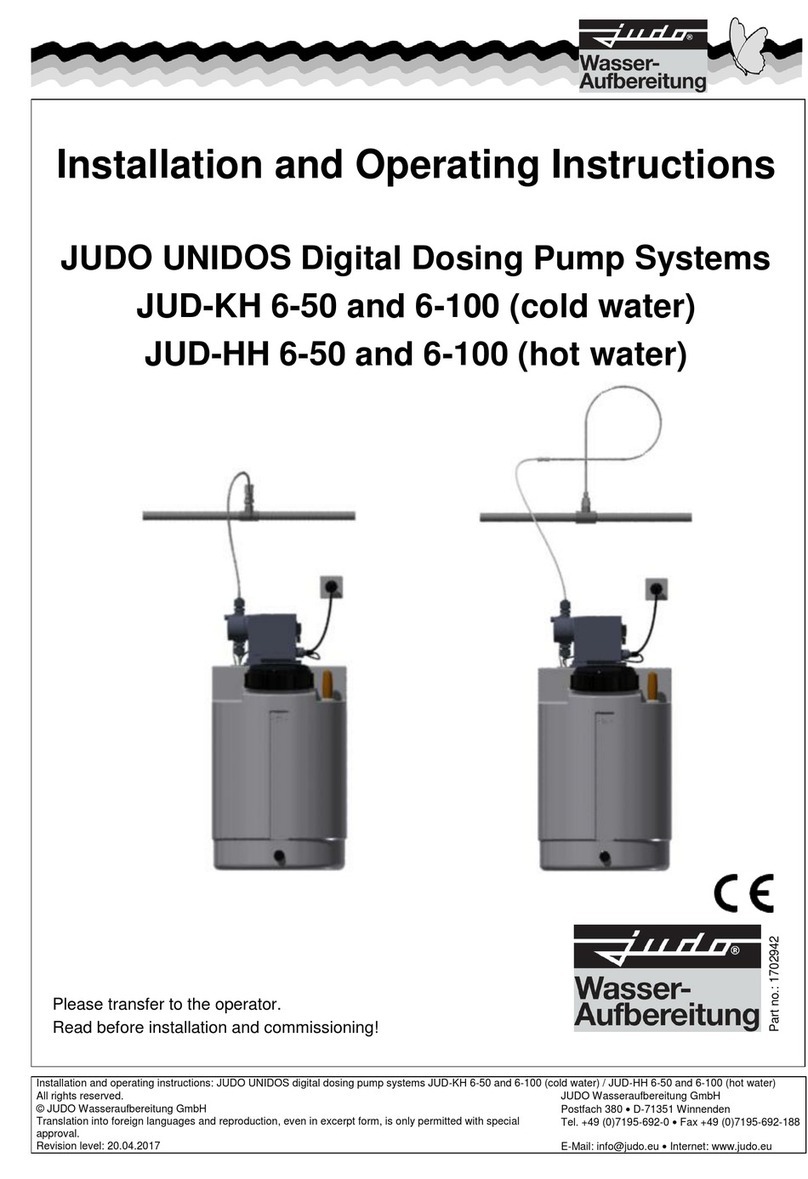
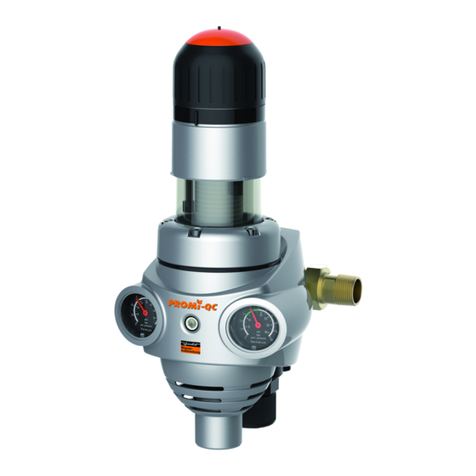
Judo JULDOS 4 User manual

Installation and operating instructions
JUDO JULDOS 4 - 25
Dosing pump
Valid for: EU countries and Switzerland
Language: English
Read before use and store!

Queries, orders, customer service
JUDO Wasseraufbereitung GmbH
Postfach 380
D-71351 Winnenden
Email: [email protected] • judo.eu
Office address:
JUDO Wasseraufbereitung GmbH
Hohreuschstraße 39 - 41
D-71364 Winnenden
Trademarks:
Trademarks used in this document are the
protected and registered trademarks of the
owners.
© JUDO Wasseraufbereitung GmbH
D-71364 Winnenden
All rights reserved.
Reprinting, even in excerpt form, is only per-
mitted with special approval.
Dear customers,
Thank you for the confidence you have
shown in us by purchasing this prod-
uct. You have purchased a state-of-the-
art device. It has been carefully checked
prior to delivery. Nevertheless, if diffi-
culties occur, please contact the closest
customer service (see chapter Customer
service).
These installation and operating instructions
are intended for both installers, who are in
charge of installing, maintaining or repair-
ing the device, and for the operators of the
device.
2 JUDO JULDOS 1703383 • 2022/10

Contents
Contents
1 Safety......................................... 4
1.1 Intended use............................... 4
1.2 Application limits......................... 4
1.3 Safety instructions....................... 4
1.4 Symbols used............................. 6
1.5 Units used................................... 6
1.6 Documentation and information
obligations of the operator.......... 7
2 Product information.................. 7
2.1 Scope of supply.......................... 7
2.2 Function description.................... 7
2.3 Remote monitoring...................... 9
2.4 Materials used............................ 9
2.5 Approval marks........................... 9
3 Installation by a technical ser-
vice provider............................. 10
3.1 Requirements for the place of
installation................................... 10
3.2 Installation position..................... 10
3.3 Power supply.............................. 11
3.4 Installing the rotary flange fitting. 11
3.5 Mounting the device.................... 12
4 Commissioning......................... 16
4.1 For JJD 4: Screw on the mineral
solution container........................ 17
4.2 Bleeding and flushing the water
meter........................................... 17
5 Operation................................... 17
5.1 Setting the dosing quantity.......... 17
5.2 Selection of the appropriate JUL
mineral solution / tablets............ 18
5.3 Refilling the mineral solution
container..................................... 18
5.4 Protection against third-party
access......................................... 19
5.5 Conversions, changes................ 19
5.6 Temporary removal of the
device (technical service
provider)...................................... 20
5.7 Maintenance, repair, spare parts 20
6 Remote transmission of mes-
sages.......................................... 20
6.1 Forwarding status and fault mes-
sages over floating outputs......... 20
6.2 Integration in building control
systems....................................... 21
7 Servicing.................................... 21
7.1 Maintenance................................ 21
7.2 Maintenance adhesive label....... 22
7.3 Function check............................ 22
7.4 Repair by JUDO customer ser-
vice or a technical service
provider, spare parts................... 22
8 Fault............................................ 23
9 Technical data........................... 24
9.1 Wall mounting installation
dimensions.................................. 25
9.2 Installation dimensions................ 26
9.3 Electronic control unit................. 28
9.4 Accessories................................. 28
10 Disposal..................................... 29
11 Spare parts................................ 30
12 EC Conformity Declaration...... 39
13 Customer service...................... 40
1703383 • 2022/10 JUDO JULDOS 3

Safety
1 Safety
These operating instructions must always
be available at the place of use of the
device.
1.1 Intended use
The device is for quantity-proportional auto-
matic dosing of JUDO JUL mineral solutions
into drinking water that protects cold and hot
drinking water supply systems against
•Corrosion damage
•Limescale deposits.
Dosing is performed in compliance with the
drinking water directive (98/83/EC).
The device can be installed in all commer-
cially available drinking water pipes. Instal-
lation and use are subject to the applicable
national conditions.
1.2 Application limits
1.2.1 Water quality
The water into which the JUL mineral solu-
tion is dosed must comply with the Euro-
pean Drinking Water Directive (98/83/EC).
Before using the device with water that does
not comply with this Directive, it is essential
to consult the manufacturer.
1.2.2 Water pressure
CAUTION
The water pressure must not exceed
10 bar input pressure. A water pres-
sure greater than 10 bar can result in
device malfunctions.
Above water pressures of
•10 bar, a pressure reducer must be
installed upstream of the filter .
•5 bar installation of a pressure
reducer upstream of the device is
recommended.
The water pressure must not fall
below 1.5 bar during operation as
otherwise device function may be
impaired!
Rated pressure PN 10
Operating pressure 1.5 - 8 bar
1.2.3 Water and ambient tempera-
ture
The device is suitable for use in cold drink-
ing water up to a maximum water and ambi-
ent temperature of 30 °C.
1.3 Safety instructions
WARNING
RISK OF INJURY DUE TO MOVING
OR HOT PARTS!
If the device is connected to the
mains, the cover must not be
removed!
In the event of repair, it may be
necessary for experts to remove
the cover to check the functioning
of the device. In this case, the fol-
lowing must be observed:
•Electronic parts may become hot
during operation. Risk of burns!
Do not touch parts!
•Parts of the device may move.
Risk of injuries! Proceed with
extreme care and caution!
1.3.1 Electrical danger
ELECTRO_NO_HEADER
Risk of electric shock
No electrical wiring or equipment that is
not splash-proof may run or be stored
below the device. Electrical devices/
equipment located in the vicinity of the
4 JUDO JULDOS 1703383 • 2022/10

Safety
device must be splash-proof or comply
with the legal regulations for wet rooms.
Only the supplied power supply unit may
be used to connect the unit to the power
supply. This reduces the mains voltage
for operating the electronics to a harm-
less low voltage of 24 V.
A splash-proof socket is required for
connection to the electrical grid, in
accordance with the legal regulations for
wet rooms.
Only low voltages can be used for the
remote transmission of the status or
fault indication via the floating output.
Switching voltage: maximum 24 V
Amperage: maximum 1 A
The power supply unit must be discon-
nected for performance of the electrical
installation.
1.3.2 Warning of property damage
WARNING
Risk of water damage or damage
to property
The device may only be installed by
technical service providers.
Installation of the device upstream of the
water meter is forbidden.
The installation room must be dry and
free from frost.
The ambient temperature must not
exceed 30 °C. In higher temperatures or
direct sunlight, material damage may
occur up to and including breakage of
device parts.
If no bypass valve (JQX; see chapter
9.4) is installed, shut-off valves must
be installed to interrupt the water sup-
ply and prevent the water from flowing
back to the unit during installation, main-
tenance, repair or malfunctions of the
device.
For JJD 4: The pipe must be able to
safely support the device (weight: see
chapter 9). If necessary, the pipes must
be provided with additional fastenings or
support.
For JJD 4: Always install the device in
an upright position (± 5°). Otherwise, cor-
rect function of the device is not guaran-
teed.
For JJD 10 - 25: Position the device ver-
tically on solid, stable and load-bearing
ground, to ensure it is securely located.
For the installation of the device in
domestic water piping systems, only use
the supplied built-in rotary flange (see
chapter 3.4).
The flange surface of the rotary flange
fitting must be vertical (i.e. point for-
wards).
The rotary flange fitting must be fitted so
that it is free from mechanical stress or
strain. Otherwise mechanical damage to
the pipe or the rotary flange fitting up to
and including breaks can result.
For proper sealing the profiled side
of the profile flange seal must point
towards the rotary flange fitting (see
chapter 3.4). If this is not observed, the
sealing may not be perfect resulting in
water escaping.
Only operate the device in a technically
faultless condition:
•Check for damage prior to installa-
tion.
•Immediately have any malfunctions
in operation rectified by qualified
technical personnel.
Persons who, due to their physical, sen-
sory or mental abilities or their inexperi-
ence or lack of knowledge, are unable to
operate the device safely may not oper-
ate it without supervision or instruction
from a responsible person.
1703383 • 2022/10 JUDO JULDOS 5

Safety
The mains voltage must not be inter-
rupted (e.g. via a light switch). If the
device is not permanently supplied with
power, dosing of mineral solution or pro-
vision of a warning in case of faults will
not be possible.
For reasons of hygiene, JUL mineral
solutions may only be transported and
stored in sealed mineral solution con-
tainers.
The storage temperature of JUL mineral
solution must be greater than 5 °C and
less than 25 °C.
Do not use household cleaning agents
to clean the outside of the device, rather
only use a damp cloth to avoid embrittle-
ment of the plastic.
Never use a spray cleaner or scouring
cleaning agent. Ensure no moisture can
get into device openings when cleaning.
The device may only be repaired by tech-
nical service providers or JUDO cus-
tomer service.
Only use original spare parts for repairs.
Before performing work on the device
that goes beyond pure operational use,
the device must be depressurised. If
this is ignored, the result may be uncon-
trolled egress of water resulting in water
damage.
In the event of temporary removal of the
device
•protect the flange surfaces against
damage to ensure proper sealing.
•protect the device from dirt so as not
to impair drinking water hygiene.
•store the device in a frost-free place
to prevent damage caused by freez-
ing water and possible resultant loss
of leak-tightness.
Unauthorised conversions and changes
are forbidden for safety reasons. These
can impair the functioning of the device,
leading to leaks and, in the worse case
scenario, to bursting of the device.
1.4 Symbols used
The safety instructions contained in these
operating instructions are labelled with the
following symbols:
Indication of existing dangers
Warning of electric voltage
Torques specified by the manufac-
turer
User tips and other information
Instructions attached directly to the device,
e.g.:
•Direction of flow (arrow)
•Type label
•Cleaning information
must be observed and maintained in legible
condition.
1.5 Units used
Size Unit Conversion
Rated
diameter
1"
1¼"
1½"
2"
Corresponds to DN 25
Corresponds to DN 32
Corresponds to DN 40
Corresponds to DN 50
Pressure bar 1 bar = 100000 Pa
= 0.1 N/mm²
≈ 14.5 psi
Water
hardness
°dH 1 °dH = 0.1783 mmol/l
Alkaline earth ions
= 17.8 ppm CaCO3
6 JUDO JULDOS 1703383 • 2022/10

Safety
1.6 Documentation and informa-
tion obligations of the opera-
tor
You can download the documents for doc-
umenting the treatment substances and for
providing the consumers with information
from the following internet address:
judo.eu/service/download-bereich
1.6.1 Documentation obligation
According to the latest drinking water ordi-
nance, treatment substances added to
drinking water and their concentration must
be documented weekly. The documentation
must be kept available for six months.
1.6.2 Obligation to provide con-
sumers with information
The drinking water ordinance also requires
that any affected water consumers be
informed about the treatment substances
used.
Information sheets are available for this pur-
pose.
2 Product information
2.1 Scope of supply
•Dosing pump with water meter
•Rotary flange fitting with bayonet con-
nection and threaded fitting
•Wall mounting (only JJD 4)
•Installation and operating instructions
2.2 Function description
Dosing pump
During drawing of water, water of the drink-
ing water system flows through the water
meter. The output signal of the incorporated
flow sensor controls the pump drive speed.
The precisely operating plunger pump trans-
ports the dissolved minerals out of the min-
eral solution container via a dosing hose to
the injection point in the water meter. Here
the dosing solution is injected against the
water pressure into the water pipe so that
the minerals mix thoroughly with the water
flowing through.
The dosing quantity of the mineral solution
can be regulated via the control to three
different levels: minimum, normal or maxi-
mum.
The pump head via which the mineral solu-
tion is raised, is located at the bottom end
of the pump console, just above the bottom
of the mineral solution container. It does not
require bleeding.
After an empty message, the dosing pump
switches off automatically to prevent dry-
running. It can only restart its operation,
once a filled mineral solution container is
attached (see chapter 5.3).
1703383 • 2022/10 JUDO JULDOS 7

Product information
JJD 4 / JJD 10 - 25
Fig. 1: Function description
JJD 4
1 Power supply unit
2 Rotary flange fitting
3 Control unit cover
4 Dosing container
Fig. 2: Function description JJD 10 - 25
1 Power supply unit
2 Rotary flange fitting
3 Control unit cover
4 Dosing container
5 Water meter
The water meter for model JJD 10 differs from
the illustration.
8 JUDO JULDOS 1703383 • 2022/10

Product information
2.2.1 JUL mineral solution
The following JUL mineral solutions are
available:
•JUL-W (Tabs; not for Switzerland)
•JUL-H (Tabs)
JUL-W
Application:
Galvanized pipes
Method of operation:
Orthophosphates and silicates react with
the metal of the piping to form a difficult-to-
dissolve compound, so that the pipe mater-
ial is shielded against the corrosive effects
of the water.
JUL-H
Application:
Mixed-metal installations
Method of operation:
The polyphosphates surround the calcium
and magnesium ions responsible for the
hardness, preventing them from forming
any more calcium/magnesium carbonate
(limescale) crystals.
Notes:
•The hardness stabilisation process was
checked according to the DVGW (Ger-
man Technical and Scientific Associ-
ation for Gas and Water) worksheet
W 512 at 80 °C; the result was a certi-
fied reduction of limescale formation of
more than 99 %.
•The hardness stabilisation occurs even
when only small phosphate quantities
are used, so that when using JUL-H,
the specified strict limit values for phos-
phates in drinking water are adhered to.
2.3 Remote monitoring
The device can be integrated in building
control systems (see chapter 6).
2.4 Materials used
The materials used are resistant to the
physical, chemical and corrosive loads
expected to be encountered in drinking
water. They fulfil the specifications required
by DIN EN 19635 (“Dosing apparatus for
drinking water treatment”).
All materials are hygienically and phys-
iologically harmless. Plastics fulfil the
KTW Guideline (Guideline for the Hygienic
Assessment of Organic Materials in Contact
with Drinking water) of the DVGW Work-
sheet W 270. Metallic materials fulfil the
requirements of DIN 50930-6 (Effect of
metallic materials on the quality of drinking
water).
2.5 Approval marks
The device complies with the technical
regulations for drinking water installa-
tion according to DIN EN 806ff. and the
national supplement DIN 1988ff. as well as
DIN EN 1717.
It has been tested and certified by the
DVGW (Deutsche Vereinigung des Gas-
und Wasserfaches e. V. - Technisch-wis-
senschaftlicher Verein) in accordance with
the requirements
• of DIN EN 14812
• of DIN EN 19635-100
(pressure range PN10). The device bears
the DIN-DVGW mark as proof of certifica-
tion.
1703383 • 2022/10 JUDO JULDOS 9

Product information
The device complies with the technical
regulations for drinking water installation
according to DIN EN 806 ff., DIN 1988 ff.
as well as DIN EN 1717. It has been tested
and certified by the Technical Testing Lab-
oratory Water (TPW) of the Swiss Gas
and Water Association (SVGW) accord-
ing to the requirements of DIN EN 13443-1
and DIN 19628 (pressure rating PN 16) for
mechanically acting filters in the drinking
water sector.
The device bears the SVGW mark as proof
of certification.
INFO_NO_HEADER
The approval mark applies only for
JUDO JULDOS dosing pumps that
are operated with JUDO JUL mineral
solution.
3 Installation by a techni-
cal service provider
CAUTION
The device may only be installed
by technical service providers.
Installation of the device upstream of the
water meter is forbidden.
3.1 Requirements for the place of
installation
The installation room must be dry and
free from frost.
The ambient temperature must not
exceed 30 °C. In higher temperatures or
direct sunlight, material damage may
occur up to and including breakage of
device parts.
A splash-proof socket is required for
connection to the electrical grid, in
accordance with the legal regulations for
wet rooms.
3.2 Installation position
For JJD 4: Always install the device in
an upright position (± 5°). Otherwise, cor-
rect function of the device is not guaran-
teed.
For JJD 10 - 25: Position the device ver-
tically on solid, stable and load-bearing
ground, to ensure it is securely located.
At least 300 mm clearance is required
above the dosing pump for maintenance
purposes.
For JJD 4: there must be sufficient clear-
ance to changeover the mineral solution
container below the dosing pump (see
chapter 9.2).
10 JUDO JULDOS 1703383 • 2022/10

Installation by a technical service provider
3.3 Power supply
Only the supplied power supply unit may
be used to connect the unit to the power
supply. This reduces the mains voltage
for operating the electronics to a harm-
less low voltage of 24 V.
The mains voltage must not be inter-
rupted (e.g. via a light switch). If the
device is not permanently supplied with
power, dosing of mineral solution or pro-
vision of a warning in case of faults will
not be possible.
3.4 Installing the rotary flange fit-
ting
CAUTION
The flange surface of the rotary
flange fitting must be vertical (i.e.
point forwards).
The rotary flange fitting must
be fitted so that it is free from
mechanical stress or strain. Oth-
erwise mechanical damage to the
pipe or the rotary flange fitting up
to and including breaks can result.
The built-in rotary flange serves as a con-
necting element between the domestic
water installation and the device. It is suit-
able both for horizontal and vertical pipes.
Attention: Install the built-in rotary flange
in the flow direction! This is indicated by an
arrow integral with the casting.
INFO_NO_HEADER
The device will not operated if it is
incorrectly installed.
1 2
Fig. 3: Rotary flange fitting
1 Profile flange seal
2 Flow direction arrow
1703383 • 2022/10 JUDO JULDOS 11

Installation by a technical service provider
3.5 Mounting the device
CAUTION
For proper sealing the profiled
side of the profile flange seal must
point towards the rotary flange fit-
ting (see chapter 3.4). If this is not
observed, the sealing may not be
perfect resulting in water escaping.
Fig. 4: Align the seal profile with the
rotary flange fitting
3.5.1 Installing JJD 4
The dosing pump is connected directly as a
unit in combination with the water meter.
Do not undo the screws on the rear side
of the device!
Procedure:
1. Insert the heads of the four flange
screws through the bayonet holes on
the rotary flange fitting (see Figure 5).
Fig. 5: Place and engage
1 Feed screws through
2 Turn clockwise to engage
12 JUDO JULDOS 1703383 • 2022/10

Installation by a technical service provider
2. Turn the device in a clockwise direc-
tion up to the stop (see Figure 5 and
Figure 6).
Fig. 6: Connection engaged
3. Tighten the four flange screws.
UNIT
Select the tightening torque
(approx. 4 Nm) so that the seal
is effective and the device is not
damaged or strained!
3.5.2 Install JJD 4 with wall mount-
ing
If the pipes are too low or too high, or if
there is not enough space, the JJD 4 mod-
els can also be mounted on the wall sepa-
rately from the water meter (see Figure 7).
Fig. 7: Installation of JJD 4 with sepa-
rate water meter
Do not undo the screws on the rear side
of the device!
Procedure:
1. Undo the fastening screws of the cover
(A) from below (see Figure 8) and
remove the cover.
1703383 • 2022/10 JUDO JULDOS 13

Installation by a technical service provider
Fig. 8: Cover removal
2. Slightly raise the dosing pump and
remove in a tilted inclination in a for-
wards direction.
3. Unwind the dosing hose, HE contact
encoder cable and the power supply
unit cable.
4. Install the water meter (see B, Figure 9)
on the rotary flange fitting (fastening
principle, see chapter 3.5.1).
5. Install the supplied wall mounting in a
suitable location.
INFO_NO_HEADER
Minimum clearance from the bot-
tom edge of the wall mounting
to the ground or the underlying
pipes:
•JJD 4: approx. 550 mm
6. Fit the dosing pump in the wall mount-
ing. The top lug of the wall mounting
grips in the corresponding cutout on the
rear part (tilt-protection!).
7. Screw the device tightly in place with
the screw that is located at the top on
the housing between the ventilation
slots.
Fig. 9: Fastening on the wall
mounting
8. Reattach the cover and screw in place
(see Figure 8).
The device is correctly installed if a uni-
form narrow slot can be seen between
the housing and the wall.
14 JUDO JULDOS 1703383 • 2022/10

Installation by a technical service provider
3.5.3 Installing JJD 10 - 25
The dosing pump is placed directly on the
mineral solution container. The water meter
is installed separately on the installation
rotary flange (see Figure 10).
Fig. 10: Installation JJD 10 - 25
The water meter for JJD 25 differs from
the illustration.
Do not undo the screws on the water
meter!
Procedure:
1. Insert the heads of the four flange
screws of the water meter through the
bayonet holes on the rotary flange fit-
ting (see Figure 11).
Fig. 11: Place and engage
1 Feed screws through
2 Turn clockwise to engage
2. Turn the water meter in a clockwise
direction up to the stop (see Figure 11
and Figure 12).
Fig. 12: Connection engaged
3. Tighten the four flange screws.
UNIT
Select the tightening torque
(approx. 4 Nm) so that the seal
is effective and the device is not
damaged or strained!
4. Unscrew the cover of the JUL mineral
solution container and remove the seal
with a sharp knife.
5. Insert the pump head in the opening of
the mineral solution container and place
the pump housing down on the mineral
solution container.
1703383 • 2022/10 JUDO JULDOS 15

Installation by a technical service provider
3.5.4 Fitting the dosing hose
Fig. 13: Injection nozzle
1 Injection nozzle hose
2 Injection nozzle
3 Connector
4 Compression nut
5 Dosing hose
Procedure:
1. Push the compression nut approxi-
mately 2 cm over the dosing hose.
2. If necessary: Shorten the dosing hose.
3. Insert the dosing hose up to the stop in
the connector of the injection nozzle.
4. Push the compression nut onto the con-
nector, screw in place and tighten with
an 8mm open-ended spanner.
UNIT
Select the tightening torque
(about 4 Nm) so that the com-
pression nut clamps the dosing
hose and seals it.
The required tightening torque is
approximately reached when the
open-ended spanner has been
tightened until it slips over the
hexagon of the compression nut.
5. Check the dosing hose for correct seat-
ing by pulling.
Installation of the dosing hose is com-
pleted.
Undo the dosing hose:
•Undo the compression nut with an
open-ended spanner and screw off.
Refitting the dosing hose:
•Cut off the dosing hose just after the
indentation and install according to the
manual.
INFO_NO_HEADER
The indentation in the dosing
hose results from tightening of
the compression nut.
3.5.5 Connecting the water meter
(only for JJD 25)
Procedure:
1. Remove cover (see Figure 8).
2. Lead the cable of the flow sensor that
is located on the water meter from the
rear into the pump housing and for-
wards under the electrical circuit.
3. Plug the three individual connectors of
the sensor cable onto the pins provided
on the electronic circuit (see 9.3).
4. Press the cable into the slot of the cable
winder on the inside of the housing rear
wall for strain relief and wrap it at least
once.
4 Commissioning
The following steps are necessary to start
up the device:
•For JJD 4: Screw on the JUL mineral
solution container (see chapter 4.1)
•Bleeding and flushing the water meter
(see chapter 4.2).
•Plug the power supply unit in.
ATTENTION: Leave the last winding of
the mains cable as a strain relief on the
winding device.
16 JUDO JULDOS 1703383 • 2022/10

Commissioning
Once commissioning is complete, the
device starts to operate.
4.1 For JJD 4: Screw on the min-
eral solution container
Procedure:
1. Unscrew the lid of the JUL mineral solu-
tion container.
2. Remove the seal with a sharp knife.
3. Push the mineral solution container on
from below over the pump head and
screw home on the pump housing.
INFO_NO_HEADER
Only plug in the mains plug when the
mineral solution container is screwed
on.
4.2 Bleeding and flushing the
water meter
Procedure:
1. Open the shut-off valve upstream of the
device.
2. Then immediately open the closest tap
downstream of the device and allow the
water to run for a few seconds.
Air and residues escape with the water
flow.
3. Reclose the tap downstream of the
device.
INFO_NO_HEADER
The bleeding and flushing process
should also be performed when com-
missioning the device after mainte-
nance work.
5 Operation
5.1 Setting the dosing quantity
Three different settings can be selected for
the dosing of JUL mineral solution into the
drinking water:
•minimal (min)
•normal (norm)
•maximum (max)
INFO_NO_HEADER
As supplied, the max setting is acti-
vated.
Recommendation:
•Initially (until the first two fillings of the
mineral solution container have been
used up), select the maximum set-
ting so that a closed protective layer is
quickly built up.
•Then optionally reduce to normal or
minimum, as required.
If signs of corrosion still occur (e.g. brown
water), the dosing quantity must be
increased again.
How to change the dosing quantity:
1. Pull the power supply unit out of the
socket.
2. Remove cover (see Figure 15).
3. Change the DIP switch on the elec-
tronic circuit to the desired dosing rate
min, norm or max (see Figure 14).
Fig. 14: DIP switch
4. Reattach the cover.
5. Plug the power supply unit into the
power outlet.
The dosing quantity has been saved.
1703383 • 2022/10 JUDO JULDOS 17

Operation
Fig. 15: Cover removal
5.2 Selection of the appropriate
JUL mineral solution / tablets
The following criteria are decisive for selec-
tion of the JUL mineral solution:
•the hardness range of the water
•the material of the piping.
ATTENTION:
•only JUL mineral solutions supplied by
JUDO may be used
•only use JUL mineral solutions
assigned to water hardness range (see
Tab. 1: JUL mineral solution - available
types).
If this requirement is ignored, the device
will not work.
INFO_NO_HEADER
The mineral solutions JUL-W and
JUL-H are available as mineral
tablets for dissolving (see chap-
ter 5.2.1). The mineral tablets are
packed in cardboard thus contributing
to a reduction in plastic waste by pre-
venting the use of the plastic packag-
ing required for mineral solution.
Pipe Hardness
range
JUL min-
eral solu-
tion
Galva-
nized
1 and 2, as well
as downstream
of the water soft-
ening system
JUL-W-
Tabs 1) 2)
Mixed
installation
2 and 3 JUL-H-
Tabs 1)
Table 1: JUL mineral solution - available
types
1) Tabs = tablet form
2) Not available for Switzerland
5.2.1 JUL mineral tablets
For models JJD 4, JJD 10 and JJD 25 the
following mineral solutions are available as
mineral tablets for dissolving in water.
•JUL-W (mineral tablets: JUL-W-Tabs for
6 or 25 litres solution)
•JUL-H (mineral tablets: JUL-H-Tabs for
6 or 25 litres solution)
INFO_NO_HEADER
For the use of the mineral tablets, a
dosing solution container is included
to dissolve the mineral tablets.
The tablets must always be dissolved as a
complete package. Removal of individual
tablets for production of partial quantities is
not permitted for hygiene reasons and also
because it is not effective.
A tablet dissolving device with a detailed
manual is available for dissolving the tablets
(see chapter 9.4).
5.3 Refilling the mineral solution
container
Once the filling level falls below the mini-
mum level,
•the yellow warning light comes on
•an audible signal can be heard.
18 JUDO JULDOS 1703383 • 2022/10

Operation
Fill up the mineral solution container with
new mineral solution as soon as possible.
Procedure:
1. Pull the power supply unit out of the
socket.
2. Remove the empty mineral solution
container.
3. Prepare new mineral solution accord-
ing to the instructions delivered with the
mineral solution tablets.
4. For JJD 4: push the filled mineral solu-
tion container on from below over the
pump head and screw home on the
pump housing.
For JJD 10 - 25: insert the pump head
in the opening of the mineral solution
container and place the pump housing
down on the mineral solution container.
5. Plug the power supply unit into the
power outlet.
The device restarts.
INFO_NO_HEADER
If no mineral solution tablets are
available, the empty dosing container
must be filled with water and con-
nected to prevent drying out of the
pump head.
5.4 Protection against third-party
access
The device can be secured using a tam-
per-proof seal. Unauthorised filling of for-
eign substances into the mineral solution
container is then no longer possible.
Suitable lugs are provided on the device
and mineral solution container for attach-
ment of a seal.
Fig. 16: JJD 4 - securing lug
Fig. 17: JJD 25 - securing lug
5.5 Conversions, changes
WARNING
Unauthorised conversions and
changes are forbidden for safety
reasons. These can impair the
functioning of the device, lead-
ing to leaks and, in the worse case
scenario, to bursting of the device.
ELECTRO_NO_HEADER
Only the supplied power supply
unit may be used to connect the
unit to the power supply. This
1703383 • 2022/10 JUDO JULDOS 19

Operation
reduces the mains voltage for
operating the electronics to a
harmless low voltage of 24 V.
In the event of repairs, printed test marks
only remain valid when original spare parts
are used.
5.6 Temporary removal of the
device (technical service
provider)
WARNING
In the event of temporary removal of
the device
•Protect the flange surfaces
against damage to ensure proper
sealing.
•Protect the device from dirt so
as not to impair drinking water
hygiene.
•Store the device in a cool and dry
place to prevent damage caused
by freezing water and possible
resultant loss of leak-tightness.
If no more JUL mineral solution is to be
dosed for a long time:
•dispose of the residual quantity in the
mineral solution container.
•thoroughly flush out the mineral solution
container with water.
•then fill the mineral solution container
with pure water and allow the device to
continue operation with it for some time.
To remove the device
1. Unplug the power supply unit.
2. Shut off the water supply to the device
(close the stopcock or switchover the
bypass valve).
3. Arrange for a technical service provider
to remove the device.
The device must be bled and flushed prior
to restarting:
•Open the stopcock or the bypass valve.
•Open a tap downstream of the device.
After a flushing water quantity of 5 litre,
the device is bled.
•Connect the JUL mineral solution con-
tainer and plug in the power supply unit.
The device then automatically restarts.
5.7 Maintenance, repair,
spare parts
CAUTION
Before performing work on the
device that goes beyond pure
operational use, the device
must be depressurised. If this is
ignored, the result may be uncon-
trolled egress of water resulting in
water damage.
The device may only be repaired
by technical service providers or
JUDO customer service.
Only use original spare parts for
repairs.
6 Remote transmission of
messages
The device offers the following options:
•Forwarding of status or fault messages
via the floating output (e.g. connection
with building control system (see chap-
ter 6.1 and 6.2)
6.1 Forwarding status and fault
messages over floating out-
puts
ELECTRO_NO_HEADER
The device may only be installed
by technical service providers.
The power supply unit must be dis-
connected for performance of the
electrical installation.
20 JUDO JULDOS 1703383 • 2022/10
This manual suits for next models
5
Table of contents
Other Judo Water Pump manuals
Popular Water Pump manuals by other brands

IPM
IPM IP02 Series OPERATIONING MANUAL WITH PARTS IDENTIFICATION

GORMAN-RUPP
GORMAN-RUPP 12C2-B Installation, operation and maintenance manual

Pfeiffer Vacuum
Pfeiffer Vacuum MVP 015-2 DC NEO operating instructions

ALPHA DYNAMIC PUMPS
ALPHA DYNAMIC PUMPS MINI 005 Installation, operation and maintenance

Edwards
Edwards nEXT85 Original instructions

GORMAN-RUPP PUMPS
GORMAN-RUPP PUMPS T4A61S-B Installation, operation, and maintenance manual with parts list