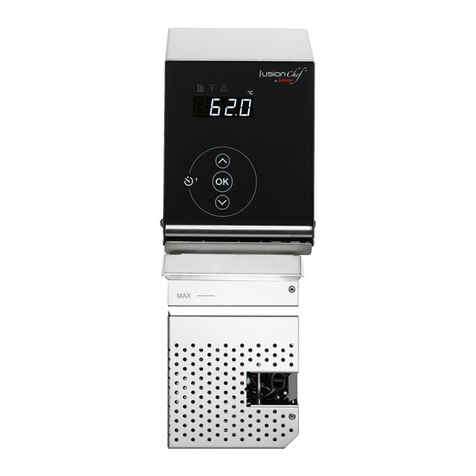
Julabo Fusion Chef diamond User manual

Table of contents
2
Table of contents
Sous Vide basics............................................................................5
Safety.............................................................................................7
Proper use.......................................................................7
Safety notices for your Diamond..................................7
Safety notices for Sous Vide cooking ......................... 11
Description of your Diamond.................................................... 13
Front and rear views.................................................... 13
Display and keypad.......................................................14
Accessories..................................................................................16
Attachments.................................................................16
Accessories for cooking containers............................ 16
Temperature sensor ....................................................18
Other accessories.........................................................19
Installation and initial operation............................................... 21
Unpacking and inspecting the unit ............................. 21
Installing your Diamond combination........................ 21
Installing your Diamond ..............................................21
Adding water to tank...................................................23
Beginning initial circulator operation ........................ 24
First steps....................................................................................25
Prep work .....................................................................25
Starting the unit ........................................................... 26
Enjoying the first results..............................................27

Table of contents
3
Improving the results...................................................28
Working with your Diamond ....................................................30
Gaining experience ...................................................... 30
Switching on and starting the unit............................................... 30
Operating the unit........................................................................... 30
Setting the desired temperature ................................................. 31
Using the quick keys....................................................................... 31
Changing the stored temperatures............................................. 32
Working with the timer ................................................................ 33
A closer look................................................................. 37
Working with the core temperature sensor ........................... 37
Connecting the core temperature sensor................................ 38
Inserting the core temperature sensor ..................................... 39
Setting the alarm for the core temperature sensor............... 39
Switching off the temp. sensor alarm......................................... 40
Automating processes .................................................41
Using automatic cooking time detection................................... 41
Activating automatic cooking time detection .......................... 41
Starting automatic cooking time detection............................... 42
Storing the cooking time ............................................................... 42
Retrieving the cooking time.......................................................... 44
What exactly will be stored?........................................................ 44
Special functions........................................................... 46
Automatic temperature monitoring........................................... 46
Recording and exporting data...................................................... 48
Additional menu settings............................................................... 52
Care and maintenance...............................................................55
Changing the water...................................................... 55
Decalcifying................................................................... 56
Cleaning the unit..........................................................56

Table of contents
4
Confirming temperature accuracy............................. 59
Checking temperature accuracy.................................................. 59
Calibrating the external sensor ................................................... 59
Calibrating the unit in an ice water bath................................... 61
Error messages ........................................................................... 64
Basic troubleshooting ..................................................64
Error messages.............................................................65
Information about the unit........................................................66
Technical data .............................................................. 66
EC compliance.............................................................. 69
Repairs...........................................................................69
Disposal ......................................................................... 70
Warranty ...................................................................... 71

Proper use
5
Sous Vide basics
Always exercise the greatest possible care and main-
tain hygienic conditions at all times.
Use only fresh ingredients of the highest possible
quality. Prepare raw ingredients properly.
Place the raw, refrigerated ingredients into special
bags suitable for Sous Vide. Vacuum them with a suit-
able vacuum device.
Fill the bath tank with hot water and use your Dia-
mond to heat the water to the desired temperature.
When the desired temperature has been reached,
place the bag with the food into the water bath. Cook
gently at low temperatures but for an extended peri-
od of time.
If you are unsure about the appropriate temperatures
and cooking times, you must consult a Sous Vide
cookbook.
If you will not serve the cooked food immediately,
you can allow the food to cool down and store it in a
refrigerator.
To do this, interrupt the cooking process shortly
before the normal ending time and cool the food to 3
°C (37 °F) within 90 minutes. The best way to do this
is with an ice water bath or a shock freezer.
Important!
1. Preparation
2. Vacuuming
3. Cooking
4. Cooling

Sous Vide basics
6
Remove the cooled bag from the ice water and store
it at 3 °C (37 °F) or colder.
Warm the cooled bag in a water bath shortly before
serving. Complete the cooking process and serve the
food.
Enjoy your meal!
5. Refrigerated
storage
6. Regeneration

Proper use
7
Safety
Proper use
This product is designed to control the temperature
of water in a bath tank. The product is used to pre-
pare food in this water bath according to the Sous
Vide technique (low-temperature, slow cooking of
food in vacuum-sealed packaging).
This product is designed exclusively for com-
mercial use.
Carefully observe hygienic standards and legally stipu-
lated minimum cooking times/minimum temperatures
at all times.
This product is not designed for direct cooking of
food (such as soups or sauces).
Direct cooking means: unprotected contact of the
food with the cooking fluid (water) and parts of the
device.
Safety notices for your Diamond
Cautions and warnings!
These operating instructions contain safety notices.
They are identified by the triangle with exclamation
point shown here.
Carefully read and observe all instructions!
It is important that you follow all safety instructions in
order to avoid personal injury and property damage.

Safety
8
This device is not intended for use by persons (includ-
ing children) with reduced physical, sensory or mental
capabilities, or lack of experience and knowledge
unless they have been given supervision or instruction
concerning the use of the device by a person respon-
sible for their safety.
Children should be supervised to ensure that they do
not play with the appliance.
Caution!
This device may be attached only to power sup-
plies with proper grounding and FI fuses!
If a grounded power supply is not available, the
customer is obligated to contract an authorized
technician to install one.
The power plug serves as a protective separator
and must be easily accessible at all times.
Caution!
Parts of the bath tank and the stainless steel cov-
er may become hot to the touch during continu-
ous operation. Exercise caution when touching
these parts! Use a hot pad or hot gloves!
Do not drain the water while it is hot! Check the
temperature of the water before draining; this
may be done by briefly switching on the unit.

Safety notices for your Diamond
9
It is essential that you read the operating instruc-
tions before initial operation.
Install the stainless steel bath tank indoors only
and on a level, noncombustible surface.
Do not use this unit outdoors!
Never operate the unit without water! Depend-
ing on the hardness of the water, we recommend
the use of soft/decalcified water. Change the wa-
ter every day. Other fluids may become combus-
tible, flammable, or explosive when vaporizing.
Use water only!
Completely drain the stainless steel bath tank
before moving the unit. Transport the unit care-
fully!
Do not carry the unit on the protection grid!
Shaking or dropping may damage the inside of the
unit.
Warning!
Do not touch the power plug or power cord with
wet hands!
Switch off the unit at the mains switch and pull
out the power plug
- before performing cleaning tasks.
- before moving the unit.

Safety
10
Never allow water to penetrate inside the circu-
lator.
The appliance shall not be cleaned with water jet.
Do not immerse the appliance under water.
Never operate a damaged or leaking unit!
Do not attempt to use the unit if the power cord
is damaged! For safety reasons a damaged power
cord may only be replaced by the manufacturer, a
fusionchef by Julabo service representative or a
similarly qualified person
Allow only authorized technicians to perform
service and repair tasks.
Low bath fluid safety float
This unit includes a low bath fluid safety switch.
Switching off this safety device (by blocking the
float) can result in a hazardous situation.
Always inspect the low bath fluid safety float
before using the unit. You can check the function-
ality of the float by manually holding down the
unit's float switch with a tool.

Safety notices for Sous Vide cooking
11
Safety notices for Sous Vide cooking
Only trained experts should attempt the Sous Vide
cooking technique. It is important to follow precise
and uniform work steps and maintain a hygienic envi-
ronment in order to ensure adequate safety during
food preparation.
It is critically important to follow procedures that
minimize the risk of the growth of anaerobic bacteria,
such as clostridium botulinum.
Make sure that you are using Sous Vide techniques
from a trained expert or from a technical culinary
manual.
Notice
Please remember to observe the following
Use high-quality ingredients from reputable manu-
facturers only.
Separate the areas for raw and cooked food.
Observe the appropriate minimum temperature
when cooking food.
Observe the maximum storage temperatures and
storage times recommended by experts or tech-
nical journals.
Label food with the date of cooking and the date
of expiration.
Always work in a sterile environment and use
sterile gloves when filling the Sous Vide bags.
Use separate devices for vacuuming raw and
cooked food.

Safety
12
It is also important that kitchen personnel employ an
appropriate HACCP (Hazards Analysis and Critical
Control Points) system in order to monitor and doc-
ument every step the food takes from delivery to
serving.
Monitor the quality of the water in the Sous Vide bath
and change it regularly. Depending on the hardness of
the water, we recommend decalcifying the unit regu-
larly. To do this, use a food-compatible decalcifier.
Be aware of potential breaks in the cold chain or
unnecessary food storage time.
Also make sure that the cooked food cools down
within the proper time before placing it into storage
(maximum temperature 3 °C (37° F)).
To achieve pasteurization, food cooked according to
the Sous Vide process must reach a core temperature
of at least 65 °C (149 °F). It is advisable to use a tem-
perature sensor or other thermometer to check the
core temperature.
In all cases, you are responsible for following Sous
Vide regulations enacted by your local health agency
as well as all food-safety directives that apply to your
area of responsibility.
Observe HACCP
regulations
Monitor water qual-
ity
Ensure a
proper cold chain
Check core
temperature

Front and rear views
13
Description of your Diamond
Front and rear views
Front without protection grid Rear with protection grid
1
VFD display (see next page)
7
RS232 interface for
computer connection
2
Keypad (see next page)
8
Mains switch, illumi-
nated
3
Safety float switch
9
Micro fuses
4
Pump discharge
10
Power cord with plug
5
Heating coil
11
Protection grid
6
Pt100 connection socket for
core temperature sensor
12
Bath attachment clamp

Description of your Diamond
14
Display and keypad
1
VFD display
2
Status icons: Heating/Alarm
3
Datalogger activation indicator
4
Temperature unit display (°C or °F) and
temperature sensor for current temperature:
Int for temperature sensor in water bath
Ext for attached core temperature sensor
5
Main display for current temperature value
6
Display line 1 for set point value
7
Display line 2 for time value
8
Timer buttons 1-3

Display and keypad
15
9
Quick keys for
MEAT,
FISH,
VEG
10
Core temperature sensor button
11
Keypad:
Arrow keys to set temperature and
timer
key to confirm the values
12
Key to correct settings, stop functions or
enter a menu (press together with key 10)

Accessories
16
Accessories
The following accessories are available for your Dia-
mond.
Attachments
Bath attachment clamp
Use the bath attachment clamp to secure the Dia-
mond to the wall of a cooking container.
Max. wall thickness
Order No.
Attach. clamp
30 mm
9FX1118
Accessories for cooking containers
Separation grid
The separation grid is used to divide bath tanks into
smaller compartments in order to keep food items
apart. They are particularly useful when cooking a
variety of items that must be removed from the con-
tainer at different times.
Separation grids are available for bath tanks of all
sizes.
Order No.
Separation grid for bath tank XS
9FX1120
Separation grid for bath tank S
9FX1121
Separation grid for bath tank M
9FX1122
Separation grid for bath tank L
9FX1123
Separation grid for bath tank XL
9FX1124

Accessories for cooking containers
17
Retaining grids
Retaining grids are inserted into the bath tank from
above and are used to keep vacuum bags underwater.
They help ensure that the food is cooked evenly from
all sides.
Order No.
1 retaining grid for bath XS
9FX1127
2 retaining grids for baths S, M
9FX1125
2 retaining grids for baths L, XL
9FX1126
Steam trapping balls
To maximize insulation of the water bath, use these
steam trapping balls. Distribute these balls on the
surface of the water to minimize the amount of heat
that is lost.
Order No.
Steam trapping balls
9FX1142
iSi Gourmet clamp
Use the special clamps to securely hold an iSi Gour-
met Whip in the water bath. Indispensable when
preparing espumas and sauces.
Order No.
iSi 0.5 l clamp
9FX1130
iSi 1.0 l clamp
9FX1131
Descaling Agent
Descaling Agent to help keep your circulator per-
forming at its peak. Dilute 1 part concentrate with 10
parts water.
Order No.
Descaling Agent, 1 L
9FX1171

Accessories
18
Temperature sensor
Core temperature sensor
Use the core temperature sensor to achieve optimal
results when cooking meat or fish. Refer to the chap-
ter A closer look starting on page 37 for more de-
tails on how to use the Diamond with the core tem-
perature sensor.
Order No.
Core temperature sensor Pt100
9FX1150
Notice
The food that is cooked with the inserted tempera-
ture sensor may serve only as a reference or reten-
tion sample. It is not advisable to consume the food
once the vacuum bag has been penetrated.
Handheld core temperature sensor (external)
A handheld measurement device is useful for moni-
toring the core temperature of the
cooked food. This device is designed to be precise
and reliable.
Order No.
Handheld core temperature sensor
9FX1151
Adhesive sealing tape
Place the adhesive sealing tape onto the vacuum bag
before inserting the core temperature sensor. This
will help maintain much of the vacuum.
Order No.
Adhesive sealing tape 4 m
9FX1141

Other accessories
19
Other accessories
Travel case
The travel case is designed to hold your Diamond
and accessories.
Order No.
Travel case
9FX1190
Soft Travel case (Polyester)
Sturdy soft travel case made of polyester, with carry-
ing straps and removable shoulder strap.
Order No.
Soft Travel Case (Polyester)
9FX1191
Timer tape
Place timer tape of a particular color on the vacuum
bags that are being monitored by the timer of the
same color.
When the red timer triggers, for example, you will
know that all vacuum bags with red timer tape are
finished.
Order No.
Timer tape, red, 5 m
9FX1145
Timer tape, blue, 5 m
9FX1146
Timer tape, yellow, 5 m
9FX1147
Easy fusionchef software
The Easy fusionchef software records data and visu-
alizes cooking processes.
Order No.
Easy fusionchef software
9FX1160

Accessories
20
RS232 interface cable
Use the RS232 interface to connect the
Diamond to a computer.
Order No.
RS232 interface cable
9FX1162
USB adapter cable
Use the USB adapter to connect the
Diamond to a computer.
Order No.
USB adapter cable
9FX1161
Table of contents
Other Julabo Kitchen Appliance manuals