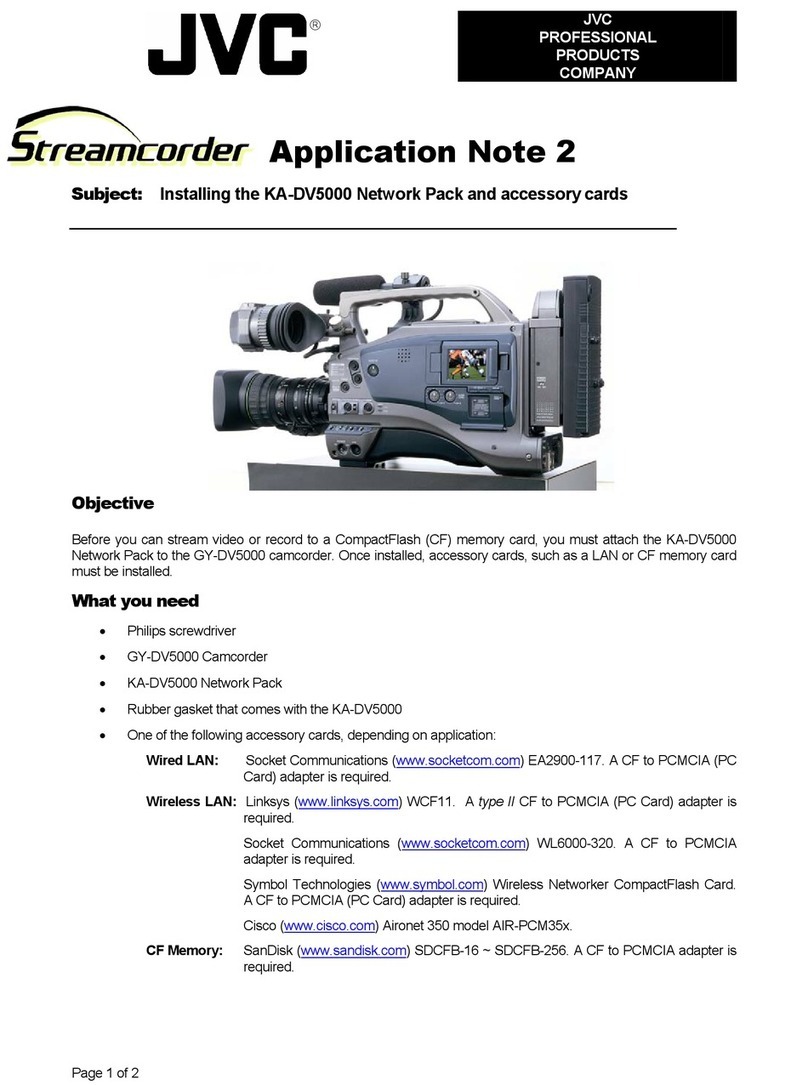
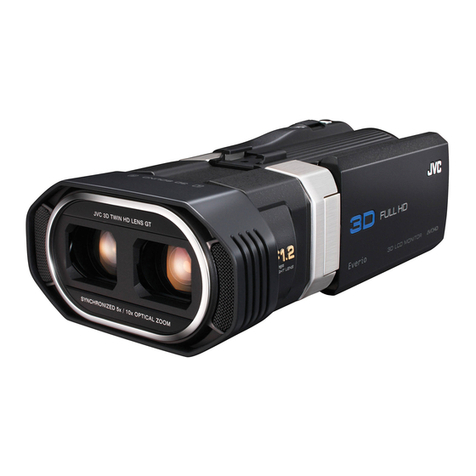
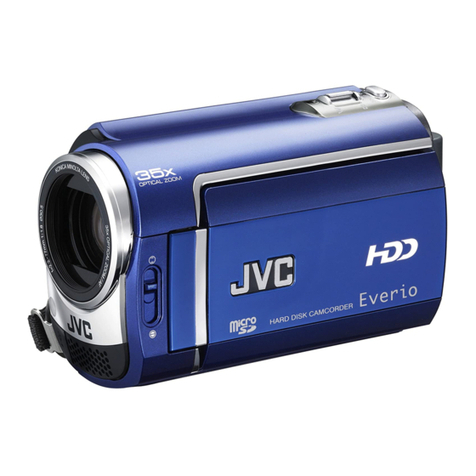
JVC GZ-HM1U User manual

INSTRUCTIONS
HD MEMORY CAMERA
GZ-HM1
LYT2196-001 B-M
ead these INSTRUCTIONS to
oy your CAMCORDER.
or more details on the
perations, refer to the
dvanced INSTRUCTIONS in
e supplied CD-ROM.
Dear Customers
Thank you for purchasing this camcorder.
Before use, please read the safety
information and precautions contained in
pages 2 and 3 to ensure safe use of this
product.
For Future Reference:
Enter the Model No. (located on the
bottom of the camcorder) and Serial No.
(located on the battery pack mount of the
camcorder) below.
Model No.
Serial No.
_1_ "+ FI]DOLBY
STEREO £REATDR TECHNOLOGY
1-411_:lmll+ AVCI-ID +_

Safety Precautions
CAUTION: TO REDUCE THE RISK OF ELECTRIC SHOCK,
DO NOT REMOVE COVER (OR BACK).
NO USER-SERVICEABLE PARTS INSIDE.
REFER SERVICING TO QUALIFIED SERVICE PERSONNEL.
The lightning flash with arrowhead symbol, within an
equilateral triangle, is intended to alert the user to the
presence of uninsulated "dangerous voltage" within the
producrs enclosure that may be of suffldent magnitude
to constitute a risk of electric shock to persons.
The exclamation point within an equilateral tflangle is
intended to alert the user to the presence of important
operating and maintenance (servicing) instructions in
the literature accompanying the appliance.
WARNING: TO PREVENT FIRE OR SHOCK
HAZARD, DO NOT EXPOSETHIS UNITTO
RAIN OR MOISTURE.
NOTES:
•The rating plate and safety caution are on the
bottom and/or the back of the main unit.
• The serial number plate is on the battery pack
mount.
• The rating information and safety caution of the
AC adapter are on its upper and lower sides.
Caution on Replaceable lithium battery
The battery used in this device may present a fire
or chemicat burn hazard if mistreated.
Do not recharge, disassemble, heat above 100°C
or incinerate.
Replace battery with Panasonic, Sanyo, Sony or
Maxett CR2025.
Danger of explosion or Risk of fire if the battery is
incorrectly replaced.
• Dispose of used battery promptly.
• Keep away from children.
• Do not disassemble and do not dispose of in fire.
For USA-California Only
This product contains a CR Coin Cell Lithium
Battery which contains Perchtorate Material
- special handling may apply.
See www.dtsc.ca.gov/hazardouswaste/perchtorate
When the equipment is installed in a cabinet or on
a shelf, make sure that it has sufficient space on all
sides to allow for ventilation (10 cm (3-15/16") or
more on both sides, on top and at the rear).
Do not block the ventilation holes.
(If the ventilation holes are blocked by a
newspaper, or cloth etc. the heat may not be able
to get out.)
No naked flame sources, such as lighted candles,
should be placed on the apparatus.
When discarding batteries, environmental
problems must be considered and the local rules or
taws governing the disposal of these batteries must
be followed strictly.
The apparatus shall not be exposed to dripping or
splashing.
Do not use this equipment in a bathroom or places
with water.
Also do not place any containers filled with water
or liquids (such as cosmetics or medicines, flower
vases, potted plants, cups etc.) on top of this unit.
(If water or liquid is allowed to enter this
equipment, fire or electric shock may be caused.)
Do not point the lens directly into the sun. This
can cause eye injuries, as well as lead to the
malfunctioning of internal circuitry. There is also a
risk of fire or electric shock.
CAUTION!
The following notes concern possible physical
damage to the camcorder and tothe user.
Carrying or holding the camcorder by the LCD
monitor can result in dropping the unit, or in a
malfunction.
Do not use a tripod on unsteady or unlevel surfaces.
It could tip over, causing serious damage to the
camcorder.
CAUTION!
Connecting cables (Audio/Video, S-Video, etc.) to the
camcorder and leaving it on top of the TV is not
recommended, as tripping on the cables will cause
the camcorder to fall, resulting in damage.
CAUTION:
The mains ptug shall remain readily operable.
• Remove the mains plug immediately if the
camcorder functions abnormally.
WARNING:
The battery pack, the camcorder with battery
installed, and the remote control with battery
installed should not be exposed to excessive heat
such as direct sunshine, fire or the like.
2 EN
IMPORTANT SAFETY INSTRUCTIONS
1. Read these instructions.
2. Keep these instructions.
3. Heed all warnings.
4. Fottow att instructions.
5. Do not use this apparatus near water.
6. Clean only with dry ctoth.
7. Do not btock any ventilation openings. Install in
accordance with the manufacturer's instructions.
8. Do not install near any heat sources such
as radiators, heat registers, stoves, or other
apparatus 0ncluding amplifiers) that produce heat.
9. Only use attachments/accessories specified by the
manufacturer.
10. Use onty with the cart,
stand, tripod, bracket,
or tabte specified by
the manufacturer, or
sold with the apparatus.
When a cart is used,
use caution when
moving the cart/
apparatus combination
to avoid injury from tip-over.
11. Unplug this apparatus during lightning storms or
when unused for tong periods of time.
12. Refer att servicing to qualified service personnel.
Servicing is required when the apparatus has
been damaged in any way, such as power-supply
cord or plug is damaged, liquid has been spilled
or objects have fallen into the apparatus, the
apparatus has been exposed to rain or moisture,
does not operate normally, or has been dropped.
'_ If this symbol is shown, it is only valid
in the European Union.
Remember that this camcorder is intended for
private consumer use only.
Any commercial use without proper permission
is prohibited. (Even if you record an event such
as a show, performance or exhibition for personal
enjoyment, it is strongty recommended that you
obtain permission beforehand.)
Trademarks
• "AVCHD" and the "AVCHD" logo are trademarks
of Panasonic Corporation and Sony Corporation.
• Manufactured under license from Dotby
Laboratories. Dotby and the double-D symbol
are trademarks of Dolby Laboratories.
• x.v.Color TM iS a trademark of
Sony Corporation.
• HDMI is atrademark of HDMI x.v.Color
Licensing, LLC.
• Windows ®is either registered I1_ _'"1 mll _
trademark or trademark of .................................
Microsoft Corporation in the United States
and/or other countries.
• Macintosh is a registered trademark of Apple
Inc.
• iTunes, iMovie, iPhoto are trademarks of Apple
Inc., registered in the U.S. and other countries.
• YouTube and the YouTube logo are trademarks
and/or registered trademarks of YouTube LLC.
• Other product and company names included in
this instruction manual are trademarks and/or
registered trademarks of their respective holders.
a
iii
I-
Z
i-
i-
iii
EN 3

Charge the battery before recording
Turn off the camcorder and attach the battery pack.
Access lamp
blinks: Accessing files
Do not remove the AC adapter,
the battery pack or the SD
card when the access lamp is
blinking.
Power/charge lamp
blinks: Charging
goes out: Charging finished
Battery Pack
I_mJb. AC Adapter
To AC Outlet
(110V to 240V)
Fire or injury may result if batteries NOT approved by JVC are used. Only use the
batteries specified on page 41.

Date/Time Setting
Open the LCD monitor to
turn on the camcorder
Power button
OSelect the city closest to
the area where you use
the camcorder
LCD monitor
Oelect [YES] within
10 seconds
Slide your finger up and down on the
sensor. Then touch OK.
OSelect [ON] if daylight
saving time is observed
• When the message disappears, press the
power button for at least 2 seconds to turn
off the power, and then press it again for at
least 2 seconds.
• Touch the sensors with your finger. The
sensors do not function if you touch them
with your finger nail or with gloves on.
O Select [CLOCK SETTING]
OSet the date and time
Touch sensor: Sets the date and time
•-_: Moves the cursor to the right
OK: Clock starts

Video recording
Before recording an important scene, it is recommended to conduct a trial '/
recording.
Slide the mode switch to select N1m(video) mode
Select recording mode (REC)
pLAY/REC
The mode changes when
you press the button.
The auto recording
indicator appears.
Start recording
iiiiiiiiiiiiiiiiiiiiiiiiii Remaining space on
iiiiiiiiiiiiiiiiiiiiiiiiii _ therecordingmedia
iiiiiiiiiiiiiiiiiiiiiiiii_
iiiiiiiiiiiiiiiiiiiiiiiiii Video Quality Record-standby
iiiiiiiiiiiiiiiiiiiiiiiii_
iiiiiiiiiiiiiiiiiiiiiiiiii _0_
iiiiiiiii!iiii:ii:ii:ii:ii:ii:ii:ii:ii:ii:ii:ii:ii:ii:ii:ii:ii:ii:ii:ii:iiPresstheSTART/STOP
iiiiiiiiiiiiiii_ii!i!iiiilililililililililililililililbutton to start recording,
iiiiiiiiiiiiiiiiiiiiiiiil;!i:i:i:i:i:i:i:i:i:i:i:i:iand press itagain to stop. Recording

Playing back
OSelect playback mode (PLAY)
PLAY/REC
0
The mode changes when
you press the button,
Select the desired file
Index screen
Select I_ (Touch OK)
Playback screen
•To perform operations such as forward search or reverse search (_" p. 22)
• To view files on TV (_ p. 24)
Do not forget to make copies after recording!
• To copy files onto discs (;_" p. 26)
• To dub files to a VCR/DVD recorder (_ p. 28)
• To edit files on your computer (__ p. 29)
iiiiiiiiiiiiiiiiiiiiiiiiiiiiiiiiiiii
iiiiiiiiiiiiiiiiiiiiiiiiiiiiiiiiiii,

Contents LI_'] I_[€]LvAvJi I: I IkV_[€l ;i l I I_[€__.']1lr__;,_I ;I J]
r_ Accessories ................................................ 10
Shoe Adapter ................................................ 10
_z Preparing the Remote Control ...................... 11
Index ............................................................ 12
Tripod Mounting ............................................ 13
Indications on LCD Monitor ....................... 14
[_o] _'d I#[_
Necessary Settings before Use ................. 16
Charging the Battery Pack ............................ 16
Date/Time Setting ......................................... 16
Language Setting ......................................... 17
Grip Adjustment ............................................ 17
Other Settings ............................................. 18
Using an SD Card ......................................... 18
I".,fo][o] :,]:1;,!-'_1i [o] _I
It,]=[_*] t,]m]I#[_J t,]I-'Vd "Y-'[_],'q
Recording Files ........................................... 19
Video Recording ........................................... 19
Still Image Recording ................................... 20
Image Stabilizer ............................................ 20
Zooming ........................................................ 21
Flash ............................................................. 21
Checking the Remaining Space on the
Recording Media ......................................... 21
Checking the Remaining Battery Power ....... 21
Playing Back Files ...................................... 22
Video Playback ............................................ 22
Still Image Playback ..................................... 23
Viewing Files on TV .................................... 24
Connection with TV ....................................... 24
Playback Operation ...................................... 25
Copying Files .............................................. 26
Using a BD/DVD Burner ............................... 26
Dubbing Files to a VCR/DVD Recorder ........ 28
Creating a Disc Using aPC ....................... 29
Using with a Portable Media Player .......... 34
Turning on the Export Mode ......................... 34
Making the Export Setting ............................ 34
Transferring the Files to PC .......................... 34
Uploading Files to Websites ...................... 35
Turning on the Upload Mode ........................ 35
Uploading Files ............................................. 35
I11J ;,;111:1:1;,_II_I _[o];,_lv__'-'_1i [o] _I
Changing the Menu Settings ..................... 36
Troubleshooting .......................................... 36
Warning Indications ................................... 38
Specifications ............................................. 39
Cautions ...................................................... 42
Terms ........................................................... 44
fRead these INSTRUCTIONS to enjoy your CAMCORDER.
For more details on the operations, refer to the Advanced INSTRUCTIONS in the
supplied CD-ROM.
In order to view the Advanced INSTRUCTIONS, Adobe ®Acrobat ®Reader TM or
Adobe <_Reade_ must be installed.
Adobe <_Reade_ can be loaded from Adobe's web site:
http://www.adobe.com/
II_[*_ll_
Select your desired language with a single click.
The model name is indicated on the bottom of your camcorder.
8EN

How to use the Touch
Sensor
After the menu is displayed on the LCD
monitor:
OSlide your finger up and down on the
sensor.
0 Select [SET]. (Touch OK.)
[]
I_To select an on-screen button appearing on
the left side, touch the portion of the sensor
next to the on-screen button.
I'tl To select an on-screen button appearing at
the bottom of the screen, touch the buttons
underneath them.
Read This First!
Make a backup of important recorded data
It is recommended to copy your important
recorded data to a DVD or other recording
media for storage. JVC will not be responsible
for any lost data.
Make a trial recording
Before the actual recording of important data,
make a trial recording and play back the
recorded data to check that the video and
sound have been recorded correctly.
Reset the camcorder if it does not operate
correctly
Close the LCD monitor and remove the power
supply (battery pack or AC adapter) from the
camcorder, then reattach it.
Precautions on handling batteries
,, Be sure to use the JVC BN-VF808U/
VF815U/VF823U battery packs. This product
includes patented and other proprietary
technology and is made to be used with the
JVC battery and not with other batteries.
JVC cannot guarantee safety or
performance of this product when it is
operated by other batteries.
•If the camcorder is subjected to electrostatic
discharge, turn off the power before using it
again.
If a malfunction occurs, stop using the
camcorder immediately and contact
www.ivc.com or by phone at 1-800-252-5722
,, Recorded data may be erased while the
camcorder is being repaired or inspected.
Back up all data before requesting repairs or
inspections.
Because camcorders may be used
for demonstration in a shop, the
demonstration mode is set to on by default
To deactivate the demonstration mode, set
[DEMO MODE] to [OFF].
a
iii
I--
r_
z
I..-
F-
iii
@
EN g

Accessories
AP-V20U BN-VF815U
AC Adapter Battery Pack
Component Cable AV Cable
An optional microphone or light can be
attached to the shoe adapter.
Slide the shoe cover
in the direction of the
arrow to reveal the shoe
adapter mounting socket,
Mount the accessory
shoe adapter.
USB Cable LY37115-001B
Shoe Adapter
RM-V760U CR2025
Remote Control Lithium Battery
Pre-installed in the
remote control.
CD-ROM
Fasten the shoe adapter
to the shoe adapter
mounting socket by
turning the screw in the
direction of the arrow.
Insert a microphone, etc.
from behind the shoe
adapter.
II_[a;I I _1
Make sure to use the provided cables for
connections. Do not use any other cables.
Do not try to attach a microphone, etc. to the
shoe adapter forcibly.
10EN

A battery is included inside the remote control
at the time of purchase.
Remove the insulation sheet before use.
Beam Effective Area
Remote Sensor
a
LU
F-
n,
O_
(.9
Z
F-
F-
UJ
L9
Effective distance:
Max. 4 m (13.16 ft)
II_[e_li_
The transmitted beam may not be effective
or may cause incorrect operation when the
remote sensor is directly exposed to sunlight
or powerful lighting.
To Reinsert the Battery ]
Pull out the battery holder by pressing the lock
tab. Lithium Battery
(CR2025)
Lock Tab
EN 11

i Index
_i__'_II_'_..........
__i,ii!_,i_ii,i_i_i,iii_i_i,i_i_i_i,i_i_i__,,_,,_.......
0II_[e]lllUl
•Be careful not to cover _, _}, 11_,and _3_,
during shooting.
• The LCD monitor can rotate 270 °.
180°
90°
12 EN

Power Button
2_ SD Card Slot
3_ OPEN knob (_" p. 18)
4_ Speaker
_ PLAY/REC Button (__ p. 19, 20, 22, 23)
6_ SNAPSHOT Button (__ p. 20)
Touch Sensor
8_ OK Button
_MENU Button (_" p. 36)
:1¢USB Connector (_" p. 26, 30)
,_17,Mode Switch [_, O]
:13:EXPORT Button (_" p. 34)
:13_DIRECT DISC Button (__ p. 27)
INFO Button (_ p. 21)
:1} DISPLAY Button (_" p. 15)
:15)UPLOAD Button (_ p. 35)
TITLE Button
:16_Lens
:lz Flash (_ p. 21)
:18_Shoe Adapter Mounting Socket (_" p. 10)
:_ Remote Sensor
_0_Zoom Lever (_" p. 21 )
Speaker Volume Control
'_0Aperture Priority Setting Button [A]
12_Shutter Speed Button [S]
12_,USER Button [U]
12_Adjustment dial/SET Button
i_5"_FOCUS/BRIGHT Switch
i_6_HDMI Mini Connector (_ p. 24)
i_t Component Connector (_" p. 24)
_sn
, ;, ,, (headphones) Connector
129_DC Connector
13_,START/STOP Button (_" p. 19)
13_AV Connector (_" p. 25, 28)
13_MIC (microphone) Connector
13_,Stereo Microphone
13_Battery Release Button (_" p. 16)
135"_Tripod Mounting Socket
Oinfrared Beam Transmitting Window
START/STOP Button
ZOOM (T) Button (Zoom in)
Left Button
O ZOOM (W) Button (Zoom Out)
INFO Button
SNAPSHOT Button
PLAY/PAUSE/SET Button
Right Button
• ) INDEX Button*
* Each time you press INDEX, the screen
switches as shown below:
mode only:
Index Screen _ Group index Screen
Align the camcorder stud hole with the tripod
stud, and the mounting socket with the screw,
and then rotate the camcorder clockwise to
mount it to the tripod.
II_[_li;I
Do not use a tripod on unsteady or unlevel
surfaces. It could tip over, causing serious
damage to the camcorder.
L9
z
I,,-
I--
L9
EN 13

Indications on LCD Monitor
Selected Recording Mode Indicator
(_c_'p. 19, 20)
IEI: Auto Mode
_: Manual Mode
27 Scene Select indicator
37 Effect Mode Indicator
47 White Balance indicator
_b Zoom Indicator (_c_"p. 21 )
67 Recording Medium Indicator
Monitor Backlight indicator
87 image Stabilizer Indicator (_c_"p. 20)
97 Focus Assist indicator
:1¢Battery Indicator
_' Date/Time (_c_"p. 16)
:12:Manual Focus Adjustment indicator
:137Aperture Value (F-number)
:1} Tele Macro Mode indicator
:15)Backlight Compensation indicator
I_: Face Detection indicator
:16_Brightness Control Indicator
_: Photometry Area Control indicator
:lz Shutter Speed
@
Mode Indicator
27 High Speed Recording Indicator/Time-
Lapse Recording Indicator
37 Upload Mode Indicator (:¢ p. 35)
47 Counter
_b Export Mode indicator (_¢ p. 34)
67 Video Quality
Remaining Time
87 • REC: (Appears during recording.)
• 11 : (Appears during record-standby mode.)
_: Shooting Indicator (_" p. 19)
:_¢Continuous Shooting indicator
_0 Wind Cut indicator
:_2:Microphone Input Level Indicator
:_37Event Indicator
:_47Sharpness Indicator
:15)x.v.Color TM
_:) Mode Indicator
2: ISO Sensitivity Indicator (When [GAIN] is
set to [AUTO], there is no indication.)
37 Flash Indicator (_¢ p. 21)
47 Focus Indicator (_c_"p. 20)
_b Image Size
67 Image Quality: FINE (fine) or STD
(standard)
2) Remaining Number of Shots
87 Shooting Indicator (_ p. 20)
97 Continuous Shooting Indicator
_: Bracketing Indicator
:_¢Self-Timer Indicator
14 EN

@
(.9
Z
P
i.u
(.9
Mode Indicator
2: High Speed Recording Indicator/Time-
Lapse Recording indicator
3: Playlist Playback indicator (Appears when
playing back a playlist.)
4_ Quick Review indicator (_c_"p. 19)
DIGEST: Digest Playback Indicator
_b Video Quality
6_ Counter
Playback Mode
I_ : Playback
II : Pause
I_1_: Forward Search
,4: Reverse Search
II1_ : Forward Slow-Motion
_111: Reverse Slow-Motion
(The number on the left shows speed.)
8_ Recording Medium indicator
9_ Battery Indicator
:1¢Date/Time (_c_"p. 16)
_' Volume Level indicator
:12:Wipe/Fader Effect Indicator
:13:X.v.CoIorTM
:1} Output with 1080p
Mode Indicator
2_ Quick Review Indicator (_c_"p. 20)
3_ Folder/File Number
4_ Slide Show Playback Indicator
_b Recording Medium Indicator
6_ Battery Indicator
Date/Time (_ p. 16)
8_ Face Detection Zoom Indicator
9_ Output with 1080p
Switching indication modes on LCD
monitor
Each time you touch DISPLAY, indications
on LCD monitor switch as shown below:
In recording mode:
All indications/Indications for selected
functions
in playback mode:
All indications/Only date and time/No
indications
EN 15

Necessary Settings before Use
II_[O_lllUl
!
I Close the LCD monitor to turn off the
camcorder.
u)
2 Attach the battery pack, then connect
LU
L9 the AC adapter.
• You can also use the camcorder with just the
AC adapter.
• The actual recording time may shorten
depending on the recording environment,
such as when recording scenes with fast
moving subject.
• Please do not pull or bend the AC adapter
plug and cable. This may damage the AC
adapter.
AC Adapter
To AC Outlet
(110V to 240V)
• The power/charge lamp blinks to
indicate charging has started.
• When the lamp goes out, charging is
finished.
Battery pack Charging time Recording
time
BN-VF808U 1 h 50 m 1 h 10 m
BN-VF815U 2h40m 2h25m
(Provided)
BN-VF823U 3 h 40 m 3 h 40 m
•To check the remaining battery power
See page 21.
• To detach the battery pack
| Open the LCD monitor to turn on the
camcorder.
2Touch MENU.
3 Select [DISPLAY SETTINGS].
4Select [CLOCK ADJUST].
5Select [CLOCK SETTING].
6Select the city closest to the area
where you use the camcorder.
Selectedareaishighlighted
Principal city of the
setected area
Time difference to
GMT
16 EN

7Select [ON] if daylight saving time is
observed.
8Set the date and time.
Change the setting by using the touch
sensor and select [--_] to set.
The language on the display can be changed.
m
I Open the LCD monitor to turn on the 0
z
camcorder. t,-
LU
Z Touch MENU. 0
3 Select [DISPLAY SETTINGS].
9Select [SAVE].
To reset the setting, select [CANCEL].
Setting the clock to local time when
traveling
After performing steps |-4 (__ p. 16)
5 Select [AREA SETTING].
4Select [LANGUAGE].
Select the desired language.
•To return to the previous screen
Select _-I.
• To quit the screen
Select [QUIT].
6Select the city closest to the area you
are traveling.
•To return to the previous screen
Select _:::3. II_[O]li_l
•To quit the screen
Select [QUIT]. • Fasten the strap when you grip the
camcorder.
• When carrying the camcorder, please be
careful not to drop it.
EN 17

i= Other Settings
The camcorder is programmed to record on
u_ the built-in memory when it is shipped from the
(.9 factory.You can change the recording medium
to an SD card.
•Operations are confirmed on the following
SD cards.
- Panasonic
- TOSHIBA
- SanDisk
- ATP
Video recording:
Class 4 or higher compatible SDHC card
(4 GB to 32 GB)
Still image recording:
SD card (256 MB to 2 GB) or SDHC card
(4 GB to 32 GB)
• Operations are not guaranteed if any other
SD card than the mentioned above is used.
• If other media are used, they may fail to
record data correctly, or they may lose data
that had already been recorded.
• MultiMediaCards are not supported.
• Video data may not be recorded onto the
SD cards on which video data have already
been recorded using the devices from other
manufacturers.
• It is recommended to use Class 6 when
recording video in UXP mode.
II_[o;Ill=l
No SD card is supplied with your camcorder.
I Insert an SD card
Preparation:
Press the _ (Power) button for more than
2 seconds to turn off the camcorder.
| Slide the OPEN knob to open the SD
card cover.
2Firmly insert the card with its clipped
edge first.
OPEN Knob
3Close the SD card cover.
•To remove an SD card
Push the SD card once.
After the card comes out a little, pull it out.
• insert and remove the SD card only while the
power is turned off. Otherwise, data on the
card may be corrupted.
• Do not touch the terminal on the reverse side
of the label.
Change the medium
recording
Set [MEDIA SETTINGS] --* [REC MEDIA
FORVlDEO] and [REC MEDIA FOR
IMAGE] to [SD CARD].
Format an SD card when using it for thefirst time
Select [MEDIA SETTINGS] --* [FORMAT
SD CARD] to format the card.
18 EN

Recording Files
Olide the mode switch to select
Nlm (video) mode.
&t
Press PLAY/REC to select the
recording mode.
PLAY/REC
SNAPSHOT
Press START/STOP to start
recording.
i!i
START
,'STOP
Approximate remaining
time for recording
You can also start/stop recording by
selecting [REC] on the LCD monitor.
(On-screen recording control)
0
0
uJ
II_[o]li_l
• To stop recording
Press START/STOP again.
• To view the last recorded scene
Select @ while recording is paused.
Selecting _ during playback deletes that
scene.
• To record a still image during video
recording
Press SNAPSHOT.
• To change the video quality
Change the settings in [VIDEO QUALITY].
• To change the manual recording mode
Select [A/M] twice.
• The video recording mode is automatically
selected when you turn off the camcorder
and then turn on again.
• If the camcorder is not operated for 5
minutes while the power is on, it turns itself
off automatically to conserve power.
EN 19

Recording Files (Continued)
Slide the mode switch to select
O(still image) mode.
J@
•To view the last recorded image
Setect @ after shooting.
Selecting _ during playback deletes that image.
• To change the image quality
Change the settings in [IMAGE QUALITY].
• To change the image size
Change the settings in [IMAGE SIZE].
• To record still images continuously
Set to [CONTINUOUS SHOOTING] in [SHUTTER
MODE].
• To change the manual recording mode
Setect [A/M] twice.
II_[O]lI=
• If the camcorder is not operated for 5 minutes while
the power is on, itturns itself off automatically to
conserve power.
• The sides of still images recorded in 16:9 size may
be cut off when printed. Check whether 16:9 size
prints can be printed at your local print store.
Press PLAY/REC to select the
recording mode.
PLAY/REC
Press and hold SNAPSHOT
halfway.
The _ indicator becomes green when
the captured image is focused.
Press SNAPSHOT fully to take a
still image.
Preparation:
• Setect _U or I_ mode.
• Setect the recording mode.
{(tI_))(White):
Image stabilizer A
- (Green):
(_[[)))lmage stabilizer B
((_) (White):OFF
The setting switches with
every touch.
A: Reduces camera shake.
B: Reduces camera shake more effectively when
shooting bright scenes on the wide angle end.
20 EN
Table of contents
Other JVC Camcorder manuals

JVC
JVC GR-D20EK User manual

JVC
JVC GY-HM650U User manual

JVC
JVC TK-C920 User manual

JVC
JVC GZ HD5 - Everio Camcorder - 1080i Instructions for use

JVC
JVC GR-AXM236U User manual

JVC
JVC Everio GZ-E305 User manual

JVC
JVC Everio Controller Instructions for use

JVC
JVC GR-D650AG User manual

JVC
JVC GZ HD5 - Everio Camcorder - 1080i Owner's manual

JVC
JVC 0104-FO-ID-PJ User manual