JVC XL-FZ258BK - CD Changer User manual

For Customer Use:
Enter below the Model No. and Serial
No. which are located either on the rear,
bottom or side of the cabinet. Retain this
information for future reference.
Model No.
Serial No.
LVT0234-002B
[C]
COMPACT COMPONENT SYSTEM
INSTRUCTIONS
XL-FZ158BK / XL-FZ258BK
COMPACT DISC AUTOMATIC CHANGER
'
XL-FZ258BK
XL-FZ158BK
MANUEL D'INSTRUCTIONS
XL-FZ158 COMPACT DISC AUTOMATIC CHANGER
EXCHANGE
PHONES LEVEL
PHONES
MIN MAX
PLAY & EXCHANGE SYSTEM
DISC
5
CALL MEMORY RANDOM PLAY MODE REPEAT
DISC
12345
DISC SKIP SEARCH STOP/CANCEL PLAY/PAUSE
/
OPEN/CLOSE
POWER
1 BIT P E M D D CONVERTER
STANDBY
RECEIVED
XL-FZ258 COMPACT DISC AUTOMATIC CHANGER
EXCHANGE
1 2 3 4 5
6 7 8 9 10 +10
PHONES LEVEL
PHONES
MIN MAX
CALL MEMORY RANDOM PLAY MODE REPEAT
DISC
12345
DISC SKIP SEARCH STOP/CANCEL PLAY/PAUSE
/
OPEN/CLOSE
PLAY & EXCHANGE SYSTEM
DISC
5
POWER
1 BIT P E M D D CONVERTER
STANDBY
RECEIVED
LECTEUR CHANGEUR DE COMPACT DISCS
'
RM-SX254U REMOTE CONTROL
CONTINUE PROGRAM RAMDOM POWER
TRACK 1 2 3
5678
4
EXCHANGE
OPEN/
CLOSE
910 +10
43¢
17¡8
DISC 1 2 3
45
DISC SKIP
REPEAT CALL CANCEL

Warnings, Cautions and Others/
Mises en garde, précautions et indications diverses
CAUTION
To reduce the risk of electrical shocks, fire, etc.:
1. Do not remove screws, covers or cabinet.
2. Do not expose this appliance to rain or moisture.
ATTENTION
Afin d’éviter tout risque d’électrocution, d’incendie, etc.:
1. Ne pas enlever les vis ni les panneaux et ne pas ouvrir le
coffret de l’appareil.
2. Ne pas exposer l’appareil à la pluie ni à l’humidité.
Caution –– POWER switch!
Disconnect the mains plug to shut the power off completely.
The POWER switch in any position does not disconnect the
mains line. The power can be remote controlled for XL-
FZ258BK.
Attention –– Commutateur POWER!
Déconnecter la fiche de secteur pour couper complètement
le courant. Le commutateur POWER ne coupe jamais
complètement la ligne de secteur, quelle que soit sa position.
Le courant peut être télécommandé modéle XL-FZ258BK.
IMPORTANT FOR LASER PRODUCTS
1. CLASS 1 LASER PRODUCT
2. CAUTION: Do not open the top cover. There are no user
serviceable parts inside the unit; leave all servicing to
qualified service personnel.
3. CAUTION:
(For U.S.A.) Visible and/or invisible class II laser radiation
when open. Do not stare into beam.
(For Canada) Visible and/or invisible class 1M laser
radiation when open. Do not view directly with optical
instruments.
4. REPRODUCTION OF LABEL: CAUTION LABEL,
PLACED INSIDE THE UNIT.
For Canada/pour le Canada
CAUTION: TO PREVENT ELECTRIC
SHOCK, MATCHWIDE BLADE OF PLUG TO
WIDE SLOT, FULLY INSERT.
ATTENTION: POUR EVITER LES CHOCS
ELECTRIQUES, INTRODUIRE LA LAME LA
PLUS LARGE DE LA FICHE DANS LA
BORNE CORRESPONDANTE DE LA PRISE
ET POUSSER JUSQUAU FOND.
For Canada/pour le Canada
THIS DIGITAL APPARATUS DOES NOT EXCEEDTHE CLASS B LIMITS
FOR RADIO NOISE EMISSIONS FROM DIGITAL APPARATUS AS SET
OUT IN THE INTERFERENCE-CAUSING EQUIPMENT STANDARD
ENTITLED “DIGITAL APPARATUS,” ICES-003 OF THE DEPARTMENT
OF COMMUNICATIONS.
CET APPAREIL NUMERIQUE RESPECTE LES LIMITES DE BRUITS
RADIOELECTRIQUES APPLICABLES AUX APPAREILS NUMIRIQUES
DE CLASSE B PRESCRITES DANS LA NORME SUR LE MATERIEL
BROUILLEUR: “APPAREILS NUMERIQUES”, NMB-003 EDICTEE PAR
LE MINISTRE DES COMMUNICATIONS.
G-1
IMPORTANT POUR PRODUITS LASER
1. PRODUIT LASER CLASSE 1
2. ATTENTION: N’ouvrez pas le couvercle supérieur. Il n’y a
aucune pièce réparable par l’utilisateur à l’intérieur de
l’appareil; confiez toute réparation à un personnel qualifié.
3. ATTENTION:
(Pour les Etats-Unis) Radiation laser de classe II visibles
et/ou invisible si l’appareil est ouvert. Ne regardez pas le
rayon.
(Pour le Canada) Rayonnement laser visible et/ou invisible
de classe 1M une fois ouvert. Ne pas regarder directement
avec des instruments optiques.
4. REPRODUCTION DE L’ÉTIQUETTE: ÉTIQUETTE DE
PRÉCAUTION PLACÉE À L’INTERIEUR DE L’APPAREIL.
FZ158BK_Safety[C] 06.6.26, 10:18 AM1

Page 1
ENGLISH
Load compact discs only
Never insert anything other than compact discs into any part of the
player.
If a problem persists
If something goes wrong, turn off the power immediately. If the same
problemreoccurs when the power is turnedononce more, turn off the
power again and consult your JVC dealer.
Handling the power cord
When unplugging from the wall socket, always pull the plug body,
never the power cable.
Volume settings
A CD player has almost zero background noise. Because of this, the
technique of listening to the background level and then setting the
volumebefore themusicstarts, asusedwith analogturntablesor tape
decks,cannot beused. Ifyou raisethevolumeleveltoo high, speaker
damage may result.
Condensation
The CD player uses optical components. If it is moved from a cold
location to a warm one, or is used in a room subject to excessive
humidity or where a fire has just been lit, condensation could form on
the optical components.
This may prevent the laser beam from being properly transmitted and
thus causes noise or even a malfunction.
If condensation has formed and the CD player does not function
correctly,werecommendthatyouleave itturned onforanhourortwo.
If at the end of this time the CD player still does not function properly,
please consult your JVC dealer.
Transporting the unit
When carrying this unit, it is best to avoid either tilting it or turning it
upside-down. Where you cannot avoid doing so, please remove the
discs first.
Using compact discs
Compactdiscs aremadeof plasticandcan easilybedamaged. If the
disc is dirty, scratched, warped or otherwise damaged, the digital
information may not be picked up correctly.
Applicable discs
Thisunitcanonlybeusedwithcompactdiscsbearingthemarkbelow.
Never use discs of other types.
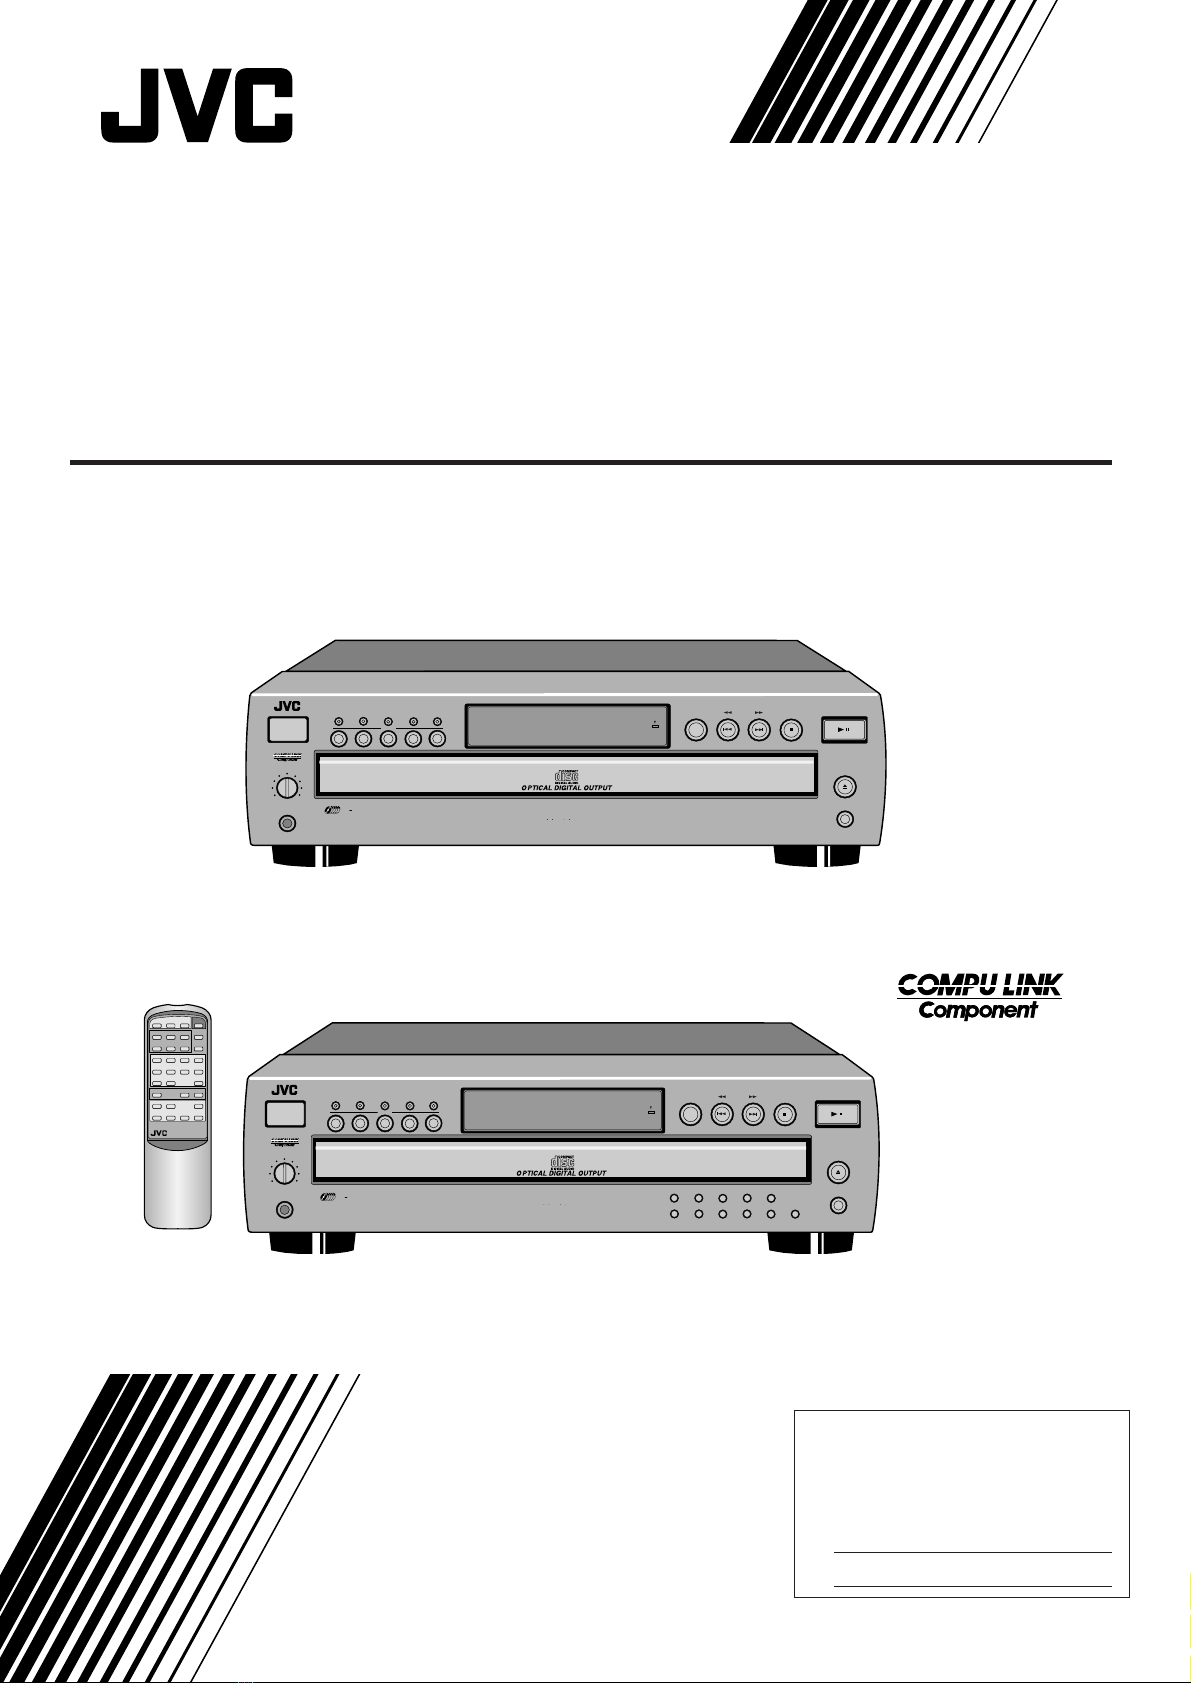
This manual covers the operating instructions for the compact disc
automatic changers XL-FZ258BK and XL-FZ158BK.
There are several functions which require separate instructions for
eachmodel. Pleasecheckthemodelnumberstatedonthecartonbox
and follow the descriptions applicable to your unit.
Especially,please note thatthe remote controlunit RM-SX254U is
supplied only with XL-FZ258BK. For XL-FZ158BK, ignore all the
descriptions on the remote control unit.
This manual is organized as follows:
The first part, “INTRODUCTION”, gives you the precautions when
using this unit, and shows you the names of buttons on the main unit
and the remote control unit.
The second part, “BEFORE USING FOR THE FIRST TIME”, tells you
what kind of operations you should do before playing discs. This part
describes where to place the unit for best results, how to install
batteries in the remote control unit and how to connect this unit to the
amplifier/receiver and other components.
The third part, “BASIC OPERATIONS”, describes how to load discs,
and convenient basic functions for playing discs.
The fourth part, “VARIOUS PLAYBACK PATTERNS”, describes vari-
ous functions for playing discs, and convenient functions for record-
ing.
The fifth part, “GENERAL INFORMATIONS”, describes the COMPU
LINK remote control system which facilitates various operations be-
tween JVC components, and explains how to take care of discs.
Thispartalsoincludes“Troubleshooting”,whichtellsyouhowtocheck
the unit when a malfunction occurs, and the technical informations
regarding this unit.
Precautions
INTRODUCTION
About this manual
'

Page 2
ENGLISH
INTRODUCTION
Names of buttons
AC POWER CORD inlet COMPULINK-3(SYNCHRO)jacks
OUTPUT jacks
PHONES: head-
phones jack
PHONES LEVEL control
POWER button
CALL: displaying
program contents
button
RANDOM: random
playback button REPEAT button
PLAY MODE: switching play mode
(continue/program) button
MEMORY button
Display window DISC SKIP button
1/¡, 4/¢SEARCH:
skip,fastforward/backward
buttons 7STOP/CANCELbutton
3PLAY/8PAUSE button
DISC buttons Disc tray 0OPEN/CLOSE
button
(XL-FZ258BK only)
remote sensor
(XL-FZ258BK only) EXCHANGE: changing
discs button
Main unit
Track buttons
XL-FZ258BK:
STANDBY/RECEIVED indicator:
lights in standby mode and upon re-
ception of the remote control signal
XL-FZ158BK:
STANDBY indicator
RIGHT LEFT
OUTPUT (SYNCHRO)
COMPU LINK - 3
DIGITAL OUT
OPTICAL
AC IN
CALL MEMORY RANDOM PLAY MODE REPEAT
DISC
COMPACT DISC AUTOMATIC CHANGER
DISC SKIP SEARCH STOP/CANCEL PLAY/PAUSE
OPEN/CLOSE
EXCHANGE
1 2 3 4 5
6 7 8 9 10 +10
PHONES LEVEL
MIN MAX
PHONES
1234
5
/
POWER
PLAY & EXCHANGE SYSTEM
DISC
5
1 BIT P E M D D CONVERTER
STANDBY
RECEIVED
DIGITAL OUT
jack (optical)

Page 3
ENGLISH
EX-
CHANGE
REPEAT I
DISC TRACK TOTAL TIME STEP
PROGRAM
RANDOM
1 2 3 4 5
1
6
11
16
2
7
12
17
3
8
13
18
4
9
14
19
5
10
15
20
PROGRAM button
CONTINUE button
DISC buttons
TRACK buttons
REPEAT button
4/¢:skip/check buttons
1/¡:fastforward/backward
buttons
Remote control signal transmitter
OPEN/CLOSE button
EXCHANGE: changing discs button
CALL: displaying program contents button
DISC SKIP button
CANCEL button
3:Play button
7:Stop button
8:Pause button
Remote control unit (for XL-FZ258BK)
Display window
Notes on the disc number indicators
÷When the power is turned on or the disc tray is closed
with the 0OPEN/CLOSE button, the unit searches for
loadeddiscsstartingfromthedisctray1.Whennodisc
isloaded,thediscnumberdisappearsfromthedisplay
and unit goes on searching for the next tray.
÷Whennodiscisloadedintheunit,“nodisc”appearson
the display.
÷In continue play mode, when playback of one disc is
finished, the circle around the corresponding disc
number disappears.
÷In program mode, circle appears around the disc
number selected at that moment.
÷WhentheEXCHANGEbuttonispressed,theindication
ofthediscnumbersisresettotheoriginalstatusandall
the disc numbers (1-5) with their circle appear on the
display.
Disc number indicators
Music calender
Play mode indicators
POWER: POWER button
Turns on the unit or put it in STANDBY mode
RANDOM: random playback button
'
RM-SX254U REMOTE CONTROL
CONTINUE PROGRAM RAMDOM POWER
TRACK 1 2 3
5678
4
EXCHANGE
OPEN/
CLOSE
9 10 +10
43¢
17¡8
DISC 1 2 3
45
DISC SKIP
REPEAT CALL CANCEL

Page 4
ENGLISH
RIGHT LEFT
OUTPUT SYNCHRO
COMPU LINK - 3
RIGHT LEFT
OUTPUT
DIGITALOUT
OPTICAL
AC IN
BEFORE USING FOR THE FIRST TIME
Best location
Select a location which is level, dry and neither too cold nor too hot
(temperature range 5°C (41°F) to 35°C (95°F)). Also, avoid dusty
locations or any location subject to vibration.
If interference occurs
If this unit is placed near a tuner or a radio receiver tuned to AM
frequencies,interferencemayoccur. Ifthishappens, we recommend
either that you move this unit as far away as possible from the tuner or
receiver or briefly turn off the power to this unit.
Installing the unit
Connectingtoanamplifierorreceiver allows you to listen to the sound
from the speakers.
Connect the OUTPUT jacks of this unit to the line input jacks of an
amplifier or receiver with the supplied audio cord.
Notes
÷
Never connect the OUTPUT jacks to the PHONO jacks of the
amplifier or receiver. This may cause damage to the components.
÷
Make sure that the same channels are connected between this unit
and the amplifier or receiver: LEFT to LEFT and RIGHT to RIGHT.
÷
Do not connect the power plug until all connections are complete.
÷
Connect the plugs firmly. Loose connections may cause noise or
malfunction.
Speaker unit
Rear panel of this unit
Audio cord Amplifier or receiver
RIGHT LEFT
OUTPUT SYNCHRO
COMPU LINK - 3
DIGITALOUT
OPTICAL
AC IN
Connecting to the Digital
Output Jack
It is possible to transmit a digital sound signal from this unit directly to
a MD recorder,etc.
Notes
÷
Neverconnectthedigitaloutputcableexcepttothedigitalinputjack.
÷
Anopticaldigitalcord (optional)isrequiredtomakethisconnection.
Refer to the instruction manual of the MD recorder, etc. for details.
÷
Thereis aprotectivecapon theDIGITALOUTjack (optical). When
makingtheconnection,pulloffthiscapandstoreitcarefullyinasafe
place. Shouldyouundotheconnection,replacethecaponthejack.
Rear panel of this unit
Optical digital cord (optional)
MD recorder, etc.(optional)
OPTICAL
DIGITAL
OUT
Connecting to the Analog
Output Jacks

Page 5
ENGLISH
To connect the AC power cord of the
main unit
The AC power cord is supplied separately and must be connected to
the unit.
PlugtheACpowercordintotheACPOWERCORDinletofthisunitand
connect to the wall outlet after all connections are complete.
Note
WhenusingtheCOMPULINKRemoteControlSystem,donotconnect
the power cord to the SWITCHED AC OUTLET of an amplifier or
receiver.
Supplying the power
To install the batteries in the remote
control unit (for XL-FZ258BK)
Before operating the remote control unit, install two batteries.
1. Remove the rear cover of the remote control unit by pressing
down and simultaneously pulling it backwards.
2. Install batteries. Be sure that the batteries are installed with
correct polarity, (+) and (–).
3. Attach the rear cover by sliding it back into position.
Notes
Incorrect use of batteries can cause corrosion or damage. Note the
following points to lengthen battery life.
÷
Install batteries observing the correct polarity, (+) and (–).
÷
Do not use new and old batteries simultaneously.
÷
Batterieswithsimilar shapesmayhavedifferentvoltageratings. Be
sure to use the correct batteries.
÷
Remove batteries from the remote control unit if it will not be used
for a long period of time.
÷
Do not expose batteries to heat or flame.
Battery replacement
Service life of batteries depends on the condition of use; standard life
is about one year. When the batteries become weak, the operating
distance of the remote control unit becomes short . If this happens,
replace the batteries R6P(SUM-3)/AA(15F) with new ones.
Note
÷
The lower the temperature, the shorter the battery life.
AC POWER CORD inlet Rear panel of this unit
Supplied AC power cord To the wall outlet
RIGHT LEFT
OUTPUT (SYNCHRO)
COMPU LINK - 3
AC IN
DIGITAL OUT
OPTICAL
·
ª
ª
·

Page 6
ENGLISH
BEFORE USING FOR THE FIRST TIME
COMPU LINK connection
JVC’s COMPU LINK Remote Control System provides unified control
over system components connected with COMPU LINK. Connecting
JVC audio components with the COMPU LINK jacks automatically
controls relative operations between components and facilitates vari-
ous operations. With the COMPU LINK connection to an amplifier or
receiver,youcanoperateXL-FZ258BK/XL-FZ158BKwiththeamplifier
or receiver’s remote control unit. Synchronized recording is also
available with this feature.
Connecting the COMPU LINK cord
TheCOMPU LINK-3 SYNCHRO jacksareusedto output and inputthe
control signal for the COMPU LINK remote control system.
COMPULINK-compatibleproductsareprovidedwiththejacksmarked
COMPU LINK-1, COMPU LINK-2 or COMPU LINK-3, referring to the
COMPU LINK version. XL-FZ258BK/XL-FZ158BK is equipped with
COMPU LINK-3. You can connect XL-FZ258BK/XL-FZ158BK also to
acomponent with lower COMPU LINK versions. But, inthatcase, only
the lower versions’ features will be available.
PlugthesuppliedCOMPULINKcordintotheCOMPULINK-3SYNCHRO
jackontherearpanelofXL-FZ258BK/XL-FZ158BK.Plugtheotherend
into the COMPU LINK jack of the other component. If there are two
COMPU LINK jacks, plug it into either of them.
Supplied COMPU LINK cord
Amplifier or receiver Cassette deck Turntable
Connect to the COMPU LINK-3 (SYNCHRO) jack of another com-
ponent eqipped with the Compu Link remote control system.
RIGHT LEFT
OUTPUT (SYNCHRO)
COMPU LINK - 3
AC IN
DIGITALOUT
OPTICAL

Page 7
ENGLISH
Turning on the power of this unit
Press the POWER button to turn on this unit. The STANDBY
indicator is turned off and the display is turned on.
Press again to turn off the power and activate the standby mode. The
STANDBY indicator is lit.
The power is automatically turned on also by;
÷Pressing the 0OPEN/CLOSE button.
÷Pressing the 3PLAY/8PAUSE button on the main unit or the 3
button on the remote control unit.
Notes
÷
Asmallamountofpower (4 watts) is consumed even in thestandby
mode.
÷
Toturnoffthepowercompletely,disconnectthepowercordfromthe
wall outlet.
Loading discs in the disc tray
Use the 0OPEN/CLOSE button to open and close the disc tray.
1. Open the disc tray by pressing the 0OPEN/CLOSE button.
2. Place discs on the disc tray according to the groove with their
label side up.
÷ To turn the disc tray and locates the disc tray to the just facing
you,Press DISC SKIP button.
3. Close the disc tray by pressing the 0OPEN/CLOSE button.
CAUTION
When loading discs in the disc tray, be sure to put the discs
according to the groove. Otherwise, the discs will be dam-
aged when the disc tray is closed, and cannot be removed
from the unit.
BASIC OPERATIONS
Basic functions for disc
playback
POWER
Main unit Remote control unit
POWER
Main unit
OPEN/CLOSE
0
Remote control unit
OPEN/
CLOSE
Main unit
6
PLAY/PAUSE
Remote control unit
3
Remote control operation
(for XL-FZ258BK)
Point the remote control unit towards the rote sensor and operate it
steadily and carefully. The remote control unit can be used within a
rangeofabout7meters(23feet)fromtheremotesensor,andatangles
of up to about 30 degrees.
Playing a disc
Pressthe3PLAY/8PAUSEbuttononthemainunitorthe3button
on the remote control unit.
The 3indicator lights on the display and playback starts.
To stop playback temporarily, press the 3PLAY/8PAUSE button on
the main unit or the 8button on the remote control unit.
The 8indicator lights on the display and playback stops temporarily.
To resume playback, press the 3PLAY/8PAUSE button on the main
unit or the 3button on the remote control unit.
Adjusting the headphones level
Insert the headphones plug into the PHONES jack and turn the
PHONES LEVEL control to adjust the volume level.
Stopping playback
Pressthe7STOP/CANCELbuttononthemainunitorthe7button
on the remote control unit.
Main unit Remote control unit
STOP/CANCEL
7
7

Page 8
ENGLISH
BASIC OPERATIONS
Specifying a desired disc
Use the DISC buttons (1-5).
To select a disc, press the desired disc number (1-5). The unit
searches for the selected disc and playback starts automatically.
Note
If no disc is loaded in the selected disc tray, the indicator of that disc is
turnedoffwithinabout4secondsandthenplaybackstartsfromthenext
disc.
Specifying a desired track
(for XL-FZ258BK)
To specify the desired track number, use the track buttons (1-10,
+10).
Theunit searches for the selected track and playback startsautomati-
cally.
Whenselectingtracknumber10orless,pressthecorrespondingtrack
button. When selecting track number 11 or above, use the [+10]
button.
Example: To select track number 12, press [+10] and then [2].
To select track number 25, press [+10] twice and then [5].
Toselect track number 30, press [+10] twice and then [10].
Note
If the selected track number does not exist on the selected disc,
playback starts from the first track on that disc.
Remote control unit
Main unit
1345
2
DISC 123
45
DISC
Main unit
1245
3
6789 10 +10
Remote control unit
678
1234
9
5
10 +10
TRACK
Skipping to a desired disc
Use the DISC SKIP button.
Each time the DISC SKIP button is pressed, the selected disc number
switches from 1 to 5, then back to 1.
Skipping to a desired track
Use the 4/¢buttons.
To skip back to the beginning of the track being played, tap the 4
button. Whenthebeginningofthetrackisreached,tappingthisbutton
again skips to the previous track.
To skip to the next track, tap the ¢button.
When using the 4/¢SEARCH buttons on the main unit, tap them
until the desired track appears.
Locating a point to start
playback
Main unit Remote control unit
DISC SKIP DISC SKIP
Remote control unitMain unit
1SEARCH ¡
4¢
1¡
Searching for a desired section
Keep the 1/¡button pressed during playback.
Playback advances or reverses rapidly.
Whilethe1buttoniskeptpressed,playbackrapidlyreversestoward
the beginning of the track. While the ¡button is kept pressed,
playback rapidly advances toward the end of the track. When the
desired section is reached, release the button. The player resumes
normal playback from that point.
Main unit Remote control unit
4¢
1SEARCH ¡
4¢

Page 9
ENGLISH
During playback of a disc, you can change other discs in the disc
tray without stopping playback.
Press the EXCHANGE button. The disc tray opens and you can
change the discs inside.
To change the discs loaded in the far end of the disc tray, press the
DISC SKIP button to make the disc tray rotate.
After changing the discs, press the EXCHANGE button again to close
the disc tray.
It is also possible to change the discs during program playback or
random playback, following the above procedure.
Note
When the disc tray is opened by pressing the EXCHANGE button, it is
not possible to close it by pushing it back with hand. Press the
EXCHANGE button again to close the tray.
Changing discs during
playback
Main unit Remote control unit
EXCHANGE EXCHANGE
VARIOUS PLAYBACK PATTERNS
Playing tracks in a order
of track/disc number
Shows the disc number being played.
DISC TRACK TIME
4
1
6
11
2
7
3
8
4
9
5
10
You can continuously play all the loaded discs, starting from any
track on any disc.
1. Press the PLAY MODE button on the main unit or the CON-
TINUE button on the remote control unit so that both the
PROGRAM and RANDOM indicators are turned off on the
display.
When you want to play from a desired disc or track, go to step 3.
2. Press the 3PLAY/8PAUSE button on the main unit or the 3
button on the remote control unit to start playback.
Playback starts from the previously selected disc.
If the disc tray is not closed, pressing the 3PLAY/8PAUSE button
closes the disc tray and then starts playback.
The following display appears.
3. Use the DISC button to select the disc number which contains
the first track to be played.
When you want to play from the first track on the selected disc, it
is not necessary to select the track number.
4. Select the track number with the 4/¢buttons or, for XL-
F258BK, the track buttons.
The selected track number appears on the display and playback
starts from the selected track automatically.
Track number being played.
PLAY MODE
3PLAY/
8PAUSE
Track buttonsDISC
4/¢
STANDBY
CALL MEMORY RANDOM PLAY MODE REPEAT
DISC
XL-FZ258 COMPACT DISC AUTOMATIC CHANGER
DISC SKIP SEARCH STOP/CANCEL PLAY/PAUSE
OPEN/CLOSE
EXCHANGE
1 2 3 4 5
6 7 8 9 10 +10
PHONES LEVEL
MIN MAX
PHONES
12345
/
POWER
PLAY & EXCHANGE SYSTEM
DISC
5
1 BIT P E M D D CONVERTER
RECEIVED
BASIC OPERATIONS

Page 10
ENGLISH
VARIOUS PLAYBACK PATTERNS
÷You can skip to a desired program step with the 4/¢button.
If you have programmed all disc (1~5)as “AL”,pressing ¢(or
4)will skip to the next (or previous) disc.
÷When the DISC SKIP button is pressed during program play, the
playback skips to the next programmed disc.
To check the program contents
Press the CALL button during stop mode. Each time the CALL button
is pressed, the program contents are displayed in the programmed
order.
÷Whenthe unit isinprogram play mode,pressthe 7buttontoenter
stop mode and then operate the CALL button.
To modify the program contents
Press the CALL button until the display shows the program step to be
corrected. Enter the new disc number and/or track number referring
to steps 2 and 3 above.
To delete a program step, press the CALL button until the display
shows the program step to be deleted and then press the 7STOP/
CANCEL button on the main unit or the CANCEL button on the remote
control unit. You can also delete a displayed program step during
programming.
÷Whenthe unit isinprogram play mode,pressthe 7buttontoenter
stop mode and then delete the program step.
To add discs/tracks to the program during program play-
back
Specify the disc number by pressing the DISC button and, with XL-
FZ258BK, the track number by pressing the track buttons.
The specified disc/track is added to the end of the program being
played back.
÷For XL-FZ158BK, only the disc number can be specified and the
entire disc is added to the program. For this operation, it is not
possible to utilize the 4/¢SEARCH buttons.
To exit program mode
Press the PLAY MODE or RANDOM button on the main unit, or the
CONTINUE or RANDOM button on the remote control unit, and the
program mode is cancelled. However, the program contents are not
erasedand,whenevertheprogrammodeisselected,youcanplaythe
tracks in programmed order.
To clear the program
In stop mode, press the 7STOP/CANCEL button on the main unit
repeatedly. The program contents will be cleared step by step.
To clear the entire program, press the 0OPEN/CLOSE button on the
main unit in stop mode. The program contents will be entirely cleared,
however, the program mode is not cancelled.
You can play only the favorite tracks in any desired order.
1. In stop mode, press the PLAY MODE button on the main unit
orthe PROGRAMbutton on the remote controlunit so that the
PROGRAM indicator lights on the display.
2. Select the disc which contains the track to be programmed
with the DISC button.
“AL” (all tracks) appears on the display.
To program the entire disc
Skip step 3 below. When the track number is not specified after
selecting the disc number, all tracks on the selected disc are
programmed.
3. ForXL-FZ258BK,selectthetracknumberbypressingthetrack
buttons.ForXL-FZ158BK,selectthetracknumberbypressing
the 4/¢SEARCH button and then the MEMORY button.
Refer to “Specifying a desired track” on page 8 for entering the
track number. For XL-FZ158BK, press the MEMORY button with
the desired track number shown on the display.
When the selected track number is programmed, the following
display appears.
÷ For XL-FZ258BK,you can also use the 4/¢SEARCH button
then the MEMORY button to select a track number.
÷If you want to cancel the displayed program step, press the 7
STOP/CANCEL button on the main unit or the CANCEL button on
the remote control unit and then enter the new disc number and/
or track number.
4. Repeat steps 2 and 3 for other tracks and/or discs to be
programmed.
You can program up to 32 steps.
5. Startplaybackbypressingthe3PLAY/8PAUSEbuttononthe
main unit or the 3button on the remote control unit.
The programmed tracks and/or discs are played in the pro-
grammed order.
÷You can skip to a desired program step with the 4/¢button.
÷When the DISC SKIP button is pressed during program play, the
playback skips to the next programmed disc.
Playing tracks in a
desired order
PLAY MODE 3PLAY/
8PAUSESTOP/CANCEL
Track buttons
DISC TRACK STEP
PROGRAM
1245
9
Display shows the disc
number and the track
number selected for step 1.
STANDBY
CALL MEMORY RANDOM PLAY MODE REPEAT
DISC
XL-FZ258 COMPACT DISC AUTOMATIC CHANGER DISC SKIP SEARCH STOP/CANCEL PLAY/PAUSE
OPEN/CLOSE
EXCHANGE
1 2 3 4 5
6 7 8 9 10 +10
PHONES LEVEL
MIN MAX
PHONES
1234
5
/
POWER
PLAY & EXCHANGE SYSTEM
DISC
5
1 BIT P E M D D CONVERTER
RECEIVED

Page 11
ENGLISH
Youcanselectandplaytracksinrandomorderfromallthediscs
loaded in the unit.
Selections are made so that each track is played only once.
1. In stop mode, press the RANDOM button so that the RANDOM
indicator lights on the display.
2. Press the 3PLAY/8PAUSE button on the main unit or the 3
button on the remote control unit to start playback.
÷To skip to the track to be played next, press the ¢button.
To cancel random playback
In stop mode, press the PLAY MODE button on the main unit or the
CONTINUE or PROGRAM button on the remote control unit. The
RANDOM indicator goes out and the random playback is cancelled.
RANDOM
Playing tracks in a
random order
3PLAY/8PAUSE
Playing repeatedly
You can repeatedly play all discs or one track.
It is also possible to utilize this function in combination with
random/program playback function.
Repeating all discs
Press the REPEAT button so that the REPEAT indicator lights on
the display.
All discs loaded in the unit are played repeatedly.
In program mode, the program contents are played repeatedly.
Repeating one track
PresstheREPEATbutton sothattheREPEAT1indicatorlightson
the display.
The displayed track is played repeatedly.
To cancel repeat mode
Press the REPEAT button so that both the REPEAT and REPEAT 1
indicators go out.
REPEAT
STANDBY
CALL MEMORY RANDOM PLAY MODE REPEAT
DISC
XL-FZ258 COMPACT DISC AUTOMATIC CHANGER DISC SKIP SEARCH STOP/CANCEL PLAY/PAUSE
OPEN/CLOSE
EXCHANGE
1 2 3 4 5
6 7 8 9 10 +10
PHONES LEVEL
MIN MAX
PHONES
1234
5
/
POWER
PLAY & EXCHANGE SYSTEM
DISC
5
1 BIT P E M D D CONVERTER
RECEIVED
STANDBY
CALL MEMORY RANDOM PLAY MODE REPEAT
DISC
XL-FZ258 COMPACT DISC AUTOMATIC CHANGER DISC SKIP SEARCH STOP/CANCEL PLAY/PAUSE
OPEN/CLOSE
EXCHANGE
1 2 3 4 5
6 7 8 9 10 +10
PHONES LEVEL
MIN MAX
PHONES
1234
5
/
POWER
PLAY & EXCHANGE SYSTEM
DISC
5
1 BIT P E M D D CONVERTER
RECEIVED

Page 12
ENGLISH
GENERAL INFORMATIONS
COMPU LINK remote
control system
Automatic source selection
Whenthe supplied COMPULINKcord is utilizedtoconnect this unit to
othersequippedwithCOMPULINKjacks,switching-inofeachsystem
component can be performed with a single touch on the source
selector button located on a JVC amplifier or receiver.
Whenselectioniscarriedoutinthismanner,thecorrespondingunitwill
automatically start operation.
Upon pressing of the play button, the source selector of the amplifier
orreceiverchangesautomatically. Whenanewunitisswitchedin,the
previously selected component stops operation within five seconds.
Synchronized recording
Synchronizedrecordingrefers to the process in which a JVC cassette
deck starts recording, synchronized with this unit. Synchronized
recording is carried out as follows:
1. Setthecassettedecktotherecordingpausemodeinaccordance
with its instructions.
2. To record only certain tracks, program the tracks in any order, as
desired.
3. Press the 3PLAY/8PAUSE button on the front panel of this unit.
The cassette deck automatically starts recording, synchronized
with this unit.
Notes
÷
Synchronized recording stops automatically when this unit stops
playback.
÷
To cancel synchronized recording, press the stop button of this unit
or the cassette deck.
÷
To properly operate the synchronized recording, the buttons/con-
trols other than POWER,
7
STOP and OPEN do not function.
÷
Ifthe recording pause modeisset on the cassettedeck by pressing
the
8
PAUSEbutton after pressing the

RECand
3
PLAYbuttons
simultaneously,synchronizedrecordingisnotpossible. Fordetails,
refer to the instructions for the cassette deck.
Automatic power on/off function
This function is to control the power on/off of the receiver/amplifier or
this unit respectively as the following.
÷When this unit enters playback mode, the power of the receiver or
amplifier is turned on.
÷When the source selector of the receiver/amplifier is set to CD
function mode, the power of this unit is turned on.
Notes
÷
Abnormaloperationmayresultifthepowersupplyofthecomponent(s)
is interrupted. If this happens, you must start over again.
÷
Ensure that the COMPU LINK jacks of the each component are
connected with the supplied COMPU LINK cord. Also, be sure to
fully read the instructions for each component.
÷
When the power of the amplifier or receiver is switched off, this unit
is also turned off automatically.
The COMPU LINK Remote Control System controls relative
operations between components automatically and facilitates
various operations.
This is a system originated and developed by JVC for facilitating
various system operations.
The following is a brief explanation of this system:

Page 13
ENGLISH
How to handle CDs
Whenhandling compactdiscs, do nottouch thesurfaceof thedisc(re-
flective silver side — the side without the label).
Since compact discs are made of plastic, they are easily damaged. If
the disc gets dirty, dusty, scratched or warped, the sound will not be
picked up correctly and, in addition, such discs may cause the CD
player to malfunction.
Maintenance of discs
When there are fingerprints or other dirt adhering to a disc, wipe the
disc with a soft, dry cloth with a movement going from the center
outwards.
If difficult to clean, wipe the disc with a cloth moistened with water.
Never use record cleaners, petrol, alcohol or any anti-static agents.
Care and handling
Even on label side
Do not damage the label side, stick paper to or use any adhesive on
the surface.
Storage
Make sure that discs are kept in their cases. If discs are piled one on
top of another without their protective cases, they can be damaged.
Do not put discs in any location where they can be exposed to direct
sunlight, or in any place where humidity or temperature is high. Avoid
leaving discs in your car!
GENERAL INFORMATIONS

Page 14
ENGLISH
GENERAL INFORMATIONS
What appears to be a malfunction may not always be serious. Please go through the following list before requesting service.
The unit is not operative.
Playback is not possible.
No sound from the headphones.
The reproduced sound includes noise.
The sound is intermittent.
The remote control unit does not function.
(for XL-FZ258BK)
Connect the plug to the AC outlet.
Load discs in the disc tray.
Loadthedisc with its label-side up in the
disc tray.
Loadthediscaccordingtothe groove of
the disc tray.
Leave the unit turned on until the mois-
ture evaporates.
Adjust the volume with the PHONES
LEVEL control.
Wipe off the disc surface with a soft
cloth.
Replace the disc with a new one.
Replace both batteries.
Remove the obstacle.
Shade the unit from the direct sunlight.
Power plug is disconnected from the AC
outlet.
Discs are not loaded.
Disc is inserted upside down.
Disc is not loaded in the correct position.
Moisture is condensed inside the unit.
Headphones volume is set to the minimum
level.
Disc is dirty.
Disc is warped.
Disc is scratched.
Batteries are exhausted.
Thereis an obstacle between remote control
unit and the remote sensor of the main unit.
Direct sunlight shines on the remote sensor
of the main unit.
Symptom Possible cause Remedy
Troubleshooting

Page 15
ENGLISH
General
Format: Compact disc digital audio
Signal detection system: Non-contact optical detection
CD capacity: 5 discs
Sampling frequency: 44.1 kHz
Power requirements
Canada AC 120 V , 60 Hz
Power consumption: 10 watts
Dimensions (W x H x D): 435 x 128 x 386 mm
(17-3/16 x 5-1/16 x 15-1/4 inches)
Mass: 5.1 kg (11.3 lbs)
Audio performance
Frequency response: 2 Hz to 20,000 Hz (±1 dB)
Dynamic range: More than 98.0 dB (at 1 kHz)
Signal to noise ratio: More than 107.0 dB
Total harmonic distortion: Less than 0.0022% (at 1 kHz)
Channel separation: More than 94.0 dB (at 1 kHz)
Wow and flutter: Less than measurable limit
Output level: 2.0 Vrms (at full scale)
Specifications
Accessories
AC power cord .......................................................................... 1
Audio cord ................................................................................. 1
COMPU LINK cord .................................................................... 1
Remote control unit (RM-SX254U) (XL-FZ258BK only) ............. 1
Battery R6P(SUM-3)/AA(15F) (XL-FZ258BK only)..................... 2
Design and specifications subject to change without notice.

Page 16
ENGLISH
WewouldliketothankyouforpurchasingoneofourJVC
products.
Beforeconnectingthis unittothe walloutlet,pleaseread
the instructions carefully to ensure that you obtain the
best possible performance.
If you have any questions, please consult your JVC
dealer.
Table of contents
INTRODUCTION................................................ 1
Precautions .................................................................1
About this manual .......................................................1
Names of buttons........................................................2
BEFORE USING FOR THE FIRST TIME .......... 4
Installing the unit .........................................................4
Connecting to the analog output jacks .......................4
Connecting to the digital output jack ..........................4
Supplying the power .................................................. 5
To connect the AC power cord of the main unit ............ 5
To install the batteries in the remote control unit
(for XL-FZ258BK) ........................................................... 5
COMPU LINK connection......................................................6
BASIC OPERATIONS ....................................... 7
Basic functions for disc playback...............................7
Turning on the power of this unit.................................... 7
Loading discs in the disc tray ........................................ 7
Remote control operation (for XL-FZ258BK).................. 7
Playing a disc................................................................. 7
Stopping playback ......................................................... 7
Locating a point to start playback ..............................8
Skipping to a desired disc ............................................. 8
Skipping to a desired track ............................................ 8
Searching for a desired section ..................................... 8
Specifying a desired disc .............................................. 8
Specifying a desired track (for XL-FZ258BK) ................ 8
Changing discs during playback................................9
VARIOUS PLAYBACK PATTERNS ................. 9
Playing tracks in a order of track/disc number ...........9
Playing tracks in a desired order ..............................10
Playing tracks in a random order..............................11
Playing repeatedly ....................................................11
Repeating all discs....................................................... 11
Repeating one track..................................................... 11
GENERAL INFORMATIONS........................... 12
COMPU LINK remote control system .......................12
Care and handling ....................................................13
Troubleshooting ........................................................14
Specifications............................................................15

Page 1
FRANÇIAS
INTRODUCTION
Précautions A propos de ce manuel
N’introduire dans cet appareil que des disques compacts
Ne jamais introduire dans le lecteur autre chose que des disques
compacts.
En cas de problème persistant
Alasurvenanced’uneanomalie,mettreimmédiatementl’appareilhors
tension. Si les mêmes symptômes réapparaissent lorsqu’on remet
l’appareilsoustension,débrancherl’appareiletconsulterlerevendeur
JVC.
Manipulation du cordon d’alimentation
Pour débrancher le cordon d’alimentation de la prise murale, il faut
toujours saisir la fiche et ne jamais tirer sur le fil.
Réglage du niveau d’écoute
Le bruit de fond d’un lecteur de CD est pratiquement nul. La méthode
qui consiste à régler le niveau d’écoute au moment où commence la
musiqueparcomparaisonaveclebruitdefonddel’appareil,méthode
parfois utilisée avec des platines de lecture ou des magnétophones à
cassette de type analogique, n’est donc pas acceptable dans le cas
présent. Un réglage trop élevé du niveau d’écoute peut endommager
les enceintes.
Condensation de l’humidité
Ce lecteur de CD comporte une optique. Si on le transporte d’une
pièce froide dans une pièce chaude, ou si on l’utilise dans une pièce
très humide, ou encore une pièce dans laquelle on fait du feu,
l’humidité peut se condenser sur l’optique.
Cela peut interdire la transmission correcte du faisceau laser et
provoquer du bruit ou diverses anomalies de fonctionnement.
Si l’humidité s’est condensée et si le lecteur ne fonctionne pas
correctement, laisser le lecteur sous tension pendant une heure ou
deux avant de l’utiliser. Si au bout de cette période, le lecteur ne
fonctionne toujours pas correctement, consulter le revendeur JVC.
Transport de l’appareil
Eviter,lorsdutransportdecetappareil,del’inclineroudeleretourner.
En cas de nécessité, retirer le disque avant de transporter l’appareil.
Utilisation des disques compacts
Les disques compacts sont fabriqués dans une matière plastique et
peuvent être aisément endommagés. Si le disque est poussiéreux,
sale, rayé ou voilé, la lecture correcte des informations numériques
qu’il porte peut être impossible.
Disques compatibles
On ne peut utiliser avec cet appareil que des disques compacts
portant le sigle reproduit ci-dessous. Ne jamais utiliser d’autres types
de disque.
Le mode d’emploi présenté dans ce manuel concerne à la fois les
lecteurs de CD à changeur XL-FZ258BK et XL-FZ158BK.
Certainesfonctionssonttoutefoisspécifiquesàunseuldecesmodèles.
Vérifiez l’indication du modèle qui figure sur le carton d’emballage et
suivez les instructions données pour ce modèle.
En particulier, veuillez noter que la télécommande RM-SX254U
n’est fournie qu’avec le modèle XL-FZ258BK. Si vous possédez le
modèle XL-FZ158BK, ne tenez aucun compte des explications
concernant la télécommande.
Ce manuel est organisé de la manière suivante:
Dans la première partie intitulée “INTRODUCTION”, vous trouverez la
présentation des précautions à observer pour l’utilisation de cet
appareil, ainsi que la nomenclature des touches de l’appareil lui-
même et de la télécommande.
La deuxième partie intitulée “AVANT LA PREMIERE UTILISATION”
présente les opérations à effectuer avant de pouvoir écouter les
disques. Vous y trouverez des indications sur le choix d’un emplace-
ment pour installer l’appareil, sur la manière de mettre les piles dans
latélécommandeetderaccorderl’appareilàl’amplificateur/récepteur
ou aux autres éléments de la chaîne.
La troisième partie intitulée “OPERATIONS DE BASE” présente la
manière de charger les disques, ainsi que les fonctions de base pour
l’écoute des disques.
La quatrième partie intitulée “LES DIVERSES POSSIBILITES DE LEC-
TURE” explique comment utiliser toutes les fonctions destinées à
faciliter l’écoute et l’enregistrement des disques.
La cinquième partie est intitulée “RENSEIGNEMENTS DIVERS”. Elle
présente le système de télécommande COMPU LINK qui agit en
même temps sur plusieurs appareils JVC de la chaîne. Vous y
trouverezégalementdesconseilssurlessoinsàapporterauxdisques.
Cettesectioncomprendaussiletableaude“Dépannage”quiexplique
cequ’ilfautfaireenprésenced’uneanomalie,ainsiquelaprésentation
des caractéristiques techniques de cet appareil.
'

Page 2
FRANÇIAS
Appareil
OUTPUT: Prises de sortie
AC POWER CORD: Prise pour
le câble d’alimentation COMPU LINK-3 (SYNCHRO):
Prises de commande synchronisée
INTRODUCTION
Nomenclature des
commandes
POWER :
Touche d’alimentation/veille
7STOP/CANCEL:Touche
d’arrêt/annulation
3PLAY/8PAUSE:
Touche de lecture/pause
1/¡, 4/¢SEARCH:
Touches de saut, déplacement rapide
du capteur dans les deux sens
Fenêtre d’affichage
MEMORY: Touche de mémoire
RANDOM: Touche de
lecture au hasard
PLAY MODE: Touche de sélection
du mode de lecture (lecture
enchaînée/lecture programmée)
REPEAT: Touche
de répétition
DISC SKIP: Touche de
sélection d’un disque
CALL:Touched’affichage
du contenu d’un pro-
gramme
PHONES LEVEL: Commande du
niveau de sortie dans le casque remote sensor:
Capteur de télécommande
(XL-FZ258BK uniquement)
PHONES: Prise
pour le casque XL-FZ258BK:
STANDBY/RECEIVED: Témoin de
veille et de réception d’un signal de
télécommande
XL-FZ158BK:
STANDBY: Témoin de veille
DISC: Touches de
sélection directe
d’un disque
Tiroir à disque
EXCHANGE: Touche de
changement de disque
Touches de sélection de plage
(XL-FZ258BK uniquement) 0OPEN/CLOSE:
Touche d’ouverture/
fermeture
RIGHT LEFT
OUTPUT (SYNCHRO)
COMPU LINK - 3
DIGITAL OUT
OPTICAL
AC IN
STANDBY
CALL MEMORY RANDOM PLAY MODE REPEAT
DISC
XL-FZ258 COMPACT DISC AUTOMATIC CHANGER
DISC SKIP SEARCH STOP/CANCEL PLAY/PAUSE
OPEN/CLOSE
EXCHANGE
1 2 3 4 5
6 7 8 9 10 +10
PHONES LEVEL
MIN MAX
PHONES
1234
5
/
POWER
PLAY & EXCHANGE SYSTEM
DISC
5
1 BIT P E M D D CONVERTER
RECEIVED
DIGITAL OUTPUT:
Prise de sortie numérique(optique)
This manual suits for next models
1
Table of contents
Languages:
Other JVC CD Player manuals