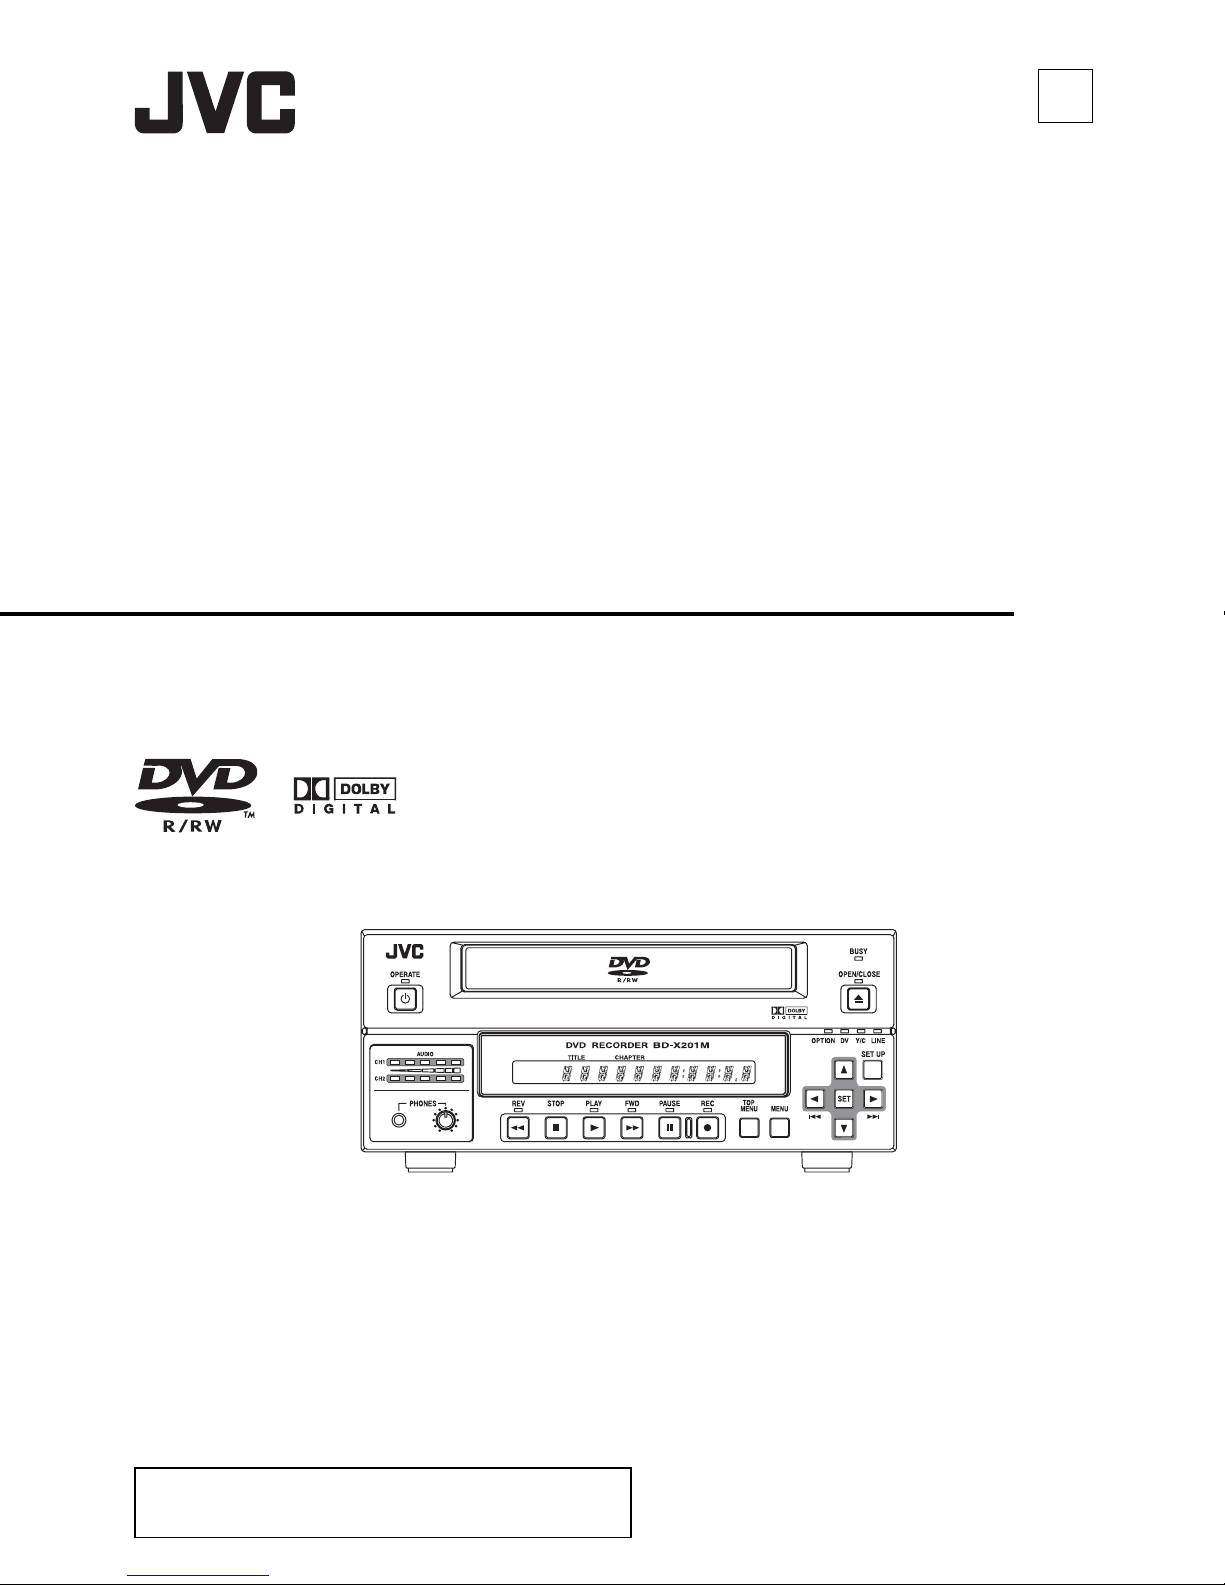
JVC BD-X201MS User manual

BD-X201MS DVD RECORDER
DVD RECORDER
INSTRUCTIONS
BD-X201MS
Thank you for purchasing this JVC product. Before operating this
unit, please read the instructions carefully to ensure the best
possible performance.
LST0373-001A
E
© 2006 Victor Company of Japan, Limited LST0373-001A

E-2
Thank you for purchasing
this DVD Recorder.
Main Features
• Recording of DVD-R/DVD-RW (video mode only) and
DVD+R/DVD+RW (compliance with video mode).
• Composite video, YC separate, and DV signals are sup-
ported as video inputs; furthermore, analog or DV signals
are supported as audio inputs.
• The title and chapter menus can be created either auto-
matically or manually.
•NTSC/PALselectable
• Dual mode foot switch terminal available.
Recording can be turned ON/OFF and insertion of chapter/
index are possible using the external switch terminal.
• Equipped with an index search feature.
Allows automatic playback upon locating a specific index
position.
• Equipped with a JPEG capture feature.
Allows DVD playback images to be captured and recorded
to a DVD disc as JPEG files. Input images can also be cap-
tured and recorded to a CD-R/RW disc as JPEG files.
Contents
Introduction
Overview of Functions . . . . . . . . . . . . . . . . . . . . . . . . . . . . . . . . . . . . . . . . . . . . . . . . . . . . . . . . . . . . . . . . . . . . . . . . . . . . . . . . . . .4
Precautions for DVD Recorder Use . . . . . . . . . . . . . . . . . . . . . . . . . . . . . . . . . . . . . . . . . . . . . . . . . . . . . . . . . . . . . . . . . . . . . . . . .5
Precautions for Disc Usage . . . . . . . . . . . . . . . . . . . . . . . . . . . . . . . . . . . . . . . . . . . . . . . . . . . . . . . . . . . . . . . . . . . . . . . . . . . . . . .6
Details Regarding Discs . . . . . . . . . . . . . . . . . . . . . . . . . . . . . . . . . . . . . . . . . . . . . . . . . . . . . . . . . . . . . . . . . . . . . . . . . . . . . . . . .7
Component Names & Functions
Front Panel . . . . . . . . . . . . . . . . . . . . . . . . . . . . . . . . . . . . . . . . . . . . . . . . . . . . . . . . . . . . . . . . . . . . . . . . . . . . . . . . . . . . . . . . . . .9
Rear Panel . . . . . . . . . . . . . . . . . . . . . . . . . . . . . . . . . . . . . . . . . . . . . . . . . . . . . . . . . . . . . . . . . . . . . . . . . . . . . . . . . . . . . . . . . .13
LCD Display and On-Screen Content
LCD Display . . . . . . . . . . . . . . . . . . . . . . . . . . . . . . . . . . . . . . . . . . . . . . . . . . . . . . . . . . . . . . . . . . . . . . . . . . . . . . . . . . . . . . . . .15
On-Screen Content . . . . . . . . . . . . . . . . . . . . . . . . . . . . . . . . . . . . . . . . . . . . . . . . . . . . . . . . . . . . . . . . . . . . . . . . . . . . . . . . . . . .17
Status Messages . . . . . . . . . . . . . . . . . . . . . . . . . . . . . . . . . . . . . . . . . . . . . . . . . . . . . . . . . . . . . . . . . . . . . . . . . . . . . . . . . . .17
Event Messages . . . . . . . . . . . . . . . . . . . . . . . . . . . . . . . . . . . . . . . . . . . . . . . . . . . . . . . . . . . . . . . . . . . . . . . . . . . . . . . . . . .19
Alarm Messages . . . . . . . . . . . . . . . . . . . . . . . . . . . . . . . . . . . . . . . . . . . . . . . . . . . . . . . . . . . . . . . . . . . . . . . . . . . . . . . . . . .20
Preparation
Connections . . . . . . . . . . . . . . . . . . . . . . . . . . . . . . . . . . . . . . . . . . . . . . . . . . . . . . . . . . . . . . . . . . . . . . . . . . . . . . . . . . . . . . . . .21
Power Connections . . . . . . . . . . . . . . . . . . . . . . . . . . . . . . . . . . . . . . . . . . . . . . . . . . . . . . . . . . . . . . . . . . . . . . . . . . . . . . . . . . . .22
Inserting & Removing Discs . . . . . . . . . . . . . . . . . . . . . . . . . . . . . . . . . . . . . . . . . . . . . . . . . . . . . . . . . . . . . . . . . . . . . . . . . . . . .23
Using a Keyboard . . . . . . . . . . . . . . . . . . . . . . . . . . . . . . . . . . . . . . . . . . . . . . . . . . . . . . . . . . . . . . . . . . . . . . . . . . . . . . . . . . . . .24
Attach the provided ferrite core . . . . . . . . . . . . . . . . . . . . . . . . . . . . . . . . . . . . . . . . . . . . . . . . . . . . . . . . . . . . . . . . . . . . . . . .24
Setting & Displaying the Date & Time . . . . . . . . . . . . . . . . . . . . . . . . . . . . . . . . . . . . . . . . . . . . . . . . . . . . . . . . . . . . . . . . . . . . . .25
Trademarks & Copyrights
• , Dolby and the Double “D” symbols are trade-
marks of Dolby Laboratories.
• The copying, broadcasting, screening, or rental of copy-
righted material without the authorization of the copy-
right holder is prohibited by law.
Copyright Protection Technology
This DVD recorder utilizes copyright protection technology
and is protected by US patents and intellectual property as
owned by Macrovision and other copyright holders. The
permission of Macrovision is required in order to use this
copyright protection technology, and except in situations
where special permission has been granted by that com-
pany, said technology is restricted to domestic usage and
for certain other viewing purposes. The disassembly and/or
modification of this DVD recorder is also prohibited.
Copyrights
• The recording, dubbing, or playing of software contain-
ing a copyright protection signal is not possible on this
DVD recorder.
• The usage of audio or video discs created using this
DVD recorder either for financial gain or in broadcasting
for widespread viewing may result in the legally-enforce-
able rights of the copyright holder being infringed.
• Unless the permission of the copyright holder has been
obtained, audio or video discs created using this DVD
recorder are to be used for personal enjoyment only.

E-3
Contents
Settings & Controls for Recording
DVD Recording . . . . . . . . . . . . . . . . . . . . . . . . . . . . . . . . . . . . . . . . . . . . . . . . . . . . . . . . . . . . . . . . . . . . . . . . . . . . . . . . . . . . . . .27
Preparing a Disc for Recording . . . . . . . . . . . . . . . . . . . . . . . . . . . . . . . . . . . . . . . . . . . . . . . . . . . . . . . . . . . . . . . . . . . . . . . . . . .28
Pre-Recording Settings . . . . . . . . . . . . . . . . . . . . . . . . . . . . . . . . . . . . . . . . . . . . . . . . . . . . . . . . . . . . . . . . . . . . . . . . . . . . . . . . .30
Specifying the Disc Status Created when the Disc was Finalized . . . . . . . . . . . . . . . . . . . . . . . . . . . . . . . . . . . . . . . . . . . . . . . . .31
Setting the Encoding Format for Audio & Video . . . . . . . . . . . . . . . . . . . . . . . . . . . . . . . . . . . . . . . . . . . . . . . . . . . . . . . . . . . . . .32
Adjusting of Audio Recording Levels . . . . . . . . . . . . . . . . . . . . . . . . . . . . . . . . . . . . . . . . . . . . . . . . . . . . . . . . . . . . . . . . . . . . . . .33
Checking the Video Input . . . . . . . . . . . . . . . . . . . . . . . . . . . . . . . . . . . . . . . . . . . . . . . . . . . . . . . . . . . . . . . . . . . . . . . . . . . . . . .34
Title & Chapter Menus . . . . . . . . . . . . . . . . . . . . . . . . . . . . . . . . . . . . . . . . . . . . . . . . . . . . . . . . . . . . . . . . . . . . . . . . . . . . . . . . . .35
Selecting Styles for Title & Chapter Menu . . . . . . . . . . . . . . . . . . . . . . . . . . . . . . . . . . . . . . . . . . . . . . . . . . . . . . . . . . . . . . . . . . .36
Changing Styles for Title & Chapter Menus . . . . . . . . . . . . . . . . . . . . . . . . . . . . . . . . . . . . . . . . . . . . . . . . . . . . . . . . . . . . . . . . .37
Recording
Recording Sequence . . . . . . . . . . . . . . . . . . . . . . . . . . . . . . . . . . . . . . . . . . . . . . . . . . . . . . . . . . . . . . . . . . . . . . . . . . . . . . . . . . .38
Recording with the Front Panel . . . . . . . . . . . . . . . . . . . . . . . . . . . . . . . . . . . . . . . . . . . . . . . . . . . . . . . . . . . . . . . . . . . . . . . . . . .39
Inserting Chapter Marks Manually or Automatically . . . . . . . . . . . . . . . . . . . . . . . . . . . . . . . . . . . . . . . . . . . . . . . . . . . . . . . .40
Erasing the Last Title . . . . . . . . . . . . . . . . . . . . . . . . . . . . . . . . . . . . . . . . . . . . . . . . . . . . . . . . . . . . . . . . . . . . . . . . . . . . . . . . . . .41
Disc Repair Feature . . . . . . . . . . . . . . . . . . . . . . . . . . . . . . . . . . . . . . . . . . . . . . . . . . . . . . . . . . . . . . . . . . . . . . . . . . . . . . . . . . .41
Finalizing (for Playback on Other DVD Players) . . . . . . . . . . . . . . . . . . . . . . . . . . . . . . . . . . . . . . . . . . . . . . . . . . . . . . . . . . . . . .42
Recording & Viewing Still Images (JPEG)
Recording Playback Still Images to DVD . . . . . . . . . . . . . . . . . . . . . . . . . . . . . . . . . . . . . . . . . . . . . . . . . . . . . . . . . . . . . . . . . . .43
Recording Still Images of Input Video to CD-R/RW . . . . . . . . . . . . . . . . . . . . . . . . . . . . . . . . . . . . . . . . . . . . . . . . . . . . . . . . . . .44
Viewing Still Images (JPEG) with FILE VIEWER . . . . . . . . . . . . . . . . . . . . . . . . . . . . . . . . . . . . . . . . . . . . . . . . . . . . . . . . . . . . .45
Precautions for Recording and Viewing Still Images (JPEG) . . . . . . . . . . . . . . . . . . . . . . . . . . . . . . . . . . . . . . . . . . . . . . . . . . . .46
Title & Chapter Menu Settings
Changing Chapter Menus (THUMBNAIL EDIT Screen) . . . . . . . . . . . . . . . . . . . . . . . . . . . . . . . . . . . . . . . . . . . . . . . . . . . . . . . .47
Changing & Naming Thumbnails for Chapter Menus . . . . . . . . . . . . . . . . . . . . . . . . . . . . . . . . . . . . . . . . . . . . . . . . . . . . . . . . . .48
Changing & Checking Chapter Menu Styles . . . . . . . . . . . . . . . . . . . . . . . . . . . . . . . . . . . . . . . . . . . . . . . . . . . . . . . . . . . . . . . . .50
Ending the Editing of Chapter Menus . . . . . . . . . . . . . . . . . . . . . . . . . . . . . . . . . . . . . . . . . . . . . . . . . . . . . . . . . . . . . . . . . . . . . .52
Changing & Checking Title Menu Styles & Names . . . . . . . . . . . . . . . . . . . . . . . . . . . . . . . . . . . . . . . . . . . . . . . . . . . . . . . . . . . .53
Playback
Playing Back a Disc . . . . . . . . . . . . . . . . . . . . . . . . . . . . . . . . . . . . . . . . . . . . . . . . . . . . . . . . . . . . . . . . . . . . . . . . . . . . . . . . . . . .57
Selecting Playback Images from the Title List . . . . . . . . . . . . . . . . . . . . . . . . . . . . . . . . . . . . . . . . . . . . . . . . . . . . . . . . . . . . . . . .59
Fast & Slow Playback . . . . . . . . . . . . . . . . . . . . . . . . . . . . . . . . . . . . . . . . . . . . . . . . . . . . . . . . . . . . . . . . . . . . . . . . . . . . . . . . . .60
Playing the Previous or Next Chapter . . . . . . . . . . . . . . . . . . . . . . . . . . . . . . . . . . . . . . . . . . . . . . . . . . . . . . . . . . . . . . . . . . . . . .60
Playing the Previous or Next Titles . . . . . . . . . . . . . . . . . . . . . . . . . . . . . . . . . . . . . . . . . . . . . . . . . . . . . . . . . . . . . . . . . . . . . . . .60
Index Writing and Index Search . . . . . . . . . . . . . . . . . . . . . . . . . . . . . . . . . . . . . . . . . . . . . . . . . . . . . . . . . . . . . . . . . . . . . . . . . .61
Setup Menu
Setting the Setup Menu . . . . . . . . . . . . . . . . . . . . . . . . . . . . . . . . . . . . . . . . . . . . . . . . . . . . . . . . . . . . . . . . . . . . . . . . . . . . . . . . .63
Setup Menu Configuration . . . . . . . . . . . . . . . . . . . . . . . . . . . . . . . . . . . . . . . . . . . . . . . . . . . . . . . . . . . . . . . . . . . . . . . . . . . . . . .64
Setup Menus . . . . . . . . . . . . . . . . . . . . . . . . . . . . . . . . . . . . . . . . . . . . . . . . . . . . . . . . . . . . . . . . . . . . . . . . . . . . . . . . . . . . . . . . .65
DISC MENU Screen . . . . . . . . . . . . . . . . . . . . . . . . . . . . . . . . . . . . . . . . . . . . . . . . . . . . . . . . . . . . . . . . . . . . . . . . . . . . . . . . . . .66
INPUT SELECT MENU Screen . . . . . . . . . . . . . . . . . . . . . . . . . . . . . . . . . . . . . . . . . . . . . . . . . . . . . . . . . . . . . . . . . . . . . . . . . . .67
SYSTEM MENU Screen . . . . . . . . . . . . . . . . . . . . . . . . . . . . . . . . . . . . . . . . . . . . . . . . . . . . . . . . . . . . . . . . . . . . . . . . . . . . . . . .67
DVD MENU Screen . . . . . . . . . . . . . . . . . . . . . . . . . . . . . . . . . . . . . . . . . . . . . . . . . . . . . . . . . . . . . . . . . . . . . . . . . . . . . . . . . . . .71
RECORDER MENU Screen . . . . . . . . . . . . . . . . . . . . . . . . . . . . . . . . . . . . . . . . . . . . . . . . . . . . . . . . . . . . . . . . . . . . . . . . . . . . .73
REMOTE MENU Screen . . . . . . . . . . . . . . . . . . . . . . . . . . . . . . . . . . . . . . . . . . . . . . . . . . . . . . . . . . . . . . . . . . . . . . . . . . . . . . . .75
DISPLAY MENU Screen . . . . . . . . . . . . . . . . . . . . . . . . . . . . . . . . . . . . . . . . . . . . . . . . . . . . . . . . . . . . . . . . . . . . . . . . . . . . . . . .77
CLOCK ADJUST MENU Screen . . . . . . . . . . . . . . . . . . . . . . . . . . . . . . . . . . . . . . . . . . . . . . . . . . . . . . . . . . . . . . . . . . . . . . . . . .78
NETWORK MENU Screen . . . . . . . . . . . . . . . . . . . . . . . . . . . . . . . . . . . . . . . . . . . . . . . . . . . . . . . . . . . . . . . . . . . . . . . . . . . . . .78
Others
Easymenu: Freeware for Editing Menu Templates . . . . . . . . . . . . . . . . . . . . . . . . . . . . . . . . . . . . . . . . . . . . . . . . . . . . . . . . . . . .79
Changing the Signal System (NTSC / PAL) . . . . . . . . . . . . . . . . . . . . . . . . . . . . . . . . . . . . . . . . . . . . . . . . . . . . . . . . . . . . . . . . .80
Information for Users on Disposal of Old Equipment . . . . . . . . . . . . . . . . . . . . . . . . . . . . . . . . . . . . . . . . . . . . . . . . . . . . . . . . . .81
Specifications . . . . . . . . . . . . . . . . . . . . . . . . . . . . . . . . . . . . . . . . . . . . . . . . . . . . . . . . . . . . . . . . . . . . . . . . . . . . . . . . . . . . . . . .82

E-4
Introduction
Overview of Functions
Video and audio signals from this DVD recorder’s input terminals can be recorded to DVD-R/DVD-RW (video mode
only) or DVD+R/DVD+RW (compliance with video mode). (XPage 28)
The types of signals that can be used are as follows.
Video: Composite video, YC separate, or DV signals (including audio)
Audio: Analog audio or DV signals (including video)
Playback images that were recorded to an unfinalized DVD by the DVD recorder can be captured and recorded to an
identical DVD as JPEG files. (XPage 43)
Video from the DVD recorder’s input terminals can be captured and recorded to a CD-R/RW as JPEG files.
(XPage 44)
A wide range of recording methods are supported. The appropriate method is to be selected in accordance with the
intended mode of use.
•The REC, PAUSE, and STOP buttons on the front panel can be used for standard operations. (XPage 39)
•Recording can be operated via the external switch that is connected to the foot switch terminal. (XPage 40)
The title and chapter menus can be created either automatically or manually. (XPage 47)
Five different patterns have been provided as display styles for the title and chapter menus. Each of these patterns is character-
ized by different thumbnail characteristics (i.e., number, position, and size) and background images displayed on the title and
chapter menu screens.
When a display style is selected during the recording of content to a DVD, this DVD recorder will automatically create the title
and chapter menus in accordance with this style.
The DVD MENU screen can be used to modify the thumbnail and background display characteristics of each of the display
styles.
In addition, the THUMBNAIL EDIT screen and the CHAPTER MENU EDIT screen can be used to modify the display style and
thumbnail images for chapter menus, and also to input chapter names and comments. The input of names or comments is car-
ried out using a keyboard connected to one of the recorder’s USB terminals.
The TITLE MENU EDIT screen can be used to modify the display style for the title menu and to enter title names.
This DVD recorder can be used to play discs that it has created. (XPage 57)
•Once a disc has been finalized, it can also be played on other DVD players.

E-5
Introduction
Precautions for DVD Recorder Use
Storage & Usage Locations
The storage and usage of this DVD recorder in the follow-
ing types of location should be avoided.
•Areas at temperatures which deviate by a significant
degree above or below the permitted service tempera-
ture range (i.e., 5°C to 35°C).
•Areas at humidities which deviate by a significant degree
above or below the permitted service humidity range
(i.e., 20% to 80% RH).
•Areas where a large amount of dust or sand is present.
•Areas where the DVD recorder may come into contact
with oily smoke or steam, such as in kitchens or in their
immediate vicinity.
•Areas that are unstable or where significant vibration
occurs.
•Areas where condensation occurs readily.
•Areas where strong magnetic fields are generated by
transformers, motors, or the like.
•Areas where transceivers, mobile phones, and other
wireless-communication devices are present.
•Areas that are subjected to X-ray irradiation or where
corrosive gases are present. (This precaution must be
strictly observed.)
Handling
•Ensure that this DVD recorder is placed on a flat, hori-
zontal surface for use.
•Do not place heavy objects such as a monitor on top of
the DVD recorder.
•Do not insert foreign objects into the disc tray opening.
•Be careful not to get your fingers clamped when loading
the disc to prevent injury.
•Do not block the fan’s ventilation holes.
•Avoid knocking or dropping this DVD recorder.
•When the DVD recorder is to be moved, ensure that any
DVD it contains is removed in advance.
•If the DVD recorder is not to be used for an extended
period of time, please set the POWER switch to OFF to
avoid wasting electricity.
Cleaning the Exterior (with the power off)
Use a soft cloth when cleaning the outside of this DVD
recorder.
Do not use paint thinners or organic solvents as cleaning
agents.
Failure to observe these precautions can result in discolor-
ation or melting of exterior surfaces.
When stubborn dirt is present, wipe away using a cloth
soaked in a dilute neutral solvent.
Always use the power cord provided with this DVD
recorder.
The usage of a different type of cord or a damaged cord
can result in the outbreak of fire or electric shocks.
The power cord supplied with this DVD recorder
should not be used with any other device.
Before connecting this DVD recorder to other devices,
turn those devices off and then carry out setup proce-
dures as described in the corresponding user’s manuals.
The DVD drive unit is an expendable part. Although the
service life of the DVD drive unit differs depending on
the usage environment of the customer, replacement
every 1000 hours as a guide is recommended.
(XPage 68 “TOTAL RECORDING TIME”)
Precautions Regarding Condensation
Condensation
When cold water is poured into a glass and droplets of
water form on its outer surface, this moisture is referred to
as “condensation”.
When condensation occurs
Condensation can cause water droplets to adhere to the
DVD recorder’s internal lens, thus making normal opera-
tion impossible.
Condensation occurs easily in the following situations,
and the appropriate care should be taken.
•When the DVD recorder is moved from a cold location
into a warm room.
•When the room containing the DVD is rapidly heated.
•When an air conditioner’s air duct is pointing straight at
the DVD recorder.
In situations where it is likely that condensation will occur,
remove any DVD that may be present in this DVD
recorder and then turn the power on. As the interior heats
up, condensation will be less likely to occur.
Condensation is a principal cause of the inability to play
discs and other similar problems. In this type of situation,
allow the DVD recorder to remain inactive with its power
on for several hours. If the problem persists after this
period of time has elapsed, contact either the store where
this DVD recorder was purchased or your JVC Authorized
dealer.
Extended Periods of Inactivity
Performance may deteriorate over extended periods of
inactivity; for this reason, the power should be turned on
and the DVD recorder should be operated at regular inter-
vals.
Compensation for Damaged Content
JVC accepts no responsibility whatsoever for damages
incurred as a result of an inability to play or record audio
and video content in the rare event that this DVD
recorder, a disc fails to operate correctly.
It is recommended that discs containing important content
be backed up at regular intervals (i.e., on a yearly basis).
Although digital signals do not deteriorate, storage envi-
ronments can have an effect on a disc’s aging character-
istics, and this may result in an inability to play or record.
If a disc should break, there will be no way to recover
data from it.
Proper playback of discs recorded using this DVD
recorder on all devices is not guaranteed.

E-6
Introduction
Precautions for Disc Usage
Care of Discs to Ensure High-Quality Playback
Fingerprints, dust, or any other similar contamination of the surface of a disc can lead to distortion in the playback of recorded
video and audio. For this reason, it is good practice to wipe each disc with a soft cloth before use.
Looking After Discs
•Using a soft cloth, wipe the disc gently from the inside to
the outside.
•If stubborn dirt is present on the surface of a disc, wipe
first using a slightly wet cloth and then using a dry cloth.
•Paint thinners, organic solvents, analog record cleaning
agents, anti-static sprays, and the like must never be
used. Failure to observe this precaution can lead to
discs being permanently damaged.
Handling Discs
•Correct method for holding a disc
Your hands or fingers should not
come into contact with the recording
surface when holding a disc.
Additional Notes on Disc Handling
Never wipe a disc using paint thinners, organic solvents,
alcohol, or record-cleaning fluid.
Do not use disc protectors or scratch guards.
Stickers and other types of paper label should not be
applied.
Do not use discs from which stickers or labels have been
removed.
Do not use discs on which illustrations or text has been
printed using a commercially-available label printer. First
create a disc using the unit before printing.
The use of non-circular discs (i.e., heart or rectangular
shaped), warped discs, and cracked discs can lead to
breakage of the DVD recorder.
Storing Discs
Avoid storing discs in any of the following locations.
•Areas with high levels of humidity or dust, or areas
where mold is present.
•Areas exposed to direct sunlight or close to heating
equipment.
•Vehicle interiors during summer months.
Take care to avoid dropping or knocking discs.
Place discs in cases and stack these cases for storage.
Discs can be deformed or cracked as a result of stacking,
leaning, or dropping when not inside a case.
•Removing a disc •Placing a disc in its case

E-7
Introduction
Details Regarding Discs
Discs for Recording & Playback
The following shows the discs that can be recorded to and
played using this DVD recorder, in addition to the correspond-
ing display marks or logos.
* Certain characteristics and properties of a disc can render
them unsuitable for recording or playback.
Recommended manufacturers
DVD-R : JVC, Maxell 2×, 4×, 8×
DVD-RW : JVC 2×, 4×
DVD+R : JVC 2.4×, 4×, 8×
DVD+RW : JVC 2.4×, 4×
CD-R : JVC ~ 40×
CD-RW : JVC ~ 32×
DVD-R/-RW and DVD+R/+RW Details
DVD-R : Only discs that conform with DVD-R Standard 2.0
(video mode) can be used.
DVD-RW : Discs of Version 1.1 or later can be used.
Although Version 1.1 of the DVD-RW Standards
allows the selection of either video mode or VR
mode for recording, this DVD recorder performs
recording in video mode only.
* Version 1.0 of the DVD-RW Standards does not
support video-mode recording, and for this rea-
son, the corresponding discs cannot be used.
In terms of recording characteristics, DVD-R/DVD-RW (video
mode) and DVD+R/DVD+RW (compliance with video mode)
differ as follows.
DVD-R/DVD+R
•Each disc can be recorded only one. Accordingly, these
discs are recommended for use in archiving or long-term
storage.
•Once a disc has been finalized, it can also be played on
other DVD players.
DVD-RW (video mode)/DVD+RW (compliance with
video mode)
•After viewing a disc, all data can be erased and it can be
used to record new content.
•Once a disc has been finalized, it can also be played on
other DVD players.
•It is possible to cancel the finalization and add a record-
ing.
Finalizing
When DVD-R, DVD-RW, DVD+R and DVD+RW have been
finalized, they can be played in the same way as any other
DVD using a standard DVD player. (XPage 42)
Recording to unused sections of a disc and the modifi-
cation of titles or display styles can be carried out as
required before a disc is finalized.
Once a disc has been finalized, it can be used as a
standard DVD and its recorded audio and video can be
played on this and other DVD players.
Playing Discs on this DVD Recorder
This DVD recorder is capable of playing any discs that it has
created and finalized.
DVD-R 12 cm: 4.7 GB
General Version 2.0
(video mode)
DVD-RW 12 cm: 4.7 GB
Version 1.1 or later
(video mode)
DVD+R 12 cm: 4.7 GB
DVD+RW 12 cm: 4.7 GB
•In the case of both DVD-Rs/DVD-RWs and DVD+Rs/
DVD+RWs, it is impossible to overwrite previously
recorded content with new data, even if the disc in ques-
tion has not yet been finalized. The deletion of specific
sections of data is also impossible.
•Regardless of whether or not finalization has been carried
out, it will not be possible to use this DVD recorder to
record new content to DVD-R/DVD-RW and DVD+R/
DVD+RW that have been recorded using other devices.
•After finalizing, a disc’s titles can be selected from the top
menu.
•Additional recording will not be possible after finalizing.
•In the case of a DVD-RW or DVD+RW, it is possible to
cancel the finalization and add a recording.
•Although a finalized disc may in principle be played on
other DVD players, certain characteristics of the disc and
its recording conditions may make this impossible.
•The following conditions may occur when attempting to
play discs recorded using other devices on this DVD
recorder.
•Inability to play
•Block-type noise (i.e., mosaic)
•Interruptions in audio and/or video
•Unintentional stopping during playback
•Commercially-available DVD-Videos and DVD-ROMs
cannot be used.

E-8
Introduction
Details Regarding Discs (continued)
DVD Data Configuration
Generally speaking, the content recorded on a DVD is sepa-
rated into large units referred to as “titles”. A unique number
called a “title number” is assigned to each of these titles, and
as a result, any title can be immediately accessed using its
title number. In addition, each title can be divided into smaller
units referred to as “chapters”. Similarly, a unique number
called a “chapter number” is assigned to each of these chap-
ters, and this allows any chapter to be immediately accessed
using its chapter number.
Each recording made to a disc is stored as a single title. In
this, each pressing of the STOP button to leave Recording
mode constitutes a different recording. (This action is also
referred to as “title closing”.) It is also possible to insert chap-
ter marks to partition titles at the desired points by pressing
the REC button while recording.
It is possible to automatically add a chapter mark when
recording is temporarily stopped by pressing the PAUSE but-
ton. (Set from the menu.) In addition, this DVD recorder can
also be used to automatically insert chapter marks at regular
intervals. (CHAPTER CREATION menu settings will be
required for this function.)
•Before a title is closed, it will be possible to modify the style
used for chapter menu display, to change the thumbnails
used, and to input thumbnail names.
•Before a disc is finalized, it will be possible to modify the
style used for the title menu and to input title names.
Region Codes
One of six numbers referred to as “region codes” is assigned
to DVD content to control the global regions in which this con-
tent may be viewed. If a DVD’s region code does not corre-
spond to the region code of the DVD player being used, it will
not be possible to play the disc.
•This DVD recorder assigns the region code “ALL” to the
discs that it records.
•It will not be possible to play discs to which region codes
have been assigned.
Screen Sizes
This DVD recorder is capable of recording video content for
wide-screen TVs (i.e., with a 16:9 aspect ratio).
In addition, signals for normal content with a 4:3 aspect ratio,
for squeezed content (i.e., where the left and right are com-
pressed), and for letterbox content (i.e., where the top and
bottom of the screen are black) can be recorded as is.
•Thumbnail creation method for use in the title/chapter
menu during wide-signal input can be selected in THUMB-
NAIL FORM of the DVD MENU screen. (XPage 71)
Disc
Title 1 Title 2
Chapter 1 Chapter 2 Chapter 3 Chapter 1 Chapter 2

E-9
Component Names & Functions
Front Panel
1OPERATE button and indicator
•This button is used to make it ready for use. Press again
to disable operation (Operate OFF mode).
•The indicator’s lighting condition depends on the condi-
tion of the DVD recorder and can be one of the following.
Lit in green : Operate ON.
Lit in orange : Operate OFF.
Notes
•The OPERATE button will have no effect if pressed while
the DVD recorder is in either Recording or Recording
Pause mode. This is also the case when performing final-
izing or erasing.
•The DVD recorder continues to use a small amount of
power even after it has been turned off using the OPER-
ATE button. If it will not be used for an extended period of
time, please set the POWER switch to OFF to avoid wast-
ing electricity.
•Do not turn the power off when in Operate On mode as
this can result in the DVD recorder being damaged.
•Malfunction may occur when switching to OPERATE ON
while pressing a key on a connected USB keyboard.
2Disc tray
The purpose of the disc tray is to hold DVDs.
This tray opens automatically when the OPEN/CLOSE but-
ton is pressed. In addition, the OPEN/CLOSE button can
be pressed again to close the tray.
Notes
•Do not push the disc tray as it is opening or closing.
•Do not place objects other than discs on the disc tray.
•Do not press down on the disc tray.
3BUSY indicator
This indicator flashes when the DVD recorder is in Record-
ing Pause mode or when it is performing time-consuming
operations such as title closing, finalizing, and erasing.
None of the DVD recorder’s buttons will have any effect if
pressed while the BUSY indicator is flashing.
4OPEN/CLOSE button and indicator
This button is used to open and close the disc tray.
In addition, the OPEN/CLOSE indicator is lit up while the
disc tray is opening, and also when it is open.
•If this button is pressed and held for at least 7 seconds,
the disc is ejected after it is finalized.
•The following operation is performed when ejecting a
CD-R/RW.
Any JPEG files captured to the memory of this DVD
recorder are automatically recorded to the CD-R/RW
and then the disc tray opens.
Note
The OPEN/CLOSE button will have no effect if pressed
while the DVD recorder is in either Recording or Recording
Pause mode. This is also the case when performing finaliz-
ing or erasing.
5Audio level indicator
These meters are used to indicate the current level of
audio on Channel 1 and Channel 2.
Specifically, the audio level meters indicate the audio
recording levels when the DVD recorder is in Recording
mode, and the audio playback levels when it is in Playback
mode. (Adjustment of the audio recording levels:
XPage 33.)
6LCD display
The LCD display is used to present important information.
During recording or playback, for example, the title, chapter
number, and elapsed time are indicated on the LCD dis-
play. (XPage 15 for more details.)
5
1
26
3
4

E-10
Component Names & Functions
Front Panel (continued)
7Video input indicators
OPTION indicator
This indicator is lit up or flashes when INPUT SELECT
from the INPUT SELECT MENU screen has been set to
OPTION. (This setting cannot be carried out using the DVD
recorder alone.)
DV indicator
This indicator is lit up or flashes when INPUT SELECT
from the INPUT SELECT MENU screen has been set to
DV. Specifically, the indicator is lit up when an input signal
is present, and it flashes when no signal is present.
Y/C indicator
This indicator is lit up or flashes when INPUT SELECT
from the INPUT SELECT MENU screen has been set to Y/
C. Specifically, the indicator is lit up when an input signal is
present, and it flashes when no signal is present.
LINE indicator
This indicator is lit up or flashes when INPUT SELECT
from the INPUT SELECT MENU screen has been set to
LINE. Specifically, the indicator is lit up when an input sig-
nal is present, and it flashes when no signal is present.
8Phones jack and volume adjuster
The phones jack allows headphones to be connected to
the DVD recorder for monitoring of audio levels; in addition,
the headphone volume can be adjusted using the volume
adjuster. Note that this adjuster has no effect on the actual
recording levels.
9REV button and indicator
•Press this button during playback or fast-forward mode
to start fast-reverse play. If pressed during fast-reverse
play, this button toggles the speed of fast-reverse play
between low speed and high speed.
•Press this button in still mode or during slow-forward
play to start slow-reverse play. If pressed during slow-
reverse play, this button toggles the speed of slow-
reverse play between low speed and high speed.
•The REV indicator is lit up during fast-reverse and slow-
reverse play.
0STOP button
•This button has the following effect when pressed in
Recording or Recording Pause mode.
If EDIT MENU from the DVD MENU screen is set to DIS-
ABLE, the DVD recorder stops recording (i.e., it per-
forms title closing).
If EDIT MENU from the DVD MENU screen is set to
ENABLE, the DVD recorder stops recording and the
THUMBNAIL EDIT screen is displayed. It will then be
possible to modify the chapter menu.
•When the STOP button is pressed in Playback mode,
the DVD recorder stops playback.
aPLAY button and indicator
•If this button is pressed together with the REC button
while a recordable disc is inserted into the DVD
recorder, recording will be started.
•When the PLAY button is pressed in Recording Pause
mode, the DVD recorder restarts recording.
•When an unfinalized disc is inserted and this button is
pressed, playback of the most recent title starts.
•The PLAY indicator is lit up in Recording and Playback
modes.
bFWD button and indicator
•Press this button during playback or fast-reverse mode
to start fast-forward play. If pressed during fast-forward
play, this button toggles the speed of fast-forward play
between low speed and high speed.
•Press this button in still mode or during slow-reverse
play to start slow-forward play. If pressed during slow-
forward play, this button toggles the speed of slow-for-
ward play between low speed and high speed.
•The FWD indicator is lit up during fast-forward and slow-
forward play.
cPAUSE button and indicator
•When this button is pressed while recording, the
recorder enters the recording pause mode.
•If this button is pressed during playback, the DVD
recorder switches to Still mode and freezes playback. If
the PAUSE button is then pressed again in Still mode,
the DVD recorder will advance playback by a single
field.
•The PAUSE indicator is lit up in Recording Pause and
Still modes.
8
90abc
7

E-11
Component Names & Functions
dREC button and indicator
•If this button is pressed together with the PLAY button in
Stop mode, recording will be started.
•If the current disc is blank or title closing has been
carried out, a new title will be created and recording
will start at Chapter 1.
•When this button is pressed during recording, a new
chapter and index will be setup within the continuous
video data.
•If this button is pressed while an unfinalized DVD with
available space is being played back, the playback
image (still image) is captured to the internal memory of
this DVD recorder.
Recording to the disc is performed when playback is
stopped. If recording is not performed and the DVD
recorder is switched to OPERATE OFF mode, the image
data stored in the internal memory of the DVD recorder
is cleared. (The simultaneous recording of multiple cap-
tured images is possible.)
•If this button is pressed in Stop mode when a CD-R/RW
with available space is inserted, a still image of the input
video (E-E image) is captured to the internal memory of
the DVD recorder.
Recording to the disc is performed when the disc is
ejected or FILE VIEWER (XPage 45) is started. If
recording is not performed and the DVD recorder is
switched to OPERATE OFF mode, the image data
stored in the internal memory of the DVD recorder is
cleared. (The simultaneous recording of multiple cap-
tured images is possible.)
•If this button is pressed and held for more than 2 sec-
onds while the DVD recorder is stopped or inserted with
no disc, input signal encoded/decoded in MPEG will be
output via the VIDEO OUT terminal on the rear panel.
This will continue for as long as the button is held, and it
allows the DVD recording quality to be confirmed. Audio
will be muted at this time.
•The REC indicator is lit up in Recording and Recording
Pause modes.
eTOP MENU button
If this button is pressed while the DVD recorder is in a play-
back condition, the current DVD’s top menu or title list will
be displayed on the monitor screen.
•The title list is displayed when the disc is unfinalized or
PLAYBACK NAVIGATION of the SYSTEM MENU (2/2)
screen is set to OFF.
•The TOP MENU is displayed when you are using a final-
ized disc and PLAYBACK NAVIGATION of the SYSTEM
MENU (2/2) screen is set to ON.
fMENU button
If this button is pressed while the DVD recorder is in a play-
back condition, the chapter menu for the currently selected
title will be displayed on the monitor screen.
If the DVD title does not contain a chapter menu, nothing
will be displayed when the MENU button is pressed.
gSET UP button
•This button can be pressed to display the Setup Menu
on the monitor. A wide range of different menu settings
can then be made via the Setup Menu. (XPage 63)
In addition, the SET UP button can be pressed again to
hide the Setup Menu.
•If the SET UP button is pressed in Recording or Record-
ing Pause mode, setting data relevant to recording (i.e.,
video bit rate and audio encoding format) will be dis-
played on-screen. In addition, the SET UP button can be
pressed again to hide this information.
•Press this button when in the Playback mode to display
the INDEX MANAGER screen.
When the INDEX MANAGER screen is displayed, press
this button to return to the original screen. (XPage 61)
•FILE VIEWER starts when an unfinalized disc is inserted
and this button is pressed and held for at least 2 sec-
onds while the DVD recorder is stopped. (XPage 45)
•If this button and the STOP button are simultaneously
pressed and held for at least 2 seconds while the DVD
recorder is stopped, the NTSC/PAL signal system is
changed. (NTSC is the setting for the US.) (XPage 80)
ef i
l
k
g
h
j
d

E-12
Component Names & Functions
Front Panel (continued)
h[g] button
•This button is used to select menu items or setting val-
ues when the Setup Menu is displayed.
•Press this button during playback to playback the next
title.
•If a title menu or chapter menu is displayed, this button
can be used to select a menu number for playback. Spe-
cifically, pressing of this button moves the selection posi-
tion upward.
•The gbutton can be used to adjust the audio recording
levels when the DVD recorder is stopped or in Record-
ing Pause mode.
•If AUDIO REC VOLUME MODE from the
RECORDER MENU (2/2) screen is set to BOTH and
this button is pressed while either the ior jbutton
is being held, the audio recording levels for both
Channel 1 and Channel 2 will increase.
•If AUDIO REC VOLUME MODE from the
RECORDER MENU (2/2) screen is set to INDEPEN-
DENCE and this button is pressed while the ibutton
is being held, the audio recording level for Channel 1
will increase. Similarly, if the gbutton is pressed
while the jbutton is being held, the audio recording
level for Channel 2 will increase.
i[h] button
•This button is used to select menu items or setting val-
ues when the Setup Menu is displayed.
•Press this button during playback to playback the previ-
ous title.
•If a title menu or chapter menu is displayed, this button
can be used to select a menu number for playback. Spe-
cifically, pressing of this button moves the selection posi-
tion downward.
•The hbutton can be used to adjust the audio recording
levels when the DVD recorder is stopped or in Record-
ing Pause mode.
•If AUDIO REC VOLUME MODE from the
RECORDER MENU (2/2) screen is set to BOTH and
this button is pressed while either the ior jbutton
is being held, the audio recording levels for both
Channel 1 and Channel 2 will decrease.
•If AUDIO REC VOLUME MODE from the
RECORDER MENU (2/2) screen is set to INDEPEN-
DENCE and this button is pressed while the ibutton
is being held, the audio recording level for Channel 1
will decrease. Similarly, if the hbutton is pressed
while the jbutton is being held, the audio recording
level for Channel 2 will decrease.
j[i] button
•If a title menu or chapter menu is displayed, this button
can be used to select a menu number for playback. Spe-
cifically, pressing of this button moves the selection posi-
tion to the left.
•This button can be pressed while the DVD recorder is
playing to move playback to the start of the current chap-
ter.
•The ibutton can be used to adjust the audio recording
levels when the DVD recorder is stopped or in Record-
ing Pause mode.
•If AUDIO REC VOLUME MODE from the
RECORDER MENU (2/2) screen is set to INDEPEN-
DENCE and either the gor hbutton is pressed
while this button is being held, the audio recording
level for Channel 1 will be adjusted accordingly.
•If AUDIO REC VOLUME MODE from the
RECORDER MENU (2/2) screen is set to BOTH and
either the gor hbutton is pressed while this button
is being held, the audio recording levels for both
Channel 1 and Channel 2 will be adjusted accordingly.
•If this button is pressed together with the jbutton,
the audio recording levels will be returned to their
default settings (i.e., unity gain).
k[j] button
•If a title menu or chapter menu is displayed, this button
can be used to select a menu number for playback. Spe-
cifically, pressing of this button moves the selection posi-
tion to the right.
•This button can be pressed while the DVD recorder is
playing to move playback to the start of the next chapter.
•The jbutton can be used to adjust the audio recording
levels when the DVD recorder is stopped or in Record-
ing Pause mode.
•If AUDIO REC VOLUME MODE from the
RECORDER MENU (2/2) screen is set to INDEPEN-
DENCE and either the gor hbutton is pressed
while this button is being held, the audio recording
level for Channel 2 will be adjusted accordingly.
•If AUDIO REC VOLUME MODE from the
RECORDER MENU (2/2) screen is set to BOTH and
either the gor hbutton is pressed while this button
is being held, the audio recording levels for both
Channel 1 and Channel 2 will be adjusted accordingly.
•If this button is pressed together with the ibutton,
the audio recording levels will be returned to their
default settings (i.e., unity gain).
lSET button
•This button is used to confirm the selection of menu
items or setting values when the Setup Menu is dis-
played.
•When this button is pressed during normal screen dis-
play, the counter from the DVD recorder’s LCD display
will switch to display of either the elapsed recording/
playback time or the remaining disc/title time.

E-13
Component Names & Functions
Rear Panel
1VIDEO LINE IN terminal (BNC)
This terminal allows composite video signals to be input to
the DVD recorder.
In order to select these signals for input, set INPUT
SELECT from the INPUT SELECT MENU screen to LINE.
•SETUP from the SYSTEM MENU (1/2) screen should be
set in accordance with whether or not this input signal is
a setup signal. (NTSC only)
2VIDEO Y/C IN terminal (4-pin)
This terminal allows YC separate video signals to be input
to the DVD recorder.
In order to select these signals for input, set INPUT
SELECT from the INPUT SELECT MENU screen to Y/C.
•SETUP from the SYSTEM MENU (1/2) screen should be
set in accordance with whether or not this input signal is
a setup signal. (NTSC only)
•This terminal’s specification (i.e., S1 or S2) can be
selected using Y/C TERMINAL MODE from the SYS-
TEM MENU (2/2) screen.
3VIDEO LINE OUT terminal (BNC)
This terminal is used to connect the DVD recorder to a
monitor.
•When the DVD recorder is in Stop or Recording mode,
the video input signal is output on the E-E screen as a
composite video signal.
•If the REC button is pressed and held for at least 2 sec-
onds while the DVD recorder is stopped, the input signal
will be subjected to MPEG encode/decode processing
and output via the VIDEO LINE OUT terminal. This will
continue for as long as the REC button is held, and it
allows the DVD recording quality to be confirmed.
•Playback from the DVD is output as a composite signal
when in Playback mode.
•The Setup Menu, title menu, chapter menus, and other
setting and control screens are displayed on the monitor
connected to this terminal.
•Status and alarm information is also displayed on-
screen. (The DISPLAY MENU screen can be used to
indicate which items are to be displayed.)
4VIDEO Y/C OUT terminal (4-pin)
For output of YC separate video signals.
•Information that is the same as that of the VIDEO LINE
OUT terminal is being output.
•This terminal’s specification (i.e., S1 or S2) can be
selected using Y/C TERMINAL MODE from the SYS-
TEM MENU (2/2) screen.
5AUDIO INPUT LEVEL switch
This switch is used to set the standard level for audio input.
+4 dB : The standard level is set to +4 dB.
–8 dB : The standard level is set to –8 dB.
6AUDIO IN terminals (RCA × 2)
These terminals allow analog audio signals to be input to
the DVD recorder.
•In order to select these signals for input, set INPUT
SELECT from the INPUT SELECT MENU screen to
LINE or Y/C.
7AUDIO OUT terminals (RCA × 2)
These terminals allow analog audio signals to be output
from the DVD recorder.
•When the DVD recorder is in Stop or Recording mode,
the audio input signals (i.e., E-E signals) are output via
these terminals.
•Audio from the DVD is output when in Playback mode.
8RS-232C REMOTE terminal (D-sub 9-pin female)
Operation of this unit can be controlled externally by con-
necting to an RS-232C control device.
9USB terminals (× 2)
For connecting to a USB-supported keyboard.
The input of text in setting screens is carried out using a
keyboard.
•It is not be possible to operate devices other than a key-
board by connecting them to the USB terminal.
•Set KEYBOARD STYLE from the SYSTEM MENU (1/2)
screen in accordance with the keyboard’s input lan-
guage.
Recommended manufacturers: Logitech
134567
8
90abcd
e
f
2

E-14
Component Names & Functions
Rear Panel (continued)
0DV IN/OUT terminal
This I/O terminal for digital signals conforms with
IEEE1394 specifications.
•In order to select this terminal’s audio and video signals
for input, set INPUT SELECT from the INPUT SELECT
MENU screen to DV.
•REMOTE SELECT from the REMOTE MENU screen is
used to select a control method for this terminal as fol-
lows.
DV (SLAVE) : The DVD recorder operates as a slave
device and is controlled by commands
from a master device.
DV (TRIGGER): The DVD recorder performs recording
in response to operation of the trigger
button on a camera capable of DV trig-
gering (i.e., a GY-DV5000 from JVC).
aFOOT SW 1/2 terminal
FOOT SW 1 : For controlling the Record/Record Pause
functions of this unit by connecting to an
external switch (foot switch, etc.).
FOOT SW 2 : If an external switch (foot switch, etc.) is con-
nected, the following operations are per-
formed in response to switch signals from
the switch.
•Insert chapter marks and indexes while
recording to a DVD.
•Capture still images (JPEG) during play-
back of an unfinalized DVD with available
space.
•Capture still images (JPEG) of the input
video when a CD-R/RW with available
space is inserted.
For selecting the method of control by this terminal using
the FOOT SW1/2 items on the REMOTE (1/2) menu
screen. (XPage 75)
bFOR SERVICE terminal (RJ-45)
•Connect this terminal to a PC that has been installed
with utilities for this unit, such as application software for
creating title/chapter menus.
•NETWORK settings must be carried out using the NET-
WORK MENU screen.
cOptional-board slot cover
This cover is removed to allow commercially-available
optional boards to be installed.
dEquipotential Terminal
Ensure proper connection of the equipotential terminal for
each device when connecting this unit to other devices.
eAC IN terminal (3P)
For connecting to the power outlet using the power cord
supplied.
fMAIN POWER switch
Switch for turning ON/OFF the power.
•When the power is turned ON, operating mode can be
selected using the AC IN MODE item on the SYSTEM
MENU (2/2) screen. (XPage 69)

E-15
LCD Display and On-Screen Content
LCD Display
The following information and data is presented on the DVD recorder’s LCD display.
No. Description
1Encoding format for audio recordings (LPCM / DOLBY DIGITAL / MPEG) …… MPEG can only be
selected when in the PAL mode.
Recording mode : The encoding format set using AUDIO ENCODE from the RECORDER MENU (1/2)
screen is displayed. This will not be displayed when the AUDIO ENCODE item is set
to NO AUDIO.
Playback mode : The encoding format used for audio on the current disc is displayed. This will not be
displayed during playback of a recorded disc with the AUDIO ENCODE item set to
NO AUDIO.
2Information relevant to the current mode.
Title number / Chapter number / Index number / Counter
Display details can be selected using the LCD item on the DISPLAY menu screen.
•Displays the title No., chapter No. and elapsed time of a title when the LCD item is set to
TITLE+CHAPTER.
•Displays the index No. and elapsed time of a title when the LCD item is set to INDEX.
Press the SET button to alternate counter display between elapsed time and remaining time.
Remaining Time: Displays the remaining time of the disc (hr: min) during recording and remaining
time of the title during playback.
When the LCD item is set to TITLE+CHAPTER
Notes
•The remaining disc and title time depend on the amount of data comprising video, and for this reason,
they should be taken as being a general indication and not an exact figure.
•When the PLAYBACK & 232C TYPE item on the SYSTEM MENU (1/2) screen is set to VTR, the
elapsed time and index No. will represent the total time and total number respectively as accumulated
from Title 1. (XPage 68)
1
2
SET button
Title No. Chapter No. Title Recording Elapsed Time (hr: min: sec)
Disc Remaining Time
(hr: min)
When the LCD item is set to INDEX
Index No. (4 digits)
SET button

E-16
LCD Display and On-Screen Content
LCD Display (continued)
No. Description
2Indication of the current operating mode
PLEASE WAIT : The DVD recorder is starting up.
OPERATE OFF : The DVD recorder is preparing to shut down.
NO DISC : The DVD recorder currently contains no disc.
LOADING : A disc is being loaded into the DVD recorder.
DVD-R : The current disc is a non-finalized DVD-R. (Approximately 3 seconds)
DVD-RW : The current disc is a non-finalized DVD-RW. (Approximately 3 seconds)
DVD+R : The current disc is a non-finalized DVD+R. (Approximately 3 seconds)
DVD+RW : The current disc is a non-finalized DVD+RW. (Approximately 3 seconds)
DVD : The current disc is a finalized DVD-R/DVD-RW/DVD+R/DVD+RW. (Approximately 3
seconds)
CD-R : The current disc is a non-finalized CD-R. (Approximately 3 seconds)
CD-RW : The current disc is a non-finalized CD-RW. (Approximately 3 seconds)
CD : The current disc is a finalized CD-R or CD-RW. (Approximately 3 seconds)
REC PAUSE : The DVD recorder is switching from Recording mode to Recording Pause mode.
REC STOP : The DVD recorder is switching from Recording mode to Stop mode.
MENU EDIT : A title menu or chapter menu is currently being edited.
EJECT : The current disc is being ejected.
TITLE CLOSE : The DVD recorder is performing title-close processing.
FINALIZE : The DVD recorder is finalizing the disc.
QUICK ERASE : The DVD recorder is erasing data from a DVD-RW disc.
FULL ERASE : The DVD recorder is erasing data from a DVD-RW disc.
INDEX WRITE : Displayed when index is written. (Approximately 3 seconds)
INDEX ERASE : Displayed when index is erased. (Approximately 3 seconds)
CAPTURE : Displayed when a still image (JPEG) is captured.
WRITE IMAGE FILES:
Displayed when a still image (JPEG) is being written to disc.
TOP MENU : The disc’s top menu is being played.
MENU : A menu is being played.
ENCODE XX : Encoded video is being output. (XX: Encode quality (UXP, XP, SP, LP, EP, DLP, DEP))
RESTORE XX : Displayed when executing disc recovery. XX: Progress (%)
Display of the Setup Menu
Menu items and setting values from the Setup Menu are displayed. (XPage 64)
Event messages
Messages relating to incorrect operation and the like are displayed for approximately 3 seconds.
(XPage 19)
Alarm messages
Alarms are displayed when the DVD recorder cannot obey a command. (XPage 20)
2

E-17
LCD Display and On-Screen Content
On-Screen Content
In addition to E-E and playback screens, the monitor connected to the DVD recorder’s VIDEO LINE OUT terminal can display the
following.
•Status messages
•Event messages
•Alarm messages
•The Setup Menu (XPage 63)
Status Messages
The DVD recorder’s setting condition and operation status are indicated by status messages, and these messages are displayed
on E-E or playback screens.
The DISPLAY MENU screen can be used to indicate whether or not status messages are to be displayed.
To display status messages:
Set DISPLAY from the DISPLAY MENU screen to ON.
The various items of status information for display can be selected.
If DISPLAY is set to OFF, no status information will be displayed.
No. Item Description
1Operation Mode This area indicates the DVD recorder’s current mode of operation.
Use RECORDER MODE from the DISPLAY MENU screen to indicate whether or not
this is to be displayed.
NO DISC : The DVD recorder currently contains no disc.
EJECT : The current disc is being ejected.
STOP : Stop mode
REC : Recording mode
REC PAUSE : Recording Pause mode
PLAY : Playback mode
STL : Still mode
FWD >> : Fast-forward playback (low speed)
FWD >>> : Fast-forward playback (high speed)
REV << : Fast-reverse playback (low speed)
REV <<< : Fast-reverse playback (high speed)
SLOW FWD >>> : Slow-forward playback (high speed)
SLOW FWD >> : Slow-forward playback (low speed)
SLOW REV <<< : Slow-reverse playback (high speed)
SLOW REV << : Slow-reverse playback (low speed)
LOADING : A disc is being loaded.
RESTORE : Disc recovery in progress. (XPage 41)
MENU
DISPLAY ON
TITLE/CHAPTER/INDEX TITLE+CHAPTER
RECORDER MODE
TIME+DATE
ON
TIME/DATE
REMAIN ON
DATE STYLE MM/DD/YY
LCD TITLE+CHAPTER
DISPLAY MENU
DISPLAY MENU screen
000 min
04/05/06
11:20:00
TITLE 01 0:11:22
DVD-RW
CHAPTER
01 0:11:22
REC
1
4
5
2
3
Status Messages
Data relevant to record-
ing:
If the SET UP button is
pressed while in Record-
ing mode, the video
encode quality and the
audio encoding format will
be displayed. If the SET
UP button is then pressed
once again, this informa-
tion is removed from the
screen.

E-18
LCD Display and On-Screen Content
On-Screen Content (continued)
No. Item Description
2Title number /
Chapter number /
Index number /
Counter
Use TITLE/CHAPTER/INDEX from the DISPLAY MENU screen to indicate whether
or not this is to be displayed.
OFF : No information is displayed
TITLE+CHAPTER: Title No., chapter No. and elapsed time of a title (hr: min: sec)
are displayed.
INDEX+TITLE : Index No. and elapsed time of a title (hr: min: sec) are dis-
played.
* When the PLAYBACK & 232C TYPE item on the SYSTEM MENU (1/2) screen is
set to VTR, the elapsed time and index No. will represent the total time and total
number respectively as accumulated from Title 1. (XPage 68)
3Date / Time Use TIME/DATE from the DISPLAY MENU screen to select the way in which the
date and time are displayed.
OFF : No information is displayed.
DATE : Only the date is displayed.
TIME : Only the time is displayed.
TIME+DATE : Both date and time are displayed.
•The date display style can be changed using DATE STYLE from the DISPLAY
MENU screen.
Recording mode : The date and time from the internal clock are displayed.
Playback mode : The date and time of disc recording are displayed.
4Remaining time Use REMAIN from the DISPLAY MENU screen to indicate whether or not this is to
be displayed.
Recording mode : The amount of video that can still be recorded on the current
disc is displayed (in minutes).
Playback mode : Not displayed
* Remaining time is to be used as a general guide, not as an exact figure.
5DISC STATUS /
Index display
When a disc is inserted into the DVD recorder, one of the following disc status is dis-
played on the monitor screen. (Approximately 3 seconds)
DVD-R : The current disc is a non-finalized DVD-R.
DVD-RW : The current disc is a non-finalized DVD-RW.
DVD+R : The current disc is a non-finalized DVD+R.
DVD+RW : The current disc is a non-finalized DVD+RW.
DVD : The current disc is a finalized DVD-R/DVD-RW/DVD+R/DVD+RW.
CD-R : The current disc is a non-finalized CD-R.
CD-RW : The current disc is a non-finalized CD-RW.
CD : The current disc is a finalized CD-R or CD-RW.
INVALID DISC : A disc other than specified was inserted.
(Displayed while being inserted.)
•The following will be displayed when index is recorded or erased. (3 seconds)
INDEX WRITE : Displayed when writing index. (This is not displayed if TITLE/
CHAPTER/INDEX item from the DISPLAY MENU screen is set
to INDEX+TITLE or LCD item is set to INDEX.)
INDEX ERASE: Displayed when erasing index.
This is not displayed if DISPLAY item from the DISPLAY MENU screen is set to OFF.

E-19
LCD Display and On-Screen Content
Event Messages
Event messages are displayed on the DVD recorder’s LCD display and on the monitor when incorrect operations are attempted.
These messages will remain on-screen for approximately 3 seconds.
Monitor message LCD display
message Description
INVALID TV INVALId TV A signal of an invalid format has been input.
Alternatively, an attempt has been made to play a disc containing signals of an
invalid format.
TITLE FULL TITLE FULL Recording was attempted on a disc already containing 99 titles.
INDEX FULL INdEX FULL An attempt was made to add a index to a title already containing 99 indexes.
CHAPTER FULL CHAP FULL An attempt was made to add a chapter to a title already containing 99 chapters.
NOT FINALIZE NoT FINAL An attempt was made to eject a disc before it was finalized.
A L-xxxx-R Set value is displayed when changing the recording level of analog audio.
d L-xxxx-R Set value is displayed when changing the recording level of digital audio.
OPE LOCK oPE LoCK This is displayed when buttons on this unit are operated while the Operation Lock is
activated. Operation Lock can be canceled by setting the OPERATION LOCK item
on the SYSTEM MENU (2/2) screen to OFF.
IMAGE FULL IMAgE FULL This is displayed when a still image is captured if more than 1000 still images have
already been captured.
NOT WRITABLE NoT WRITE • This is displayed when the capture operation is performed if 1000 still images
have already been written to disc.
•This is displayed when the capture operation is performed for a finalized disc.
000 min
04/05/06
11:20:00
TITLE 01 0:11:22
CHAPTER
01 0:11:22
REC
TITLE FULL
Event messages:
Displayed when
DISPLAY from the
DISPLAY MENU
screen is set to
ON.
Event message
Monitor screen
LCD display

E-20
LCD Display and On-Screen Content
On-Screen Content (continued)
Alarm Messages
Alarm messages are displayed on the DVD recorder’s LCD display and on the monitor when the recorder cannot obey a com-
mand. These messages will remain on-screen until the next operation is carried out.
CAUTION
If alarm messages such as “INVALID DISC” are displayed several times when a disc recorded using this DVD recorder or a
blank disk is inserted, there is a possibility that the disc itself has been damaged. In such a case, the damaged disc should be
replaced with a new one.
If the alarm messages continue to appear after replacing the disc, the problem may lie within the DVD recorder, and in such a
case, you are recommended to contact either the store where this DVD recorder was purchased or your JVC authorized dealer.
Monitor message LCD display
message Description
INVALID DISC INVALId dISC A disc other than specified was inserted.
NOT SUPPORT
DISC
NoT SUPPoRT A disc recorded using a different DVD recorder was inserted or played.
REC INHIBIT REC INH • Recording was attempted using a disc on which no more data can be recorded.
•The current disc is a non-finalized disc to which no more data can be recorded.
COPY INHIBIT CoPY INH Recording of a copy-protected signal was attempted.
DISC FULL dISC FULL All remaining space on the disc is used up during recording.
CELL OVER CELL oVER The number of cells for a single title exceeded 255.
This will be displayed when the recording time for a single title is exceeded as a
result of setting ENCODE QUALITY to a low quality, recording content with little
movement, or other similar factors.
OVERHEATING! oVERHEATING Displayed when the internal temperature of the set rises due to fan malfunction, etc.
In this case, immediately turn off the power and discontinue use. The power will
automatically shut down in about 20 minutes after the OVERHEATING display.
INVALID SYNC INVALId SYNC This is displayed if recording is discontinued when signals are interrupted and out of
sync during recording.
ERRoR This is displayed when playback or recording is stopped due to dirt or damage on the
disc. In this case, either clean the disc or replace it.
FAN STOP FAN SToP This is displayed when the fan stops.
000 min
04/05/06
11:20:00
TITLE 01 0:11:22
CHAPTER
01 0:11:22
REC
REC INHIBIT
Alarm messages:
Displayed when
DISPLAY from the
DISPLAY MENU
screen is set to
ON.
Alarm message
LCD display
Monitor screen
Other manuals for BD-X201MS
1
Table of contents
Languages:
Other JVC DVD Recorder manuals

JVC
JVC DRMV77S - DVDr/ VCR Combo User manual

JVC
JVC DR-MH200SE User manual

JVC
JVC BD-X201M User manual

JVC
JVC DR-DX5SE User manual

JVC
JVC DR-DX5SU User manual

JVC
JVC DR-MV1S User manual

JVC
JVC BD-X200U - Dvd Authoring Recorder User manual

JVC
JVC BD-X200U - Dvd Authoring Recorder User manual

JVC
JVC HR-XVC24SUC User manual

JVC
JVC DR-MH50S User manual