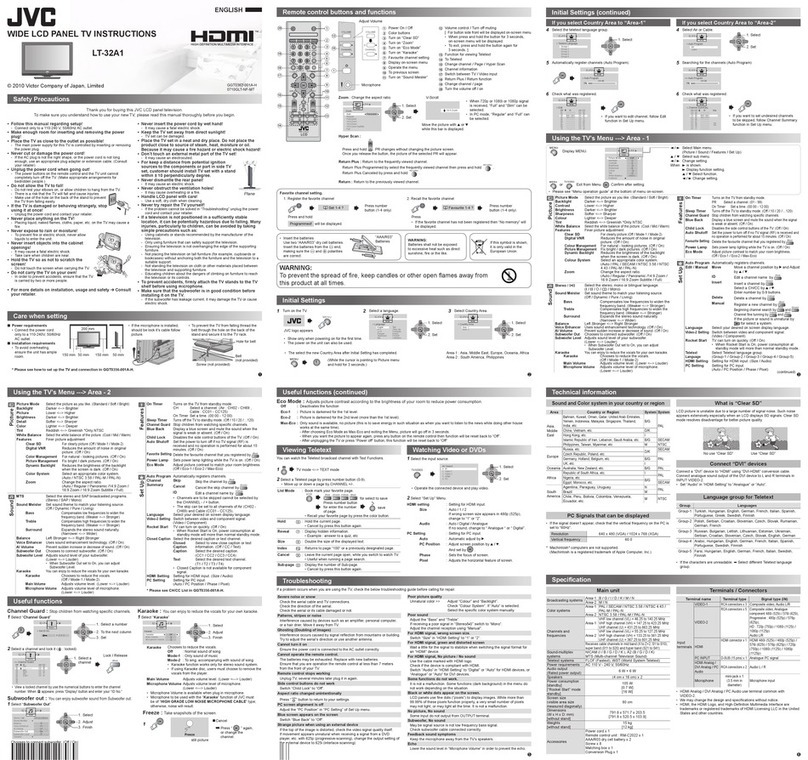
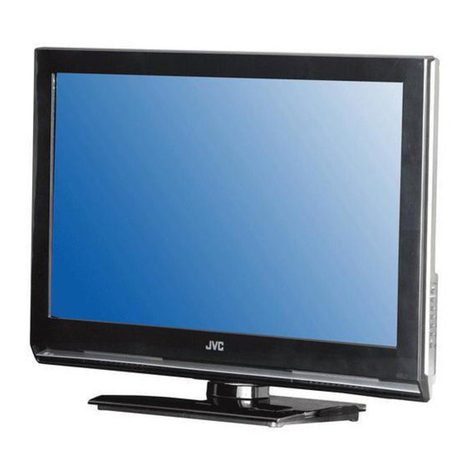
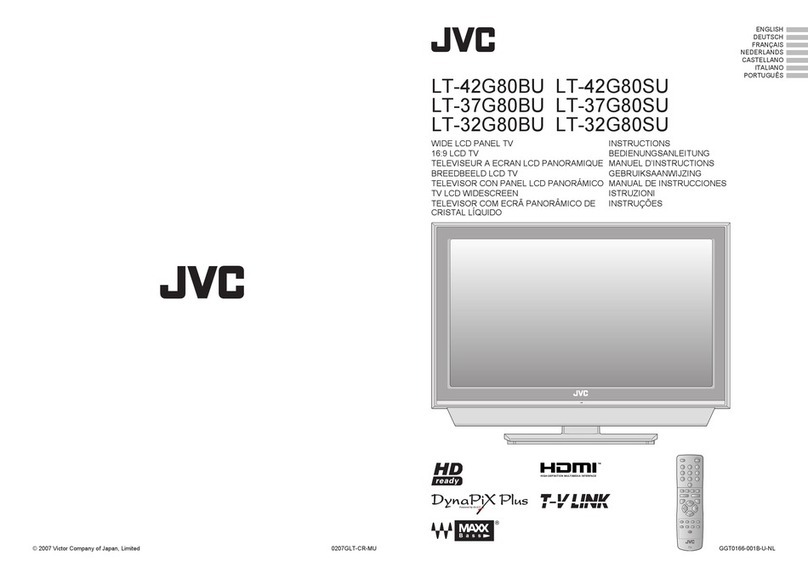
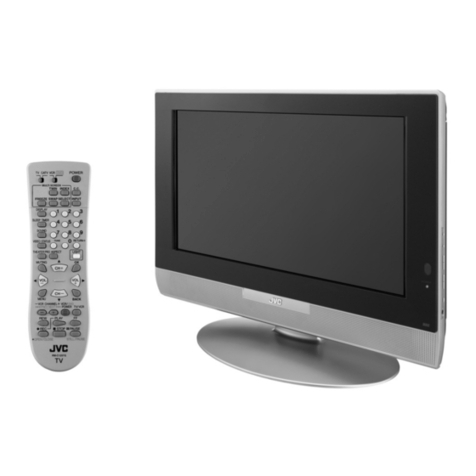
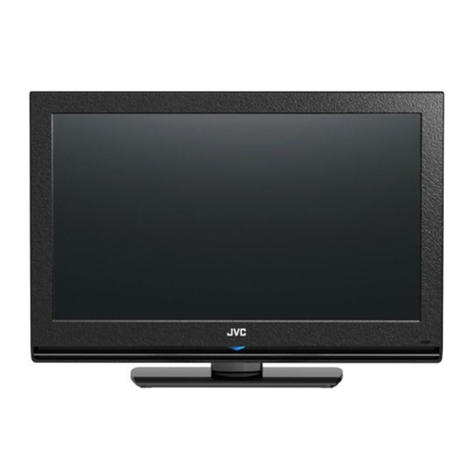
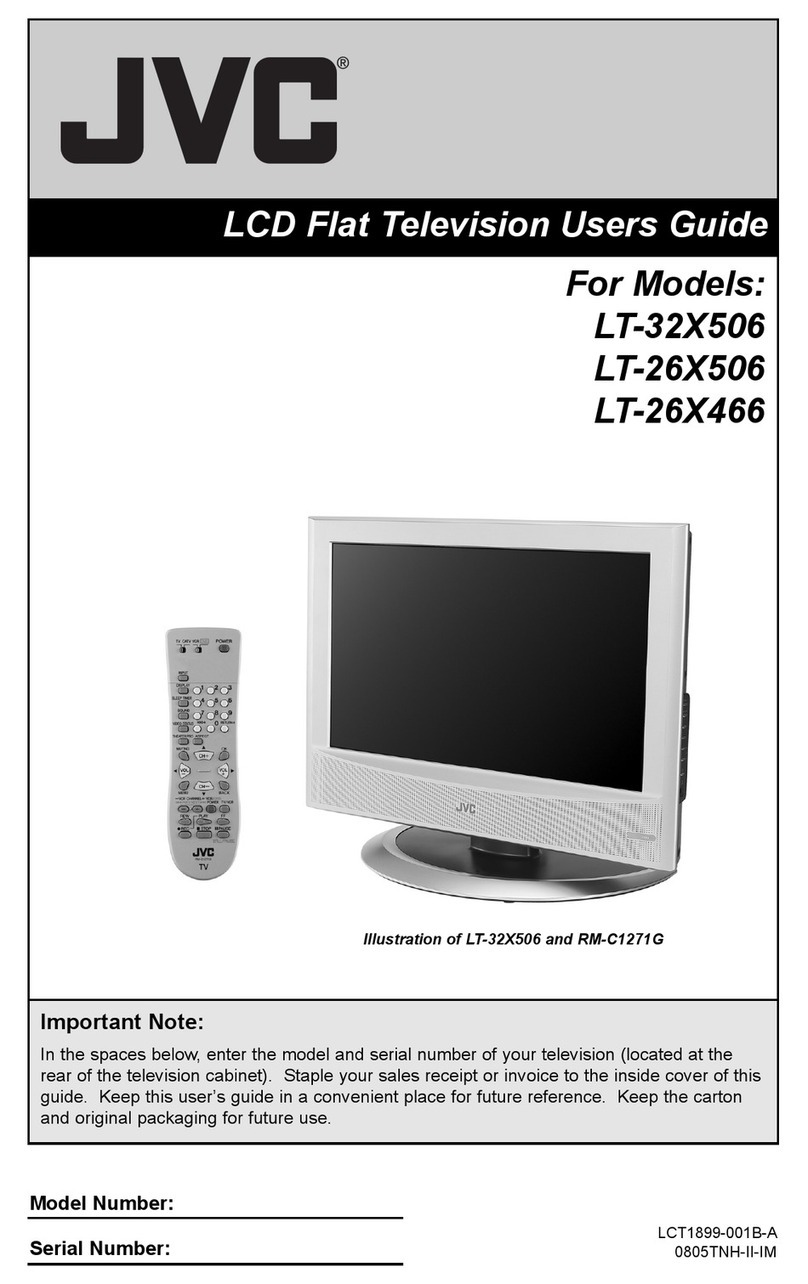
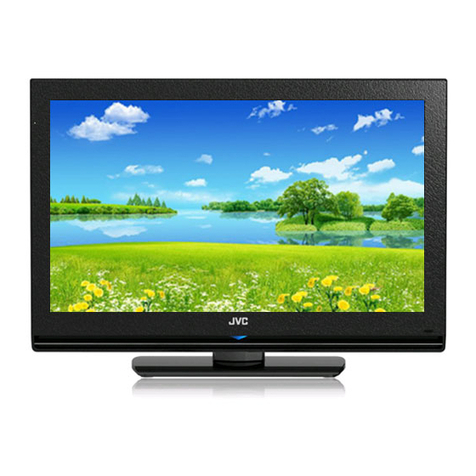
JVC LT-32DE9BU User manual

LT-32DE9BU
LT-26DE9BU
DEUTSCHFRANÇAIS
CASTELLANO
ITALIANO
NEDERLANDS
PORTUGUÊS
ČESKYMAGYARPOLSKIΕΛΛΗΝΙΚΑROMÂNĂ
LCD-FLACHBILDFERNSEHERLCD-FLACHBILDFERNSEHER
TELEVISEUR LCD A ECRAN PLATTELEVISEUR LCD A ECRAN PLAT
TV PLANO LCDTV PLANO LCD
TV LCD A SCHERMO PIATTOTV LCD A SCHERMO PIATTO
LCD FLAT TVLCD FLAT TV
PLOCHÝ LCD TELEVIZORPLOCHÝ LCD TELEVIZOR
Síkképernyős LCD TV-készülékSíkképernyős LCD TV-készülék
PŁASKI TELEWIZOR LCDPŁASKI TELEWIZOR LCD
ΕΠΙΠΕΔΗ ΤΗΛΕΟΡΑΣΗ LCDΕΠΙΠΕΔΗ ΤΗΛΕΟΡΑΣΗ LCD
TV LCD PLATTV LCD PLAT
ANWEISUNGENANWEISUNGEN
INSTRUCTIONSINSTRUCTIONS
INSTRUCCIONESINSTRUCCIONES
ISTRUZIONIISTRUZIONI
INSTRUCTIESINSTRUCTIES
INSTRUÇÕESINSTRUÇÕES
POKYNYPOKYNY
UTASÍTÁSOKUTASÍTÁSOK
INSTRUKCJEINSTRUKCJE
ΟΔΗΓΙΕΣΟΔΗΓΙΕΣ
INSTRUCŢIUNIINSTRUCŢIUNI
Trade Mark of the DVB Digital Video Broadcasting
Project (1991 to 1996) Number : 5229 : LT-32DE9BU
5230 : LT-26DE9BU

GB-1
Information for Users on Disposal of Old Equipment ENGLISH
[European Union]
Attention:
(Business users)
[Other Countries outside the European Union]
Benutzerinformationen zur Entsorgung alter Geräte DEUTSCH
[Europäische Union]
Hinweis:
(Geschäftskunden)
[Andere Länder außerhalb der Europäischen Union]
Informations relatives à l’élimination des appareils usagés, à
l’intention des utilisateurs FRANÇAIS
[Union européenne]
Attention :
(Utilisateurs professionnels)
[Pays ne faisant pas partie de l’Union européenne]
Informatie voor gebruikers over het weggooien van oude
apparatuur NEDERLANDS
[Europese Unie]
Let op:
(Zakelijke gebruikers)
[Landen buiten de Europese Unie]
Información para los usuarios sobre la eliminación de equipos
usados CASTELLANO
[Unión Europea]
Atención:
(Empresas)
[Otros países no pertenecientes a la Unión Europea]
Informazioni per gli utenti sullo smaltimento delle apparecchiature
obsolete
ITALIANO
[Unione Europea]
Attenzione:
(Per gli utenti aziendali)
[Per altre nazioni al di fuori dell'Unione Europea]
Informações para os Utilizadores sobre a Eliminação de
Equipamento Antigo PORTUGUÊS
[União Europeia]
Atenção:
(utilizadores profissionais)
[Outros países fora da União Europeia]
Informasjon til brukerne om kassering av gammelt utstyr NORSK
[Europeiske Union]
OBS!
(Bedriftsbrukere)
[Andre land utenfor EU]
EN – English
Dear Customer,
This apparatus is in conformance with the valid European directives and standards
regarding electromagnetic compatibility and electrical safety.
European representative of Victor Company of Japan, Limited is:
JVC Technical Services Europe GmbH
Postfach 10 05 04
61145 Friedberg
Germany
DE - Deutsch
Sehr geehrter Kunde, sehr geehrte Kundin,
dieses Gerät stimmt mit den gültigen europäischen Richtlinien und Normen
bezüglich elektromagnetischer Verträglichkeit und elektrischer Sicherheit überein.
Die europäische Vertretung für die Victor Company of Japan, Limited ist:
JVC Technical Services Europe GmbH
Postfach 10 05 04
61145 Friedberg
Deutschland
FR – Français
Cher(e) client(e),
Cet appareil est conforme aux directives et normes européennes en
vigueur concernant la compatibilité électromagnétique et à la sécurité électrique.
Représentant européen de la société Victor Company of Japan, Limited :
JVC Technical Services Europe GmbH
Postfach 10 05 04
61145 Friedberg
Allemagne
IT – Italiano
Gentile Cliente.
Questa apparecchiatura è conforme alle direttive e alle norme europee
relative alla compatibilità elettromagnetica e alla sicurezza elettrica.
Il rappresentante europeo di Victor Company of Japan, Limited è:
JVC Technical Services Europe GmbH
Postfach 10 05 04
61145 Friedberg
Germania
ES – Español
Apreciado cliente,
Este aparato cumple con las normativas y normas europeas respecto a la
seguridad eléctrica y a la compatibilidad electromagnética.
El representante europeo de Victor Company of Japan, Limited es:
JVC Technical Services Europe GmbH
Postfach 10 05 04
61145 Friedberg
Alemania

GB-2
NOTICE
Read this manual carefully and make sure you understand the instructions provided. For your safety, check
what the result of each action will be.
To reduce the risk of electric shock, do not remove cover (or back). No user
serviceable parts inside. Refer servicing to qualified service personnel. Indicates a
situation which, if not avoided, could damage the equipment or other apparatus.
This symbol indicates dangerous voltage inside the TV that presents a risk of electric
shock or personal injury. Indicates a hazardous situation which, if not avoided, could
result in serious injury.
This symbol indicates important instructions accompanying the TV.
Copyright ( © 2008 Victor Company of Japan, Limited)
Not to be copied, used or translated in part or whole without JVC’s prior consent in writing except approval of
ownership of copyright and copyright law.
Warranty
The information in this document is subject to change without notice. JVC does not have any responsibility for direct,
indirect, accidental and other damage caused by the use of the information contained in this manual.
Trademarks
VIACCESS™ is a trademark of France Telecom.
CryptoWorks™ is a trademark of Philips Electronics N.V.
Irdeto is a trademark of Mindport BV.
Nagravision is a registered trademark of KUDELSKI S.A.
Conax is a trademark of Telenor Conax AS.
Thank you for purchasing a JVC TV. Please read this user manual carefully in order to safely install, use and
maintain the TV at maximum performance. Keep this user manual next to your TV to ensure the best performance
possible.

GB-3
GENERAL SAFETY PRECAUTIONS
Power
● Plugthepowercordintothecorrectpoweroutlet.Anunstableconnectionmaycausefire.
● Donotusedamagedpowercordsorplugs,orusealoosewalloutlet.Thismaycauseelectricalshockorfire.
● Donevertouchthepowercordwithwethands.Thismaycauseelectricalshock.
● Donotusemultipledeviceswithoneoutlet.Overheatingtheoutletmaycausefire.
● Donotbendorpulloutthepowercordusingforce,norplaceheavyobjectsoverit.Thismaycauseelectrical
shock or fire.
● Makesureyoupulloutthepowercordholdingtheplugitself.Aninternaldisconnectionmaycausefire.
● Whenremovingtheproduct,turnoffthepowerandpullouttheplugfromthepoweroutlet.Alsomakesureother
devices including the antenna or the connectors are removed from the outlets before relocating the product.
Otherwiseyoumaysufferelectricalshockorfireduetoadamagedpowercord.
● Themainsplugshallremainreadilyoperable.
● Plugasdisconnectiondeviceshallremaintobereadilyapproachedbyuser.
● Makeenoughroomforinsertingandremovingthepowerplug.PlacetheTVasclosetotheoutletaspossible.
● EveniftheTV’spowerlampisunlit,themainpowersupplyisnotcutoffunlessthepowercordisunplugged.
The main power supply is not cut off unless the power cord is unplugged. The main power supply for this TV is
controlled by inserting or removing the power plug.
● IfyoudonotusethisTVforalongperiodoftime,besuretodisconnectthepowerplugfromtheACoutlet.
● Thisisaclass1productsoitshallbeconnectedtoaMainSocketoutletwithaprotectiveearthingconnections.
Installation
● Keeptheproductawayfromanyheatingdevices.Placingitclosetoaheatingdevicemaycausefire.
● Keepthepowercordawayfromanyheatingdevices.Ameltedcoatingmaycausefireorelectricalshock.
● Placetheantennaasfarawayaspossiblefromanyhigh-voltagecables.
Touching the high voltage wiring may cause fire or electrical shock.
● Donotinstalltheproductinoily,smokyorhumid(orexposedtorain/water)placesorautomobiles.Thismay
cause fire.
● Theconnectionbetweentheexternalantennaandtheinternalwiringshouldbeturnedinsidetoavoidanyinflow
of rain. Exposing the LCD to water (rain) will cause electrical shock or fire.
● Donotusetheproductinhumidplaces.Humiditywillshortenthelifeoftheproductandmaycauseanelectrical
shortage or fire.
● Donotusetheproductinplaceswithlowtemperatures(below5°C).
● Avoidinstallingtheproductinpoorlyventilatedplaces.Internaloverheatingmaycauseanelectricalshortageand
fire.
● Besurenottocovertheventilator(withatable-clothorcurtain,etc.).Internaloverheatingmaycauseanelectrical
shortage and fire.
● Donotinstalltheproductinanunstableplaceoronasmallstand.Theproductmaycauseseriousinjury,ifitfalls
on somebody (especially children). Install it on an even, stable place as it is front-heavy.
● Donotinstalltheproductonthefloor.Someone(especiallychildren)maytripoverit.

GB-4
GENERAL SAFETY PRECAUTIONS
Usage
● Unplugtheproductfromthewalloutletanddonottouchtheantennaduringathunderstorm.Thiswillprevent
damage to the unit due to lightning and power-surges.
● Keepdustorwaterawayfromthepinsortouchingpointsofthepowerplug.
This will prevent electrical shock or fire.
● Keepchildrenfromclimbingovertheproduct.Thedevicemaycauseseriousinjuryordeathifitfallsonthem.
● Donotplaceanythingovertheproductthatchildrenmaytrytoreach.Thedevicemaycauseseriousinjuryor
death if it falls on them.
● Whenremovingthebatteryfromtheproduct,keepitoutofchildren’sreach.
If a child swallows a battery, consult a doctor immediately.
● Useonlyspecifiedbatteriesanddonotuseanoldbatteryalongwithanewone.Alignthebatteriesaccordingto
the correct polarity (+ or -). Aligning them incorrectly may cause an internal explosion or a leakage of the internal
liquid, leading to electrical shock, physical damage or pollution of the surroundings.
● Donotinsertanymetaloraflammableobjectoranaliensubstanceintotheventilator,theAVinputterminalsor
the slot for the Modules or Smartcards. This may cause damage to the product and reduce its life span.
● Donotdisassemble,repairorreconstructtheproductatyourdiscretion.Thismaycauseelectricalshockorfire.
Contact your local customer support.
● Keeptheproductawayfrominflammablesprayersorignitableobjects.
Exposure to these may cause explosion or fire.
● Donotplacewater-pots,flowervases,beveragecans,smallmetalsorheavyobjectsovertheproduct.Contact
of these contents with the product may cause electrical shock or fire, while any falling of the product may cause
injury.
● Donotplacenakedflamesource,suchaslightedcandlesovertheproduct.Itmaycauseafire.
● Iftheproductbreaksdown,turnoffthepowerandunplugitfromtheoutletbeforecontactingCustomerSupport.
This will protect you from electrical shock or fire.
● Whenyounoticesomethingstrangelikeanoddnoise,smellsomethingburningorseesmoke,unplugthepower
cord and contact your local Customer Support. Do this to avoid electrical shock or fire.
● DonotusesharptoolssuchasapinorapencilneartheTV,astheymayscratchtheLCDsurface.
● Donotuseasolvent,suchasbenzene,tocleantheTV,asitwilldamagetheLCDsurface.
● DonotmovetheTVorturnthepoweroffsuddenlywhiletheharddiskdriveisrunning.
● Thecompanyshallnotbeliableforanycorruptionofdataontheharddiskdrivecausedbythecarelessnessor
misuse of users.
● Donotseparatetheharddiskdrivefromthemainbody.ContactyourlocalCustomerSupportwhenyouwantto
change the hard disk drive.
Cleaning
● Unplugthepowercordbeforecleaningtheproduct.Thismaycauseelectricalshockorfire.
● Donotsprinklewaterontheproduct.Thismaycauseelectricalshockorfire.
● Useonlyasoftdryclothasthesurfaceisweakonscratch.Donotusechemicalslikewax,benzene,alcohol,
thinners, aroma, lubricator or cleanser.
Handling the glossy finish of the TV
● BecarefulwhenhandlingtheglossyfinishoftheTV.TheglossyfinishoftheTVscratcheseasily.
● ProtectionfilmshavebeenpastedontotheglossyfinishoftheTVtopreventscratches.Peeloffthefilmsafterthe
TV has been placed properly.
● Iftheglossyfinishgetsdirty,clearthedustofftheglossyfinishfirst.Thenwipesoftlywithasoftcloth.Ifyoudo
not clear the dust first, or you wipe the glossy finish too hard the glossy finish may be scratched.

GB-5
TABLE OF CONTENTS
PREPERATION
FrontandSidePanel--------------------------------6
RearandSidePanel--------------------------------8
RemoteControlButtons------------------------------9
ConnectingtheAntenna-----------------------------11
Inserting a CI Module
(Conditional Access Module) (for the digital channels only) - - - -11
CONNECTING EXTERNAL DEVICES
Connecting the DVD or Set-Top Box - - - - - - - - - - - - - - - - - - - -12
ConnectingtheVCR-------------------------------13
Connecting the Camcorder or Game Console - - - - - - - - - - - - -13
ConnectingtheDigitalAudioSystem(InDigitalTVModeOnly) -14
ConnectingHeadphones ----------------------------14
INSTALLATION WIZARD
WizardforDigitalChannels(InDigitalTVModeOnly) -------15
WizardforAnalogChannels(APS)(InAnalogTVModeOnly)- -16
BASIC OPERATION
TurningontheTV---------------------------------17
ChangingChannel---------------------------------17
VolumeControl-----------------------------------17
DisplayingInformation -----------------------------18
DisplayingChannelList ----------------------------19
DigitalProgrammeFeatures(InDigitalTVModeOnly) -------20
Selecting the Main Input Source - - - - - - - - - - - - - - - - - - - - - -21
SettingtheAspectRatio ----------------------------21
Displaying Teletext information - - - - - - - - - - - - - - - - - - - - - - - -22
PROGRAMME GUIDE (In Digital TV mode only)
Changing the Channel List Group- - - - - - - - - - - - - - - - - - - - - -23
MovingtheTimeBar-------------------------------24
Reserving a Recording (Schedule) - - - - - - - - - - - - - - - - - - - - -24
FindingaProgramme ------------------------------25
MENU SETTINGS
PictureSettings ----------------------------------26
SoundSettings-----------------------------------26
InstallationSettings(InAnalogTVModeOnly)-------------27
FeatureSettings----------------------------------27
DTVSetup(InDigitalTVModeOnly) -------------------29
ANALOG CHANNEL SETTINGS (In Analog TV mode only)
AutomaticSearch---------------------------------30
ManualSearch-----------------------------------31
EditChannels------------------------------------31
DIGITAL CHANNEL SETTINGS (In Digital TV mode only)
AutoSearch-------------------------------------32
ManualSearch-----------------------------------33
EditChannels------------------------------------33
RECORDINGAND PLAYBACK (In Digital TV mode only)
Time Shifted Recording (TSR) - - - - - - - - - - - - - - - - - - - - - - - -34
PlaybackControlButtons ---------------------------35
InstantRecording---------------------------------37
Descrambling and Re-recording - - - - - - - - - - - - - - - - - - - - - - -37
RecordingSchedule -------------------------------38
Programme Playback in the Play List - - - - - - - - - - - - - - - - - - -39
ChasePlay--------------------------------------40
Editing Recorded Programmes- - - - - - - - - - - - - - - - - - - - - - - -41
HDDControl -------------------------------------43
Recording’sStart/EndTime --------------------------43
DTV CONFIGURATION (In Digital TV mode only)
ParentalControl----------------------------------44
LanguageSetting---------------------------------44
TimeSetting-------------------------------------45
MiscellaneousSettings -----------------------------45
DTV SOFTWARE UPDATE (In Digital TV mode only)
AutomaticUpdate---------------------------------46
ManualUpdate-----------------------------------46
Regular Auto Update and Search Time - - - - - - - - - - - - - - - - - -47
APPENDIX
MenuMap --------------------------------------48
Troubleshooting ----------------------------------49
ErrorMessage -----------------------------------51
Specifications------------------------------------52

GB-6
Front and Side Panel
Here the shown illustration is LT-32DE9BU model and may be somewhat different from your TV.
Accessories
Please check that the following accessories are included with your TV.
Note: Package contents may vary according to area.
Remote control
(RM-C2111B)
Inserting Batteries
Insert two AA size batteries ensuring that the plus(+) and minus(-)
signs of the batteries are correctly aligned.
Pull
Insert
NOTE: Do not mix different battery types such as alkaline with
manganese.
AA batteries (X2)
User’s manual
Power cord
NOTE: Stand and screws are also included. For details, refer to page 7. (only for LT-32DE9BU).
PREPERATION
Changes input source.
Displaysmenu/confirmsselection.
Changeschannel/movesselection.
Adjustsvolume/movesselection.
PowerOn/Off
Power lamp
ON:Lit(Blue)/STANDBY:Unlit/REC:Lit(Red)
Remote control sensor

GB-7
PREPERATION
When attaching the TV to the wall, use the optional JVC wall
mounting unit (only for LT-32DE9BU)
• Consult a qualified technician.
• See the included manual on mounting procedures.
• JVC assumes no responsibility for damage due to improper mounting.
• Mountingholesforwallmountingunit:M5x4,200mmx200mm
Depthofscrewholes:13.7mmfromthesurfaceoftheTV
Installation requirements
To avoid overheating, ensure the unit has ample room.
Stand Installation (only for LT-32DE9BU)
Assemble the TV as shown.
Fix the 4 screws securely using the holes in the back of the TV.
Note: To prevent scratches on the panel, lay a piece of soft cloth on an even platform and place the TV onto it.

GB-8
PREPERATION
Rear and Side Panel
External AV Terminals by Model
SCART
Input/Output
COMPONENT
Input COMPOSITE
Input S-VIDEO
Input HDMI
Input
LT-26DE9BU EXT-1, EXT-2 EXT-3 EXT-4 EXT-4S EXT-5,EXT-6
LT-32DE9BU EXT-1, EXT-2 EXT-3 EXT-4 EXT-4S EXT-5,EXT-6,EXT-7
CI (Common Interface) SLOT
A slot for a CI Module
(Conditional Access Module).
HDMI INPUT
ConnecttotheHDMIoutputsofDVDorSTB.
H/P
Connects to headphones.
AC INPUT
Connects the power cord.
SCART INPUT/OUTPUT
ConnecttotheSCARTinput/output
of VCR, DVD or STB.
COMPONENT INPUT
Connect to the component
outputs of DVD or STB.
RF INPUT
Connects to an antenna or a
cable system.
DIGITAL AUDIO OUT (OPTICAL)
Connects to a digital audio component
(Digital TV audio output only).
COMPOSITE INPUT
Connect to the Composite video and audio outputs of VCR.
S-VIDEO INPUT
Connect to the S-video output of VCR or DVD.
Not available
(Service only)
Heretheshownillustrationis
LT-32DE9BU model and may be
somewhat different from your TV.

GB-9
PREPERATION
Remote Control Buttons
Coloured Buttons
Used for interactive applications in
the EPG, Edit Channels and Teletext
mode.
MENU
DisplaystheOnScreenDisplay(OSD)
menu.
BACK
Returns to the previous display.
OK/LIST
Confirms (save or enter) your choice in
theOnScreenDisplay(OSD)menuor
displays the channel list.
Arrow (▲/▼/◄/►) Buttons
ControlstheselectionintheOnScreen
Display(OSD)menu.
(Information)
Displays information on the current
channel or input.
GUIDE
Displays the Electronic Programme
Guide (EPG) in Digital TV input.
PLAYLIST
Displays the recorded programme list.
SCHEDULE
Displays the reserved prgramme list.
P /
Switches channels.
VOL+/-
Adjusts the volume.
(Power On/Off)
Switches between operation and
standby modes.
AV
Changes input sources.
(MUTE)
Mutes the sound.
TV/DTV
Switches between digital TV and
analog TV modes.
PIC MODE
Selects the picture mode.
(DUAL SOUND)
Selects the sound mode (Stereo,
Mono, etc.) in Analog TV input or the
soundtrack list in Digital TV input.
(SUBTITLE)
Selects the subtitle language in Digital
TV input.
TV/RADIO
Switches between digital TV and Radio
modes.
SLEEP
Selects a preset time interval for
switching the TV to standby mode
automatically.
ZOOM
Select the aspect ratio.
Number Buttons
Enters the channel number for direct
display. Used to enter digit numbers.
No function button

GB-10
PREPERATION
TELETEXT Function Buttons
TEXT ON/OFF
Activates or deactivates the teletext
service.
MIX
Overlapstheteletextwiththe
broadcasting screen.
Adjusts the opacity to the background
in Teletext mode.
(INDEX)
Displays the teletext index page.
(CANCEL)
Displays the TV programme when
searching for the new teletext page.
(REVEAL)
Shows the hidden information.
F.T/L (MODE)
Selectstheteletextmode(LIST/FLOF)
(SIZE)
Displays the double-size letters.
(HOLD)
Holdsthecurrentteletextpagenot
updating it.
(SUBPAGE)
Displays the availale sub-page.
Playback Control Buttons
(only in Digital TV input)
REPLAY
Jumps back 7 seconds (default value)
and starts playing again in trick play
mode.
SKIP
Skips watching the programme for 30
seconds (default value) forward.
SLOW
Plays the programme in slow motion
mode.
(STOP)
Stops recording or playback and go to
the live programme.
(RECORD)
Records programmes or sets time to
end recording.
/
(PLAY/PAUSE)
Plays at normal speed or pauses the
live programme.
(FAST FORWARD)
Fast forward at high speed. Each
time you press this button the fast
forwarding speed increases.
(FAST REWIND)
Rewinds at high speed. Each time you
press this button the fast rewinding
speed increases.
BOOKMARK ADD
Sares the current viewing position as
a bookmark.
BOOKMARK JUMP
Displays the list of saved viewing
positions.
(A-B Repeat)
Plays back a specified block repeatedly.
No function button

GB-11
PREPERATION
Connecting the Antenna
1 Connect the RF coaxial cable from an aerial or a cable TV to the RF jack on the rear of the TV.
NOTE
For proper reception of signals, an external antenna is required. For best reception, an outdoor antenna is recommended.
To improve the picture quality in a poor signal area, please purchase a signal amplifier and install properly.
Inserting a CI Module (Conditional Access Module)
(for the digital channels only)
CI Module looks like a PC Card (called PCMCIA) for laptops. There are different kinds of CI Module suitable for
different coding systems.
1 Follow the instructions of the module and insert a Smartcard into the CI Module.
2 Keep the CI Module (with a Smartcard) vertically.
3 Insert the CI Module completely into the CI slot on the side of the TV.
NOTE: Ensure the Smartcard or CI Module is inserted in the right direction. Inserting in the wrong direction may cause
damage to the Smartcard or CI Module.
▪
▪
Aerial
CI Module
(ConditionalAccess Module)
Smartcard
Heretheshownillustrationis
LT-32DE9BU model and may be
somewhat different from your TV.

GB-12
Connecting the DVD or Set-Top Box
With a SCART cable
Connect the SCART cable between the SCART connector (EXT-1 or EXT-2) on TV and the SCART connector of
DVD or STB.
With a component cable
Connect the component video and audio cable between the component video and audio input connectors (EXT-3) on
TV and the component video and audio output connectors of DVD or STB.
NOTE: Dependingonthemanufacturer,theY/Pb/PrjacksmaybeidentifiedasY/PB/PR,Y/B-Y/R-YorY/CB/CR.
With an HDMI cable
ConnecttheHDMIcablebetweenthe(EXT-5, EXT-6 or EXT-7)onTVandtheHDMIoutputconnectorofDVDor
STB.
NOTE: AllHDMIinputssupportDVIvideobutonlyfirstHDMIinput(EXT-5)supportsDVIaudiothroughcomponentaudio
input (EXT-3).
SCARTInput/Output COMPONENTInput HDMIInput
LT-26DE9BU EXT-1, EXT-2 EXT-3 EXT-5,EXT-6
LT-32DE9BU EXT-1, EXT-2 EXT-3 EXT-5,EXT-6,EXT-7
CONNECTING EXTERNAL DEVICES
HDMI
SCART
COMPONENT
DVD
STB
Heretheshownillustrationis
LT-32DE9BU model and may be
somewhat different from your TV.

GB-13
CONNECTING EXTERNAL DEVICES
Connecting the VCR
With a SCART cable
Connect the SCART cable between the SCART connector (EXT-1 or EXT-2) on TV and the SCART connector of
VCR.
With a composite cable
Connect the composite video and audio cable between the composite video and audio input connectors (EXT-4) on
TV and the composite video and audio output connectors of VCR.
With a S-video cable
Connect the S-video and audio cable between the S-video and audio input connectors on TV (EXT-4) and the
S-Video and audio output connectors of VCR.
NOTE: ThecompositevideoandS-VideoshareAudio-L/RinEXT-4onside.
Connecting the Camcorder or Game Console
With a composite cable
Connect the composite video and audio cable between the composite video and audio input connectors (EXT-4) on
TV and the composite video and audio output connectors of camcorder or game console.
SCARTInput/Output COMPOSITEInput S-VIDEOInput
LT-26DE9BU EXT-1, EXT-2 EXT-4 EXT-4S
LT-32DE9BU EXT-1, EXT-2 EXT-4 EXT-4S
Heretheshownillustrationis
LT-32DE9BU model and may be
somewhat different from your TV.
VCR
SCART
S-VIDEO
Camcorder / Game consoles / VCR
Cable of COMPOSITE
Cable of S-Video
COMPOSITE

GB-14
CONNECTING EXTERNAL DEVICES
Connecting the Digital Audio System (In Digital TV Mode Only)
DIGITAL AUDIO OUT (OPTICAL)
Connect the optical cable between the DIGITAL AUDIO OUT (OPTICAL) on TV and the composite optical audio
input connector of digital audio system.
Connecting Headphones
Connect a set of headphones to HP on TV if you want to watch a television programme without disturbing other
people close to you.
NOTE: Prolonged use of headphones at a high volume may cause health damage on your ears.
Headphone
Digital Audio System
Not available
(Service only)
Heretheshownillustrationis
LT-32DE9BU model and may be
somewhat different from your TV.

GB-15
INSTALLATION WIZARD
Wizard for Digital Channels (In Digital TV Mode Only)
The installation wizard for digital channels will appear automatically when you perform the followings;
● TurningonyourTVforthefirsttimeafterpurchase.(Refertop.17)
● PerformingthedefaultsettinginDTV Setup > Installation menu when Digital TV mode. (Refer to p.29)
NOTE:
This wizard is available in Digital TV mode only.
The options given of the installation wizard may vary according to area.
If you exit the installation wizard without fully completing the channel searching procedure, you may not have all of the
channels available. In this case, you can use the DTV Setup > Installation menu to search for more channels.
1 Language:Selectthemainlanguage.
2 Area Setting:Selectthecountry.
3 Channel Search
Please wait for finishing the channel search. If you want to stop during search, press the OK button.
If the channel search is stopped or finished, you can edit the found channels.
• Select All:Selectallthefoundchannels.
• Unselect All:Unselectallthefoundchannels.
• Delete:Deletetheselectedchannels.
Select Save and press the OK button to save the result.
4 Time Setting:SettheGMToffsetforcurrenttime.
NOTE: The current time is set automatically whenever GMT offset changes.
5 Result:Afterallsettingsarecompleted,youcanviewtheresultscreen.SelectFinish and press the OK button
to complete the installation wizard.
▪
▪
▪
4
Back
Time Setting
GMT Oset
Next
Auto
5
Back
Result
Language : English
Country : Germany
Search Result
TV : 7 Channels
Radio : 3 Channels
Total : 10 Channels
Time : Auto
Finish
2
Area Setting
Back
Next
Country Germany
Auto Search
Select All
Save
Unselect All
Delete
Total
3
All
1
Language

GB-16
INSTALLATION WIZARD
Wizard for Analog Channels (APS)(In Analog TV Mode Only)
Firstly, switch to Analog TV input mode using the AV or TV/DTV button.
WhenyouperformthedefaultsettinginFeature menu, the installation wizard for analog channels will appear
automatically. (Refer to p.27)
NOTE: The default PIN code is 0000. If you have forgotten the PIN code, please contact your local TV distributor.
1 Selectthemainlanguageandcountryusingthe◄/►button.
2 Select Channel Search and press the OK button.
Please wait for finishing the channel search. If you want to stop
during search, press the BACK button.
If the channel search is stopped or finished, you can edit the found
channels.
• Skip:SetsthechanneltobeskippedusingtheRED button.
• Move:ShiftsthechannelusingtheGREEN button.
• Delete:DeletesthechannelusingtheYELLOW button.
NOTE:
If you do not want to setup the channels at this time, you can setup it later using the Installation menu.
If you connect an active antenna to the TV, you have to set the Antenna Power to Ontosupplythe5Vpowerinto
antenna. The default value is Off.Active antenna is a portable or indoor antenna which needs power supply from the
product because it does not have power cord for itself.
▪
▪
APS
Language
An tenn a Po wer
C ou nt r y
Channel Search
English
Off
Ger m any
Analog Channel Found 25
Sca n Pro gre ss 80 %
Stop

GB-17
Turning on the TV
1 Firstly, connect the power cord correctly. At this stage, the TV switches to standby
mode.
2 In standby mode to turn TV on, press the POWER, TV/AV or P / button on the
TV or press the POWER, AV, TV/DTV,P / or NUMBER button on the remote
control and the TV will switch on.
Changing Channel
1 Press the P / button or enter the channel number using the NUMBER buttons to
move to the channel directly.
2 Press the TV/RADIO button to switch between digital TV channels and radio
channels.
3 Press the TV/DTV button to switch between analog TV channels and digital TV
channels.
4 Press the BACK button to return to the previous channel.
NOTE: Youcanswitchchannelsusingthechannellistorprogrammeguide.
Volume Control
1 Press the VOL+/- button to adjust the audio volume.
2 Press the MUTE button to stop the audio temporarily.
NOTE: The mute function remains set while you switch channels.
BASIC OPERATION

GB-18
BASIC OPERATION
Displaying Information
Programme Information (i- plate) (In Digital TV Mode Only)
Programme information is displayed for a certain period of time whenever you switch channels.
Youcanviewtheprogrammeinformationbypressingthe button while watching a
programme.
The information is displayed as follows on the screen.
1 Channel number and channel name
2 Programme name
3 Icons
REC
MHP
13
Reserved programme
REC
MHP
13
Subtitle information
REC
MHP
13
Locked channel
REC
MHP
13
Teletext information
REC
MHP
13
Scrambled channel
REC
MHP
13
Parental control level (minimum age for viewing)
REC
MHP
13
Compressed bitstream audio signal
REC
MHP
13
Programme on recording
4 Current time
5 Detailedprogrammeinformation:Pressthe button again to view detailed information.
6 Current channel list
7 Programme broadcasting time and progress bar
8 Nextprogrammeinformation:Pressthe►buttontodisplaythenextprogrammeinformation.

GB-19
BASIC OPERATION
Simple Information (except for Digital TV Mode)
Youcanviewtheinformationsuchasthechannelnumber(orinputsource),andsoundmode(orsourceresolution)
by pressing the button while watching an analog TV channel or external input source.
P 11 -----
Mono EXT-1 EXT-3
720 x 480p
P 11 -----
Mono EXT-1 EXT-3
720 x 480p
P 11 -----
Mono EXT-1 EXT-3
720 x 480p
▲AnalogTVInput ▲ExternalInput
(SCART, Composite, S-Video) ▲ExternalInput
(Component,HDMI)
Press the button again to view the current time at the top right hand corner of the screen.
NOTE: Wheneveryouswitchchannels,thisinformationisdisplayedforacertainperiodoftime.
Displaying Channel List
Press the LIST button while watching a programme to display the channel list.
Tochangethechannel,selectachannelusingthe▲/▼buttonandpresstheOK button.
Channels
▲Digital Channel List
(InDigitalTVModeOnly)
▲Analog Channel List
(InAnalogTVModeOnly)
For Digital Channel List
● DigitalChannelListisprovidedinthreetypesasfollowsforeasyandquickchannelbrowsing;TV, Radio or
Favourite channel list. And also you can select Playlist to display the recorded programme list. (Refer to p.39)
● Pressthe►buttontochangeachannellistgroup.
● Youcanmovetothechannelyouwantbyenteringthechannelnumberdirectly.
● PresstheP / buttontomovetotheprevious/nextpage.
● PresstheTV/RADIO button to switch between TV and radio channel list.
● Todisplayscrambleicon(
REC
MHP
13
) in the channel list, select On in DTV Setup > Configuration > Miscellaneous
Settings > Option in CH List menu.
This manual suits for next models
1
Table of contents
Other JVC Flat Panel TV manuals

JVC
JVC LT-20B70BE Quick start guide

JVC
JVC LT-37DS6BJ User manual

JVC
JVC HD-58DL8U User manual

JVC
JVC AV-21MS30 User manual

JVC
JVC LS20C70BU User manual

JVC
JVC InteriArt LT-20E50SU User manual

JVC
JVC InteriArt LT-20C70BU User manual

JVC
JVC GGT0359-001A-H User manual

JVC
JVC LCT1691-001A-A User manual

JVC
JVC LT-17B60SU User manual

JVC
JVC PD-42DX6BJ User manual

JVC
JVC LT-17B60SU User manual

JVC
JVC GGT0211-002A-H User manual

JVC
JVC InteriArt LT-20DA6SSP User manual

JVC
JVC 0807TNH-II-IM User manual

JVC
JVC LT - 32EX18 User manual

JVC
JVC LT-Z37DX7 User manual

JVC
JVC LT-20B60SU User manual

JVC
JVC InteriArt LT-17D50BK User manual

JVC
JVC DynaPix LT-26DR7SJ User manual