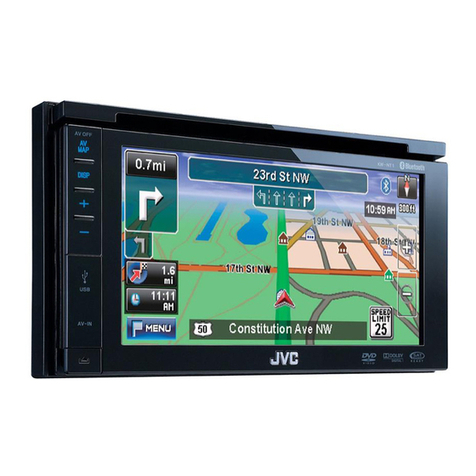
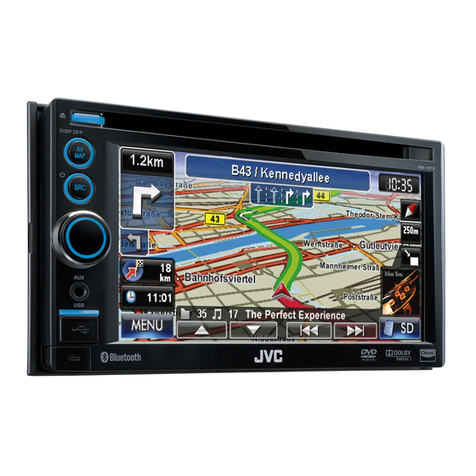
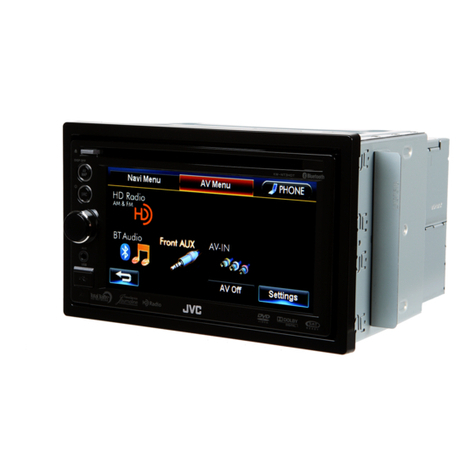
JVC KW-NT1 - Navigation System With DVD player User manual

GPS NAVIGATION SYSTEM
KW-NT1
KW-NT1
KW-NT1
=
=
=
~
-
.Jye
Microsoft«
Windows"
Powered
,.
-,.
SYSTEME DE NAVIGATION GPS
SISTEMA DE NAVEGACION GPS
.Ive
[I]
DOLBY
D1IGITAl
I
~~
~~
For
installation
and
connections,
refer
to
the
separate
manual.
Para
la
insta!aci6n
y
las
conexiones,
refierase
al
manual
separado.
Pour
I'installation
et
les
raccordements,
se
referer
au
manuel
separe.
INSTRUCTIONS
MANUAL
DE
INSTRUCCIONES
MANUEL D'INSTRUCTIONS
For
customer
Use:
Enter
below
the
Model
No.
and
Serial
No.
which
are
located
on
the
top
or
bottom
of
the
cabinet.
Retain
this
information
for
future
reference.
Model
No.
Serial
No.
LVT1982-001 A
[J]

Thank
you
for
purchasing
a
JVC
product.
Please
read
all
instructions
carefully
before
operation,
to
ensure
your
complete
understanding
and
to
obtain
the
best
possible
performance
from
the
unit.
IMPORTANT
FOR
LASER
PRODUaS
1.
CLASS
1
LASER
PRODUCT
2.
CAUTION:
Do
not
open
the top
cover.
There
are
no
user
serviceable
parts
inside
the
unit;
leave
all
servicing
to
qualified
service
personnel.
3.
CAUTION:
(For
U.S.A.)
Visible
and/or
invisible
class
II
laser
radiation
when
open.
Do
not
stare
into
beam.
(For
Canada)
Visible
and/or
invisible
class
1M
laser
radiation
when
open.
Do
not
view
directly
with
optical
instruments.
4.
REPRODUCTION
OF
LABEL:
CAUTION
LABEL,
PLACED
OUTSIDE
THE
UNIT.
CAUTION
ATTENTION
AVISO
VARNING
;1:.
CAUTION
VISIBLE
AND
/
OR
RAYONNEMENT
LASER
RADIACION
LASER
SYNUG
OCH
I
ELLER
;:;:~!lI
<I:
DJll
VISIBLE
AND!
OR
INVISIBLE
CLASS
1M
VISIBLE
ETI
OU
DE
CLASE
1M
OSYNUG
IUJ/~t:IHDJIl
INVISIBLE
CLASS
D
LASER
RADIATION
INVISIBLE
DE
CLASSE
VISIBlE
YIO
INVISIBLE
LASERSTRALNING,
~'J?A1M
LASER
RADIATION
WHEN
OPEN.
DO
NOT
1M
UNE
FOIS
OUVERT.
CUANDO
ESTA
KLASS
1M,
NAR
DENNA
v-'J'-jljjiJl
WHEN
OPEN.
VIEW
DIRECTLY
WITH
NE
PAS
REGARDER
ABIERTO.
NO
MIRAR
oa.
AR
OPPNAD.
Wit.
DO
NOT
STARE
OPTICAL
INSTRUMENTS.
DIRECTEMENT
AVEC
DIRECTAMENTE
BETRAKTA
EJ
l't*"~illl
INTO
BEAM.
IEC60825-1:2001
DES
INSTRUMENTS
CON
INSTRUMENTAL
STRALEN
MED
OP11S<A
lfl~\~(f:~~\.
FDA
21
CFA
(ENG)
OPTIOUES.
(fAA)
OI'flCO.
(ESP)
INSTRUMENT.
(SWE)
(JPN)
(ENG)
INFORMATION
(For
U.S.A.)
This
equipment
has
been
tested
and
found
to
comply
with
the
limits
for
a
Class
B
digital
deVice,
pursuant
to
Part
15
of
the
FCC
Rules.
These
limits
are
designed
to
prOVide
reasonable
protection
against
harmful
interference
in
a
residential
installation.
This
equipment
generates,
uses,
and
can
radiate
radio
frequency
energy
and,
if
not
installed
and
used
in
accordance
with
the
instructions,
may
cause
harmful
interference
to
radio
communications.
However,
there
is
no
guarantee
that
interference
will
not
occur
in
a
particular
installation.
If
this
equipment
does
cause
harmful
interference
to
radio
or
television
reception,
which
can
be
determined
by
turning
the
equipment
off
and
on,
the
user
is
encouraged
to
try
to
correct
the
interference
by
one
or
more
of
the
following
measures:
-
Reorient
or
relocate
the
receiving
antenna.
-Increase
the
separation
between
the
equipment
and
receiver.
-
Connect
the
equipment
into
an
outlet
on
a
circuit
different
from
that
to
which
the
receiver
is
connected.
-
Consult
the
dealer
or
an
experienced
radio/TV
technician
for
help.
2
Caution
Changes
or
modifications
not
approved
by
JVC
could
void
the
user's
authority
to
operate
the
equipment.
[European
Union
only]
-

5
on
tile
monitor:
•
The
monitor
built
in
this
unit
has
been
produced
with
high
precision,
but
it
may
have
some
ineffective
dots.
This
is
inevitable
and
is
not
malfunction.
•
Do
not
expose
the
monitor
to
direct
sunlight.
•
Do
not
operate
the
touch
panel
using
a
ball-point
pen
or
similar
tool
with
the
sharp
tip.
Touch
the
buttons
on
the
touch
panel
with
your
finger
directly
(if
you
are
wearing
a
glove,
take
it
off).
•
When
the
temperature
is
very
cold
or
very
hot...
-
Chemical
changes
occur
inside,
causing
malfunction.
-
Picture's
may
not
appear
clearly
or
may
move
slowly.
Pictures
may
not
be
synchronized
with
the
sound
or
picture
quality
may
decline
in
such
environments.
•
DO
NOT
install
any
unit
or
wire
any
cable
in
a
location
where;
-it
may
obstruct
the
steering
wheel
and
gearshift
lever
operations.
-it
may
obstruct
the
operation
of
safety
devices
such
as
air
bags.
-it
may
obstruct
visibility.
•
DO
NOT
operate
the
unit
while
driving.
If
you
need
to
operate
the
unit
while
driving,
be
sure
to
look
around
carefully.
•
The
driver
must
not
watch
the
monitor
while
driving.
•
Ifthe
parking
brake
is
not
engaged,
caution
message
about
parking
brake
appears
on
the
screen,
and
no
playback
picture
will
be
shown.
-
This
warning
appears
only
when
the
parking
brake
wire
is
connected
to
the
parking
brake
~;ystem
built
in
the
car
(refer
to
the
Installation/Connection
Manual).
3
For
safety
...
•
Do
not
raise
the
volume
level
too
much,
as
this
will
block
outside
sounds,
making
driving
dangerous.
•
Stop
the
car
before
performing
any
complicated
operations.
Temperature
inside
the
car
...
If
you
have
parked
the
car
for
a
long
time
in
hot
or
cold
weather,
wait
until
the
temperature
in
the
car
becomes
normal
before
operating
the
unit.
While
driVing
at
a
speed
greater
than
6
milh
(10
km/h),
some
screens
on
the
navigation
menus
are
not
available.

Features
Navigation system
Searching for adestination/via point
23-32
21,22
etc.
POI
name
Registering your home orfavorite
points
Telephone
number
Address
37-40
......
I
• 1
-
....
Route guidance
Route arrangement Settings on the menu
43,44
35,36
•
When
the
SD
card
is
ejected,
the
imported
POI
cannot
be
used.
Importing
POI
information on Google Maps
You
can
import
POI
information
on
Google
Maps
through
an
SD.
For
details
about
Street
Director
Assistant,
visit
<http://www.jvc-exad.com>
.
Street Director Assistant

68-70
67
66
.
63-65
AVsources
Settings
on
the
menu
Satellite radio
External
component
~
Sound
adjustment
[iJJ
58,59
60-62
51-57
.
SO
card/USB device
Radio
£
49,50
iP(lld/iPhone device

or
Map
screen
..
How
to
forcibly
eject
a
disc
AVscreen
Soft
case
(supplied)
Attaching
..
Detaching/attaching
the
monitor
panel
Detaching
1
•
Hold
the
monitor
panel
securely
so
as
not
to
drop
it
accidentally.
•
Fit
the
monitor
panel
onto
the
attaching
plate
until
it
is
firmly
locked.
•
Be
careful
not
to
drop
the
disc
when
it
ejects.
•If
this
does
not
work,
detach
the
monitor
panel
then
attach
it.
How
to
read
this
manual:
• <>
indicates
the
variable
screens/menus/operations/settings
that
appear
on
the
touch
panel.
•
[]
indicates
the
buttons
on
the
touch
panel.
6

7

Introduction
9Installation settings
10
Parts identification
11
Basic operations
Turning
on
the
power
11
Adjusting
the
audio
volume
11
Displaying
monitor
setting
bars
11
12
About operating screens
Map
screens
12
AV
screens
12
14
Switching screens
8

Select
<On>
when
connecting
the
rear
view
camera
to
the
CAMERA
IN
jack.
Select
the
reverse
signal
polarity
«Battery>
or
<GND>)
according
to
the
connection
of
your
car.
Select
<Auto>
if
your
residential
area
is
subject
to
Daylight
Saving
Time.
Select
your
residential
area
for
automatic
clock
adjustment
by
GPS
signal.
Select
the
State
or
Province
where
you
are
now.
*1
*2
You
can
also
change
these
settings
through
<Settings>.
(*1:
1&
page
70/*2:
1&
page
69)
DST*1
Camera
Input*2
Reverse
Signal
Polarity*1
TimeZone*1
State/
Province
•
Finish
the
procedure.
•
Adjust
the settings.
•
If
you
select
[Skip
Installation
Settings
(fOlr
Store
Display)],
the
System
starts
in
the
navigation
demonstration
mode
for
stores.
You
need
to
make
the
installation
settings
next
time
you
turn
on
the
power
or
detach
the
monitor
panel
(then
attach
it).
•
Whlen
selecting
[Start
Installation
Settings],
<Demonstration>
is
set
to
<O'ff>.
(1&
page69)
Insta
lation
settings
,
•
You
can
also
select
the
system
language
through
<Language>.
(1&
page
70)
8
Display
installation
settings
screen.
When
you
turn
on
the
unit
for
the
first
time,
the
initial
setup
screen
appears.
8
Turn
on
the
ignition
switch.
The
power
is
turned
on,
and
the
opening
screen
is
displayed
for
about
5
seconds,
then
the
language
selection
screen
is
displayed.
•
Sele(t
the
language
you
want
for
the
display
and
the
voice
guidance.
9

Parts
identification
:8---:
I
1='
I 1
'=1
, , • I
Screen
(touCh
panel)
U_'
_1'-_-_-_-_-_-_-_-
_-
_-J_V-C~~~~~~~~~_r
Monitor
panel
Touch
pad
controls
You
can
operate
the
unit
by
touching
the
appropriate
part
ofthe
touch
pad
controls.
•
If
it
is
difficult
to
open
the
cover
on
the
input
terminals,
detach
the
monitor
panel,
open
the
cover,
then
attach
it.
+/-
buttons
Adjusts
the
audio
volume.
(1&
page
11)
AV
MAP/AV
OFF
button
•
Switches
the
screen
between
the
map
screen
and
AV
screen.
(1&
page
14)
•
Turns
off/on
the
AV
function.
[Hold]
(1&
page
48)
e+--+--:~~~-
DISP
button
•
Shows
the
AV
control
bars
while
the
map
is
displayed.
(~
page
14)
•
Displays
the
monitor
setting
bars.
[Hold]
(1&
page
11)
'1'
USB
AV·IN
[
,-,
Iri:::::i:::::::::::::::::±::::::--
Input
terminals
(IIUSB,lIl1iPod
ll
and
IIFront
AV-IN
II
)
'1==-=41
L~J
cUll~
~
lfllf)_
.,..---
.::~
______
~
(Detach)
button
Detaches
the
monitor
panel.
(1&
page
6)
10

Displaying
monitor
setting
bars
_
*1
I~
[HOldlV
Night
Map Mode
rA'U'iO"'1
On Off
Basic
I
perations
IlRIVI RIS
Rl
PONSIIIII
fOR
DRIVIN(;
III
(NONS
IINO
KHP!rl(;
IVIS
ON
1111
IWAIl'
Caution
•
When
displaying
the
map
screen
for
the
first
time
after
turning
on
the
power,
the
screen
below
appears.
Pay
sufficient
attention
when
operating
the
unit
and
make
sure
of
safe
driving.
-
If
[OK]
is
not
pressed
on
the
caution
screen,
the
same
screen
appears
each
time
you
switch
to
the
map
screen.
To
use
the
map
screen,
press
[OK].
Turning
on
the
power
_
Turn
on
the
ignition
switch.
,
(hi"
1II1i1
llivd
quidtlllr:~
1I1llv,OrivHI
IIlU"
UhtiHIVP
.Hld oht-ly
tlllllrltfil
1111~
...
<Illd
10'111
"i'IIIS
rp'lo1ldh~
........
llilinil
ill,lrllllior,,".
Ulluip
1.. llll....
ts
"nd
dtliu~lmellt
shpuld
he
entered
oldy
while
veliitle
is SlUflpetl.
Pledse
see
o\~l1er's
U1dllUdl
lUI
l:UlIlfllete
..
dIety
illstluctiollS.
OK~
•
The
power
is
turned
off
when
the
ignition
switch
is
turned
off.
Night
Map
Mode"1
••
Changes
the
map
to
the
night
color.
•
Auto:
Activates
the
night
mode
when
you
turn
on
the
headlights.
*2
•
On:
Activates
the
night
mode.
•
Off:
Cancels.
Adjusts
the
brightness.
(-5
to
+5)
Adjusting
the
audio
volume
__
Screen
Off
Turns
off
the
screen.
•
To
turn
on
the
screen,
perform
one
of
the
followings:
-
Press
AV
MAP.
-
Press
and
hold
DISP.
-
Touch
the
screen.
•
About
the
adjustable
volume
range,
~
page
68.
•
To
adjust
the
guidance
volume,
~
page
40.
To
hide
the
monitor
setting
bars,
perform
one
of
the
followings:
•
Press
DISP.
•
Press
[1iEIIJ.
•
Touch
the
area
other
than
the
monitor
setting
bars.
*1
Appears
only
when
the
map
screen
is
displayed.
*2
The
ILLUMINATION
CONTROL
lead
connection
is
required.
(~
Installation/Connection
Manual)
11

About
operating
screens
Map
screens
_
Destination
Menu
Searches
for
the
destination.
AV
screens
_
AVMenu
Changes
or
turns
off
the
AV
source.
.
~,,>
Ak:~'
"
t~
;
L'
Home Previous Favorites
Address
.
.R~"'f
(I'
•.
.."
....
..t.'/
.9-.
_~
".
--l-
L...-
~inity
POI Name P
'o~e
Coordinates
-Ouick Sea,,:h 1
Quid
Sr,lJ(:h 1Ouick Se.trr.h 1
....
Destination Menu
Function
Menu
Function
Menu
Shows
the
information
about
the
navigation
system.
Options
Changes
the
detailed
settings.
Settings
Changes
the
detailed
settings.
Settings i
Audio
Display
Phone
System
FaderlBalance
010
Equalizer
Flat
SubwooferlHPF
Enter
Adaptive Volume
~
Mid >
Telephone Muting Mutlng1 Muting2
~
~-
.It. 2
""'"
-
Options
Priority
Freeway
Toll
Road
Ferry
Route
Sound
Display
others
.~.
Shortest
~
Avoid
~
Avoid
~
Avoid
12

When
items
on
the
menu
are
not
availablle
•
Non-available
items
will
be
shaded.
To
change
the
page
of
menu/list
Menu
Current
page/total
menu
pages
Changes
the
page
List
Ex.:
Folder/track
list
Changes
the
page
To
select
folder/track
on
the
list
Select
a
folder
(CD),
then
a
track
(@).
Current
folder
13

Switching
screens
AV
MAP
button
T:P.:
DISP
button
~DISP
=+
=
=
~
USB
AV-IN
•
Press
[1iiiEJI]
to
return
to
the
previous
screen
.
•
On
navigation
screens
only:
press
[_
to
display
the
current
position
on
the
map.
14

--~
15
*1
You
can
change
the
source
by
pressing
the
AV
source
icon.
*2
Switches
the
category
by
pressing
the
corresponding
tab.

Navigation System
17
Safety instructions for
the Navigation System
18
Basic
operations
To
change
the
map
scale
19
To
scroll
the
map
19
To
display
your
current
position
20
To
change
the
map
view
20
21
Registering your homel
favorite points
Registering
your
home/favorite
points
21
Editing
registration
22
23
Searching for aplace
About
search
screens
and
input
screens
23
Setting
a
destination
on
the
map
24
Setting
a
destination
using
the
Destination
Menu
24
To
go
home
25
By
address
<Address>
25
By
telephone
number
<Phone>
27
By
coordinates
<Coordinates>
27
POI
near
a
place/route
<Vicinity>
28
From
the
list
of
POI
<POI
Name>
29
From
your
favorites
<Favorites>
30
From
previous
destinations
<Previous>
30
Quick
Search
31
33
Starting guidance
Starting
guidance
to
the
destination
33
To
cancel
gUidance
33
Changing
route
options
33
35
Arranging your route
Adding
places
to
stop
by
35
Avoiding
a
congestion
ahead
36
37
Howyou are guided
Getting
information
on
your
route
and
places
39
Customizing
how
you
are
gUided
40
Adjusting
the
vehicle
position
40
41
Checking
the
information
of
the navigation system
42
Initializing memoriesl
navigation settings
43
Navigation menu items
45
Additional information
16

Safe
instrurtions
for
the
Navigation
System
SAFETY
IN:5TRUCTIONS
Use
of
the
Navigation
System
is
only
permitted
if
the
traffic
conditions
are
suitable
and
you
are
absolutely
sure
that
no
risk,
obstruction
or
inconvenience
will
be
incurred
to
you,
your
passengers
or
other
road
users.
The
requirements
ofthe
Road
Traffic
Regulations
must
always
be
followed.
The
destination
must
not
be
entered
whOle
driving
the
car.
The
Navigation
System
serves
solely
as
an
aid
to
navigation.
It
never
releases
the
drivers
from
their
duties
to
drive
carefully
and
to
make
own
judgement
in
road
traffic.
Inaccurate
or
incorrect
instructions
may
happen
to
be
given
due
to
changing
traffic
conditions.
The
actual
road
signs
and
traffic
regulations
must
therefore
always
be
observed.
In
particular,
the
Navigation
System
cannot
be
used
as
an
aid
to
orientation
when
visibility
is
poor.
This
Navigation
System
must
only
be
used
for
its
intended
purpose.
The
volume
ofthe
car
radio/
Navigation
System
must
be
adjusted
so
that
external
noise
is
still
audible.
Navigation
guidance
is
performed,
based
on
the
database,
therefore,
it
may
not
be
applicable
to
the
current
situation
because
of
changes
in
traffic
conditions
(e.g.
changes
in
toll
roads,
principal
roads,
one-way
traftlc,
or
other
traffic
regulations).
In
this
case,
observe
the
current
traffic
signs
or
regulations.
•
Traffic
signs
should
be
observed
carefully
while
driVing
using
the
Navigation
System.
Navigation
System
is
only
an
aid.
Driver
must
always
decide
whether
or
not
to
heed
the
information
provided.
JVC
does
not
accept
liability
for
erroneous
data
provided
by
the
Navigation
System.
•
Traffic
guidance
is
restricted
to
passenger
vehicles
only.
Special
driving
recommendations
and
regulations
for
other
vehicles
(e.g.
commercial
vehicles)
are
not
included.
•
Do
not
opll!rate
the
unit
while
driving.
17
Terms
of
licence
You
are
granted
a
non-exclusive
licence
to
use
the
database
for
your
personal
purposes.
The
present
licence
does
not
authorise
the
granting
of
sublicenses.
Use
of
the
data
is
only
permitted
in
this
specific
JVC
system.
It
is
forbidden
to
extract
or
make
further
use
of
significant
parts
of
the
database
content,
or
to
duplicate,
modify,
adapt,
translate,
analyse,
decompile
or
reverse-engineer
any
part
thereof.
WARNING:
Road
traffic
regulations
always
take
priority
when
a
vehicle
is
being
driven
in
traffic.
Navigation
System
is
only
an
aid.
Errors
may
occur
in
individual
data
items/
entries.
At
all
times,
the
driver
must
decide
whether
or
not
to
heed
the
information
provided.
JVC
does
not
accept
liability
for
erroneous
data
proVided
by
the
Navigation
System.
©
2008
NAVTEQ
All
rights
reserved.

Basic
operations
.
~
Your
position
is
always
at
the
center
of
the
map.
Your
position
Zoom
buttons
•
(1&
page
19)
Shows
the
navig'i
•
The
information
ohe
map
(such
as
street
name,
the
POI
information,
and
speed
limit)
may
not
be
always
displayed
dependi:
1
on
the
condition
(for
example,
if
the
System
does
not
have
the
information
of
the
position).
Selects
all
sub-categories*
Deactivates
~
_Off
~
•American
:li Asian
•..
Barbecue &
sout~
•Chinese
II
.$,.
14
"I"
Activates
POI
Icon
•
Gas
Station
•Parking
•Hotel
~
•
.:staur:t
c~ai:~
•
The
selected
items
are
marked
with
"t/."
4
Activate
or
deactivate
the
POI
icons
of
the
selected
categories.
3
Select
categories
(CD)
and
sub-categories
((1))
of
POI
which
you
want
to
be
displayed
on
the
map.
Icons
on
the
ml'
J
•
Home
(~)
and·
orite
point
(,.;<)
icons
are
displayed
after
he
e/favorite
points
are
registered.
•
POI
icons
are
displed
on
the
map
when
a
group
is
selected
in
the·
)01
Icon>
setting
(1&
below)
and
the
map
scalE
between
80
ft
(25
m)
and
800
ft
(250
m).
-
The
following
his
are
displayed
when
the
map
scale
is
betwee
;0
ft
(25
m)
and
0.6
mi
(1
km):
-
Airport
icon'
ne
travel
category
-
Golf
course
j,
\
in
the
leisure
category
-
Gas
station
i(IS
•
POI
icons
may
no';
e
displayed
correctly
when
the
System
displays
ti
wide
area
of
map.
In
this
case,
zoom
in
the
map:'
display
the
detailed
map.
To
display/hide
POI
icons
on
the
map
1~
2
POI
Icon
~~
•Gas Station Select
All.
*
When
aI/sub-category
is
selected,
the
button
is
automatical/y
changed
to
[Deselect
All].
Press
[Deselect
All]
to
cancel
the
selection
of
aI/sub-
categories.
18

~
The
position
you
touched
is
centered
on
the
map.
To
scroll
the
map
_
Zoom
in
2
To
change
the
map
scale
_
1
Scale
buttons*
Zoom
out
*
You
can
also
select
a
scale
directly
by
pressing
one
of
the
scale
buttons.
The
map
scrolls
to
the
direction
you
are
touching
and
holding.
•
Touch
and
hold
the
map
to
keep
scrolling
the
map
.
•
The
scrolling
speed
varies
depending
on
the
position
you
are
touching
and
holding:
-
Inner
area:
slow
-
Outer
area:
fast
~
Direction
and
distance
from
your
current
position
19

20
North
Up
The
map
view
is
oriented
with
north
"upwards,"
as
in
usual
paper
maps.
•
The
icon
shows
the
direction
ofthe
car.
30Map
The
three
dimensional
map
is
displayed
in
"heading
up."
•
The
icon
shows
the
direction
of
north
.
20
Heading
Up
The
map
rotates
so
that
you
are
always
displayed
heading
"upwards."
•
The
icon
shows
the
direction
of
north
.
•
•
To
change
the
map
view
_
Basic
operations
To
display
your
current
position
_
20
Other manuals for KW-NT1 - Navigation System With DVD player
4
Table of contents
Other JVC GPS manuals

JVC
JVC KW-NT1 - Navigation System With DVD player User manual

JVC
JVC KW-NT310 User manual

JVC
JVC KV-PX701 User manual

JVC
JVC KV-PX501 User manual

JVC
JVC KW-NT810HDT User manual

JVC
JVC KW-NT3HD User manual

JVC
JVC KW NX7000 - Double Din Navigation Guide

JVC
JVC MultiMediaNavigator User manual

JVC
JVC KV-PX9S - EXAD 20GB GPS Navigation System Technical manual
JVC
JVC KW-NT50HDT User manual