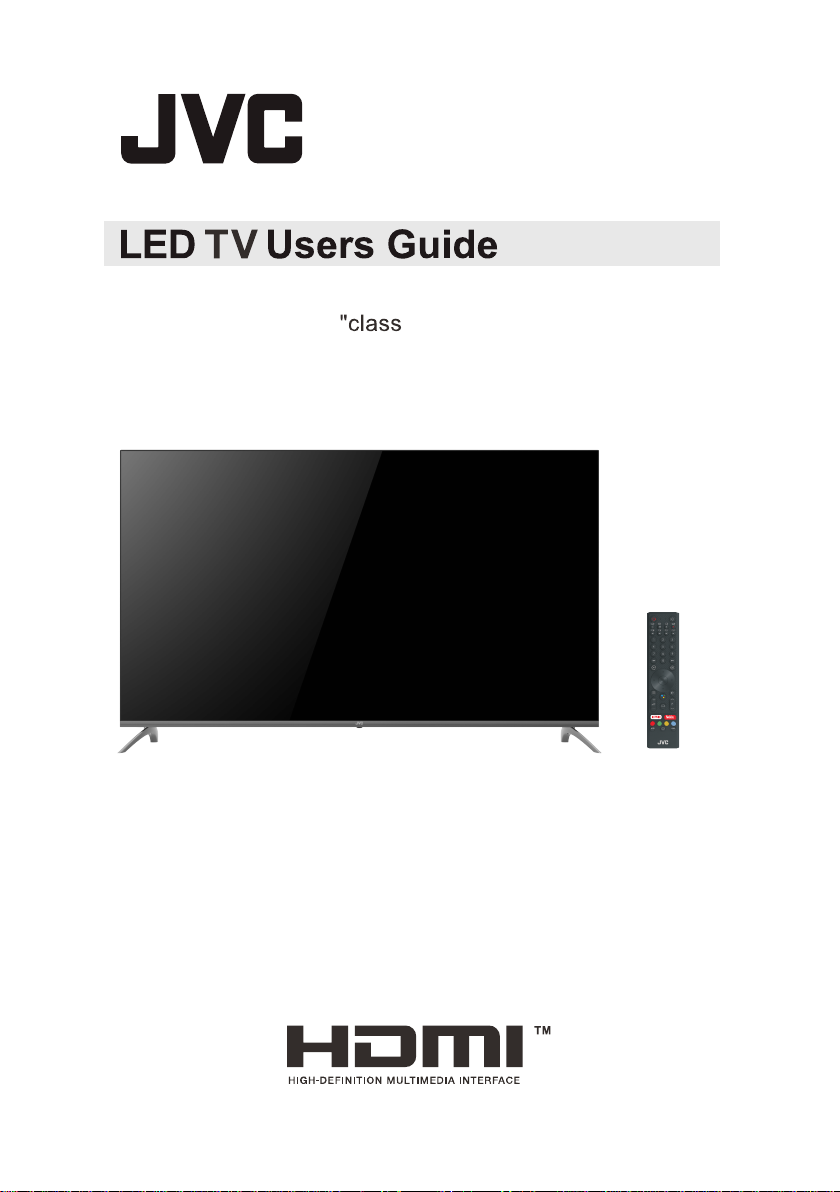
JVC LT-55NQ7105A User manual

LT-55NQ7105A 55


Table of Contents
........................................................................................1
Warning.............................................................................................................................1
Important Safety Instructions
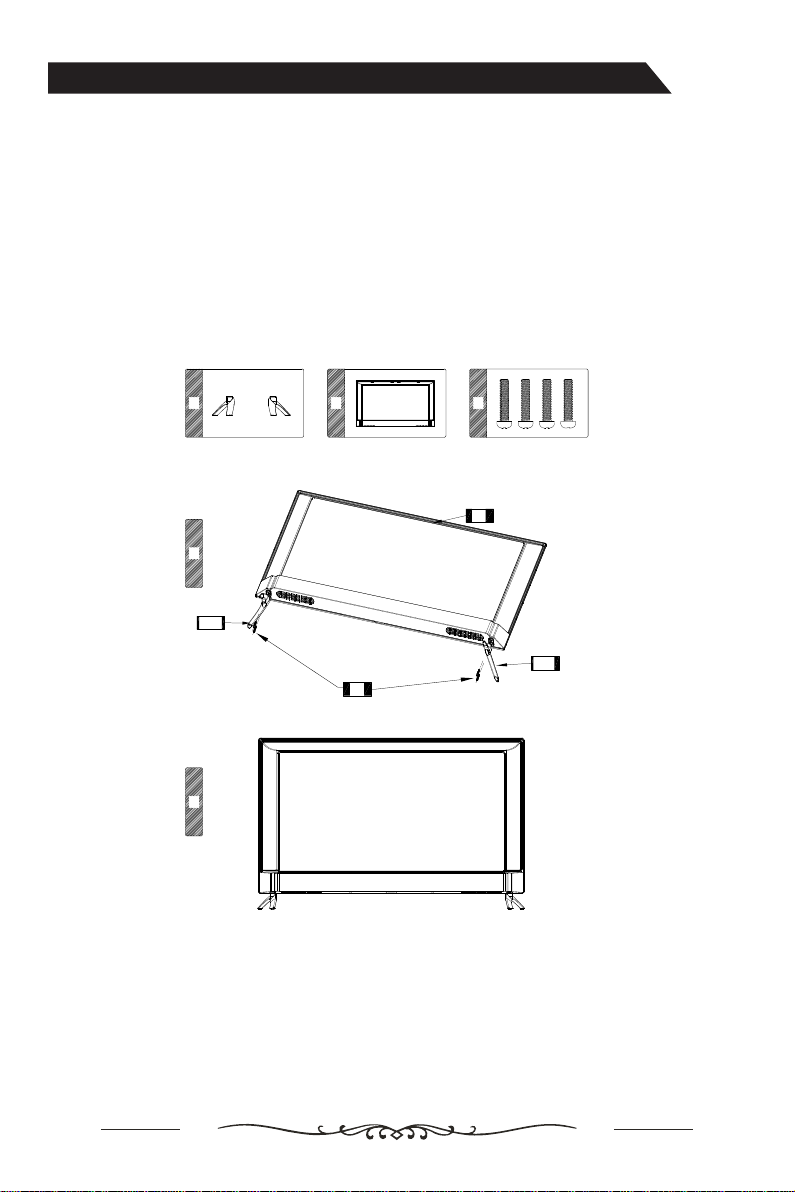
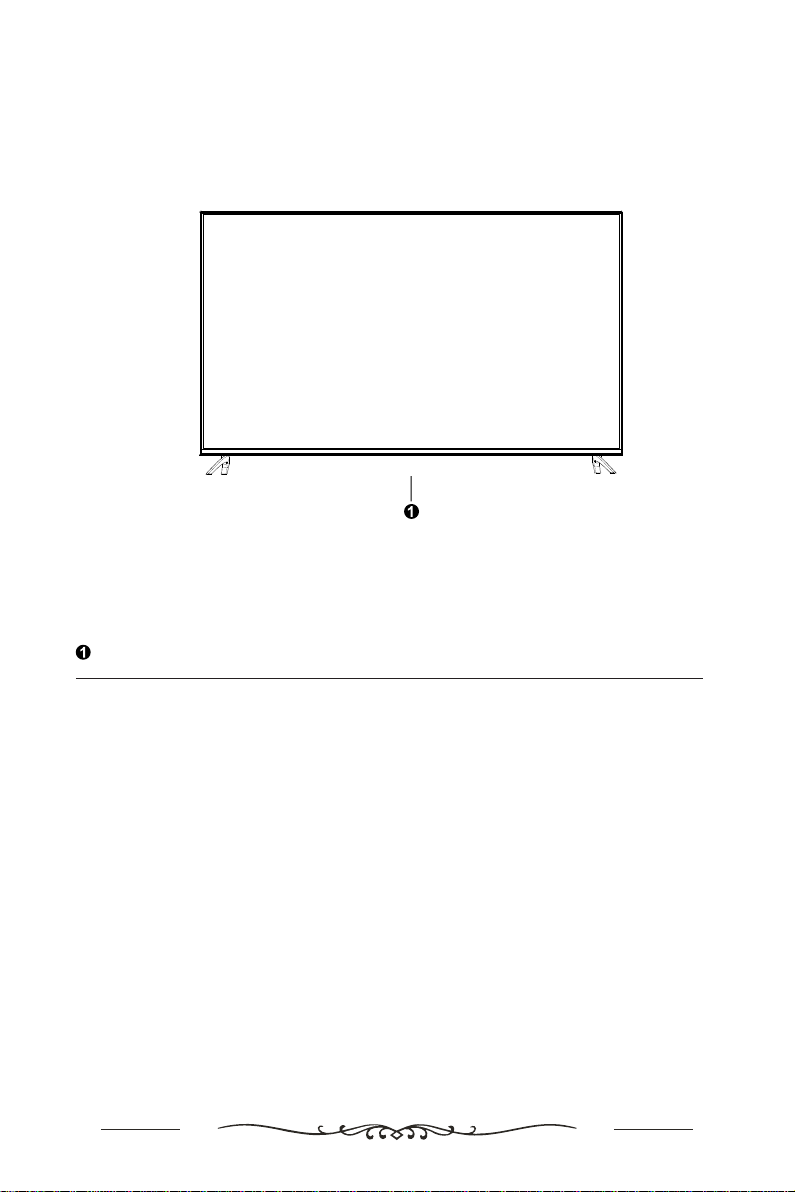
Assembling the Stand.....................................................................................................4
Package contents............................................................................................................5
Getting started ................................................................................................................5
Overview-Front Panel
Overview-Back Panel .....................................................................................................8
.....................................................................................................7
Overview-Remote Control .............................................................................................9
....................................................11
First Time Setup ............................................................................................................13
Connecting antenna,Internet and external devices
Getting started ...............................................................................................................12
After use .........................................................................................................................16
Trouble-shooting ...........................................................................................................16
Technical Features ........................................................................................................17
...........................................................................14
How to access Help Menu on the TV

1

2

3

Stand Installation
NOTE:
Before beginning this process, make sure that you have a clean, safe, and cushioned
space to work at to avoid any damage to the unit.
Do not touch or press the TV screen, the glass might break under pressure.
1. Carefully place the TV screen face-down on a clean, cushioned surface.
2. Insert and secure the stands (R and L) with 2 screws (supplied) each side as shown.
3. Insufficient tightening or incorrect installation
of the stand will not support your TV correctly, and could result in damage or injury from
tip-over.
A B C
1
2
RL
A B C
1
2
RL
A B C
1
2
RL
A B C
1
2
RL
A B C
1
2
RL
B
A-R
C
A-L
Assembling the Stand
Make sure the AC cord is not connected to an AC outlet.
Important:
Screw size:M4 x 20 mm
4

Figures and illustrations in this User
Manual are provided for
reference only and may differ slighty from actual product appearance.
Package contents
2. Insert the batteries supplied into the remote control. Make sure that you insert the
batteries correctly with the polarity as shown inside the battery compartment.
3. Replace the battery compartment cover and push in the opposite direction to the arrow
until it clicks into place.
Getting started
Fitting the stand
Before you can install your TV set, you need to fit the stand. Alternatively, you can mount it
on the wall. A Phillips screwdriver is needed to perform the installation.
Setting up the TV set
Place your TV set on a flat, stable surface (e.g. a table or a specially designed TV stand).
Make sure that all cables are laid simply and safely and do not represent a trip hazard. The
device must be connected to a mains socket using the mains cable. This mains socket must
be easily accessible so that the mains plug can be removed immediately in the event of an
emergency.
Fitting the batteries into the remote control
1. Turn the remote control over with its underside facing upwards, insert a finger into the
recess, and push the battery compartment cover in the direction of the arrow. Remove
the battery compartment cover.
The remote control uses 2 x 'AAA' batteries (included).
5
1 x 55” 4KKKKKK QLED TV
2 x Base Stands
4 x Screws
1 x Remote Control
2 x AAA Batteries
1 x Instruction Manual
1 x Quick Start Guide
1 x Warranty Card
K
1 x 3.5mm to RCA connector cable

Notes on Using Batteries:
The use of the wrong type of batteries may cause chemical leakage and/or explosion.
Please note the following:
Always ensure that the batteries are inserted with the + and - terminals in the correct
direction as shown in the battery compartment.
Different types of batteries have different characteristics. Do not mix different types.
Do not mix old and new batteries. Mixing old and new batteries will shorten battery
life and/or cause chemical leakage.
Replace batteries as soon as they stop working.
Chemicals which leak from batteries may cause skin irritation. If any chemical matter
seeps out of the batteries, wipe it up immediately with a dry cloth.
The batteries may have a shorter life expectancy due to storage conditions. Remove
the batteries whenever you anticipate that the remote control will not be used for an
extended period.
The batteries (battery pack or batteries installed) shall not be exposed to excessive
heat such as sunshine, fire or the like.
CAUTION:
It may result in an explosion if batteries are replaced incorrectly.
Only replace batteries with the same or equivalent type.
Caution: Before connecting or disconnecting any cables, switch off all related
devices (also the TV). Otherwise you could damage the devices.
6

Overview-Front Panel
7
Remote sensor / Standby indicator
-Standby indicator is Red in standby mode.
-Standby indicator is Off when the TV is turned on.

1
4
5
7
Headphone out
USB 2.0 ports
AV
5.
HDMI
6.
Antenna socket
LAN: Network port
ports
2
3
6
1.
2.
3.
4.
7. Optical Audio Out
*
Overview-Back Panel
* Note: Use the connector cable provided to convert
the 3.5mm mini AV port to RCA inputs.
8

Definition of the buttons on remote control:
Back
Power Mute
Media
Number
EPG
Info
Settings
Source
Direction/OK
Menu
Voice
Program
Volume
Home
Audio
YouTube
Color
Subtitle
TTX
NETFLIX
Buttons
Description
Power Turn on/off TV
Mute
Mute or restore sound
Number Number buttons
Info Display program information
Overview-Remote Control
/
/
Media:
/
/
/
/
/
/
/
/
/
/
/
/
/
/
9

Definition of the buttons on remote control:
Back
Power Mute
Media
Number
EPG
Info
Settings
Source
Direction/OK
Menu
Voice
Program
Volume
Home
Audio
YouTube
Color
Subtitle
TTX
NETFLIX
Buttons
Description
EPG Launch Electronic Program
Guide
Settings Display System Settings Menu
Source Select signal source
Direction/
OK
Press the direction buttons
to select menu options or
settings. Press OK to select
or confirm menu item.
Menu
Display main menu
Back
Return to last viewed
program
Voice
Activate Voice command
Volume
Adjust the volume
Program
Select the next or previous
program (channel).
Home
Open Android TV Homepage
YouTube
Open YouTube App
Color Use in accordance with the
Operation
interface
instructions
Audio Select audio languages and
Audio channels
Subtitle Select subtitle
TTX Show or hide Teletext*
NETFLIX
Overview-Remote Control
function. See 'Pairing the
Remote Control' section.
10
Open Netflix app
-Bluetooth pairing indicator
.
-Micorophone for voice commands
Pairing the Remote Control with the TV:
1. Press and hold the Setting button and the - button (Reduce Volume button) at
the same time. Red light flashes indicating that pairing process has begun.
2. Let go of the buttons and wait for the prompt of successful pairing.
3. Press the Voice button; a login dialog box pops up. Login your Google account
details and follow the on screen instructions.
4. Now you can use the voice function. Press the Voice button and say your
command.

Connecting antenna, Internet and external devices
Connecting the TV
antenna or cable TV
You can connect the cable
from your indoor or outdoor
antenna or cable TV to the
antenna socket.
Connecting the network cable (LAN connection)
You can also establish
an internet connection
via WiFi.
Connecting external equipment with HDMI interface
In order to play the audio and video
signal fed in from the external device
on the TV, select the signal source
as appropriate.
You can connect headphones or an analogue playback device to the socket marked with a
headphones symbol.
Connecting USB device
The TV has USB 2.0 ports for connection with
appropriate mass storage devices.
HDMI is the abbreviation for “High Definition Multimedia Interface” and allows the digital
transmission of both audio and video signals over the same cable.
Connecting headphones
112

Getting started
Powering the TV set on and off
Powering on
Check that the TV is in standby mode. This means the mains cable must be connected to a
working mains socket.
Powering off
To power the TV off, either press the Power button on the device or press the button
on the remote control.
Connecting a digital audio system
You can connect your TV set to a digital audio system.
Thenpress the power button on the device or the button on
the remote control to turn on the TV.
Sending the TV'S digital audio
signal to
extemal audio equipment
via the Optical Out port.
Connecting an external device with AV output
Connect external devices
via the AV IN jack directly to
TV by using a Mini
cable.
In order to play the audio and
video signal fed in from the
external device on the TV,
select the signal source “AV”.
AV
123

- Language and country settings: Press the up/down button to select the language
and country.
- Quick Setup: Press the up/down button to select “continue” to connect to an Android
phone or tablet or skip. Press the ok button to confirm.
- Network Settings: Press the up/down button to select one of the networks
or select “skip” to skip the network settings. The “skip” option is at the bottom of the list.
Press ok button to confirm
- Log in to the Google account: Press the up/down button to select “Sign In”
(click on the Google account as prompted) or select “Skip” to skip the setting.
- Terms of Service: Contains the Google Terms of Service, Google Privacy Policy,
Google Play Terms of Service instructions, and only click "Accept" to enter
the next setting.
- Location: Press the up/down button to select “Yes” to enable the positioning function
or “No” to disable the positioning function.
- Help improve Android performance: Whether to send emergency reports,
devices and app usage data to Google. Press the up/down button to select
“Yes”, send or select “No”, and do not send.
- Set the TV device name:Press the up/down button to select the name provided
in the table, or you can customise a name (by clicking "Enter custom name"
at the bottom of the list).
- Android TV features browsing: Browse the features of this TV device.
- Set the password lock: Enter the password for four digits (must be a number,
non-numeric cannot be entered, enter "0000" is invalid) and then confirm the password
- Select TV mode :Press the up/down button to select “Home” or “Retail”
- Channel Scan: Press the up/down button to select “Scan” or “Skip Scan”
131
When you turn on the TV for the first time,
First Time Setup

1431
The Help feature offers a lot of information about your TV operation. To use the Help
feature, press the Home button, and then use the arrow and OK buttons to access
the Help menu. You can find how to troubleshoot from the list or keyword search.
If you update APK, the Help feature and information will be updated.
Note: Use the Arrow and OK buttons to move through the menu and make selections.
Step 1
Press the Home button on the remote control. Select 'AI PONT' from the options.
Step 2
Select 'Help' from the options.
How to access Help Menu on the TV

1531
Step 3
Select the desired Help topic.
Note: The password for the Specs section is 3138.
You can use the arrow and OK buttons to make a selection.

Caution:
when you clean the screen, hold the device steady with one hand
and carefully clean the screen with the other. Otherwise, the device could tip
over and get damaged or cause injuries.
Storage when not in use
If you do not plan to use the device for an extended period of time, unplug the power cord from
the socket and remove the batteries from the remote control. Make sure that the storage
temperature is between -15 °C and 45 °C and the relative humidity does not exceed 90%.
Transport
If you wish to move the device a short distance, proceed as follows to transport the device:
1. Disconnect the device from the mains.
2. Remove all cables connected to the device.
3. If you wish to move the device outside your building, demount the base and the optional
side supports or the mounted wall bracket by reversing the procedure.
4. Pack the TV set up carefully. Take special care to ensure the corners of the casing and
the screen are well protected.
5. Take the TV set and its accessories to its new location and recommission it.
Troubleshooting
You can solve most common problems yourself using the solutions below. If the
problem
persists after checking the suggested solutions, please contact .
General problems
The TV set will not switch on.
•Plug the power cable of the TV set into a working mains socket.
•Replace the batteries in the remote control.
•Unplug the plug of the power cable from the mains socket, wait approx. 30 seconds and
plug the power cable back in. The device should then work normally.
The remote control does not work
•Is there an obstruction between the remote control and the sensor on the TV?
•Replace the batteries.
•Make sure that the remote control sensor is not exposed to direct sunlight.
Customer Service
Note: There is also a built-in Help app available on this TV. To access this, go to
Home -> AI PONT -> HELP and choose the desired help topic.
164
After use
Cleaning
Warning: Make sure the device is unplugged from the mains power before
cleaning. Otherwise, there is a risk of electrocution!
Never spill or spray any type of liquid into the unit. Only use a clean, dry cloth for cleaning
the casing. Never use aggressive liquids. When very dirty, use a slightly dampened cloth.
Clean the screen with a special cleaning cloth for screens.

TV reception problems
•Is the antenna plugged in properly? Is the antenna cable damaged?
•Is the antenna cable plug firmly connected?
•Have you selected the correct signal source on the TV set?
•Have you already executed a channel search at your present location?
Poor picture
•Is the antenna plugged in? Adjust the antenna.
•Check that the channel is tuned properly.
•Adjust the picture settings, such as brightness, colour, sharpness.
No sound
•Is the sound muted? Press the button .
•Is the volume turned down? Press the +button .
No colour
•Adjust the colour setting.
•Check the programme is broadcast in colour.
•Check that the channel is tuned properly.
Multimedia playback problems
File is not played back
•Check that the USB mass storage device contains compatible files.
Problems with playback from external devices
No sound
•Check that the audio cable is properly connected or damaged.
•Make sure that you have selected the correct signal source on your TV set.
Sound is distorted or humming
•Clean the connector plugs.
•Replace the connection cable to the external device.
Problems with online services (Smart TV)
If you are using a cable network connection (LAN)
•Check that the network cable is properly connected.
•Check whether the network cable is damaged.
•Check whether you can access the internet from another device on the network .
•It is possible that the server for the selected service is temporarily down.
No picture
•Are all the connection cables to external signal sources properly connected?
•Is the connection cable to the external signal source damaged?
•Have you selected the correct signal source on the TV set?
175
Other manuals for LT-55NQ7105A
1
Table of contents
Other JVC LED TV manuals