Important Information
4
Table of Contents
If a television is not positioned in a sufficiently stable location, it can be potentially hazardous
due to falling. Many injuries, particularly to children, can be avoided by taking simple precautions
such as:
• Using cabinets or stands recommended by the manufacturer os the television.
• Only using furniture that can safely support the television.
• Ensuring the television is not overhanging the edge os the supporting furniture.
• Not placing the television on tall furniture (for example, cupboards or bookcases) without
anchoring both the furniture and the television to a suitable support.
• Not standing the televisions on cloth or other materials placed between the television and
supporting furniture.
• Educating children about the dangers of climbing on furniture to reach the television or its
controls.
• Keep small accessories out of reach of children so they are not mistakenly swallowed.
5
5
6
7
8
8
9
10
13
13
13
14
15
16
17
18
19
19
21
21
22
24
26
27
29
31
32
34
34
34
35
36
37
Introduction
B
-------------------------------------------------------------------------------------------------------------
asic Functions---------------------------------------------------------------------------------------------------------
Specifications-------------------------------------------------------------------------------------------------------------
-----------------------------------------------------------
--------------------------------------------------------------------------------------------------
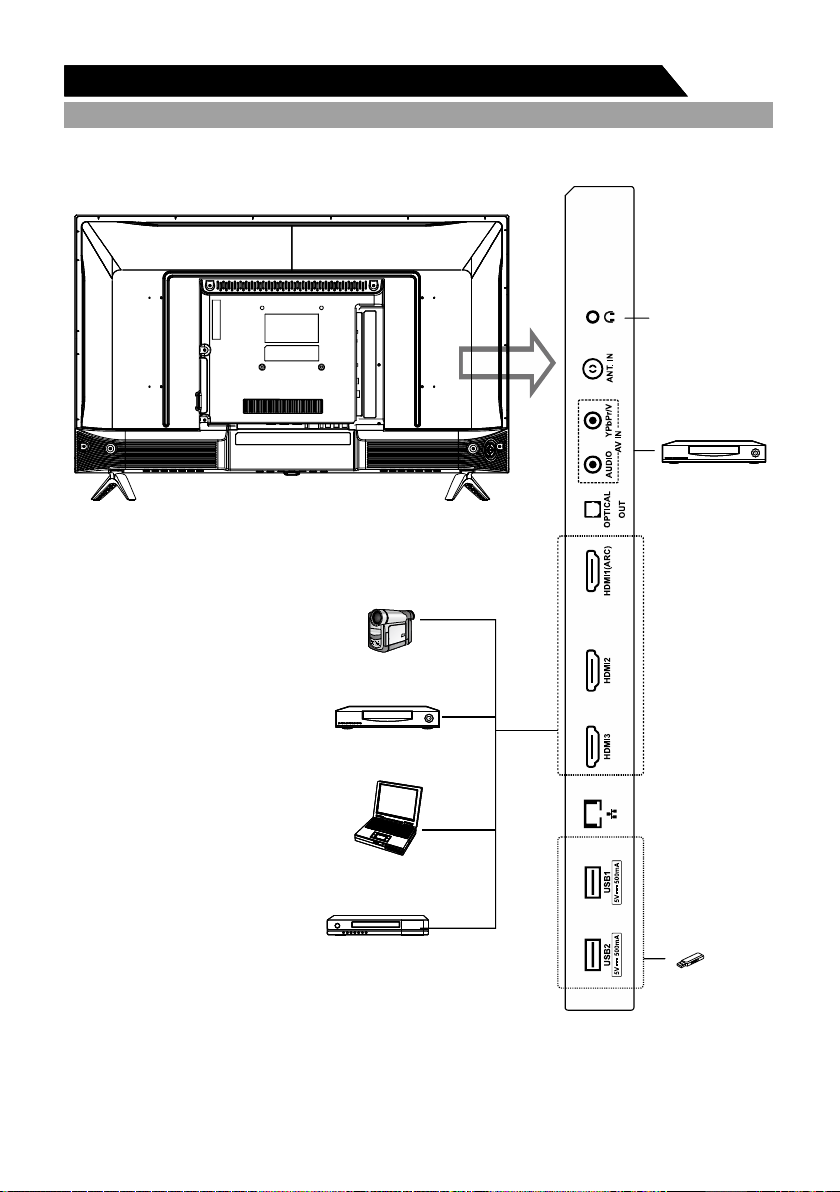
Overview of back panel------------------------------------------------------------------------------------------------
Overview of front panel------------------------------------------------------------------------------------------------
Overview of remote control--------------------------------------------------------------------------------------------
Installing Batteries in the Remote Control-------------------------------------------------------------------------
--------------------------------------------------------------------------------------------------
Antenna connection-----------------------------------------------------------------------------------------------------
Connecting VCR---------------------------------------------------------------------------------------------------------
Connecting a Camcorder----------------------------------------------------------------------------------------------
Connecting DVD Player/Set-Top Box via HDMI-----------------------------------------------------------------
Connecting Digital Audio System------------------------------------------------------------------------------------
----------------------------------------------------------------------------------------------------
---------------------------------------------------------------------------------------------------------
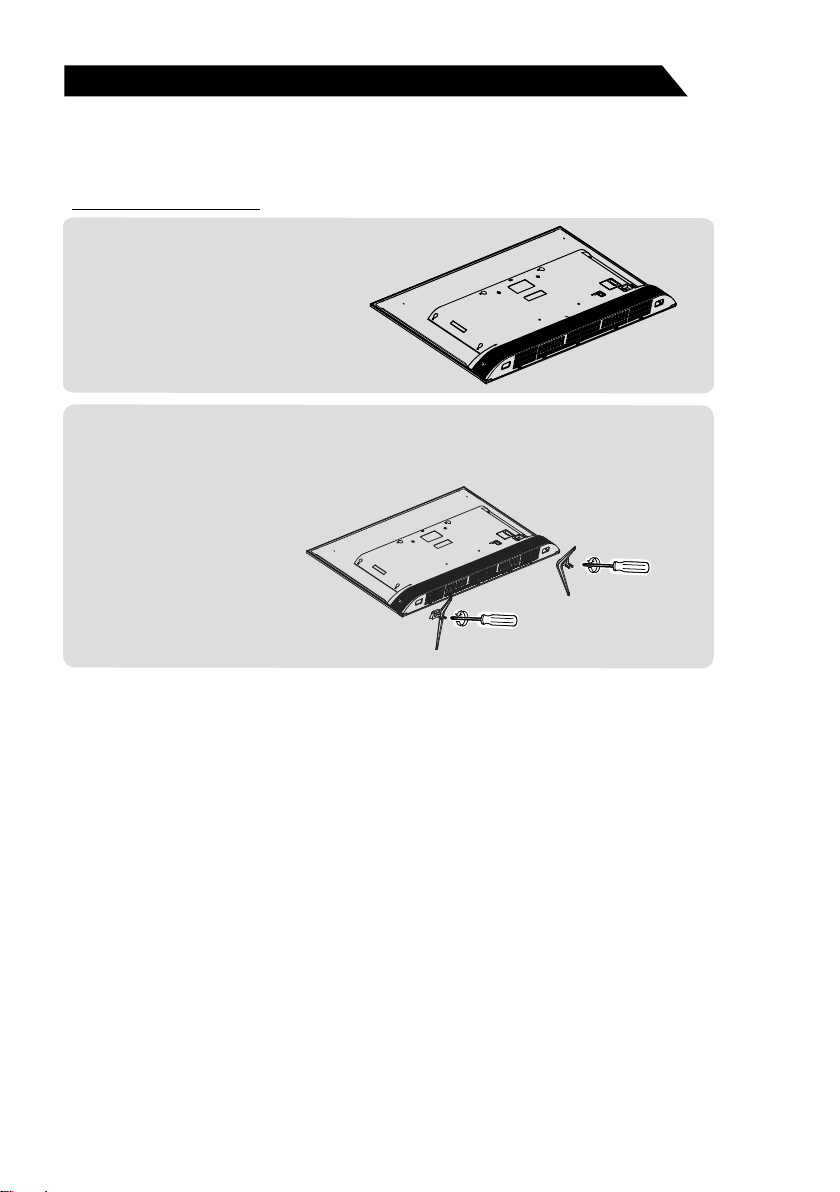
Stand and wall-mounting instructions (optional)
General Description
External Connection
Supporting signals
Basic operation
Menu Operation----------------------------------------------------------------------------------------------------------
--------------------------------------------------------------------------------------------Menu system instruction
Picture----------------------------------------------------------------------------------------------------------------------
Sound ---------------------------------------------------------------------------------------------------------------------
Setting ---------------------------------------------------------------------------------------------------------------------
Lock-------------------------------------------------------------------------------------------------------------------------
PVR Option---------------------------------------------------------------------------------------------------------------
Program-------------------------------------------------------------------------------------------------------------------
Network -------------------------------------------------------------------------------------------------------------------
About ----------------------------------------------------------------------------------------------------------------------
------------------------------------------------------------------------------------------------------
SOURCE setup --------------------------------------------------------------------------------------------------------
APP setup ---------------------------------------------------------------------------------------------------------------
SETTING setup --------------------------------------------------------------------------------------------------------
---------------------------------------------------------------------------------------------------
--------------------------------------------------------------------------------------------------------
Home Operation
Digital Media Player
Troubleshooting