9
COLOUR SYSTEM
You can select the appropriate colour system when the picture is
not clear or no colour appears.
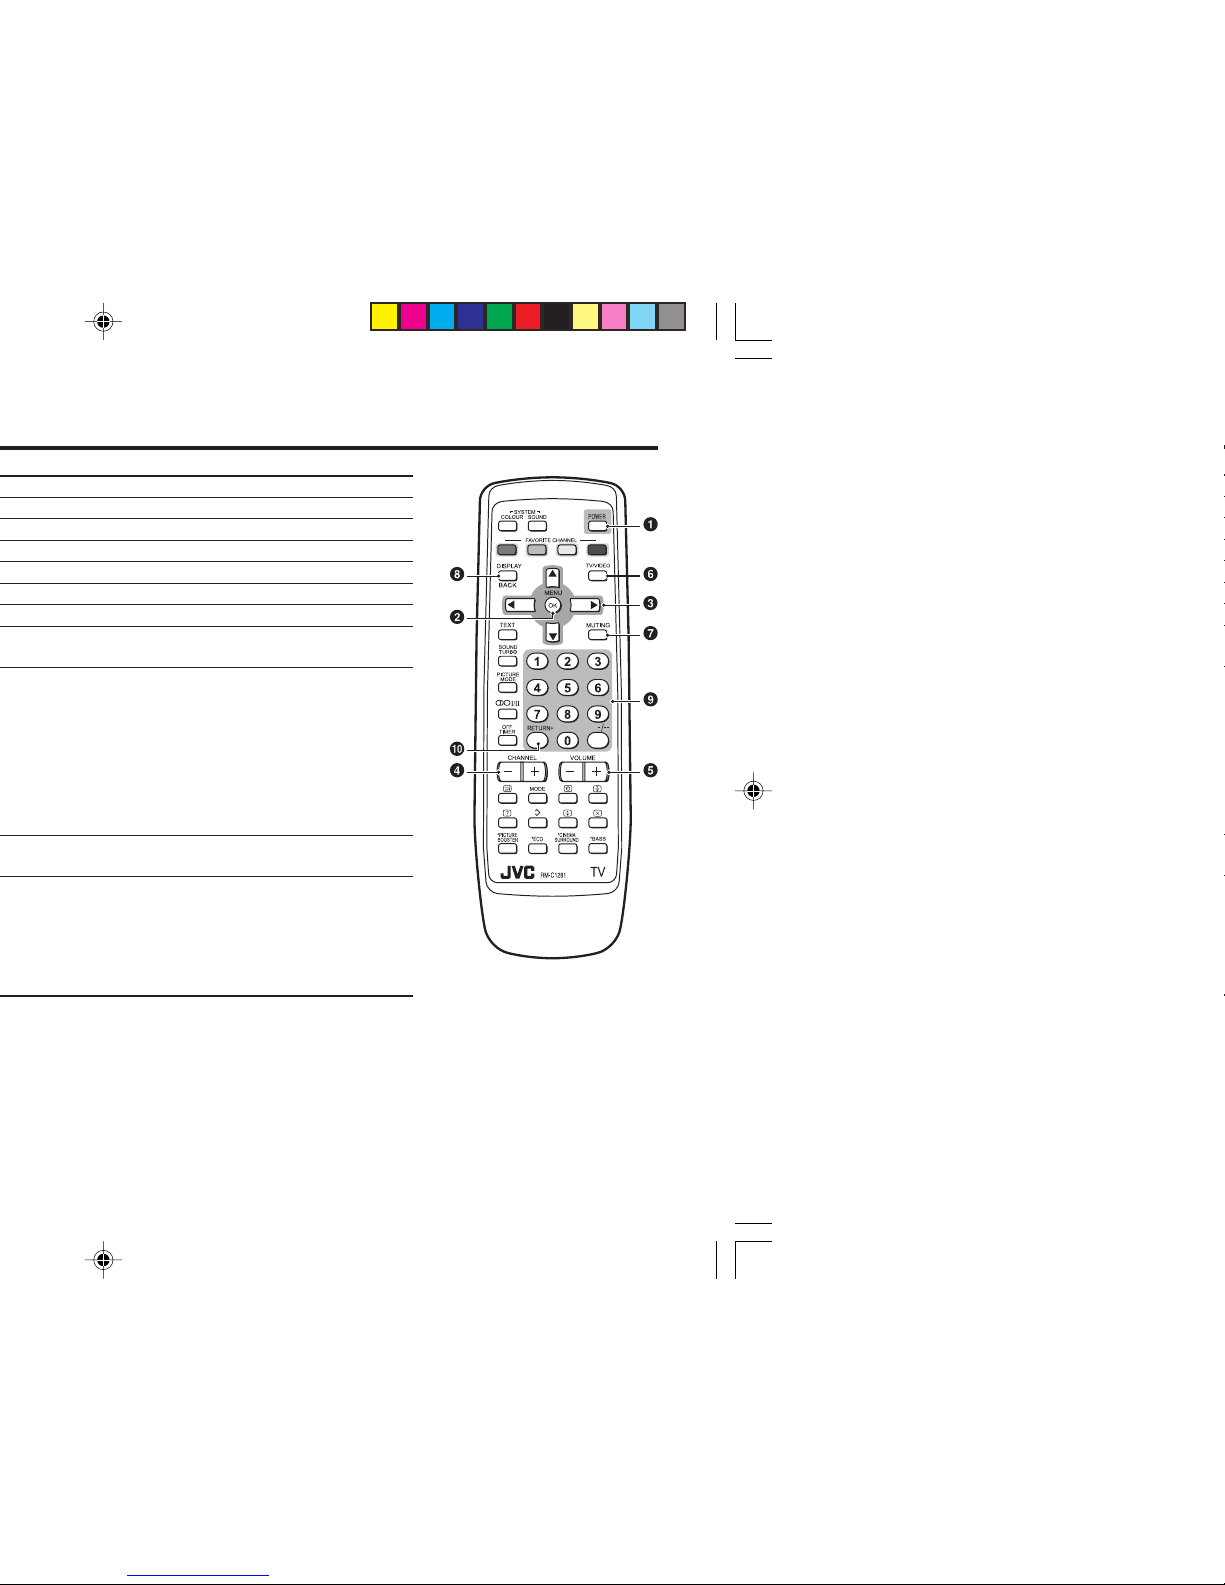
Press the COLOUR SYSTEM button to select a setting.
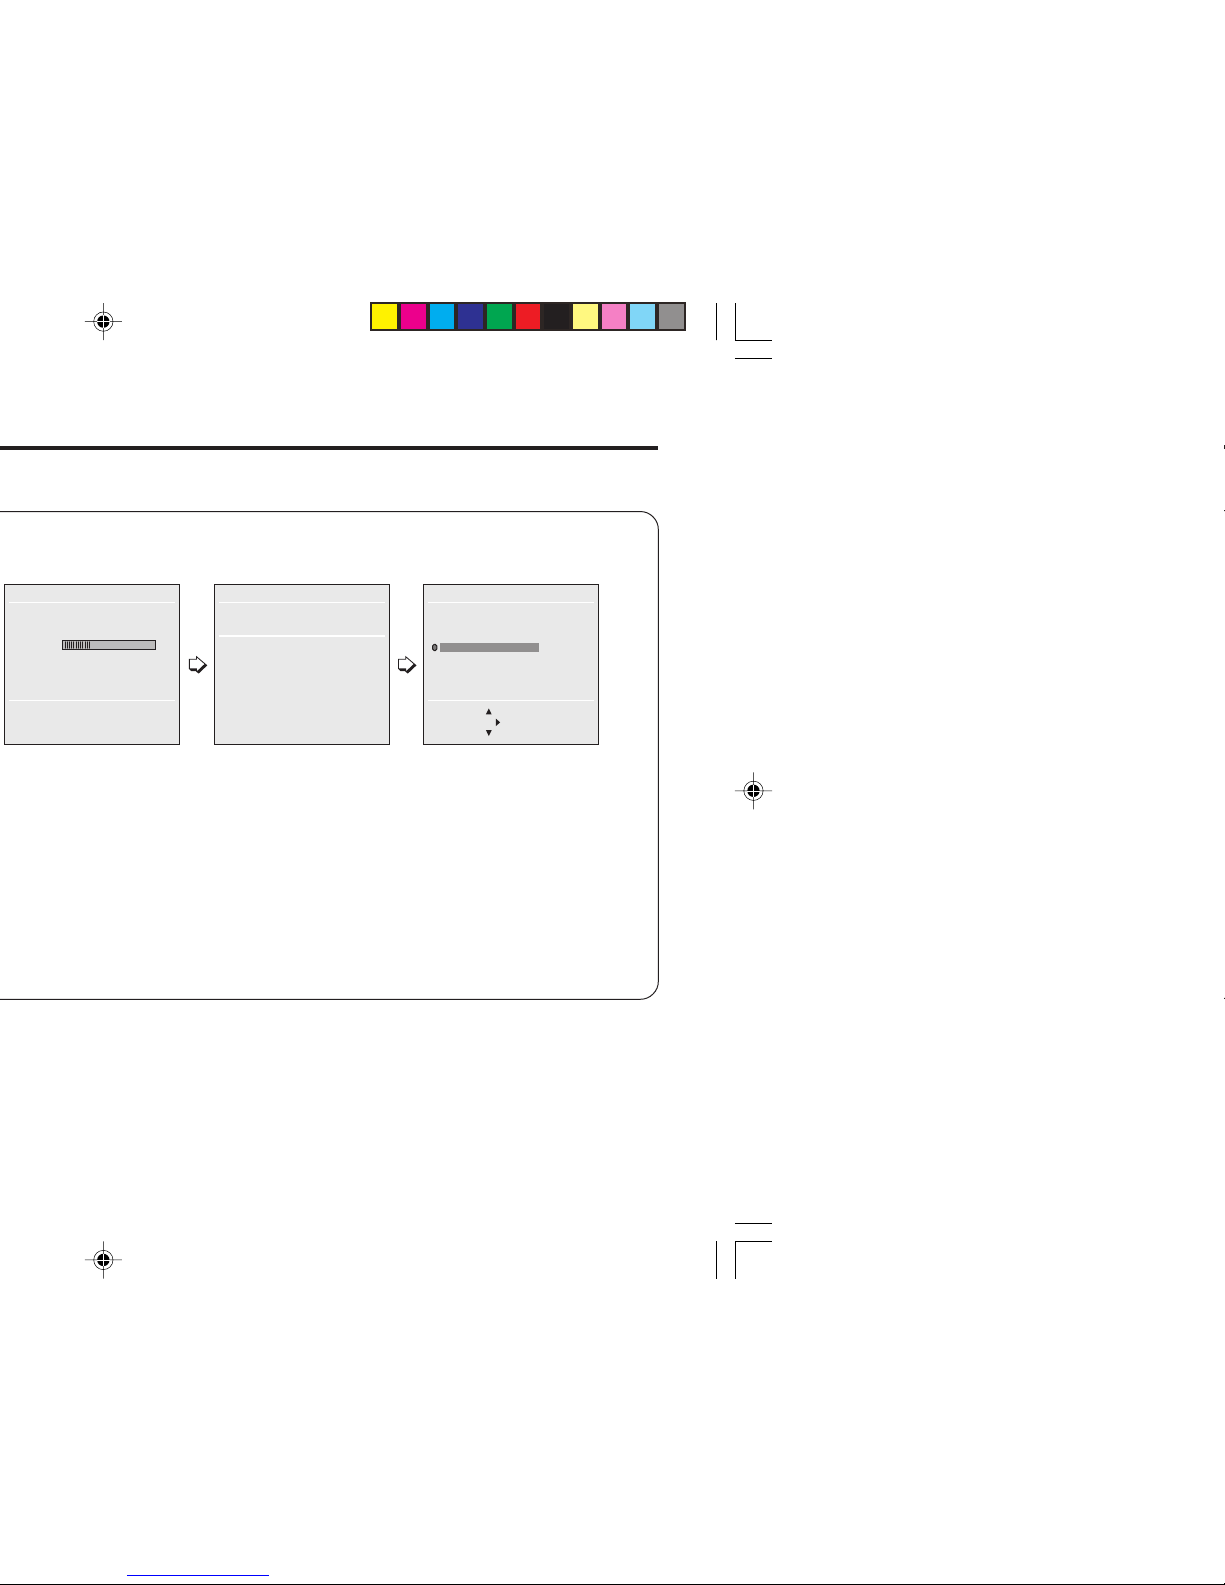
To operate this function with a menu:
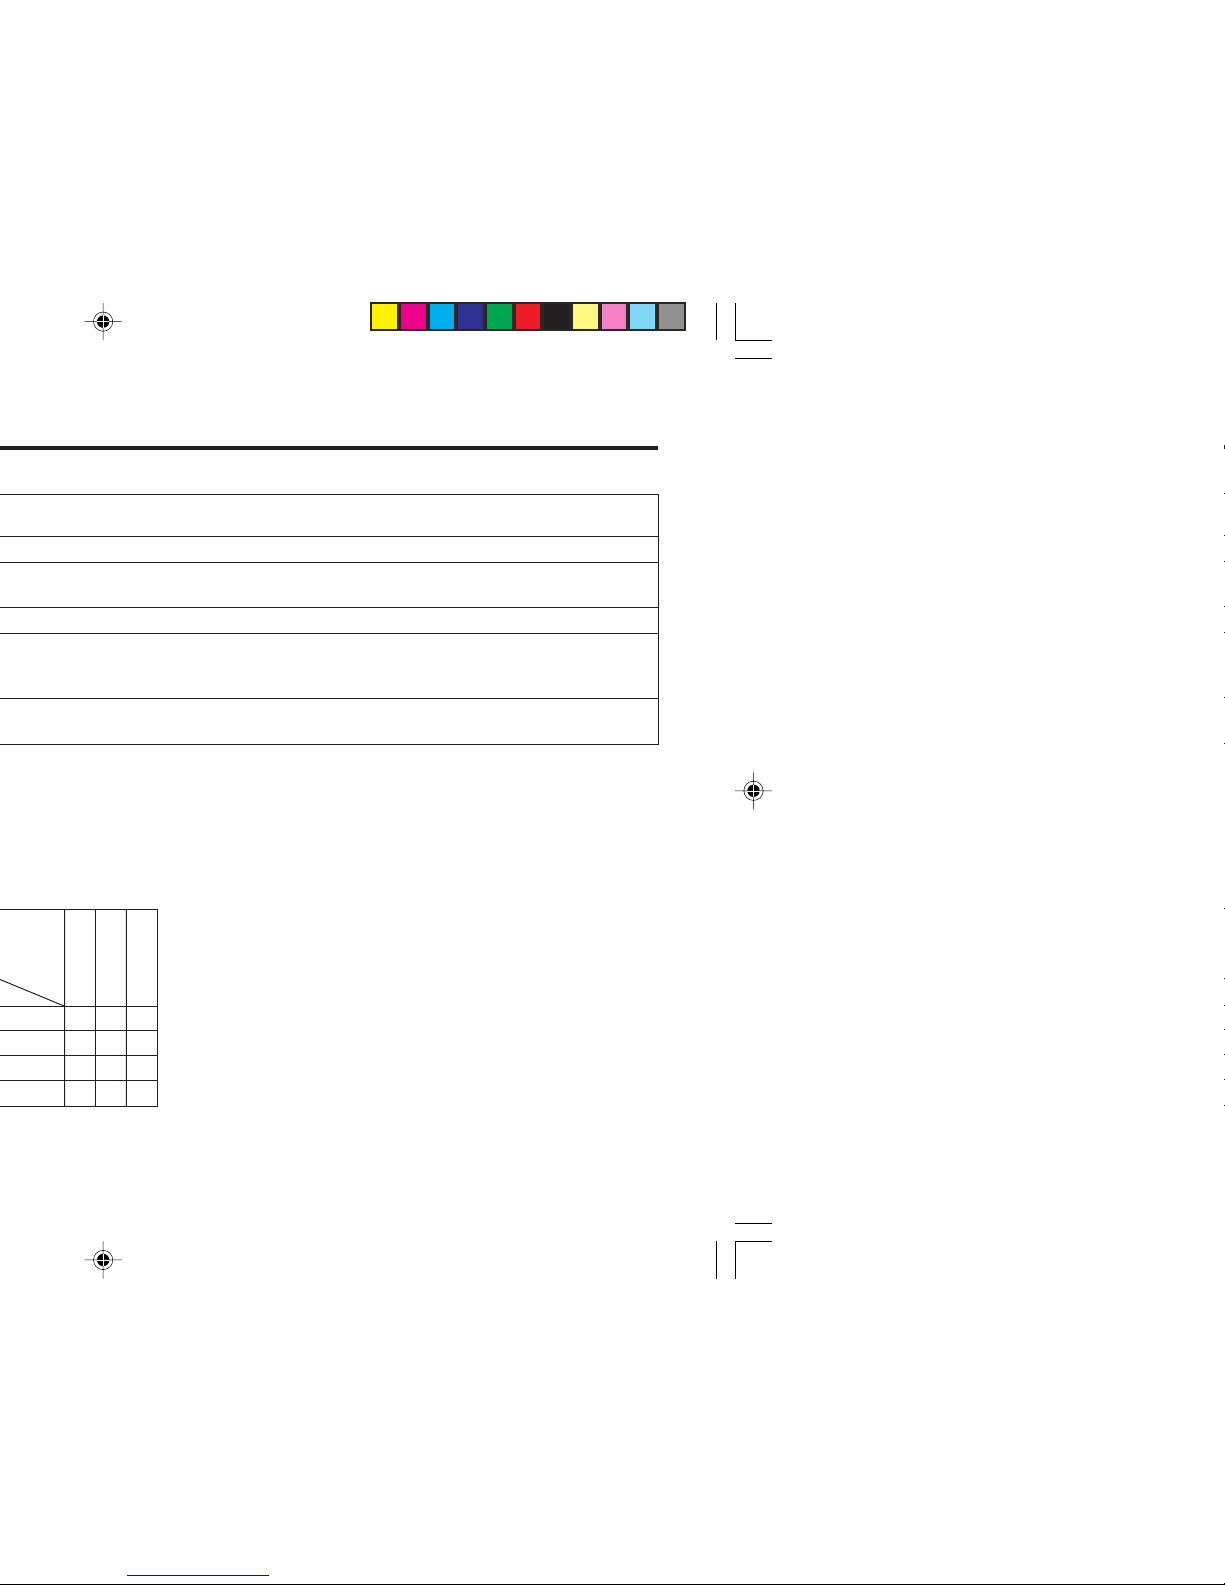
For the colour system in each country or region, see the table
below:
PICTURE MODE
You can choose the desired picture setting with one-touch.
Press the PICTURE MODE button to select a setting.
SOFT Softens contrast and sharpness.
BRIGHT Heightens contrast and sharpness.
STANDARD Standard picture setting.
USER You can change this picture setting as you like.
Select USER and adjust following items in the
PICTURE SETTING menu. (CONTRAST, BRIGHT,
SHARP, COLOUR, TINT*)
*TINT can only be adjusted in NTSC system.
To operate this function with a menu:
To return the USER setting to the default, press the blue button
when the PICTURE SETTING menu appears.
❇About the basic operations of the menu, please see the “How
to operate menus and menus locations”on page 5.
Basic setting for picture
AUTO PAL SECAM NTSC3.58
NTSC4.43
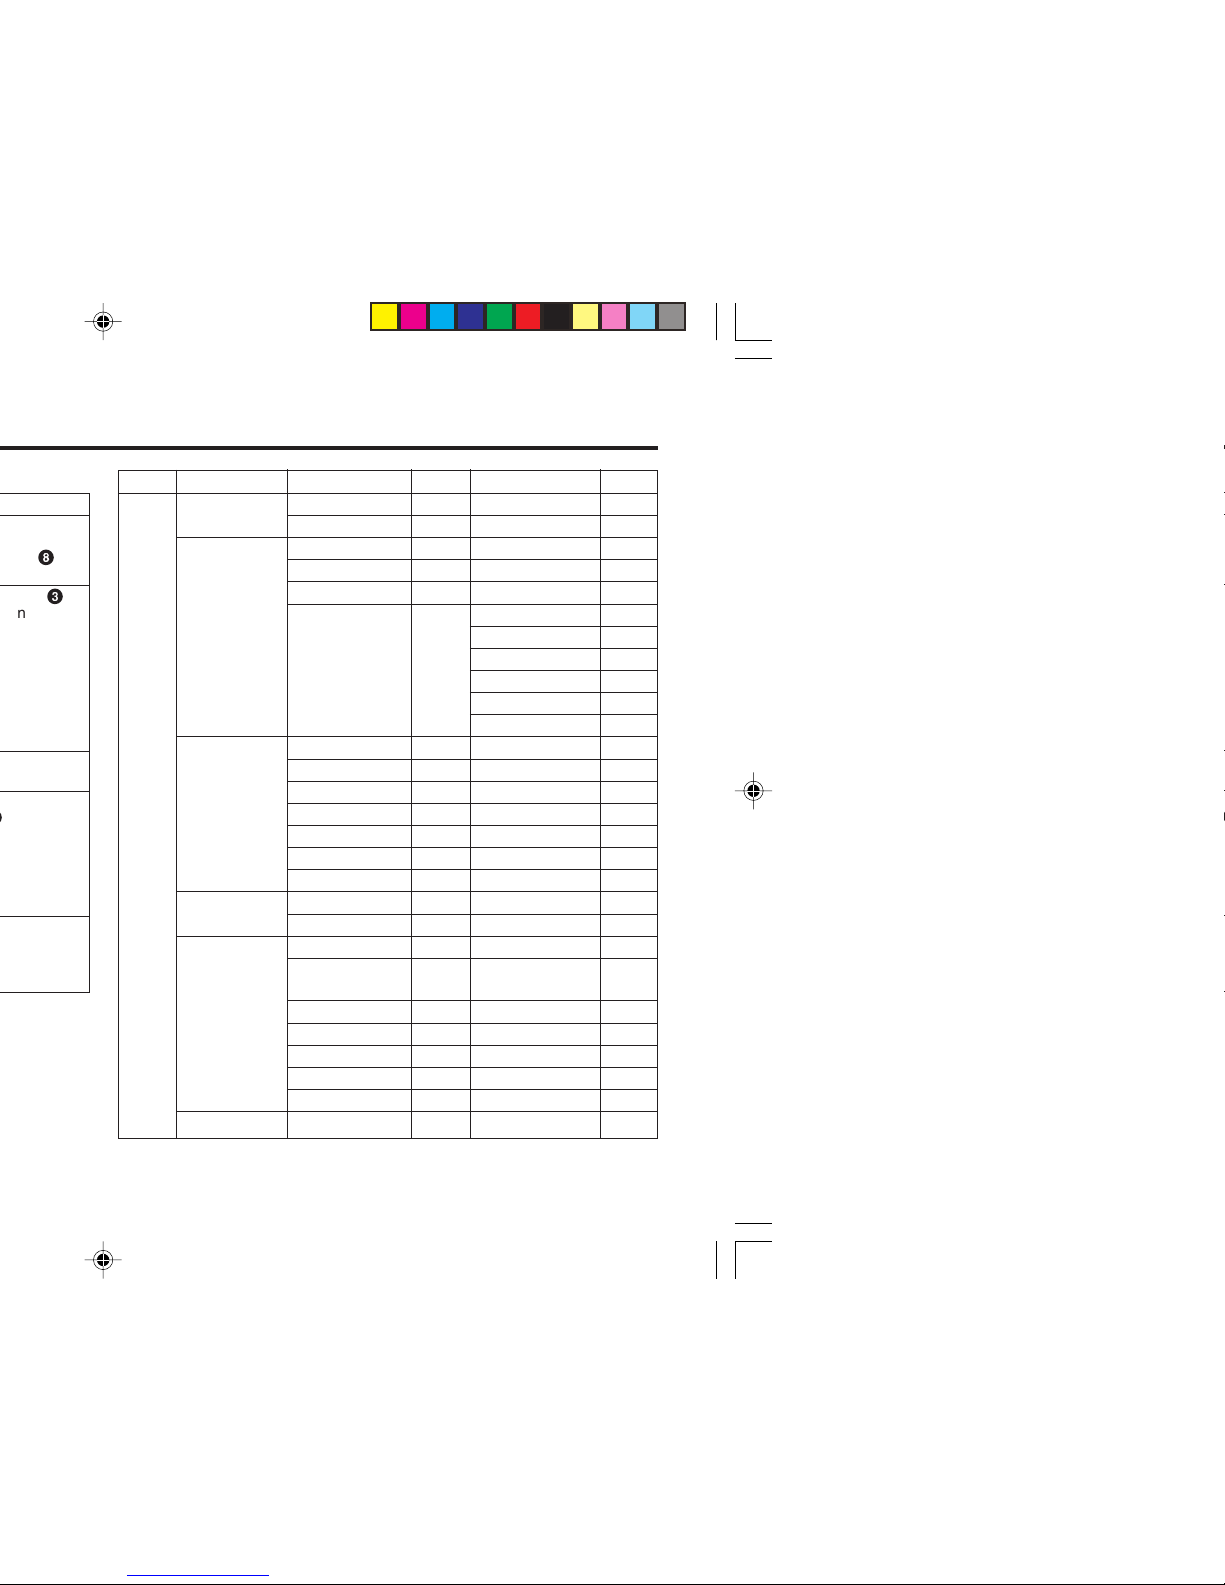
MENU PICTURE menu PICTURE FEATURES menu
COLOUR SYSTEM
Area Country or Region System
Bahrain, Kuwait, Oman, Qatar, United Arab Emirates,
Yemen, etc. PAL
Indonesia, Malaysia, Singapore, Thailand, India, etc.
Asia, Middle China, Vietnam, etc. PAL
East Hong Kong, etc. PAL
Islamic Republic of Iran, Lebanon, Saudi Arabia, etc. SECAM
Philippines, Taiwan, Myanmar, etc. NTSC
Russia, etc. SECAM
Europe Czech Republic, Poland, etc. PAL
Germany, Holland, Belgium, etc. PAL
UK, etc. PAL
Oceania Australia, New Zealand, etc. PAL
Republic of South Africa, etc. PAL
Africa Nigeria, etc. PAL
Egypt, Morocco, etc. SECAM
MENU PICTURE menu PICTURE MODE
❇
❇
GGT0096-001A-H_EN 07/04/2005, 6:30 PM9