- 6 -
First select your country by pressing or button. his
will affect the sort process in APS.
By pressing the or buttons, come to the Language
item and select the language in which the menus of the V
will appear. You can see the available languages by pressing
or button. As soon as you change the language, the
menu items will be displayed in the selected language.
o select Continue use or button. By pressing
or button start the A.P. .
When you start A.P. . the following window will appear on
the screen.
35&+$11(/1$0(
&&
$36,65811,1*
3/($6(:$,7
$36
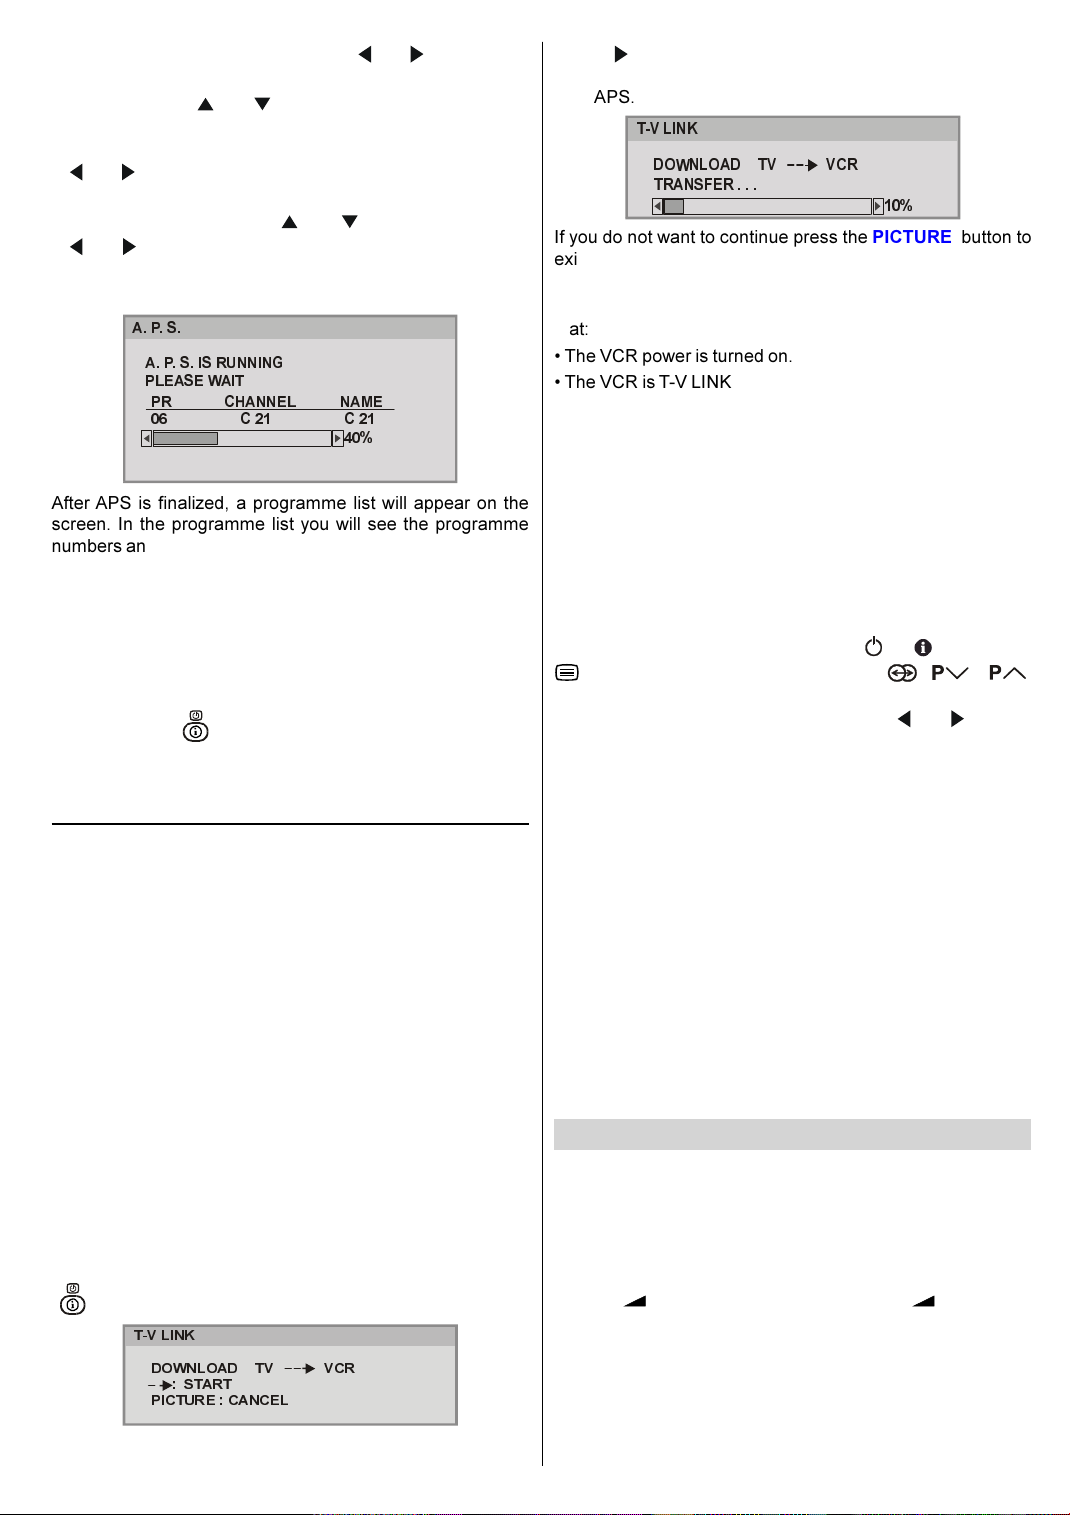
After APS is finalized, a programme list will appear on the
screen. In the programme list you will see the programme
numbers and names assigned to the programmes.
If you do not accept the locations and / or the programme
names of programmes, you can change them in Program menu.
For details see PROGRAMME menu on page 9.
If you do not have a -V LINK compatible VCR, press BLUE
button to exit the menu.
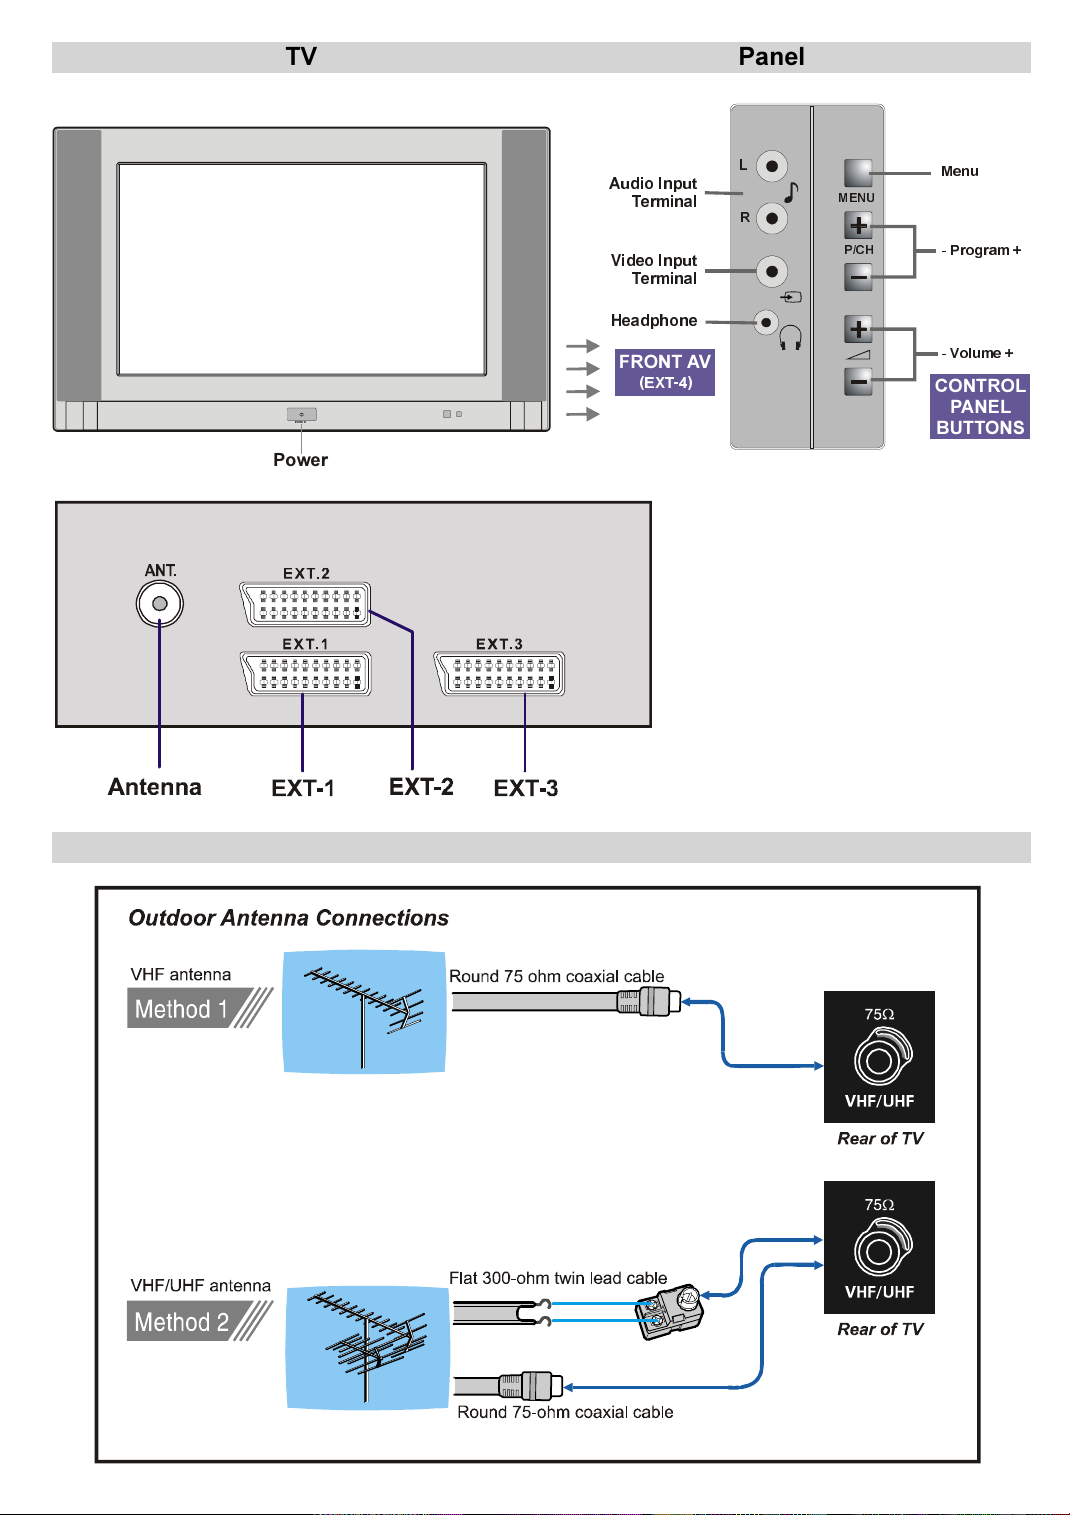
If you have a -V LINK compatible VCR connected to the EX .2
terminal, press button to display -V LINK menu. hen
follow the operating procedure Downloading data to VCR in
the following -V LINK section.
T-V LINK
When a -V LINK compatible VCR is connected to the EX .2
terminal on the V, it is easier to set up the VCR and to view
videos. -V LINK uses the following features:
To use T-V LINK functions
A -V LINK compatible VCR means a JVC video cassette
recorder with the -V LINK logo, or with one of the following
logos. For details see your VCR instruction manual.
Q-LINK (A trademark of Panasonic Corporation)
Data Logic (A trademark of Metz Corporation)
Easy Link (A trademark of Philips Corporation)
Megalogic (A trademark of Grundig Corporation)
MARTLINK (A trademark of Sony Corporation)
Downloading data to VCR:
he VCR will automatically download the registered data on
the V channels from the V. his means you do not need to
set up the programme channels on your VCR manually.
he -V LINK menu will be displayed when you press the
button while PROGRAM menu is displayed.
'2:1/2$' 79 9&5
67$57
3,&785(&$1&(/
79/,1.
Press button to start downloading data to VCR. RANS-
FER is displayed in the menu. ransfer bar can only be seen
after APS.
'2:1/2$' 79 9&5
75$16)(5
79/,1.
If you do not want to continue press the PICTURE button to
exit the menu.
If FEA URE NO AVAILABLE is displayed, download was
not performed correctly. Before trying to download again, check
that:
he VCR power is turned on.
he VCR is -V LINK compatible.
he VCR is connected to the EX .2.
he scart cable is fully wired.
Direct REC:
You can easily record to VCR the images that you are watch-
ing on the V. For details, read the manual for your VCR. Use
your VCR controls. VCR IS RECORDING is diplayed. You
can not carry out Direct REC using your Vs control.
When the VCR is not ready (For example when there is no
tape inserted), NO RECORDING is displayed.
When you press the following buttons (
,
, , AV, MENU,
, BACK, SUB I LE, GUIDE, ZOOM, , / ,
number buttons) during recording, a message appears asking
if you want to stop recording or not. Press or button
to stop recording or BLUE button to continue recording.
Do not turn the TV off in the following cases:
When recording images from an external device connected
to V (For example camcorder).
When recording a V channel after it has been unscrambled
on a decoder.
When recording a V channel by using the Vs output be-
cause the VCRs own tuner can not properly receive that
channel.
When recording Digital terrestrial broadcasting (DVB- ).
TV autopower on/VCR image view:
When the VCR starts playing, the V automatically turns on
and images from EX 2 appear on the screen.
his function does not happen if your Vs main power is turned
off. Set your Vs main power to on (StandBy Mode).
Basic Operations
You can operate your TV using both the remote control
and onset buttons
Operation with the buttons on the TV
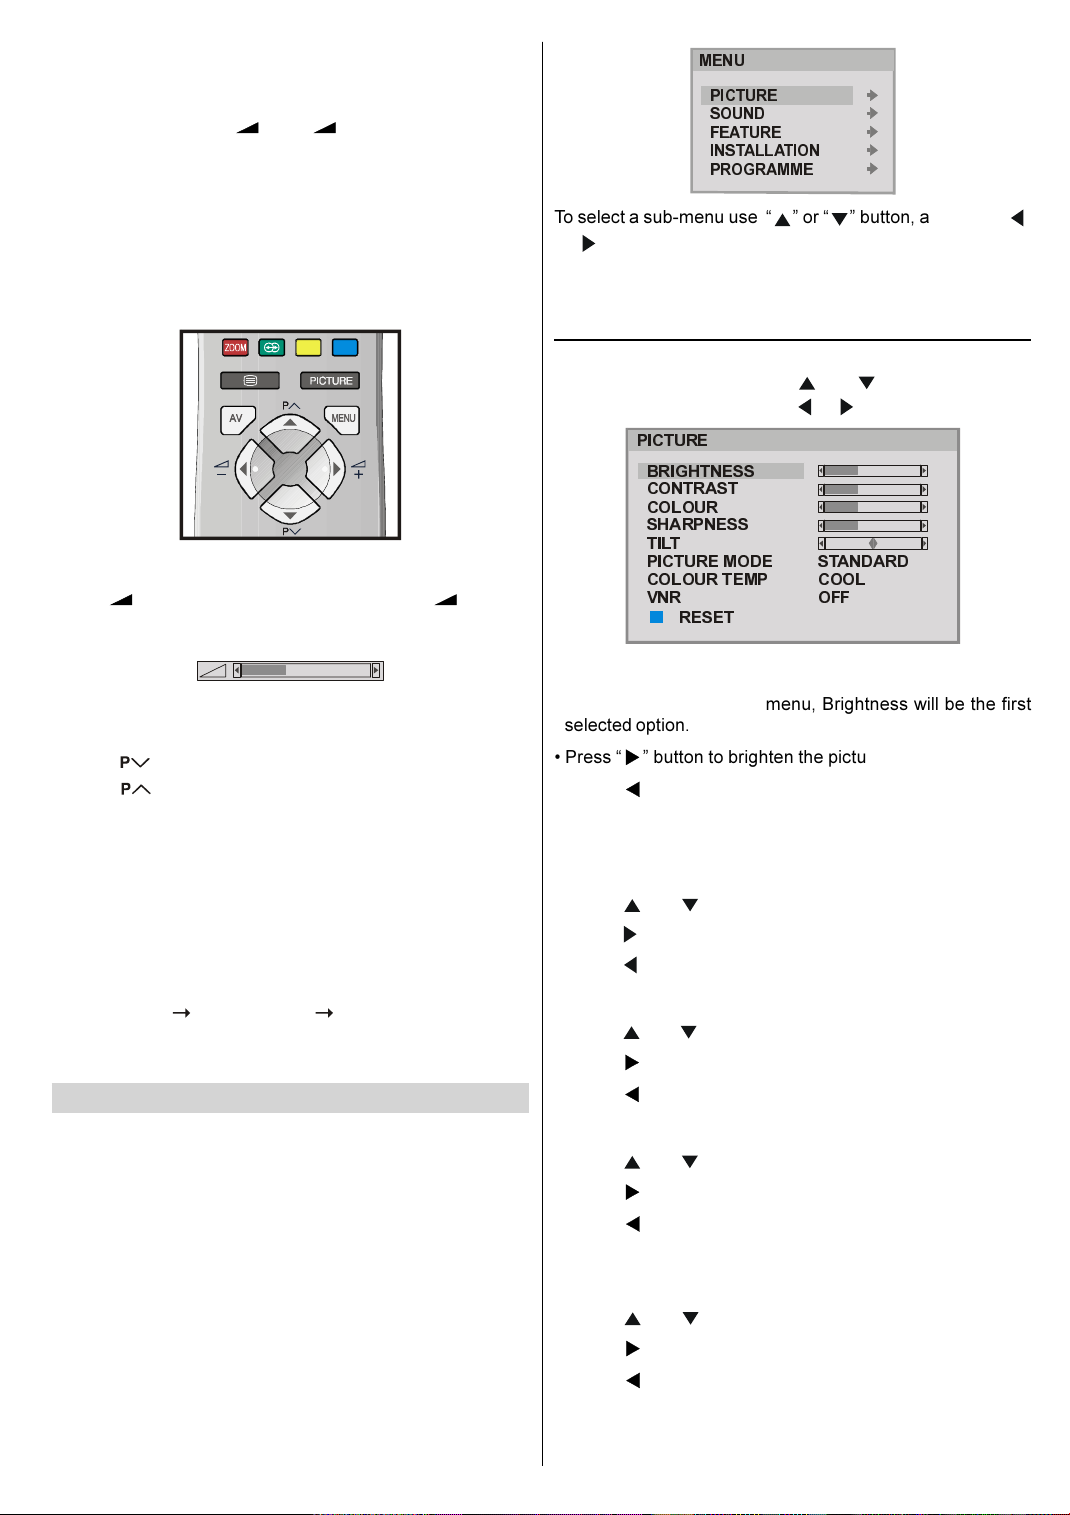
Volume Setting
Press - button to decrease volume or + button to
increase volume, so a volume level scale (slider) will be dis-
played at the middle of the bottom on the screen.
Programme Selection
Press P/CH + button to select the next programme or P/
CH - button to select the previous programme.
ENG&BG-AK49-C1512UK-2826W-RF-CLED-PLLCH-(AV-28F3SJ)-BSI-10041579-50086694.p65 13.04.2006, 14:326