K-Drill Ice Auger User manual

1
Owner’s Manual
Please read this manual and follow its instructions carefully. The words
WARNING, CAUTION, and IMPORTANT carry special meanings and should be
carefully reviewed.
WARNING - Failure to read, understand and follow all
warnings and instructions listed could result in serious injury or death to
self or others.
CAUTION - These instructions point out special safety
procedures or precautions that must be followed to avoid damaging the
augers, injuries to self and others.
IMPORTANT - This provides special information to make usage of the K-Drill
easier and important instructions more clear.
Table of Contents
Product Introduction 1
Drill Setup 3
Attaching to the Drill 3
Drilling Ice Holes 4
Redrilling Holes 5
Safety & Usage Tips 6
Replacing the Blades 8
Free Lifetime Sharpening 9
Parts & Accessories 10
Cordless Drill Requirements 11
Specications 11
Limited Warranty 13
K-Drill Patent #7,946,355
Introducing the K-Drill Ice Auger
EfciencyandlightweightperformancebestdescribestheK-DrillIceAuger.Both
the 6” and 8” K-Drill Ice Augers are designed to be driven with rechargeable elec-
tric drills or gas power heads.
The unique center tip and high carbon steel chipper blades allow for quick and
clean holes under all ice conditions. K-Drill will also work exceptionally well when
re-opening existing holes.
TheK-Drillhasitsownotationsystemtopreventitfromsinkingdowntheholeif
it should come detached from the drill. The 6-inch K-Drill Ice Auger cuts a 6” hole.
However, the 8-inch K-Drill cuts a 7-1/2” hole.

2
Drill Drive Adapter
(#IDRL28)
Safety Float
(#IDRLFLT)
Thermal Wrap
(#LBLA02)
Locking Collar
(#IDRL19)
Modular Flighting
(Patent Pending)
6” - #IDRL17
8” - #IDRL48
Head
Replaceable Blade Set
Each set uses two chipper blades and one
center tip blade.
6” Blade Set (#IDRLBL6)
8” Blade Set (#IDRLBL8)
Universal Safety Cover
(#IDRL24)

3
Owner’s Manual
IMPORTANT -At the end of the ice shing season, before storing for summer,
please spray WD-40 on the blades.This simple maintenance prevents rusting during
storage. Also, K-Drill offers free blade sharpening. See page 9 for details.
CAUTION - Always place protective cover over blades when not drilling.
Keep the electric drill assembly out of the water.
K-Drill Ice Auger Operation
Proper Drill Setup
1) Ensure that you have an adequate drill, meaning a half-
inch chuck and at least 725 in/lbs of torque.
2) Ensure the drill is set to its DRILL mode, not ratchet
or hammer.
3) Ensure the drill is set to its LOWEST (slowest) gear
setting.
4) Ensure your drill has a side-arm attachment so you can
maintain a secure two-handed hold on the drill.
Attaching the K-Drill to your Electric Drill
3 Times Method
1) Set drill to neutral position or remove battery for your safety.
2)Insertthedriveadapterofthek-drillintoyourelectricdrillaligningtheatson
the drive adapter with the 3 jaws of in the chuck of the electric drill.
3) Begin hand tightening the chuck down on the drive adapter while rotating the
handle of the electric drill back and forth 15-20 degrees. Continue this hand
tightening until the chuck feels tight on the adapter. Possible to use both hands to
assure chuck is tight.That’s #1.
4) Re-install battery and drill 3-4 inches of ice - tighten chuck more. That’s #2
5) Drill 2-3 complete holes and tighten chuck more. That’s #3, now the chuck is
secure on the drive adapter and should be good for drilling most of your holes
for the day. Always good to check again every 15-20 holes being certain nothing
loosens up during use.

4
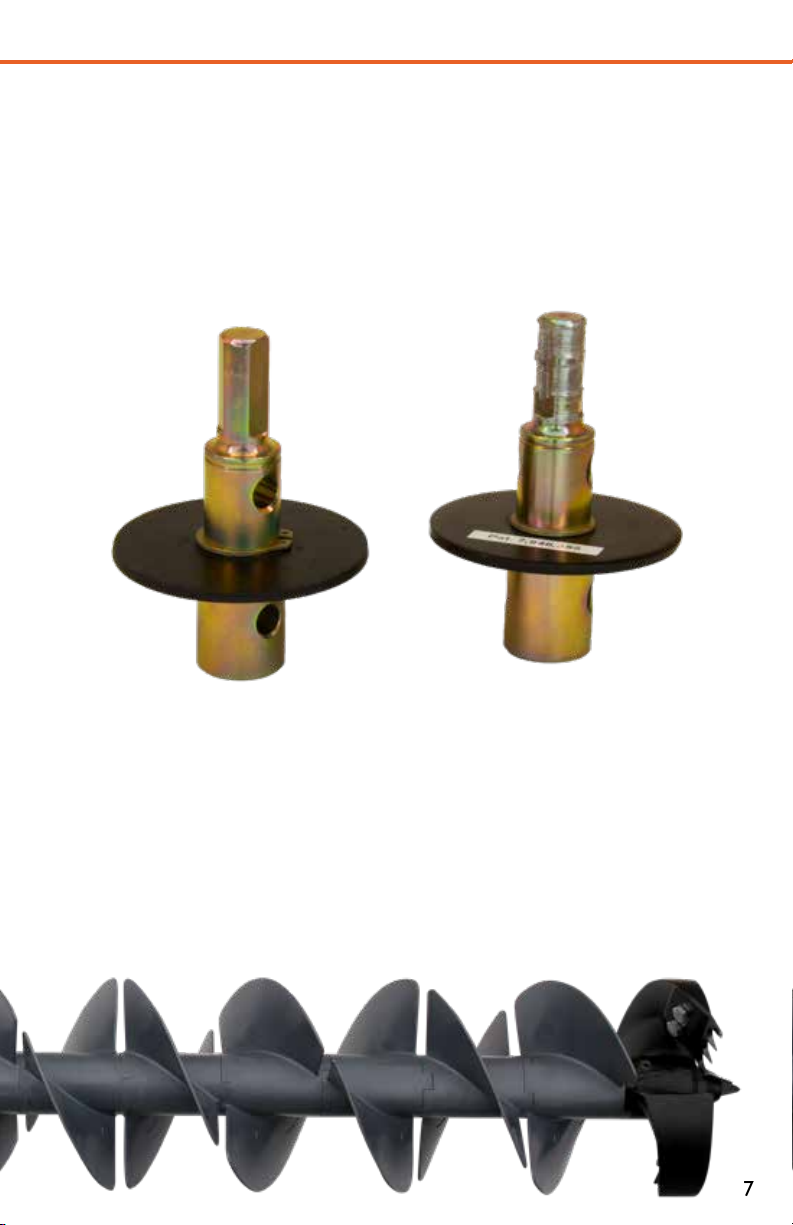
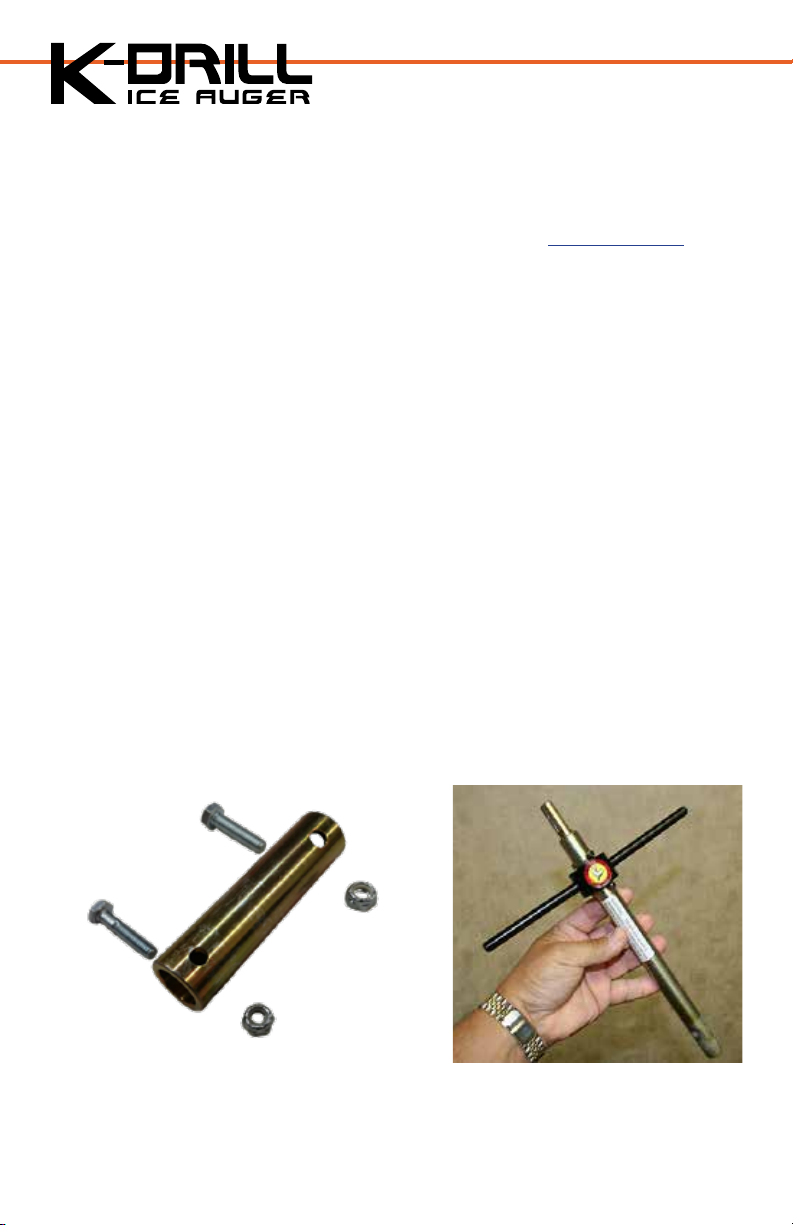
IMPORTANT: At no time is it safe to insert the K-drill into the chuck and pow-
er-up the drill to tighten it onto the shaft. The same also holds true of removing
the K-drill from the chuck. Do it manually for your own safety and the safety of
others. If necessary set the drill in Neutral mode or simply remove the battery
when inserting or removing the K-drill from the chuck of the electric drill.
Drilling Holes in the Ice
1) Important to keep protective cover in place until
you are ready to start drilling ice.
2) Ensure drill settings are correct - lowest speed and
drill mode.
3) Ensure K-Drill is secure in the electric drill chuck
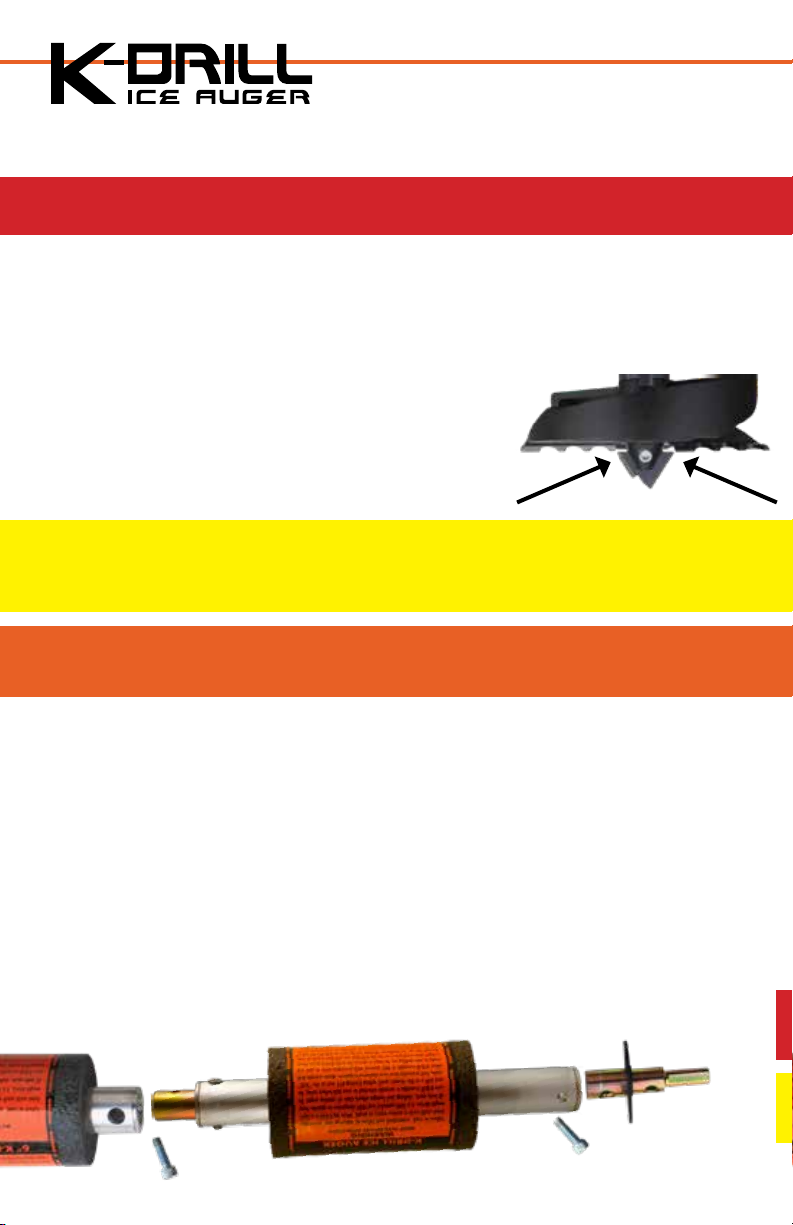
4) Set center tip where you want to drill the hole and
that you are holding the drill straight down.
5)Holdthedrillhandleandside-armsupportrm-
ly and pull the trigger fully while using minimum
downward force to begin guiding the drill through
the ice. Occasionally it will help with the support by resting the support
handle on your hip/leg while drilling.
6) On thicker ice, beyond 24 inches, you will drill continuously until the top
ightingisnotvisible,THENCLEARTHEHOLE!
Without letting up on the trigger, resume drilling and clear the hole again of
ice chips every 5 seconds until break-through. Then slow the drill speed until
hole is clear of ice chips or stop drill and reverse
drill direction and drive the chips down under the
ice. DO NOT let up on the drill speed until break-
through as this may result in the k-drill binding and
sticking in the hole.
7) Failure to clear the hole of ice chips and allowing
ittobuildtheseicechipsontopoftheighting
willresultindamagetothetopightingsections.
This will NOT be covered under warranty. It is
the responsibility as operator to adequately “Clear
Your Hole” .

5
Owner’s Manual
Redrilling of Holes in the Ice
Beforeexplaininghowtore-drillanoldholeyoumustrstunderstandhowan
existing hole refreezes.
1) It will begin refreezing from the top and outside edges
2) As it continues to freeze, the ice will continue
thickening in from the sides with more ice at the
top of the hole than the bottom
3) Given enough time and the right freezing con-
ditions the hole would become a solid water
column and would appear as though a hole had nev-
er been in that location. However,if you come back
to this hole in a day or 2 it is possible to have a solid
layer of ice on the top 1-2 inches and then you will
experience the center core being of wa-
ter while the outside edges are being frozen. The further you drill down
through the existing hole you will notice less and less ice on the out-
side perimeter of the hole and more water in the center. This is where
reopening these holes may get a little tricky depending upon which blade
congurationandaugerheadyouareusingandhowclosetheaugerheadand
cutting blades match in size. The more closely the cutting head comes to meet-
ing the blade size, the easier it will cut and the further you will get down the
existing hole.
4) Once the ice on the side of the hole is smaller than the cutting head diameter,
the blades will want to grab the side walls of the remaining ice and cork-screw
itself down through the rest of the ice in the hole.
5) It is extremely important to hold back on the auger at that time to prevent it
from doing this little cork-screw maneuver. By holding back on the auger and al-
lowing the blades to cut away on the thin layer of ice on the outside edge of the
hole you will cut out as much of this ice as possible ALL the way down to the
bottom of the hole giving you a clean hole much the same as your original hole.

6
Safety and Usage Tips
• DO NOT use the K-Drill Auger for anything else except for
drilling ice. It was not designed to drill into soil or lumber.
•KEEParmholdonthedrillhandleandside-armasyoudrill.
Also maintain proper footing and balance at all times.
• DO NOT leave drill standing in partially drilled hole. It can freeze into place.
• TRAIN inexperienced operators to regularly clear hole during drilling.
• DO NOT wear loose clothing or lanyards. They can be caught in moving
auger.
• BE AWARE that when cutting ice, the auger can bind, causing the drill to stop
suddenly. Use caution and don’t force the drill.
• CLEAR ice shards and slush several times while drilling to assure excess ice
shavings do not buildup in the hole, or binding may result. CLEAR ice shards
just before breaking through.
• ALWAYS set the auger in a safe place to prevent personal injury or damage to
the auger shaft or blades.
• KEEP your electric drill assembly out of standing water. Rest the drill horizon-
tally using the drill handle (battery) and side-arm as the props.
• KEEP the drill battery in a warm location prior to use in colder conditions.
Keep spare batteries warm as well.
• INSPECT your K-Drill auger periodically. If damaged, have it repaired or re-
placed by an authorized service facility.
• KEEP the blades sharp and clean for best performance.
• DO NOT try to sharpen the blades yourself. K-Drill offers Lifetime Blade
Sharpeningaslongasthebladesremainwithinspecications.FreeLifetime
Blade Sharpening does NOT cover negligence or misuse.
If you have problems or have a defective K-Drill, DO NOT return
it to the retailer. Contact K-Drill directly for all warranty issues.
See page 10

7
Owner’s Manual
Proper Auger-to-Drill Chucking
It is important to ensure that your K-Drill Auger is properly attached (chucked)
into your cordless drill. Look closely to ensure the drill bites the auger stem
properly on all three sides. Failure to do so will cause the auger to come lose as
well as stem stripping shown here.
Storage & Maintenance
Make sure to store the K-Drill auger in a safe location, and out of reach of
children and animals. MAKE SURE THE SAFETY COVER IS IN PLACE DURING
STORAGE!
Attheendoftheiceshingseasonbeforestoringforsummer,sprayWD-40on
the blades to prevent rusting during the off season.
New Stem Stripped Stem

8
Replacing the Blades
WARNING–Bladesaresharp!Useleathergloveswhenhandlingblades.
1) Set the drill to neutral or remove the battery from the drill for your own safety.
2) Remove the center tip blade with 3/16” Allen wrench.
3) Remove the outside chipper blades with 7/16” open end wrench.
4) Replace the outside chipper blades and snug the bolts into
position.Thentorqueanadditional1⁄4turnandSTOP!
(If possible torque to 115 in/lbs)
5) Replace the center tip. Adjust the blade so it is equally
spaced side-to-side from the chipper blades installed in
the previous step.
IMPORTANT - The center point blade when being re-installed needs to be
centered between the two main chipper blades. The unique two stage point may look like
a broken tip but it is designed this way.
CAUTION - DO NOT OVER TIGHTEN as it will strip the threads and this will
not be covered under warranty.
6) Torque bolt of center tip to 115 in/lbs.
K-Drill Extension Installation
The standard K-Drill can drill through up to 36” of ice.The K-Drill extension can
be added for thicker ice conditions. Extensions can be “stacked” if needed to create
a very long ice auger.
1)Slidethedownoat,exposingtheAllenbolt.
2) Remove the bolt and remove the drive adapter with washer.
3) Install the stem of extension. Replace and tighten bolt removed in step #2.
4) Install the driver adapter with washer into top of extension. Secure it with the
bolt provided.
#IDRLEXT - 12 “ Auger Extension

9
Owner’s Manual
#IDRLBL6 (6”) & #IDRLBL8 (8”)
(shown)
Free Lifetime Blade Sharpening*
*Blade sharpening for the K-Drill is FREE unless
the blades have been abused drilling into rock,
gravel, sand, etc., or until the blades can no longer
be sharpened. Refer to the warranty policy at the
back of this manual.
The blades can be re-sharpened 2-3 times under
normal use, before needing replacement. After
re-sharpening blades multiple times they may fall
outsidethespecicationandwillnolongercutef-
ciently. It will then be necessary to purchase a new
replacement set of blades for your K-Drill. Under
normal use, blades should be sharpened every 2 to
3 years.
Please let us know if you would like to purchase
an additional set of blades when you return your
blades for re-sharpening. We will notify you at the
time of re-sharpening whether your blades cannot
be re-sharpened due to wear or neglect.
When returning a set of blades for re-sharpening
please wrap them securely to protect the sharp
edges. Allow 2 to 3 weeks for processing. Send
them to the address shown below:
K-Drill Blade Re-Sharpening
6667 West Old Shakopee Rd. Suite 102
Bloomington, MN 55438
WARNING - Even used blades can be SHARP. Handle them with care.
Wrap lose blades in cardboard to protect sharp edges.
IMPORTANT - Be certain to include your name, address and phone number along
with your returned blades.

10
Parts and Accessories
To purchase other parts and accessories for the K-Drill Ice Auger Systems please
contact K-Drill customer service at 952-224-3649 or visit kdrillauger.com to place
an order online.
Replacement Parts
IDRLBL6: 6” Replacement Blades (Set of 3 blades)
IDRLBL8: 8” Replacement Blades (Set of 3 blades)
IDRL24: Replacement Safety Cover for 6” or 8” K-Drill
IDRLFLT: Replacement Float for K-Drill
IDRL28: Replacement Drive Adapter
LBLA02: Replacement Thermal Wrap
IDRL19: Replacement Locking Collar
IDRL17: Replacement Flighting for 6” Auger (requires 8 pcs)
IDRL48: Replacement Flighting for 8” Auger (requires 6 pcs)
Accessories
IDRLEXT: 12” Auger Extension
IDRLADPC: Adapter for Clam Drill Plate
KLG001: Kluge Drill Attachment
#KLG001
Kluge Drill Attachment
#IDRLADPC
Clam Drill Plate Adapter
T-Handle Adapter to be used
from StrikeMaster hand auger to
electric drill

11
Owner’s Manual
Milwaukee M18 Fuel
K-Drill Cordless Drill Requirements
You can use any cordless drill brand you choose, as long as it meets the following
minimum requirements:
1) Side Stabilizer Arm (for a secure two-handed grip)
2) 1/2” Drill Chuck
3) 18 Volt/4 Amp Lithium Ion Battery (or higher)
4) Brushless Motor Design
5) 500-750 RPM with a minimum of
6) 725 in/lbs of torque (or higher)
Most of the Milwaukee M18 fuel series
and most DeWalt MX XR series can
be used with the K-Drill. Before you
buy, please visit kdrillauger.com to see
acompletelistofspecicallyapproved
and tested drill models
K-Drill Specifications
Weight: 5 LBs
Overall Length: 38”
Flighting Length: 24“
Drive Stem Dia: 1/2”
Cutting Dia: 7.5” (#IDRL08)
6” (#IDRL06)
Float Length: 7 “
Float Dia: 3.5”
Shaft Dia: 1.375”

12
Hoody Sweatshirt
Our charcoal K-drill hoodies
aredenitelyoneofthe
heaviest and warmest
hoodies around.
• Sueded 70%
cotton & 30%
polyestereece
• Rib knit side
gussets, cuffs and
waist
• Key pocket inside
pouch
• 1/4 zip collar with YKK
zipper
• Super-thick draw cords
• Screen printed logo
Wear Truckers Cap
2-tone grey and black with
K-Drill embroidered logo,
mesh top with snap back.
• Grey / Black
• Mesh top
• Snap back
• Screen printed logo
Go to kdrillauger.com to Order!
Knit
Stocking
Cap
A very comfortable
2-tone grey and black knit, with
K-Drill embroidered logo.
Fits nicely over the
Truckers Cap.
• Warm knit material
• Embroidered logo
#KAP001
#KAP002
#IDW110
Table of contents
Other K-Drill Fishing Equipment manuals
Popular Fishing Equipment manuals by other brands

Fisherman's Habit
Fisherman's Habit 98882 Setup and operation instructions

Aqua-Vu
Aqua-Vu QUAD-HD user guide

Eskimo
Eskimo FatFish 6120i Take-Down Instructions

Eskimo
Eskimo M43Q10 Assembly instructions & parts explosions

Scotty
Scotty LINE PULLER Installation, Maintenance, Use and Safety

Classic Accessories
Classic Accessories Gunnison Float Tube instructions

Atlas Elektronik
Atlas Elektronik ATLAS NORTH AMERCA Marine Sonic Sea Scan ARC... manual

Jiffy
Jiffy Pro4 Lite Operating manual/parts guide

EcoNet
EcoNet Eco-Popper quick start guide

Cadence
Cadence CB6 manual

DZCARP
DZCARP DZ-750 user guide

Great day
Great day QUICK DRAW QD805 BF Instructions for installation and use