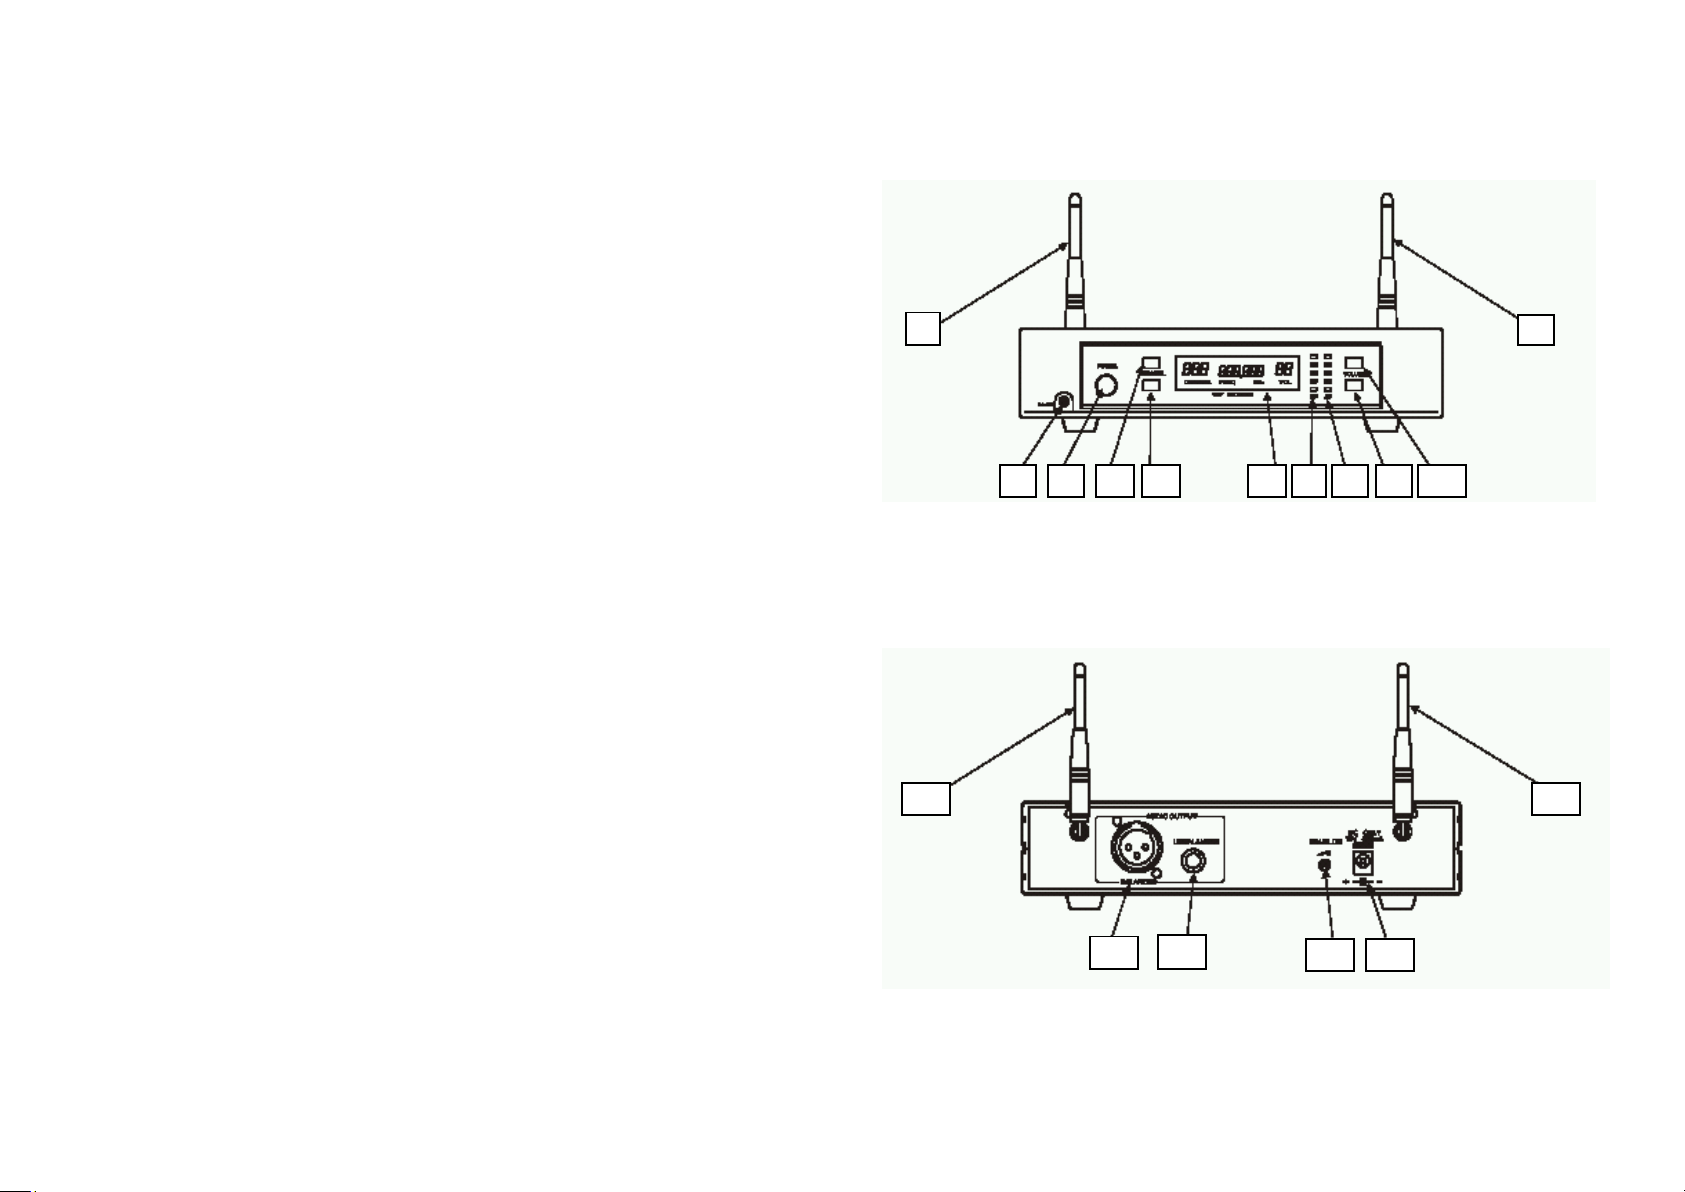
DESCRIPTION RECEIVER:
1. Antenna
Fixed adjustable UHF antenna.
2. DC out
Connection for charge cable.
3. Power button
Press the button to turn the receiver on/off.
4. Channel + button
Channel up. Keep the button pushed for 1 second to change the channel.
The display will flash. Push the button once to change the channel.
5. Channel - button
Channel down. Keep the button pushed for 1 second to change the channel.
The display will flash. Push the button once to change the channel.
6. Display
Shows channel, frequency and volume level.
7. RF level indicator
LED’s show the strength of the reception from the microphone.
Green: normal reception.
Red: approaching overload condition.
8. AF level indicator
LED’s show the strength of the audio signal from the microphone.
Green: normal reception.
Red: approaching overload condition.
9. Volume - button
Press the button to decrease the output volume.
10. Volume + button
Press the button to increase the output volume.
11. XLR connection
3-pin balanced output for mixer or amplifier.
12. 6,3mm connection
unbalanced output for mixer or amplifier.
13. Squelch adjustment
The squelch adjusts the output level to suppress the noise. Turn the button
to the right for maximum adjustment with minimum noise interference. With
this adjustment the range of the system is limited. Turn the button to the left
for maximum range of the system but with possible noise interference.
14. DC connection
Input for AC/DC adapter. (12V, 500mA)
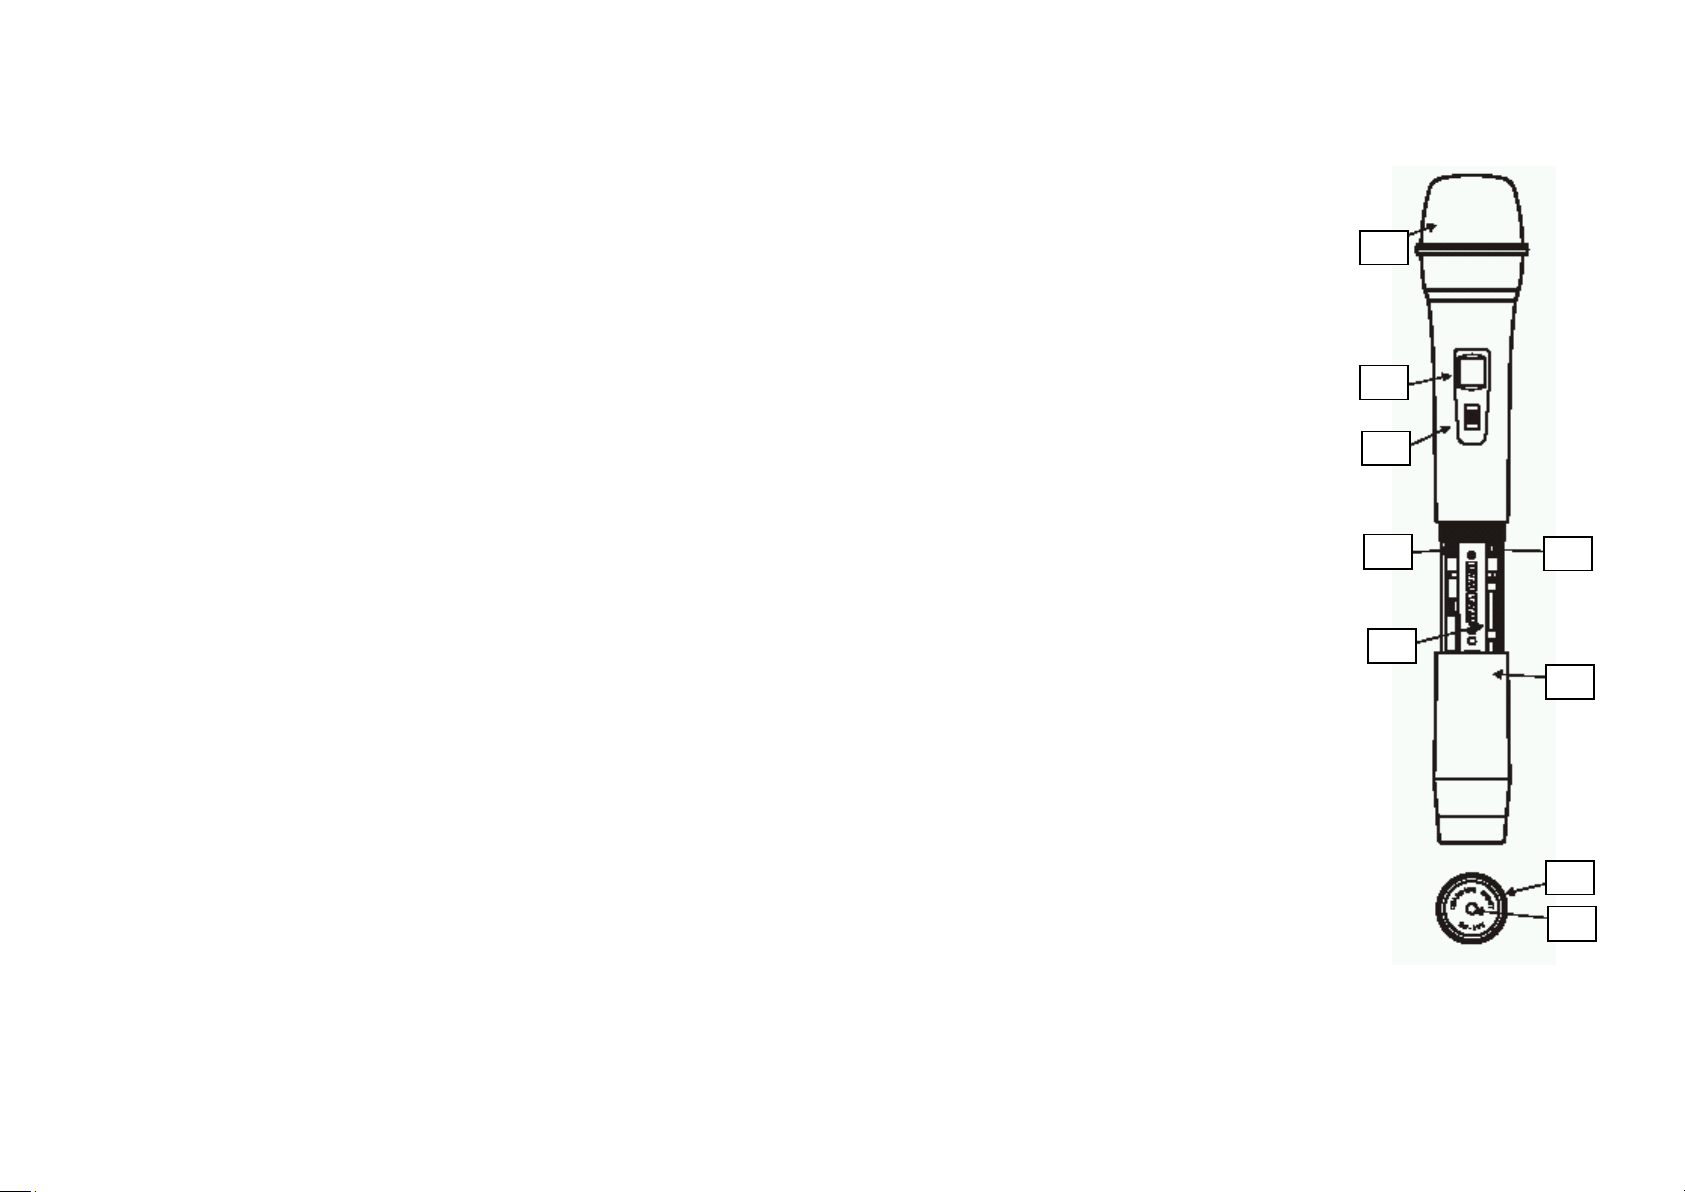
DESCRIPTION MICROPHONE:
1. Grille
Protects the microphone element
and reduces the sound of wind
and breathe.
2. Display
Shows channel and battery status.
3. Power switch
Slide the switch up to turn on the
microphone. Slide the switch down to
turn the microphone off.
4. Channel + button
Change of channel up.
Keep the button pushed for 1 second
to change the channel. The display will
flash. Push the button once to change the
channel.
5. Channel - button
Change of channel down.
Keep the button pushed for 1 second
to change the channel. The display will
flash. Push the button once to change the
channel.
6. Battery compartment
Insert 2 regular or rechargeable AA 1.5V
batteries. Use only NiMH batteries for
charge function.
7. Battery cover
Turn the cover to the left to unscrew and
get access to the battery compartment and
channel buttons.
8. Color clip
Turn the clip to the left to unscrew and
change from color.
9. DC in
Connection for charge cable.
3.
4.