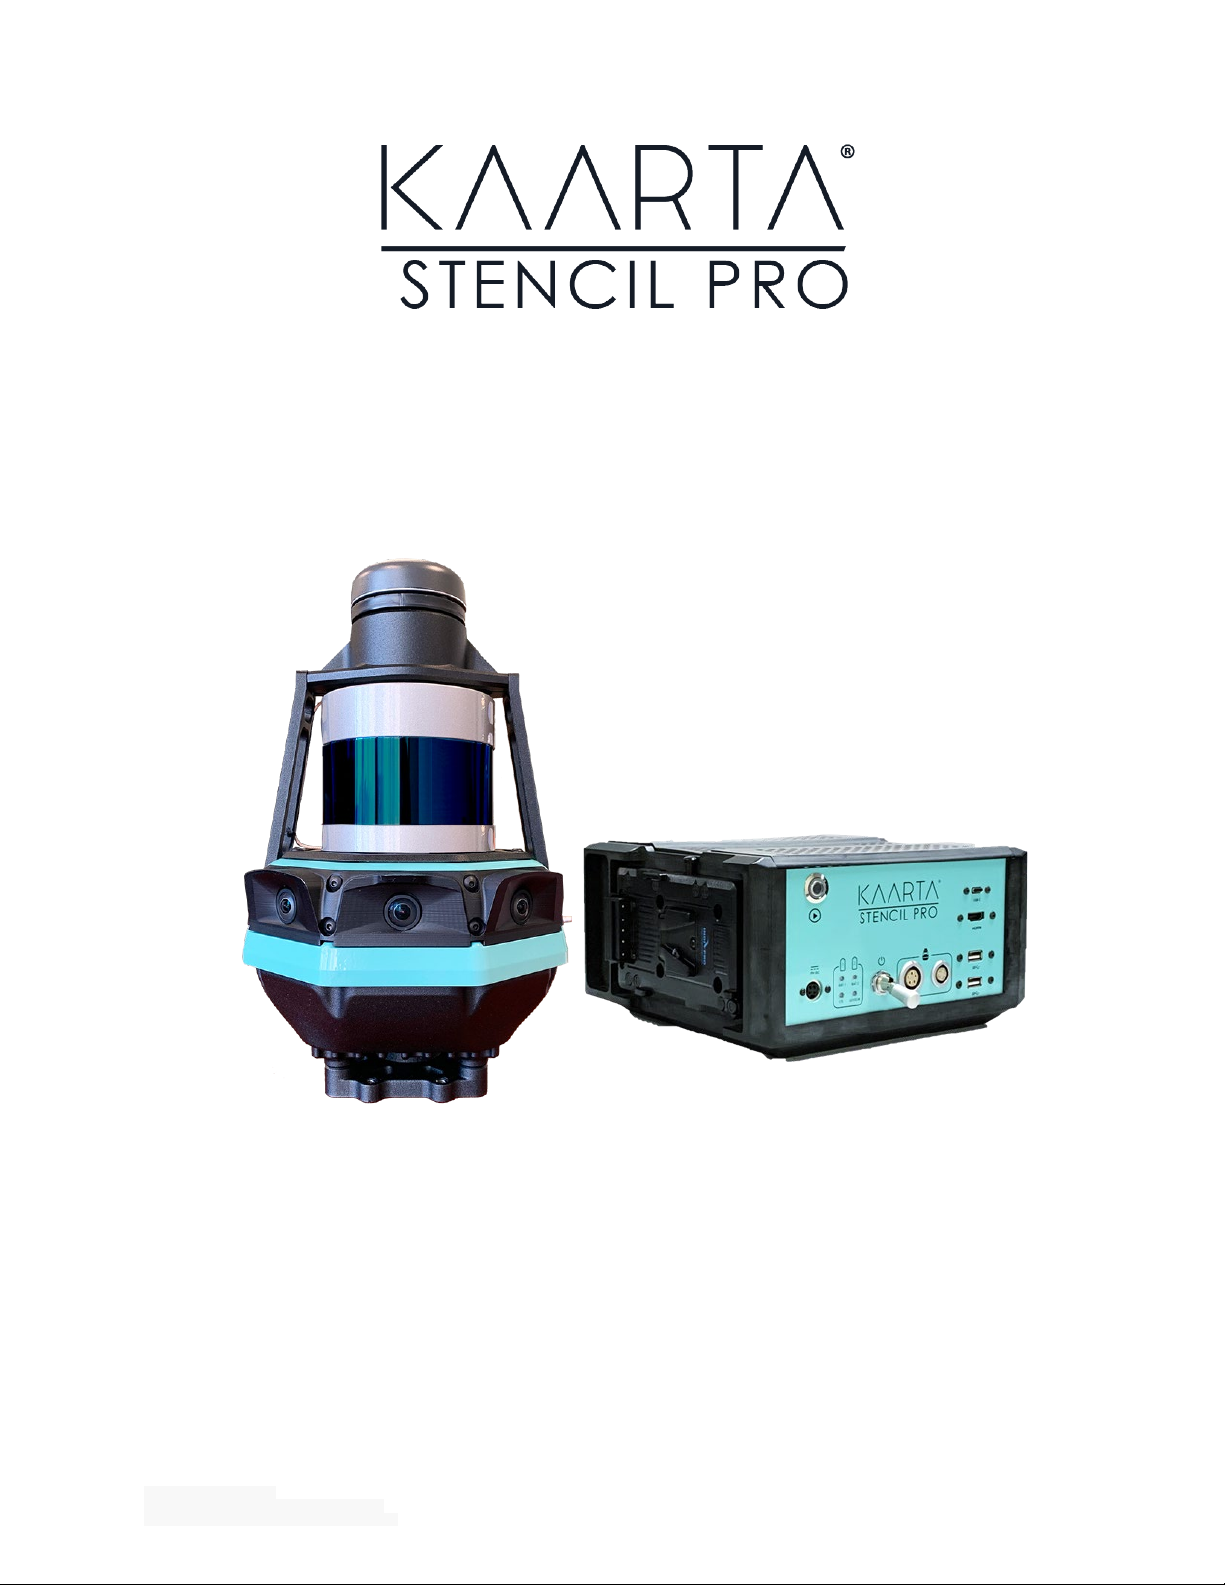
kaarta STENCIL PRO User manual

KAARTA ENGINE
U.S. PATENT NO. 10,962,370
AND OTHER PATENTS PENDING
USER GUIDE
UG-S3- 2 1.02.1 - 002 - 0 8 2 2

WWW.KAARTA.COM 2
INTRODUCTION
Congratulations on your purchase of Kaarta Stencil®Pro. This document serves as a guide
to get you quickly up and running with Stencil Pro and its component parts – the scanner
and controller/control pack. You will learn to operate the system, familiarize yourself with
the user interface, utilize the GNSS, and perform post-processing functions.
Visit our web site at www.kaarta.com for updates and additional information.
OVERVIEW
Stencil Pro is the innovative mobile mapping platform that goes anywhere – in just about
any environment – giving you rapid, accurate and visually stunning reality capture. An all-
in-one system to scan, process and view captured data in real time, Stencil Pro offers
integrated GNSS, panoramic 4K imagery and colorized point clouds in an IP65-rated
professional form factor. With robust surround-view perception in a wide range of light
conditions, Stencil Pro is optimized for both indoor and outdoor performance. Featuring
an impressive 32-line high-density, low-noise lidar with a range of up to 200m and a data
rate of 600,000 points per second, Stencil Pro produces a highly accurate 3D model in
minutes. New advancements are backed by proven Kaarta technology, quality, and
accuracy.
Stencil Pro’s intuitive user interface (UI) makes data capture and processing simple. The
user experience includes one-button scanning, real-time scan monitoring and
streamlined post-processing options for maximizing data clarity and usability. Remote
operation with an iPad allows for mounting Stencil Pro on a multitude of transports.
When hand-carrying, scan status can also be started and stopped with a push of a button
on the device.
KAARTA ENGINE
Real-time registered pointcloud generation
Multi-sensor input (lidar, IMU, panoramic cameras, GNSS)
Continuously self-correcting minimal drift techniques
Implicit loop closure
Fast, explicit loop closure at point of scan
CARE
Like any precision instrument, take precautions to ensure a long, useful life of the device.
Treat it with care. Stencil Pro scanner has an IP or “Ingress Protection” Rating of 65,
meaning that it is dust tight and is protected against low-pressure water jets or water
projected from a nozzle. Avoid rough handling and submersion in water. Operating
temperature for Stencil Pro scanner is -10°C/14°F to 45°C/113F.

WWW.KAARTA.COM 3
The Stencil Pro controller is not water or dust proof and should be operated with some
caution. Keep the controller out of extreme temperatures, such as below freezing (0°C or
32°F) or hot temperatures (above 35°C/95°F). Use the shipping case to protect Stencil Pro
during transportation.
CLEANING
In general, clean Stencil Pro scanner with isopropyl alcohol for the metal parts, including
the threaded base. Use warm water for the remaining non-metal parts, such as the body
of the scanner and the GNSS antenna/bracket. Use a clean microfiber towel, or a damp
cloth if needed, to dust or clean the Stencil Pro controller.
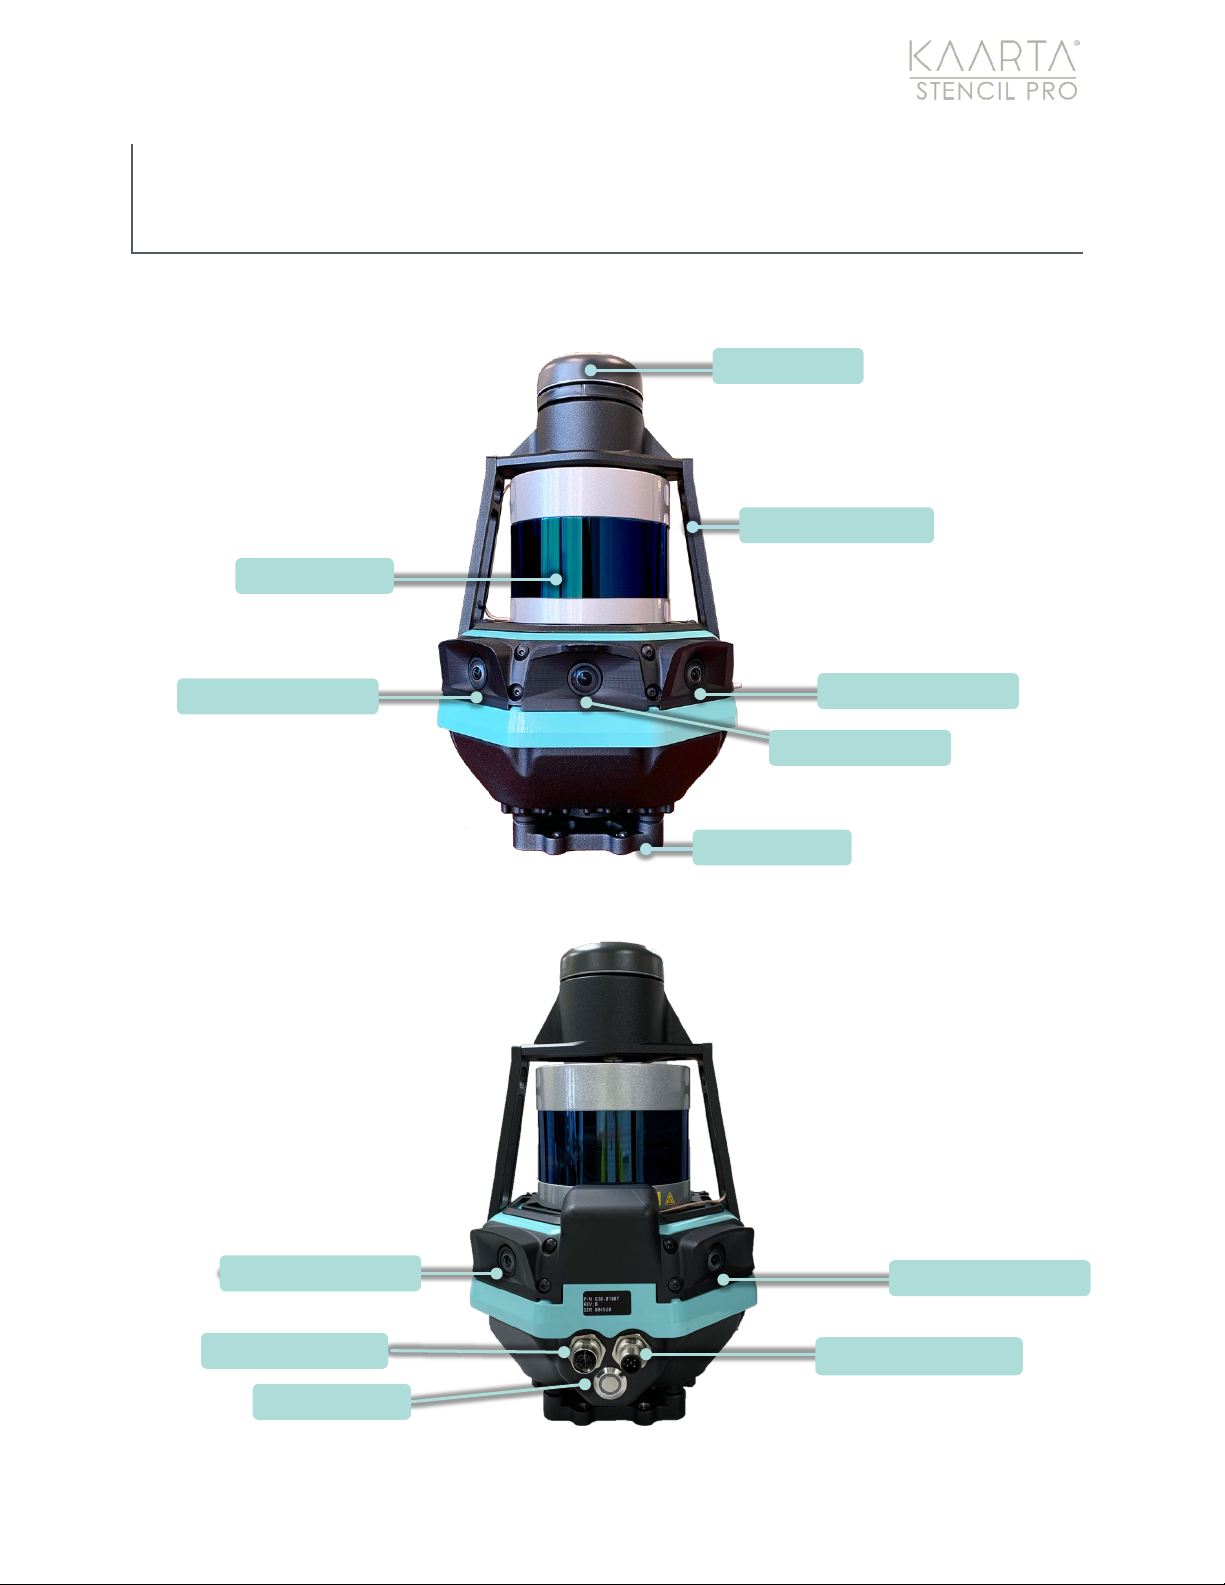
For cleaning the Velodyne lidar sensor, use isopropyl alcohol for the polycarbonate ring
lenses. If the lidar is caked with mud or bugs use a spray bottle with warm water to
loosen any debris from the sensor. Do not wipe dirt directly from the sensor. If necessary,
use isopropyl alcohol and a clean microfiber towel to clean any bug splatter or other
debris from the sensor. Then use warm, mildly soapy water and gently wipe the sensor
with a clean microfiber towel. Wipe along the curve of the sensor and not top-to-bottom.
Spray the sensor with clean water to rinse off the soap and dry with a second, clean
microfiber towel.
SCOPE
These instructions are for Stencil Pro Software Version S3-21.02.1 Software Updates and
Hardware Upgrades are available for all Stencils. Email stencilsupport@kaarta.com with
the Stencil Pro Serial Number for the best options for your particular unit. See Serial
Number on page 4 about the different ways to find your Serial Number on Stencil Pro
components or within the software.
SOFTWARE UPDATES
Kaarta has an automated process that ensures your Stencil Pro is up to date. When
Stencil Pro is connected to the Internet, it will connect to Kaarta’s software server. Check
for updates regularly from Device Settings. For details regarding software updating, see
the About section of Device Settings on page 22. Ensure a reliable internet connection and
sufficient power before starting an update. Typically, the update process takes a few
minutes with a high-speed internet connection. Software updates include bug fixes and
new features, so it is important to stay up to date with the latest software.
REGISTRATION
Your newly purchased Stencil Pro is shipped with an Official Registration Card which
contains pertinent information for successfully registering your device, including a copy of
your Serial Number, at the Kaarta registration website address: kaarta.com/register. If
your card is misplaced, the product’s Serial Number can be found on the back side of the

WWW.KAARTA.COM 4
Stencil Pro controller. See Serial Number below for more information. You must read and
accept the End User License Agreement (EULA) to register your product; not fully
registering your device could delay product support or any associated product warranty.
SERIAL NUMBER
There are three serial numbers on Stencil Pro; one for the controller, one for the scanner,
and one main Stencil Pro Serial Number located on the backside of the controller (Figure
1). When registering your device or requesting technical support from Kaarta, be sure to
locate the official
Stencil Pro Serial Number
. The Stencil Pro serial number can also be
found on the About tab of Device Settings, through the Stencil Pro UI. See About on page
22 for more information on identifying your Stencil Pro Serial Number via the Stencil Pro
Main Gallery options.
Figure 1: Stencil Pro serial number location on back side of Controller.
CASE STUDIES
For examples of Case Studies for Stencil Pro, please contact the Kaarta Stencil Pro support
team at stencilsupport@kaarta.com for real-world challenges that were overcome by
utilizing Stencil Pro, projects with unique circumstances and deliverables, and innovative
ways to use Stencil Pro to satisfy your client needs.
Do you have an original application, interesting subject matter, or just a cool render you
created with a Kaarta product? We’d love to hear from you and highlight your story! Email

WWW.KAARTA.COM 5
RELEASE NOTES
NEW FOR STENCIL PRO SOFTWARE RELEASE S3-21.02.1 (JUL 2022)
User Interface
Mask Editor Image
Selection
Images used for the Mask Editor can now be selected
from the UI’s Image Mgmt. Tab.
Mask Editor
Instructions
Directions have been added to the Mask Editing screen
for assistance.
Exposure & White
Balance Control
Exposure and White Balance tools are now embedded
in the scanning screen and can be adjusted while
actively scanning.
UI Output Log
Output of the UI is now redirected to its own dedicated
log.
Concurrent Job
Processing
Copy and upload jobs can now run concurrently with
other post-processing tasks.
Import Scan
An Import Scan feature has been added, allowing for
more seamless importing of zip files that have been
downloaded from Kaarta Cloud or other locations.
Addition of
Processing Tooltips
Tooltips have been added to post-processing fields and
tasks for improved transparency.
Image Sorting
Images are now sorted in order of time in the Image
Mgmt. tab
Enhancements
Kaarta Engine
Stability
Kaarta Engine stability enhancements have been
implemented.
Localization Option in
Playback
A new post-processing feature, Localization, has been
added to Playback.
Yaml File Updates
Live scanning and Playback parameters are now
recorded in the scan_info.yaml file.
Fine Align Options
Expanded user options have been added to the Align
Fine post-process.
Playback Default
Settings
The Playback parameter “Optimize Raw Data” is now
disabled by default.
Time Field Fix
A feature to fix time field inconsistencies in point
clouds saved from CloudCompare has been
implemented.
GNSS Trajectory Tool
A tool to create level GNSS trajectory from Stencil
trajectory has been added.
Wi-Fi Hotspot
Configuration
Configuration for Wi-Fi hotspot and VNC has been
added for remote connection.

WWW.KAARTA.COM 6
CONTENTS
Introduction ................................................................................................................................... 2
Overview................................................................................................................................... 2
Care........................................................................................................................................... 2
Cleaning.................................................................................................................................... 3
Scope ........................................................................................................................................ 3
Software Updates .................................................................................................................... 3
Registration .............................................................................................................................. 3
Serial Number.......................................................................................................................... 4
Case Studies............................................................................................................................. 4
Release Notes............................................................................................................................. 5
Chapter 1........................................................................................................................................ 8
Getting Started........................................................................................................................... 8
What’s In The Box .................................................................................................................... 8
Identifying Stencil Pro Components......................................................................................... 8
Front of Scanner ...................................................................................................................... 8
Back of Scanner ....................................................................................................................... 8
Front of Controller................................................................................................................... 9
Side/Top of Controller............................................................................................................. 9
External Scanner Components............................................................................................. 10
External Controller Components ......................................................................................... 12
Chapter 2...................................................................................................................................... 14
Before You Begin Mapping ..................................................................................................... 14
Charge Batteries .................................................................................................................... 14
Connect Peripherals.............................................................................................................. 14
Supply Power To The Controller........................................................................................... 15
Power on Scanner and Connect Data To/From Controller ................................................ 15
Chapter 3...................................................................................................................................... 17
Stencil Pro Operation .............................................................................................................. 17
Main Gallery ........................................................................................................................... 17

WWW.KAARTA.COM 7
System Information...............................................................................................................32
Chapter 4...................................................................................................................................... 37
Basic Scanning.......................................................................................................................... 37
Begin A New Scan ..................................................................................................................37
Scanning................................................................................................................................. 40
Stop Mapping.........................................................................................................................46
Scan Details............................................................................................................................47
Chapter 5...................................................................................................................................... 57
Playback and Processing ......................................................................................................... 57
Processing ..............................................................................................................................57
Chapter 6....................................................................................................................................100
Getting Best Results with GNSS............................................................................................ 100
PPK Best Practices ...............................................................................................................100
Configuring NTRIP ...............................................................................................................103
Changing the Trimble Antenna ..........................................................................................107
Using Data From Your Own Base Station.......................................................................... 108
Chapter 7....................................................................................................................................111
Troubleshooting..................................................................................................................... 111
Verify Scanner Is Receiving Images....................................................................................111
Verify GNSS Is Communicating...........................................................................................112
IP Addresses for Stencil Pro................................................................................................114

WWW.KAARTA.COM 8
CHAPTER 1
GETTING STARTED
WHAT’S IN THE BOX
1. Scanner, with
a. GNSS Antenna
b. 5/8-11 Threaded Base
2. Control Pack, with:
a. Controller
b. Dual V-Mount Battery Plate
c. V-Mount Batteries (2) (US Only)
d. Carrying Bag
3. ¼-20 to 5/8-11 Adapter
4. Vehicle and Hand Carry Umbilical Cables
between Controller and Scanner
5. Wireless Keyboard and Mouse
6. iPad and Wi-Fi dongle for wireless display
and operation
7. V-Mount Battery Charger (AC)
8. Controller AC Adapter
9. Shipping Case
10. Tactical Accessories Bag
11. Manfrotto Monopod
1 4
2
1b
1a
2a
2b
2d
Side
3
5
6
7
9
8
10
2c
Top
11

WWW.KAARTA.COM 8
IDENTIFYING STENCIL PRO
COMPONENTS
FRONT OF SCANNER
BACK OF SCANNER
32-LINE SCANNER
ANTENNA BRACKET
SCAN BUTTON
DATA CONNECTOR
PANO/COLOR CAMERA
POWER CONNECTOR
PANO/COLOR CAMERA
PANO/COLOR CAMERA
THREADED BASE
PANO/COLOR CAMERA
ODOMETRY CAMERA
GNSS ANTENNA

WWW.KAARTA.COM 9
FRONT OF CONTROLLER
SIDE/TOP OF CONTROLLER
LED STATUS LIGHTS
POWER SWITCH
SCANNER DATA CONNECTOR
HDMI PORT
SHORE POWER CONNECTOR
V-MOUNT BATTERY PLATE
BATTERY RELEASE
V-MOUNT BATTERY PLATE
AIR VENTS
SCANNER POWER CONNECTOR
USB-C PORT
SCAN BUTTON
USB-A PORTS

WWW.KAARTA.COM 10
EXTERNAL SCANNER COMPONENTS
SCANNER POWER/OPERATING B UTTONS
Scan Button
Start Scanning Push the
Scan
button to begin scanning. The LED ring around
the button turns from blue to green or teal when Stencil Pro
scanning has started (takes approximately 4-5 seconds).
Stop Scanning
To stop scanning, push the Scan button. The LED ring around
the button turns from green/teal to yellow while saving, then
returns to a blue ready state. Wait for the blue indicator
before powering off or beginning a new scan.
Note: Supply power to the scanner by connecting it to the controller through
their respective Power Connectors.
SCANNER CONNECTORS AND PORTS
Power Connector
Power is supplied to the scanner from the controller’s Scanner Power
Connector via the Power Connector.
Data Connector
Data is supplied to the scanner from the controller’s Scanner Data
Connector via the Data Connector.

WWW.KAARTA.COM 11
SCAN BUTTON LED STATUS COLORS
SOLID SLOW BLINK
(1.0S)
MEDIUM BLINK
(0.5S)
FAST BLINK
(0.1S)
White
Scanner Booting
Scanner
Successfully
Booted
Red
Scanner Initializing
Blue
Kaarta Software
Ready < 6 Satellites
Kaarta Software
Ready >= 6 Satellites
Green
Ready to Scan,
GPS Lock
< 6 Satellites
Scanning,
GPS Lock
< 6 Satellites
Teal
Ready to Scan,
GPS Lock
>= 6 Satellites
Scanning,
GPS Lock
>= 6 Satellites
Yellow
Processing
Orange
Scanning Error
Disk Critical,
< 5GB
Not Licensed
Scanner Error
Pink
Disk Level Low,
< 25GB
Disk Very Low,
< 12.5GB
Lost
Communication
with Controller

WWW.KAARTA.COM 12
EXTERNAL CONTROLLER COMPONENTS
CONTROLLER POWER/OPERATING B UTTONS
Scan Button
Start Scanning Push the
Scan
button to begin scanning. The LED ring around
the button turns from blue to green or teal when Stencil Pro
scanning has started (takes approximately 4-5 seconds).
Stop Scanning
To stop scanning, push the Scan button. The LED ring around
the button turns from green/teal to yellow while saving, then
returns to a blue ready state. Wait for the blue indicator
before powering off or beginning a new scan.
Power
Switch
Up/On
Turn the switch up to power on the controller. To utilize shore
power, connect the controller’s AC adapter. It is recommended
to remove the batteries when using shore power, as the
batteries will continue to drain if they remain in the V-mounts.
If shore power is not connected, the system utilizes battery
power. The V-mount batteries are not charged via Stencil
Pro’s shore power connection and should be charged with
the supplied AC battery charger.
Down/Off
Turn the switch down to turn off the controller.
CONTROLLER CONNECTORS AND PORTS
USB-C Port
The USB-C connector can be used for high-speed USB 3.0 drives for
fast data transfers.
USB-A Ports
There are two USB-A ports on the controller. The USB-A ports can
be used with the wireless mouse/keyboard dongle for easier
computer operations.
HDMI Port
The HDMI port can be used with the included Wi-Fi dongle to
connect wirelessly to the iPad.
Power Connector
The controller’s Power Connector supplies power to the Scanner.
Data Connector
The controller’s Data Connector supplies data to the Scanner.
Shore Power
Connector
The Shore Power Connector supplies electrical power to the device
through the controller’s AC Adapter (input voltage: 100-240 VAC or
12V with an inverter).

WWW.KAARTA.COM 13
CONTROLLER LED STATUS LIGHTS
LAYOUT
Left
Battery
(BAT 1)
Right
Battery
(BAT 2)
Internal
Compute
r Power
(CTL)
Scanner
Power
(SENSOR)
CONTROLLER LED STATUS COLORS
Left/Right
Battery SOLID
Internal
Computer/Scanner SOLID
Red
<15%
Red
Error/Off
Yellow
<20%
Green
>=20%
Green
Normal
Operation
Blue
AC
Power
Usage
Off
No
battery

WWW.KAARTA.COM 14
CHAPTER 2
BEFORE YOU BEGIN MAPPING
CHARGE BATTERIES
For all United States orders, Stencil Pro is shipped with two V-mount batteries to power
the device for scanning. If shipped within the United States, the batteries are charged to
approximately 30%. Begin by charging both batteries with the supplied
battery charger while you get familiar with Stencil Pro operations.
Once charged, place the batteries in their respective V-mounts on either
side of the controller. Make sure the Power Switch on the controller is
in the off or down position. One battery will run approximately 1 hour,
for a total of 2 hours scan time with both batteries fully charged. The V-
mount batteries are hot swappable and can be removed/added during
scanning.
On the side of each battery, a five-level LED gauge displays the battery's
remaining power.
You should
continue to monitor the battery level during scanning.
If outside the United States, compatible Li-Ion V-mount batteries typically used for
cameras and camcorders can be utilized to run Stencil Pro. Note that batteries should be
below 100Wh for air travel. Please contact Kaarta for recommended battery solutions.
CONNECT PERIPHERALS
Like any computer, Stencil Pro works with external devices. To utilize the user-friendly
Stencil Pro UI, connect the supplied wireless keyboard/mouse, using the controller’s USB-
A ports. Connect the iPad to Stencil Pro by inserting the HDMI Wi-Fi dongle into a Stencil
Pro HDMI port and selecting the internal PCI Wi-Fi Hotspot Active option under wireless
settings. For more details regarding iPad connection, see Wireless on page 35. Through
the UI, you can start/stop a scan, track your scan’s progress in real time, review data, and
process scans. Scans can also be started and stopped outside of the UI by pressing the
scanner’s Scan button.
Battery’s
LED power

WWW.KAARTA.COM 15
SUPPLY POWER TO THE CONTROLLER
Power is supplied to the controller by connecting the AC
adapter to the controller’s Shore Power Connector. To
utilize shore power, connect the controller’s AC adapter.
It is recommended to remove the batteries when using
shore power, as the batteries will continue to drain if they
remain in the V-mounts.
If shore power is not connected, the system utilizes
battery power. Leave the Power On/Off Switch in the
down or off position until the scanner’s power and data connections are configured.
Caution:Stencil Pro does not charge your V-Mount batteries when
connected to electrical/shore power. Use a compatible AC charger or
power supply to recharge batteries when drained. For orders in the
United States, your V-mount batteries are shipped with an AC adapter.
POWER ON SCANNER AND CONNECT DATA TO/FROM CONTROLLER
The scanner is powered directly from
the controller, either
through battery or shore
power. Connect the
umbilical cable supplying
power to the scanner from
the controller. Align the red
dots at the top of the controller’s connectors to the red dots on the umbilical
cable to ensure proper cable orientation. Push the plug straight into the
connector.
Next, connect the umbilical cable
supplying data to/from the scanner and
controller. Turn the Power Switch on the
controller to the on or up position to
power on all components. To utilize
electrical power only, remove the
batteries and connect shore power. If
shore power is not connected, the
system utilizes battery power.
Scanner’s
power
Controller’s scanner
power connector
Shore Power Connector (left); LED
Status Lights (center); Power On/Off
Switch (right) in the down/off
Scanner’s data
connector
Controller’s scanner
data connector
Connector
guides

WWW.KAARTA.COM 16
The LED status indicator ring around the scanner’s Scan button changes
colors during the boot sequence, from solid red, to solid white, to a white
slow blink. After cycling through the boot sequence, the Scan button
should settle to a blue or ready state. See Scan Button LED Status on
page 11 for the full list of the button’s status indications.
Once the device boots, the Stencil Pro UI automatically opens and displays on the iPad
(Figure 2). For more information about the Stencil Pro UI, see Main Gallery on page 17.
You are now ready to start collecting data to capture your scene. See the following
chapter, Stencil Pro Operation for complete scanning instruction.
Figure 2: Stencil Pro UI
Warning:If the Scan Button’s LED status stays
white (or turns white during scanning) the Stencil
Pro software and/or the internal computer is
having trouble powering up. Power cycle the
scanner by unplugging the power connection from the
controller.
If the LED status turns pink and begins to fast blink, then
communication between the scanner and controller has been
interrupted. Check the data connections between the
controller and scanner, making sure cables are firmly plugged
into their respective connector(s).
Blue/Ready
White
Pink

WWW.KAARTA.COM 17
CHAPTER 3
STENCIL PRO OPERATION
At the heart of Stencil Pro is the system’s software and intuitive user interface. Stencil Pro
not only has full computing capabilities to capture real world spaces easily and accurately,
it can also be used to review files and replay raw data. In addition, Stencil Pro performs
post-processing data functions such as sharpening, filtering, and colorization of the point
cloud.
MAIN GALLERY
Once Stencil Pro’s controller and scanner are properly connected and
powered on, and the device successfully boots, the Stencil Pro UI
automatically opens. If the UI is accidentally closed, it should promptly
reopen. There is also an icon on the Ubuntu desktop to reopen the Stencil
Pro UI. The UI opens to the Main Gallery screen where scans are displayed
when generated (Figure 3).
Figure 3: Stencil Pro Main Gallery.
Main Gallery Menu
From the Main Gallery, you can browse scans and albums by simply scrolling through the
saved files using a connected mouse and keyboard. You can also search for a specific
scan by typing into the Search Scans text box located in the upper right corner of the UI
Ubuntu
Kaarta UI

WWW.KAARTA.COM 18
(Figure 4). To the right of Search Scans is the Main Gallery Menu. Click the Main Gallery
Menu button (three vertical dots) to display options for viewing, sorting, and selecting
scans. From the Main Gallery Menu, you can also see system/device settings and open
Stencil Pro’s jobs queue.
Figure 4: Search Scans and Main Gallery Menu
MAIN GALLERY MENU
Sort by
The Name, Date, and Size options in the Main Gallery Menu change the
sorting scheme. By default, scans and albums are sorted by date created,
with newest scans first.
View
View options change how scans are displayed in the Main Gallery. You can
view by Scan Photo (your scan’s cover photo) or by Pointcloud (your scan’s
map or pointcloud) (Figure 5).
Select
Scans
Use Select Scans to select scans or albums, either individually or in multiples
(including selecting All) to perform actions on all selected scans
concurrently. Actionable items include add to an Album, Copy to USB,
Merge (not currently available), or Delete selected scan(s). Hit the back
arrow in the upper left to exit selection mode. You can use the Merge
function to combine two scans that are in the same coordinate system,
usually meaning that one scan was created by using the other scan as a base
map or reference.
Import Scan
Use Import Scan to import a Contour scan (.ply) or a Stencil Pro scan as a zip
file.
Jobs Queue
If you run post-processing on multiple scans, they can be queued to run
unattended in the Jobs Queue. The Jobs Queue shows you which scans are
currently being processed, and which scans are scheduled to run. For more
information about the Jobs Queue, see Job Queue on page 94.
MAIN GALLERY MENU
SEARCH SCANS

WWW.KAARTA.COM 19
MAIN GALLERY MENU
Trash Bin
View the contents of the trash bin. You can select
All
contents of the bin,
permanently Delete one or more files from the system, Restore files to the
Main Gallery, or Empty the contents of the trash bin. Click the back arrow in
the upper left to return to the Main Gallery.
Device Settings
Device Settings provides access to information regarding the system’s Status,
Scanning, Help, and About. The settings screen provides information on the
status of Stencil Pro’s components, the current options available for
Scanning, such as enabling exposure lock or saving a cover photo, and
different ways to access help or support for your Stencil Pro. See Device
Settings on page 19 for more detailed information.
Figure 5: View Scans by Pointcloud.
Device Settings
The Main Gallery Menu provides access to your device’s system information through tabs
for Status, Scanning, Help, and About. The device settings screen provides information on:
•The status of Stencil Pro’s components.
•The current options available for Scanning, such as saving a cover photo.
•Different ways to access help or support for your Stencil Pro.
STATUS
The Status tab displays the status (active or inactive) of Stencil Pro’s main components;
IMU, and color camera (active or inactive), as well as the status of the scanner (on or off)
(Figure 6).
Hartwood
Other manuals for STENCIL PRO
2
Table of contents
Popular Measuring Instrument manuals by other brands

Center
Center 316 instruction manual

Omni Instruments
Omni Instruments TR150 instruction manual

Meriam
Meriam M2001 user manual

PCB Piezotronics
PCB Piezotronics J357B11 Installation and operating manual

Thermo Scientific
Thermo Scientific Orion Star A329 reference guide

Elcometer
Elcometer CG20 operating instructions