CLEANING
Clean with cold water and a soft bristle brush.
Do not use soaps or detergents. Do not
expose to petrol, diesel, oils or chemicals of
any nature.
Failure to follow these instructions may impact
the performance of your awning and cause
damage.
STORAGE
If you have to pack your awning up wet - it
is essential that the awning is unpacked and
allowed to dry fully as soon as possible. Failure
to do so will result in damage to the awning
fabric, waterproong and may cause mildew.
Although the PVC cover material itself is
waterproof, there is a chance of water ingress
from the zippers when the awning is stored.
We recommend to check the inside of the
awning’s bag to ensure no water has made its
way inside in the case of bad weather. If there
is moisture or water, the awning needs to be
allowed to dry out.
STRUCTURE
Kakadu™awnings have been designed for
general outdoor use under normal conditions.
Always ensure all poles, ropes, pegs and
straps are attached and the awning is secured
at all times.
To avoid chances of personal injury and
or property damage, Kakadu™highly
recommends the awnings should NOT
be erected during windy conditions.
Damaged caused by wind and or
adverse weather will not be covered
under warranty.
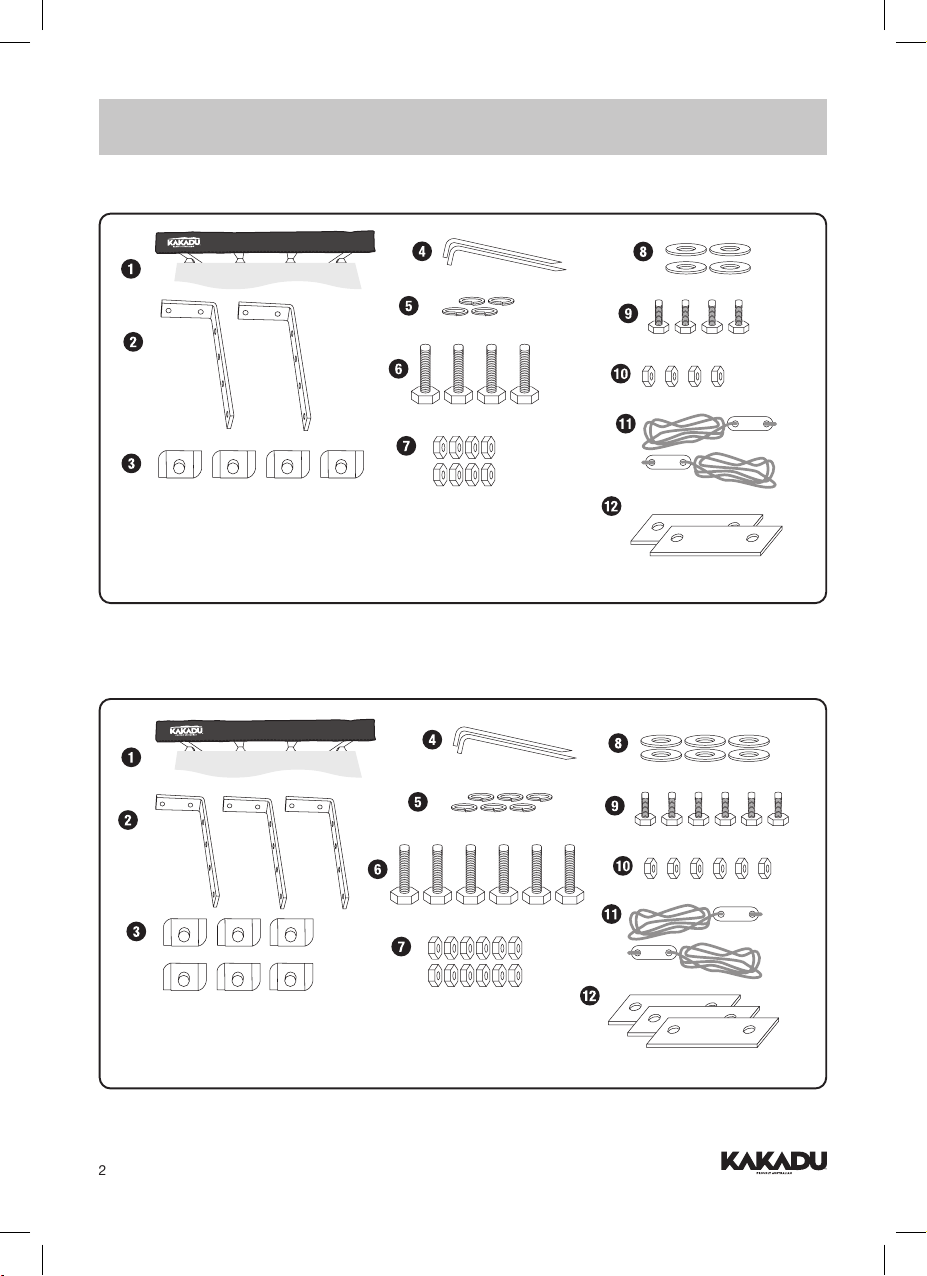
FITTING
Kakadu™recommends this awning to
be installed with 2-3 people. It is also
recommended to use an experienced
aftermarket 4X4 accessories tter to mount the
awning to your rack. All mounting hardware
on both the awning and roof rack should be
checked regularly to ensure they are always
mounted securely.
NOTE: Kakadu™takes no responsibility
for the fitment of the awning to any
vehicle or roof rack.
Prolonged travelling on uneven, rough
or corrugated terrain will require more
frequent inspections.
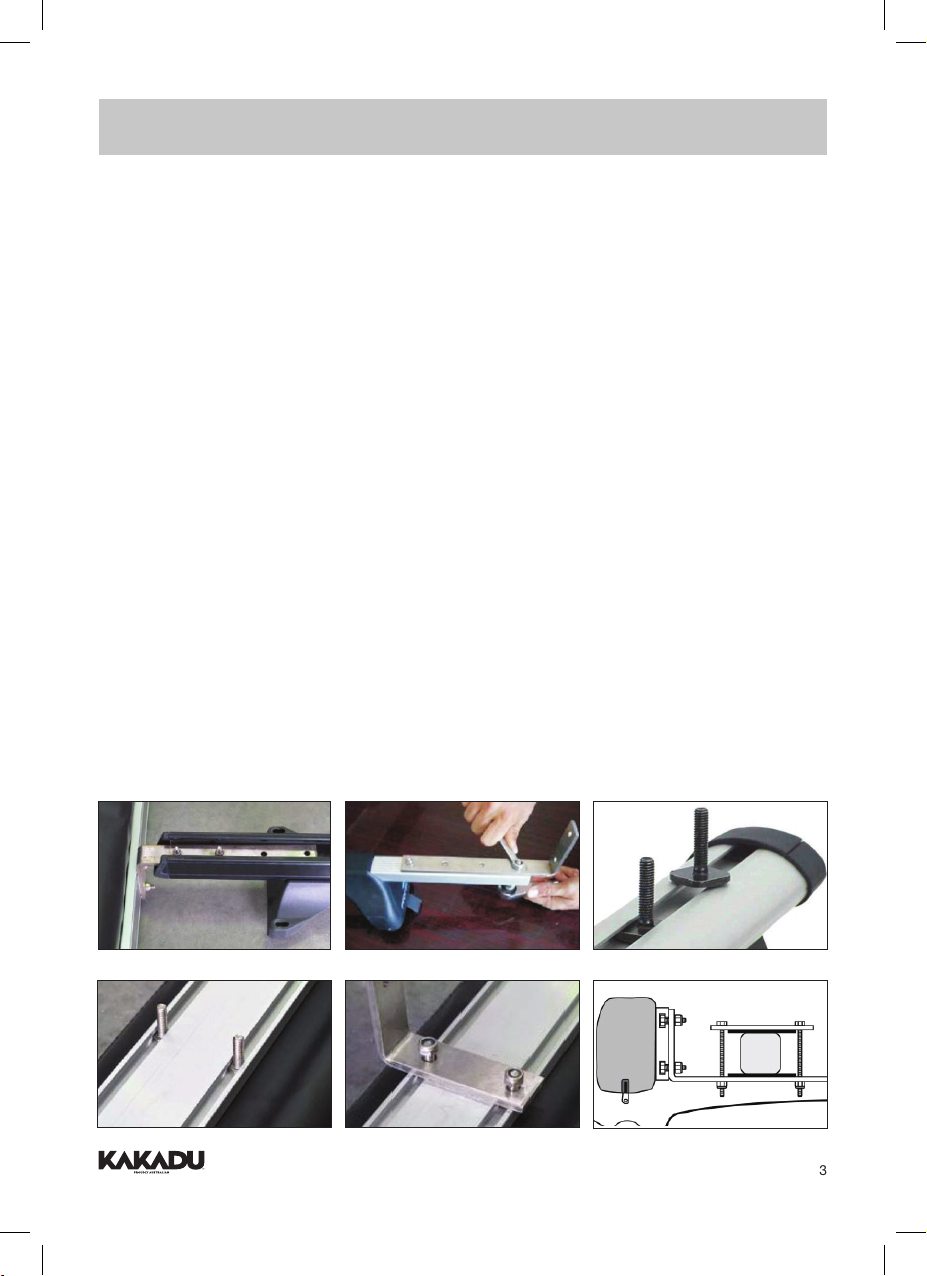
The brackets have been carefully designed
to t most common roof rack congurations.
However, the increasing amount of roof rack
designs available in the market makes it
difcult to supply a bracket to t all racks.
It is recommended to discuss specic
mounting options and load capacities with
a roof rack specialist. Ensure you attach
the brackets at the same distance out from
the car so the awning will mount straight.
Failure to do so may result in the backboard
bending which isn’t covered under warranty.
It is recommended to use a straight edge or
measuring tape to check this before you nish
tightening the bolts and nuts.
WATERPROOFING
The raw materials that have been used on this
awning have been designed to withstand most
weather events. The water repellent coating
and sealed seams provide protection from
bad weather. Water ingress still may occur as
this awning has zippers and multiple layered
seams. Wind-driven rain can also cause water
ingress underneath the awning. If you nd that
water is coming through a zipper, a softened
wax stick can be used to rub over that area.
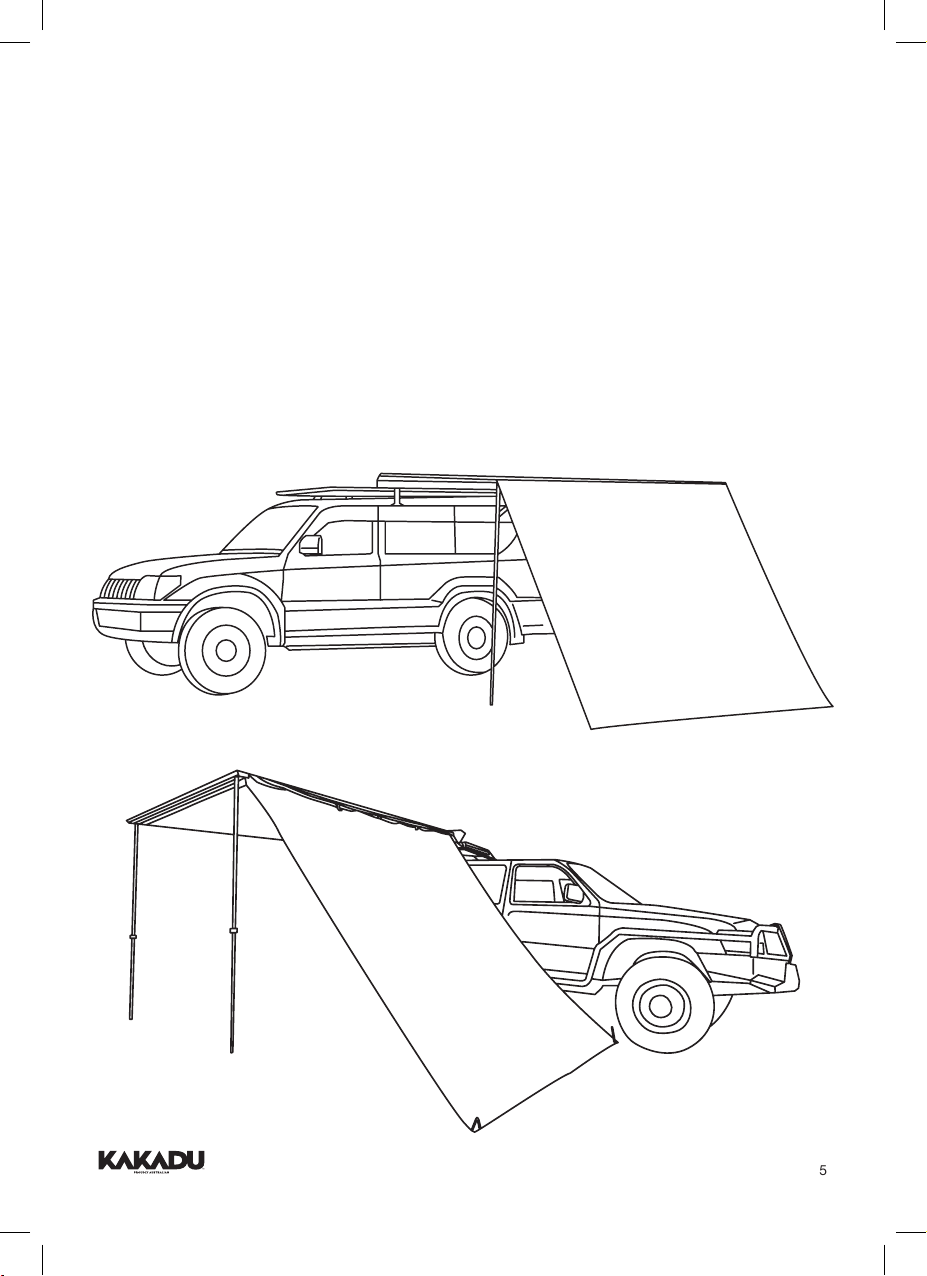
USING THE OPTIONAL WALLS
The awning walls will provide a sheltered /
protected area around the awning. When
attached to the awning, they are designed to
create a shaded area and help reduce dust.
Disclaimer: Any addition applied onto the
vehicle’s roof changes the loading and
handling of the vehicle. Kakadu™disclaims all
responsibility in the occurrence of accidents
due to improper use, lack of maintenance and
not ensuring the awning has been securely
tted. Kakadu™shall not be liable for any
damages whether they are special, indirect,
incidental, accidental or consequential.