Kambrook KHM300 Series User manual

Due to continual improvement in design or otherwise, the product you
purchase may differ slightly from the illustration in this book. Issue B15
Kambrook - New Zealand
Private Bag 94411
Botany, Manukau
Auckland 2163
New Zealand
Customer Service Line/
Spare Parts 0800 273 845
Customer Service Fax 0800 288 513
www.kambrook.co.nz
Kambrook - Australia
Ground Floor, Suite 2, 170-180 Bourke Rd
Alexandria NSW 2015, Australia
Locked Bag 2000
Botany NSW 1455
Customer Service Line 1300 139 798
Customer Service Fax 1800 621 337
www.kambrook.com.au

Suits all KHM300 modelsINSTRUCTION BOOKLET

Important
Please retain your instruction
book for future use.
In the event that you need some assistance with your
Kambrook appliance, please contact our Customer Service
Department on 1300 139 798 (Australia) or 0800 273 845
(New Zealand). Alternatively, visit us on our website at
www.kambrook.com.au or www.kambrook.co.nz

Contents
Kambrook Recommends
Safety First
p4
Your Kambrook Mix & Store
Hand Mixer
p7
Assembly and Operation of Your
Kambrook Hand Mixer
p8
Mixing Guide p12
Troubleshooting Guide p13
Care, Cleaning and Storage p14
Recipes p16

4
Kambrook Recommends Safety First
IMPORTANT: Please retain your
instruction book for future use.
At Kambrook, we believe that safe performance is the first priority in any
consumer product, so that you, our valued customer can confidently
use and trust our products. We ask that any electrical appliance that
you use be operated in a sensible fashion with due care and attention
placed on the following important operating instructions.
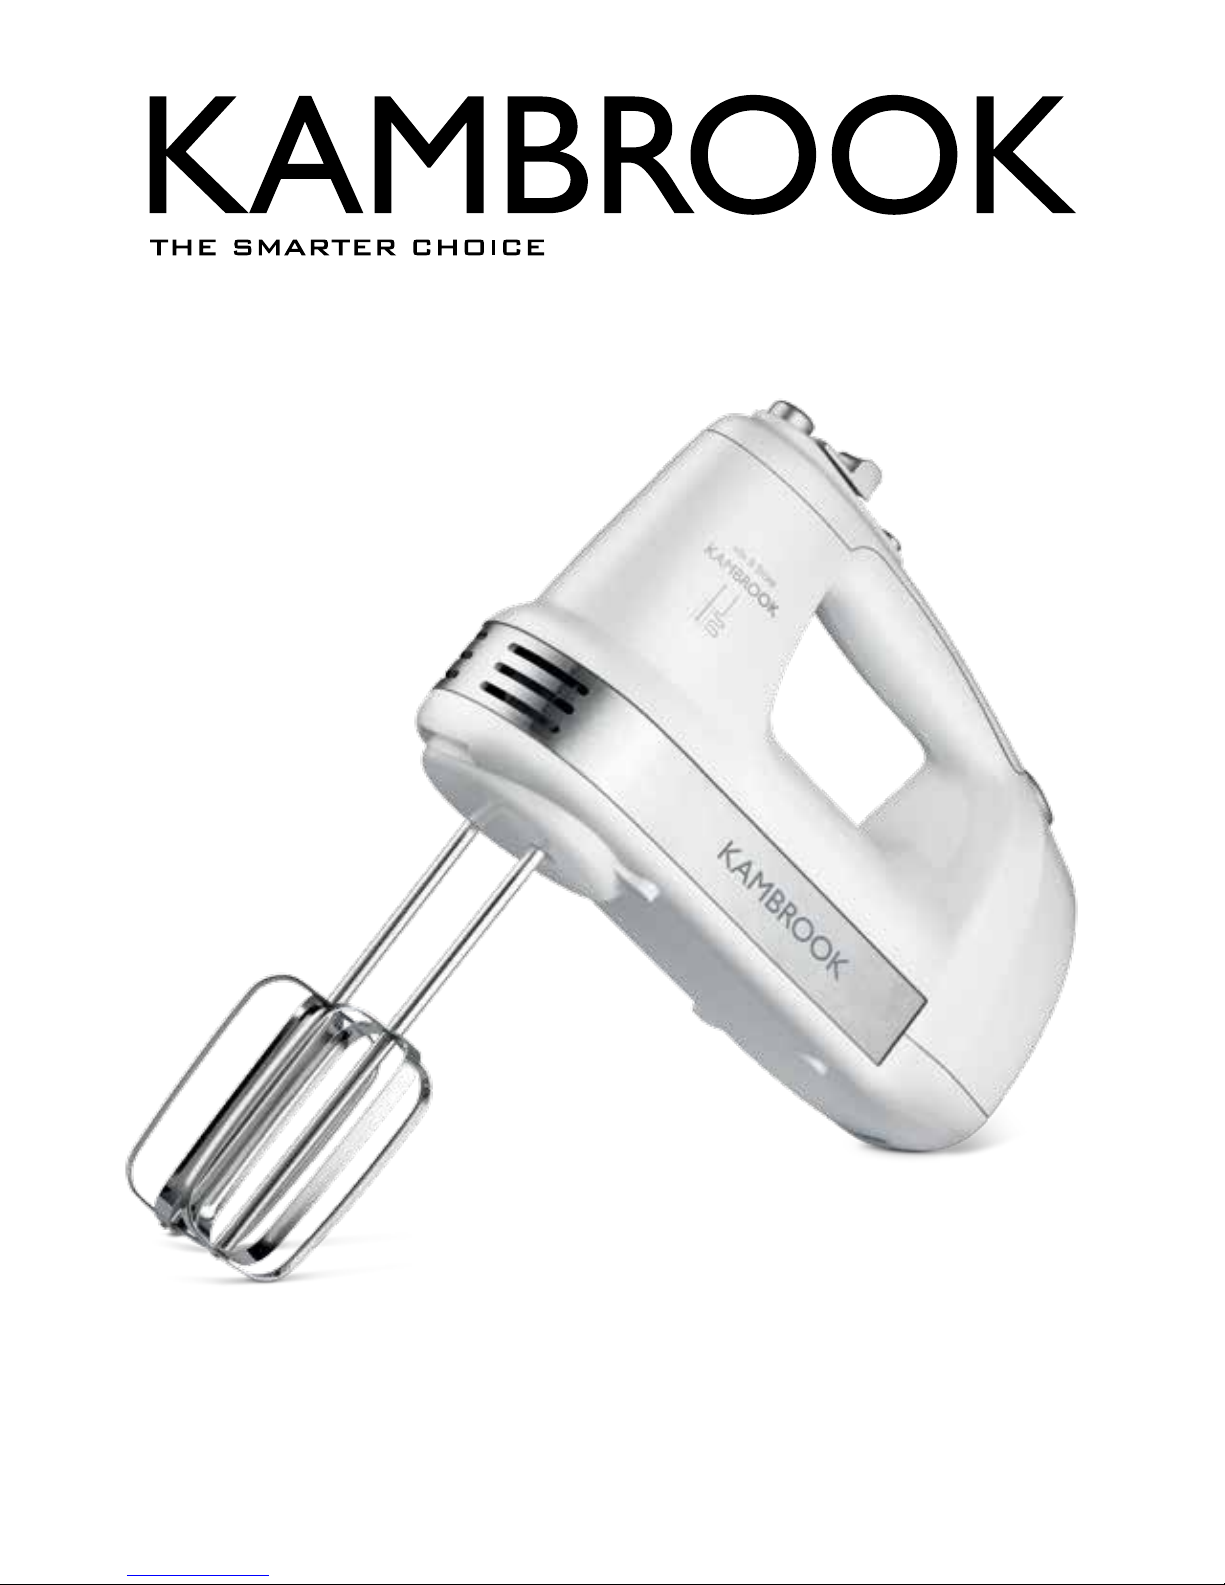
Important Safeguards For Your Kambrook
Mix & Store Hand Mixer
• Carefully read all instructions before
operating the hand mixer for the first time
and save for future reference.
• Remove and safely discard any packaging
material and promotional labels before using
the hand mixer for the first time.
• To eliminate a choking hazard for young
children, remove and safely discard the
protective cover fitted to the power plug of
this hand mixer.
• Do not place the mixing bowl (not included)
near the edge of the bench or table during
operation. Ensure the surface is level, clean
and free of water and other substances.
Vibration during operation may cause the
mixing bowl to move.
• Do not place the hand mixer on or near a
hot gas or electric burner, or where it could
touch a heated oven.
• Do not use the hand mixer on a sink drain
board.
• Always ensure the hand mixer is completely
assembled before operating. Follow the
instructions provided in this booklet.
• Do not operate the hand mixer with wet
hands.
• Ensure the speed control switch is in the ‘OFF’
position and the hand mixer is switched
off at the power outlet and the power
cord is unplugged before attaching the
attachments (beater and dough hook
attachments).
• Do not use attachments other than those
provided with the hand mixer.
• Always ensure the attachments are firmly
positioned before operating.
• Do not operate the hand mixer continuously
for periods longer than 3 minutes on any
setting. Allow the motor to rest between
each use.
• In the event that you are using the hand
mixer with an excessive load, do not operate
continuously for more than 1 minute. Allow
the motor to rest for 1 minute between each
use. None of the recipes in this instruction
book are considered a heavy load.
• Do not double the ingredients of the recipes
as it can damage the hand mixer.
• The hand mixer can be used for mixing yeast
dough. When doing this, fill the mixing bowl
with a mass of flour not exceeding 35% of the
bowl’s maximum capacity.
• Handle the hand mixer and attachments
with care. Never place your fingers inside
the mixing bowl (not included) or near the
attachments during operation.
• Keep hands, hair, clothing, as well as
spatulas and other utensils away from the
attachment and the mixing bowl being
used during operation to reduce the risk
of injury to persons and/or damage to the
hand mixer.

5
• Should an object such as a spatula or spoon
fall into the bowl while mixing, immediately
turn the hand mixer speed control switch to
the OFF position, unplug at the power outlet
and remove the object.
• Do not place hands in the mixing bowl unless
the hand mixer is disconnected from the
power outlet.
• Ensure the motor and the attachments have
completely stopped before disassembling.
Always remove the attachment from the
hand mixer before cleaning.
• Care should be taken when removing
food from the bowl by ensuring the motor
and the attachments have completely
stopped before disassembling. Ensure the
speed control switch is in the OFF position;
the appliance is switched off at the power
outlet and unplugged before removing the
mixed food from the mixer bowl and the
attachments.
• Always ensure the speed control switch is in
the ‘OFF’ position, the power is switched off
at the power outlet before attempting to
move, assemble or disassemble the hand
mixer when the hand mixer is not in use and
before cleaning or storing.
• Always switch off the hand mixer and
disconnect from the power outlet before
removing attachments, changing
accessories or approaching parts that move
in use.
• Do not cover the air vents on the hand mixer
to avoid overheating.
• The use of any accessory attachments not
recommended by Kambrook may cause
injuries.
• Do not leave the hand mixer unattended
when in use.
• Do not place any parts of the hand mixer in
the dishwasher or microwave oven.
• Do not use abrasive scouring pads or
cleaners when cleaning the beaters or
dough hooks as these may scratch the
surface. Also ensure that the beaters or
dough hooks are not soaked in water for
extended periods of time, i.e. for several
hours or overnight, as this may damage the
metal finish.
• Do not wash or soak the hand mixer in water
or other liquid. Clean with a damp cloth and
dry thoroughly. Do not allow water or any
liquid to enter the gear system as damage
may result.
• Keep the hand mixer clean. Follow the Care,
Cleaning and Storage instructions provided
in this book.
WARNING: Never insert a
dough hook with a beater to
operate together as this may
damage the hand mixer.
WARNING: Beaters and
dough hooks must be
inserted into the correct
sockets as they are not
interchangeable. Incorrect
insertion will result in the
beaters or dough hooks
falling out during operation
and cause damage.
WARNING: Always hold the
power plug before pressing
the retractable cord button
for power cord retraction to
prevent it from striking.

6
Important safeguards for all electrical
appliances
• Fully unwind the power cord before use.
• Connect only to 230V or 240V power outlet.
• Do not let the power cord hang over the
edge of a bench or table, touch hot surfaces
or become knotted.
• To protect against electric shock, do not
immerse the power cord, power plug or
appliance in water or any other liquid,
unless it is recommended in the cleaning
instructions.
• The appliance is not intended for use by
persons (including children) with reduced
physical, sensory or mental capabilities,
or lack of experience and knowledge,
unless they have been given supervision or
instruction concerning use of the appliance,
by a person responsible for their safety.
• Children should be supervised to ensure that
they do not play with the appliance.
• It is recommended to inspect the appliance
regularly. Do not use the appliance if the
power supply cord, plug, connector or
appliance becomes damaged in anyway.
Return the entire appliance to the nearest
authorised Kambrook Service Centre for
examination and/or repair.
• Any maintenance other than cleaning
should be performed at an authorised
Kambrook Service Centre.
• This appliance is for household use only.
Do not use this appliance for other than its
intended use. Do not use in moving vehicles
or boats. Do not use outdoors. Misuse may
cause injury.
• The installation of a residual current device
(safety switch) is recommended to provide
additional safety protection when using
electrical appliances. It is advisable
that a safety switch with a rated residual
operating current not exceeding 30mA be
installed in the electrical circuit supplying
the appliance. See your electrician for
professional advice.
• Always turn the appliance to the OFF
position, switch off at the power outlet
and unplug at the power outlet when the
appliance is not in use.
• Before cleaning, always turn the appliance
to the OFF position, switch off at the power
outlet, unplug at the power outlet and
remove the power cord, if detachable, from
the appliance and allow all parts to cool.
• Do not place this appliance on or near
a heat source, such as hot plate, oven or
heaters.
• Position the appliance at a minimum
distance of 20cm away from walls, curtains
and other heat or steam sensitive materials
and provide adequate space above and on
all sides for air circulation.

7
Your Kambrook Mix & Store Hand Mixer
1. 300 watt motor body
2. 5 speed control switch
3. Boost button for an extra
burst of power
4. Eject button for quick
release of accessories
5. Chrome plated beaters
6. Chrome plated dough hooks
7. Beater and dough hook sockets
8. Storage case- conveniently store
beaters and dough hooks inside
after each use
9. Retractable cord button
Not Shown
• Retractable power cord

8
Assembly and Operation of Your Kambrook
Hand Mixer
Before First Use
Remove any packaging material and
promotional labels.
When unpacking the hand mixer,
check to see you have received all
the required parts before discarding
the packaging.
Hold the storage case with one hand
whilst holding the mixer body by the
handle with the other hand; pull the
mixer body away from the storage
case to remove.
Remove the beaters and dough
hooks from inside the storage case.
Wash the beaters, dough hooks,
storage case in warm soapy water
with a soft cloth. Rinse and dry
thoroughly.
Wipe the mixer body with a damp
cloth and dry.
WARNING: Never
immerse the mixer, power
cord or plug in water or
any other liquid.
NOTE: When first using the hand
mixer you may notice an odour
from the motor. This is normal
and will dissipate as the motor is
run in.
Assembly of the Beaters
WARNING: Ensure the
hand mixer is switched
off and unplugged from
the power outlet before
attaching the beaters to
the mixer.
1. Insert each beater shaft into the
left and right beater/dough hook
sockets underneath the mixer
body (See Fig. 1).
Fig. 1
2. Insert the beaters by pushing the
shaft into the socket, turning slightly
if required until they lock into place.
NOTE: Always ensure the beaters
are firmly positioned before
operating.
WARNING: Beaters must
be inserted into the
correct sockets as they
are not interchangeable.
Incorrect insertion will
result in the beaters falling
out during operation and
cause damage.

9
Assembly of the
Dough Hooks
WARNING: Ensure the
hand mixer is switched
off and unplugged from
the power outlet before
attaching the dough
hooks to the mixer.
1. Insert each dough hook shaft
into the left or right dough hook/
beater sockets underneath the
mixer body (See Fig. 2).
Fig. 2
2. Insert the dough hooks by pushing
the shaft into the socket, turning
slightly if required until they lock
into place.
NOTE: Always ensure the dough
hooks are firmly positioned
before operating.
WARNING: Dough hooks
must be inserted into the
correct sockets as they
are not interchangeable.
Incorrect insertion will
result in the dough
hooks falling out during
operation and cause
damage.
WARNING: Never use a
dough hook with a beater
as this may damage your
hand mixer.
Removing Beaters or Dough
Hooks
1. Sit the hand mixer upright on a flat
surface with the beaters/dough
hooks facing away from you.
2. Pressing the ‘EJECT’ button
to automatically release the
beaters/dough hooks from the
sockets. Grasp the beaters/dough
hooks by the shafts, being careful
as they may be hot after use.
NOTE: The beaters/dough hooks
will be released automatically.
Do not force the beaters/dough
hooks out of the sockets.

10
Operating Your Kambrook
Hand Mixer
1. Ensure the Speed Control Switch is
set to the ‘OFF’ position.
2. Insert the beaters or dough hooks
correctly as required.
3. Select a mixing bowl large
enough to accommodate the
beaters/dough hooks, as a bowl
that is too small will damage the
beaters/dough hooks.
4. Add the ingredients to a mixing
bowl as per the recipe or your
requirements.
5. Press down on the ‘ ’ button at
the top of the mixer and gently
pull the power cord out of the
motor body. Plug the power cord
into a 230V or 240V power outlet
and switch the power outlet on.
6. To commence mixing, slide
the Speed Control Switch in a
forward direction using your
thumb. Always begin mixing at
a lower speed setting to prevent
splattering. Increase the speed
suited to the mixing task. The
speed setting can be adjusted
during operation by moving the
Speed Control Switch forward
and back between speeds 1 to 5.
7. Occasionally stop the hand mixer
during operation and scrape any
food mixture down the sides of
the mixing bowl with a spatula.
NOTE: Always turn the hand mixer
off if you need to scrape the bowl
during use, then continue mixing.
Assembly and Operation of Your Kambrook Hand
Mixer Continued...
8. When mixing is complete, set the
Speed Control Switch to the ‘OFF’
position. Switch the hand mixer off
at the power outlet and remove
the power cord from the outlet.
9. Sit the hand mixer upright on a
flat surface with the beaters/
dough hooks facing away from
you. Remove the beaters/dough
hooks by pressing the ‘EJECT’
button while grasping the shafts.
The beaters/dough hooks will be
released automatically. Do not
force the beaters/dough hooks
out of the sockets. Use a spatula
to remove the mixture from the
beaters/dough hooks. Do not
strike the beaters/dough hooks on
the rim of a mixing bowl.
WARNING: After mixing,
take out the beaters/
dough hooks with care as
they may be hot after use.
Boost Function
Pressing the ‘BOOST’ button while
mixing provides an extra burst of
power and overrides the speed
setting being used. Press and hold
the ‘BOOST’ button for no more than
30 seconds at one time to avoid
overheating.

11
Cord Retractable Function
The hand mixer has retractable cord
for easy power cord storage.
To safely retract power cord, always
hold the plug with one hand and
press the ‘ ’ with another hand to
retract the power cord to prevent it
from striking. If power cord gets hung
up during retraction, release the
button and press it again until cord is
fully retracted.
NOTE: Do not continue to pull
the power cord too far to its end
as it may cause damage to the
power cord.
WARNING: Hold the plug
with one hand and guide
the cord into the hand
mixer during retraction to
prevent it from striking you
or the hand mixer.
Assembly and Operation of Your Kambrook Hand
Mixer Continued...

12
Mixing Guide
Speed
Setting Mixing Task Best For Mixing
1 Kneading, folding Cookie dough, pizza dough, pasta dough, bread
dough, mousse, fruit cake, scones
2 Light mixing Cake mix, custard, curd, pudding
3/4 Light beating/creaming Creaming butter and sugar, cheesecake mix
5 Whipping/aerating Soufflé, meringue, whipped cream, icing, pancake
batter
NOTE: Always begin mixing at
lowest speed setting number 1
then increase to higher speed
setting to prevent splattering.
WARNING: Never exceed
speed setting number 1
when kneading heavy
ingredients such as
dough using the dough
hooks.
WARNING: Do not double
the ingredients of the
recipes as it can damage
the hand mixer.

13
Troubleshooting Guide
Problem Possible Solution
Unsure whether to use
beaters or dough hooks
• Use beaters for all mixing/whipping tasks
• Use dough hooks only for preparation of yeast/bread dough
• DO NOT use a dough hook with a beater- this will damage
the hand mixer
Unsure of which speed
setting to use
• Use the mixing guide on page 12 to help select correct
mixing speed when preparing recipes
• Begin mixing at lowest speed, then increase to higher speed
to prevent splattering
Over mixing has occurred • Mix for the recommended time in the recipe to avoid over
mixing
Egg whites are not
whipping
• Be sure beaters and bowls are completely clean and
dry before use- even a small amount of fat will affect the
whipping performance
Bread dough is not
combining
• Some brands of flour absorb more liquid than others, so
additional amounts of liquid may need to be added if the
bread is not combining
• DO NOT exceed speed setting 1 when kneading
• DO NOT place hands near dough hooks when mixer is
operating
Batter is too firm • Add more liquid to your batter
Mixture is curdling after the
eggs have been added
• Add eggs one at a time, beating well after each addition
• Make sure eggs are at room temperature
Sugar crystals still visible
after creaming
• Continue to cream until sugar has dissolved, or use caster
sugar
Lumps in batter or dough • Sift the flours and sugar before mixing
Cooked pavlova • Continue to whip until all sugar is dissolved. Test by rubbing a
small amount between your fingers; if sugar granules are still
felt, further mixing is required
Beaters or dough hooks
are stalling
• Dough or batter is too thick; add more liquid or reduce
quantity
• Chocolate, nuts or fruit pieces are too large; reduce the size
of these ingredients to avoid this problem

14
Care, Cleaning and Storage
Cleaning After Use
1. Always ensure that the Speed
Control Switch is in the ‘OFF’
position and that the power is
switched off at the power outlet,
then remove the power cord from
the power outlet.
2. Press the ‘EJECT’ button and
remove the beaters/dough hooks
from the mixer.
3. Wipe the mixer body with a soft,
damp cloth then dry thoroughly.
4. Wipe any excess food particles
from the power cord.
5. Wash the beaters, dough hooks,
storage case in warm soapy
water with a soft clean cloth.
Rinse and dry thoroughly.
6. Do not allow the beaters/dough
hooks to soak in water for an
extended period of time, as this
may damage the metal finish.
NOTE: Do not place any part
of the hand mixer inside the
dishwasher.
NOTE: Do not use abrasive
scouring pads or cleaners
when cleaning the beaters/
dough hooks as these may
scratch the surface.
NOTE: Do not wash or soak
the mixer body in water or any
other liquid. Clean with a damp
cloth and dry thoroughly. Do
not allow water or any other
liquid to enter the gear system
as damage may result.
NOTE: Ensure that the beaters/
dough hooks are not soaked in
water for an extended period
of time, i.e. for several hours
overnight, as this may damage
the metal finish.
WARNING: Never
immerse the hand mixer,
power cord, or plug in
water or any other liquid.
Storage
Before storage, turn the power off at
the power outlet and then remove
the power plug from the outlet.
Ensure the hand mixer is cleaned and
completely dry.
Storage Case
The beaters and dough hooks
conveniently pack inside the storage
case.
1. Put the storage case on a flat
surface and place the beaters
and dough hooks inside the
storage case. Position the beaters
so they are in opposite directions
from each other (See Fig. 3).
Do the same for the dough hooks
and also position the dough hook
shafts at the same end as the
beaters (See Fig. 4). Make sure to
lay the accessories flat.
Fig. 3

15
Fig. 4
2. With the hand mixer tilted, align
the slot under the mixer body
with the tab on the front of the
storage case (See Fig. 5). Now
that the top of the mixer body is
attached, simply push the bottom
of the mixer body down so it locks
securely to the bottom of the
storage case (See Fig. 6). Ensure
the mixer body is secured to the
storage case; when the mixer
body is lifted the storage case
stays attached.
Fig. 5
Care, Cleaning and Storage Continued...
Fig. 6
Retractable Cord
For added storage convenience, the
hand mixer includes a retractable
cord that fits inside the mixer body.
Before storing the power cord, wipe
any particles that may be on the
cord.
To retract the cord, press down on the
‘’ Retractable Cord Button at the
top of the mixer. The power cord will
automatically retract.
WARNING: Always hold
the plug with one hand
and guide the cord into
the hand mixer during
retraction to prevent it
from striking.
With the storage case attached and
retractable cord inside the motor
body keep the hand mixer in a
convenient position on your kitchen
bench or in an accessible cupboard.

16
Recipes
Pancakes
Makes 8-10 pancakes
1 cup plain flour
Pinch of salt
1 egg
1 ¼ cups milk
2 tbsp unsalted butter, for greasing
Maple syrup, for serving
Ice cream, for serving
1. Combine flour, salt, egg and milk in a
mixing bowl.
2. Use the hand mixer with the beater
attachments on speed 5 to beat
mixture until smooth and well
combined.
3. Heat frying pan and grease lightly
with butter.
4. Pour ¼ cup of batter into frying pan
and swirl to cover base of pan. Cook
over a medium heat until bubbles
start to burst on the top surface.
5. Carefully turn the pancake and cook
on other side until golden brown.
Remove from pan. Continue with
remaining batter until all the batter is
used.
6. Serve pancakes with maple syrup and
ice cream.
Plain Scones
Makes 8 scones
2 tbsp butter
2 cup self-raising flour, sifted
1 cup milk
Pinch of salt
Extra self-raising flour, for kneading
Extra milk, for glazing
Butter, for serving
Jam, for serving
1. Preheat oven to 220ºC.
2. Using the hand mixer with the beater
attachments on speed 2, cream the
butter in a bowl until soft.
3. Add half the flour and continue
mixing. Add remaining flour and salt
and then gradually add milk. Mix until
soft dough is formed.
4. Raise and lower beaters throughout
mixing to assist in combining the
mixture. Be careful not to over mix.
5. Turn dough onto a lightly floured
board and knead lightly. Press or roll
the dough to desired thickness.
6. Cut dough into desired shapes and
place close together on a lightly
greased baking tray. Brush lightly with
milk.
7. Bake for 15 minutes or until cooked
and golden. Turn out onto a wire rack
to cool. Serve hot or cold, with butter
and jam.

17
Lemonade Scones
Makes 10 scones
2 ½ cups self-raising flour, sifted
1⁄3cup caster sugar
2⁄3tsp salt
2⁄3cup thickened cream
2⁄3cup lemonade
1 ¼ tbsp milk
Jam, to serve
Cream, to serve
1. Preheat oven to 220ºC. Lightly grease
a baking tray.
2. Place all ingredients into a large bowl.
Using the hand mixer with beater
attachments, mix on speed 2 to form
soft dough. Turn out onto a lightly
floured workbench and knead lightly
until combined.
3. Press the dough with your hands to a
thickness of about 2cm. Use a 6cm
round cutter to cut out 10 scones.
Place scones on baking tray and
brush with milk.
4. Bake for 10-15 minutes or until lightly
browned. Serve warm with fresh jam
and cream.
Butter Cake
125g butter chopped, at room
temperature
3⁄4cup caster sugar
1 tsp vanilla essence
2 eggs
2 cups self-raising flour, sifted
2⁄3cup milk
Icing
2 cups icing sugar
15g butter
1-2 tbsp hot water
1 tsp vanilla extract
1. Preheat oven to 180°C. Lightly grease
a deep, 20cm round cake tin. Line
base with baking paper.
2. Using the hand mixer with the beater
attachment beat butter, sugar and
vanilla together on speed 3 in a large
bowl, until pale and creamy.
3. Add eggs one at a time, beating well
after each addition, scraping down
sides of bowl.
4. Alternate lightly folding flour and milk
into creamed mixture, using the hand
mixer on speed 2.
5. Spoon mixture into prepared tin and
spread evenly. Bake for 40-45 minutes,
or until cooked, use a wooden skewer
to test. Cool in pan for 5 minutes,
before turning onto a wire rack to cool
completely.
6. Vanilla Icing: Sift icing sugar into a
bowl. Add butter, water and vanilla.
Beat well with a hand mixer and
the beaters on speed 3, once the
ingredients have combined, increase
speed and mix until a smooth
spreadable consistency. Spread over
cooled cake.

18
Pizza Dough
Makes 2 medium pizzas
½ tsp white sugar
1 tbsp active yeast
½ cup warm water
1 ½ cups plain flour
1 tsp salt
1 tbsp vegetable oil
1. Place sugar, yeast and water in a
bowl, mix together with a spoon and
allow to rest for 15 minutes (it should
go frothy).
2. Sift flour and salt into a second bowl
and then transfer to the frothy sugar
mix. Add the oil and mix well using the
hand mixer with the dough hooks on
setting 1 until dough ball is formed.
3. Transfer to a lightly floured surface and
knead for a 8-10 minutes until smooth
and slightly stretchy.
4. Place dough in a greased bowl
and cover with a clean tea towel.
Place in a warm area and allow the
dough to double in size, this will take
approximately 30 minutes.
5. Punch the dough by pushing a fist in
the middle of the mix; this will knock
the air out of it. Cut dough into 4
equal-sized pieces and using a rolling
pin roll flat to a thickness of 1cm.
6. Lightly oil a pizza tray and place
dough on tray.
7. Assemble toppings on the base and
bake in oven for 15 minutes at 220°C.
NOTE: Once dough hooks start to
slow and the dough ball is formed,
cease using the hand mixer.
Transfer dough ball to a lightly
floured surface and continue
kneading by hand.
TIPS: Top with your favourite
toppings and then grated
mozzarella cheese. Choices might
include: sliced meats, seafood,
char grilled vegetables, sliced
fruits, cheeses and herbs. For a
sweet pizza, try using a chocolate
hazelnut spread for the base
and topping with fruit, nuts,
marshmallows and a drizzle of
honey.

19
Pasta Dough
Serves 4
200g Plain flour
100g semolina
Pinch salt
2 eggs, room temp
1 egg yolk
70ml water
20ml vegetable oil
1. Combine flour, semolina and salt in a
bowl. Make a well in the centre and
add eggs, water and oil.
2. Using the hand mixer and the dough
hooks mix on setting 1 until dough ball
is formed.
3. Transfer to a lightly floured surface and
knead for 5-10 minutes until smooth
and a slightly stretchy.
4. Wrap the dough in plastic wrap and
refrigerate for at least 30 minutes.
5. Roll out pasta dough with a rolling pin
before feeding through your pasta
machine. You will need to flour it as
you go to prevent it from sticking.
6. Fill a large pot with water and a pinch of
salt. Cook for 5 minutes, once cooked,
drain pasta and add a splash of olive oil
to prevent it from sticking together.
NOTE: Once dough hooks start to
slow and the dough ball is formed,
cease using the hand mixer.
Transfer dough ball to a lightly
floured surface and continue
kneading by hand.
TIPS: It’s very important to let the
pasta dough rest for at least 30
minutes before rolling it out to
prevent the dough from being too
elastic and shrinking when cooked.
TIPS: Make sure you flour the pasta
dough as you roll it out to prevent it
from sticking.
TIPS: When cooking your pasta, use
the largest pot you have, the more
water you have to boil your pasta
the less chance it has of sticking
together.
Table of contents
Other Kambrook Hand Mixer manuals
Popular Hand Mixer manuals by other brands

SOLIS
SOLIS HAND & STICK MIXER 8371 user manual

Eldom
Eldom Miix R100 Instructions for use

Black & Decker
Black & Decker Performance Helix MX600BC Series use and care manual

Caterlite
Caterlite BW002 instruction manual

SAPIRHOME
SAPIRHOME Z-1110-ZV instruction manual

EFBE-SCHOTT
EFBE-SCHOTT RG 610 operating instructions