bediening
13
Automatisch in- en uitschakelen met baktijd-
en eindtijdfunctie
De baktijd is de tijd die nodig is om het
gerecht te bereiden. De eindtijd is de tijd
wanneer het gerecht klaar moet zijn. Met
deze functie kunt u door middel van het
instellen van een baktijd en eindtijd de oven
automatisch laten in- en uitschakelen.
De oven berekent zelf de starttijd, en schakelt
na het verstrijken van de bereidingstijd
automatisch uit.
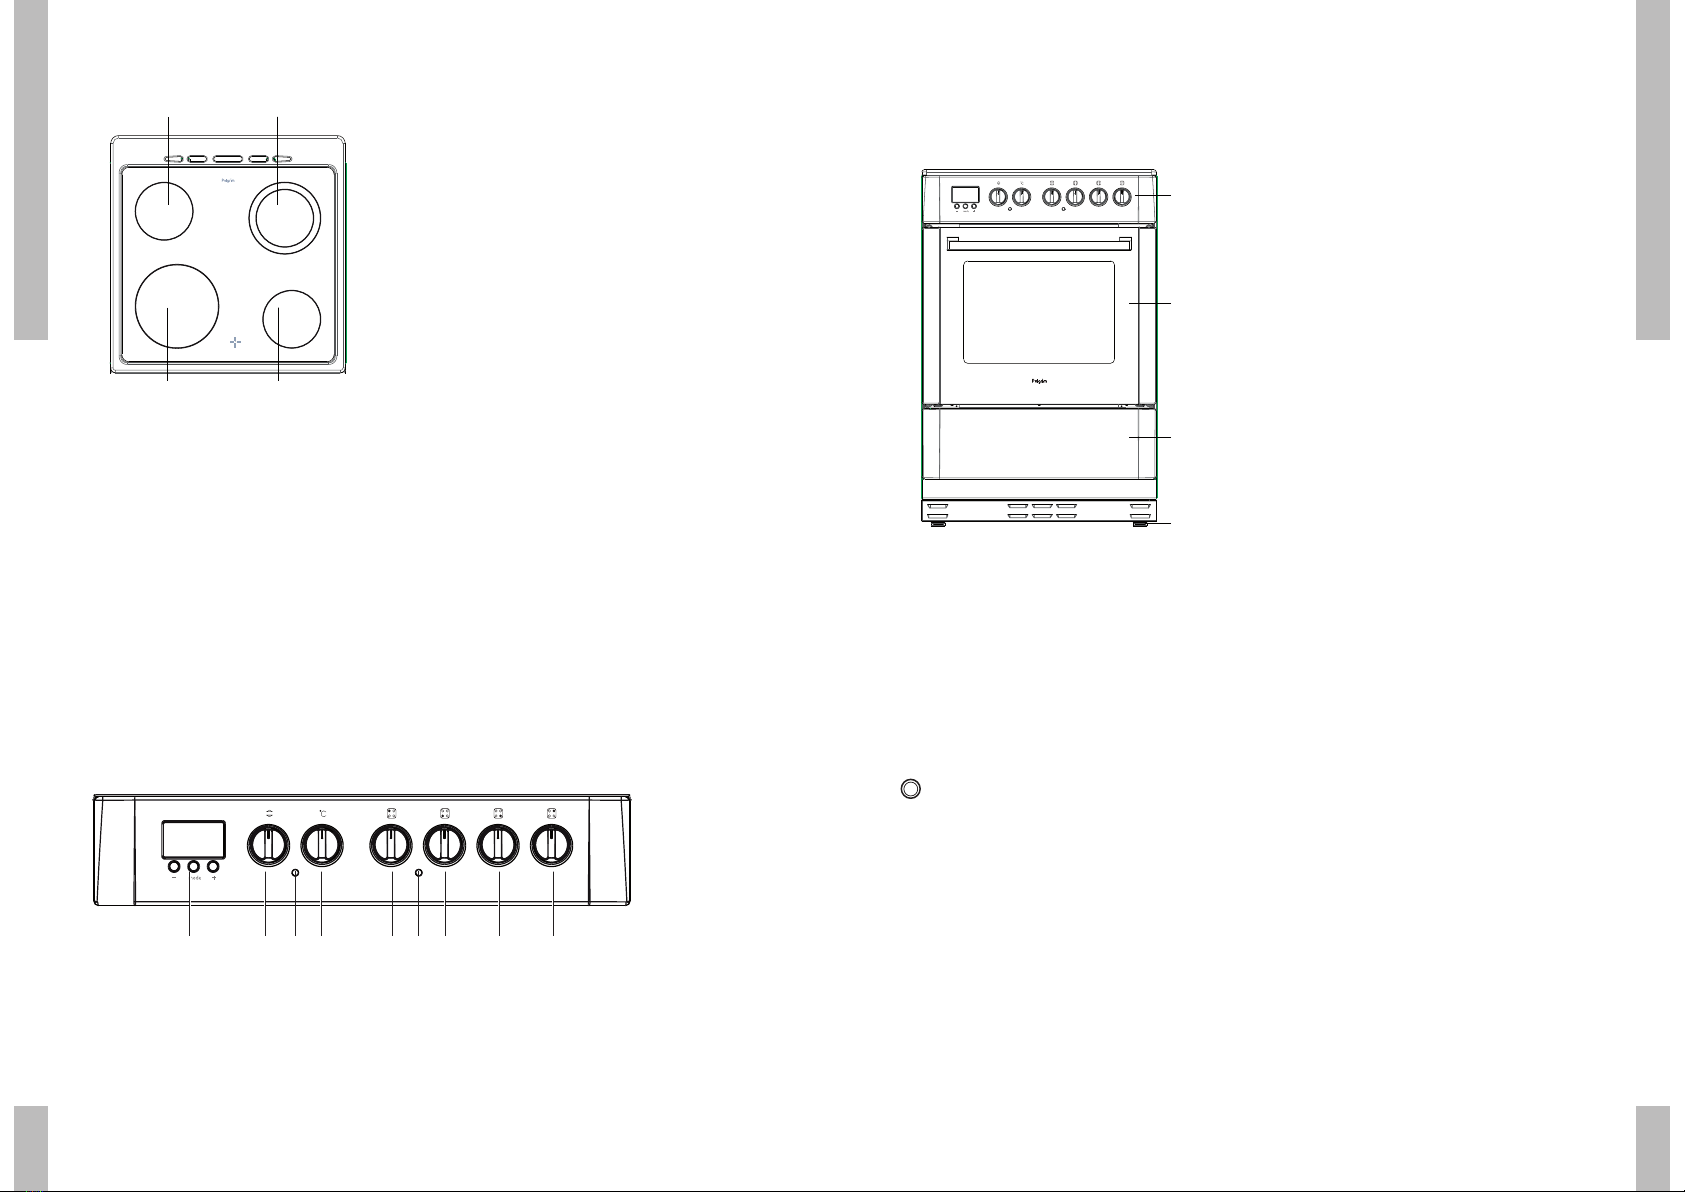
nKies een ovenfunctie door de knop op het
gewenste symbool te draaien.
nKies de gewenste temperatuur.
De temperatuur is traploos regelbaar.
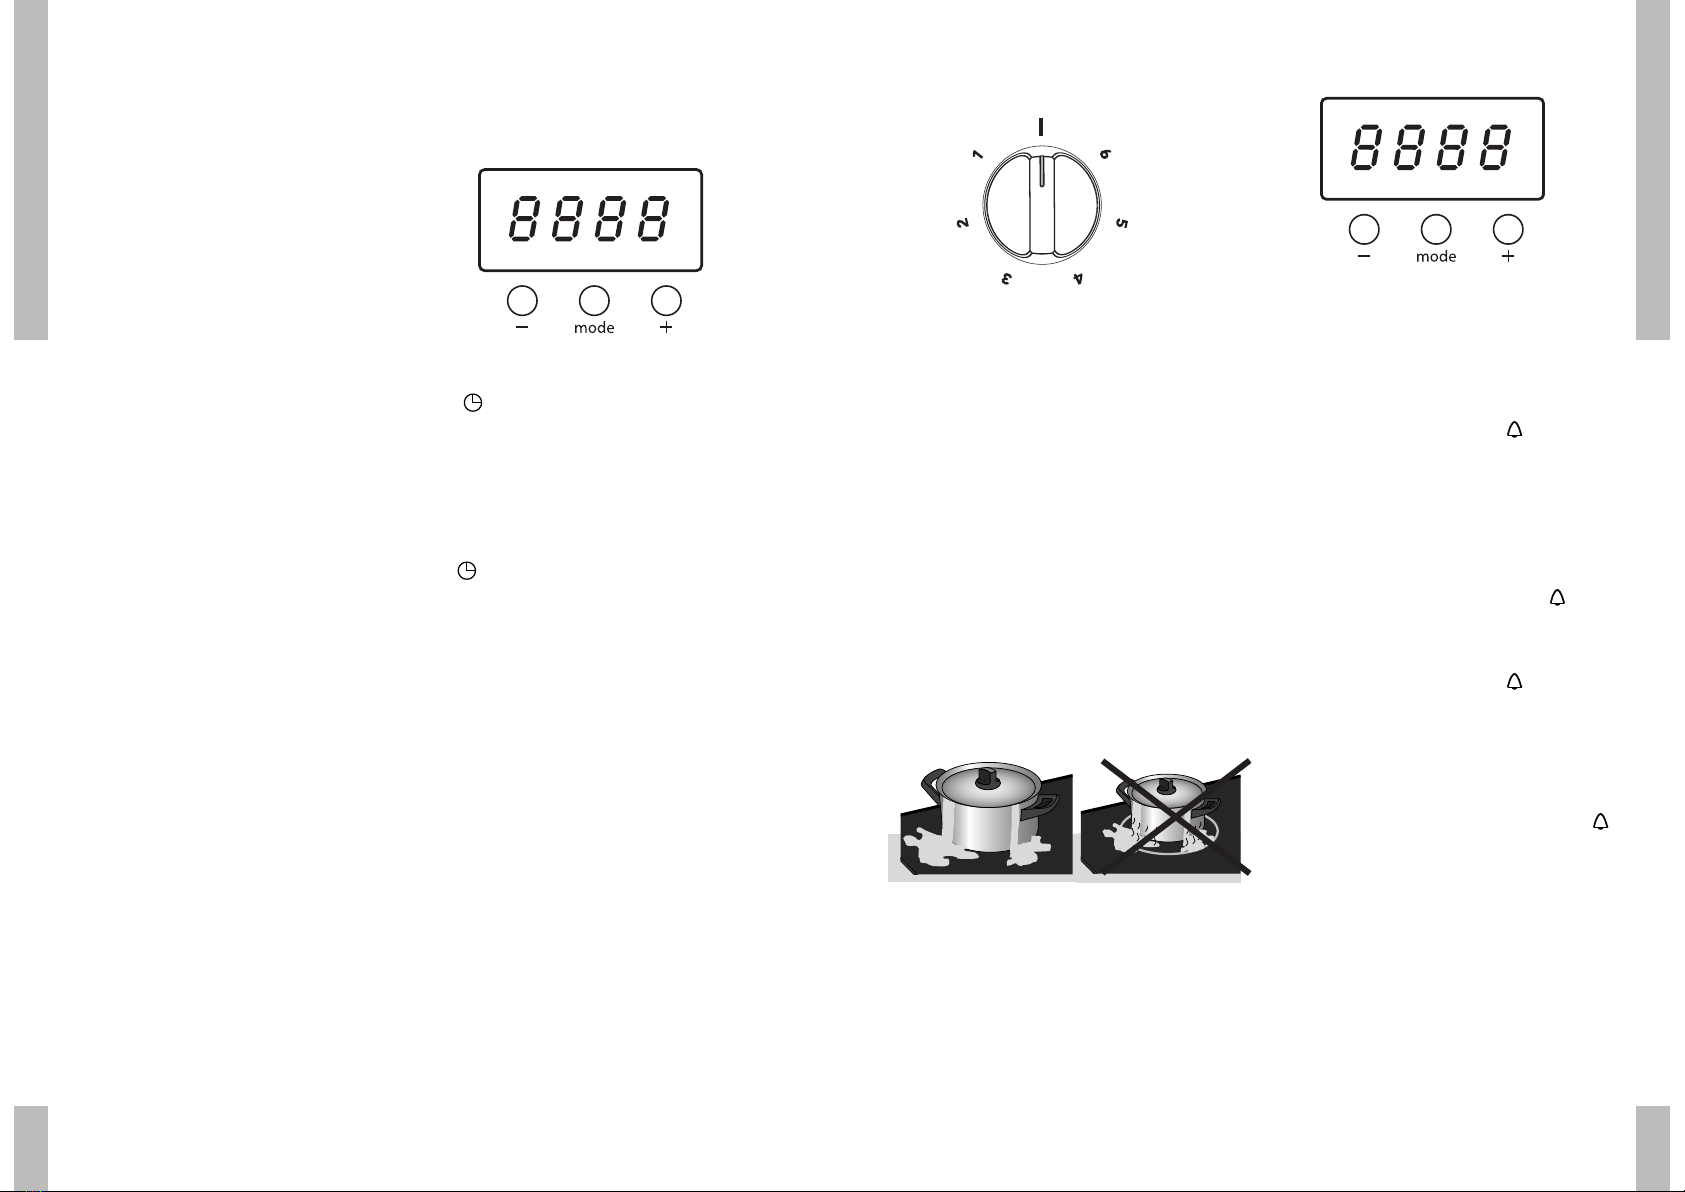
nDruk op de ‘mode’ toets tot in het
display knippert.
nDruk op de –/+ toetsen totdat de juiste
baktijd bereikt is. Vijf seconden na het
loslaten van de toets verschijnt de
ingestelde baktijd in het display en
stopt met knipperen.
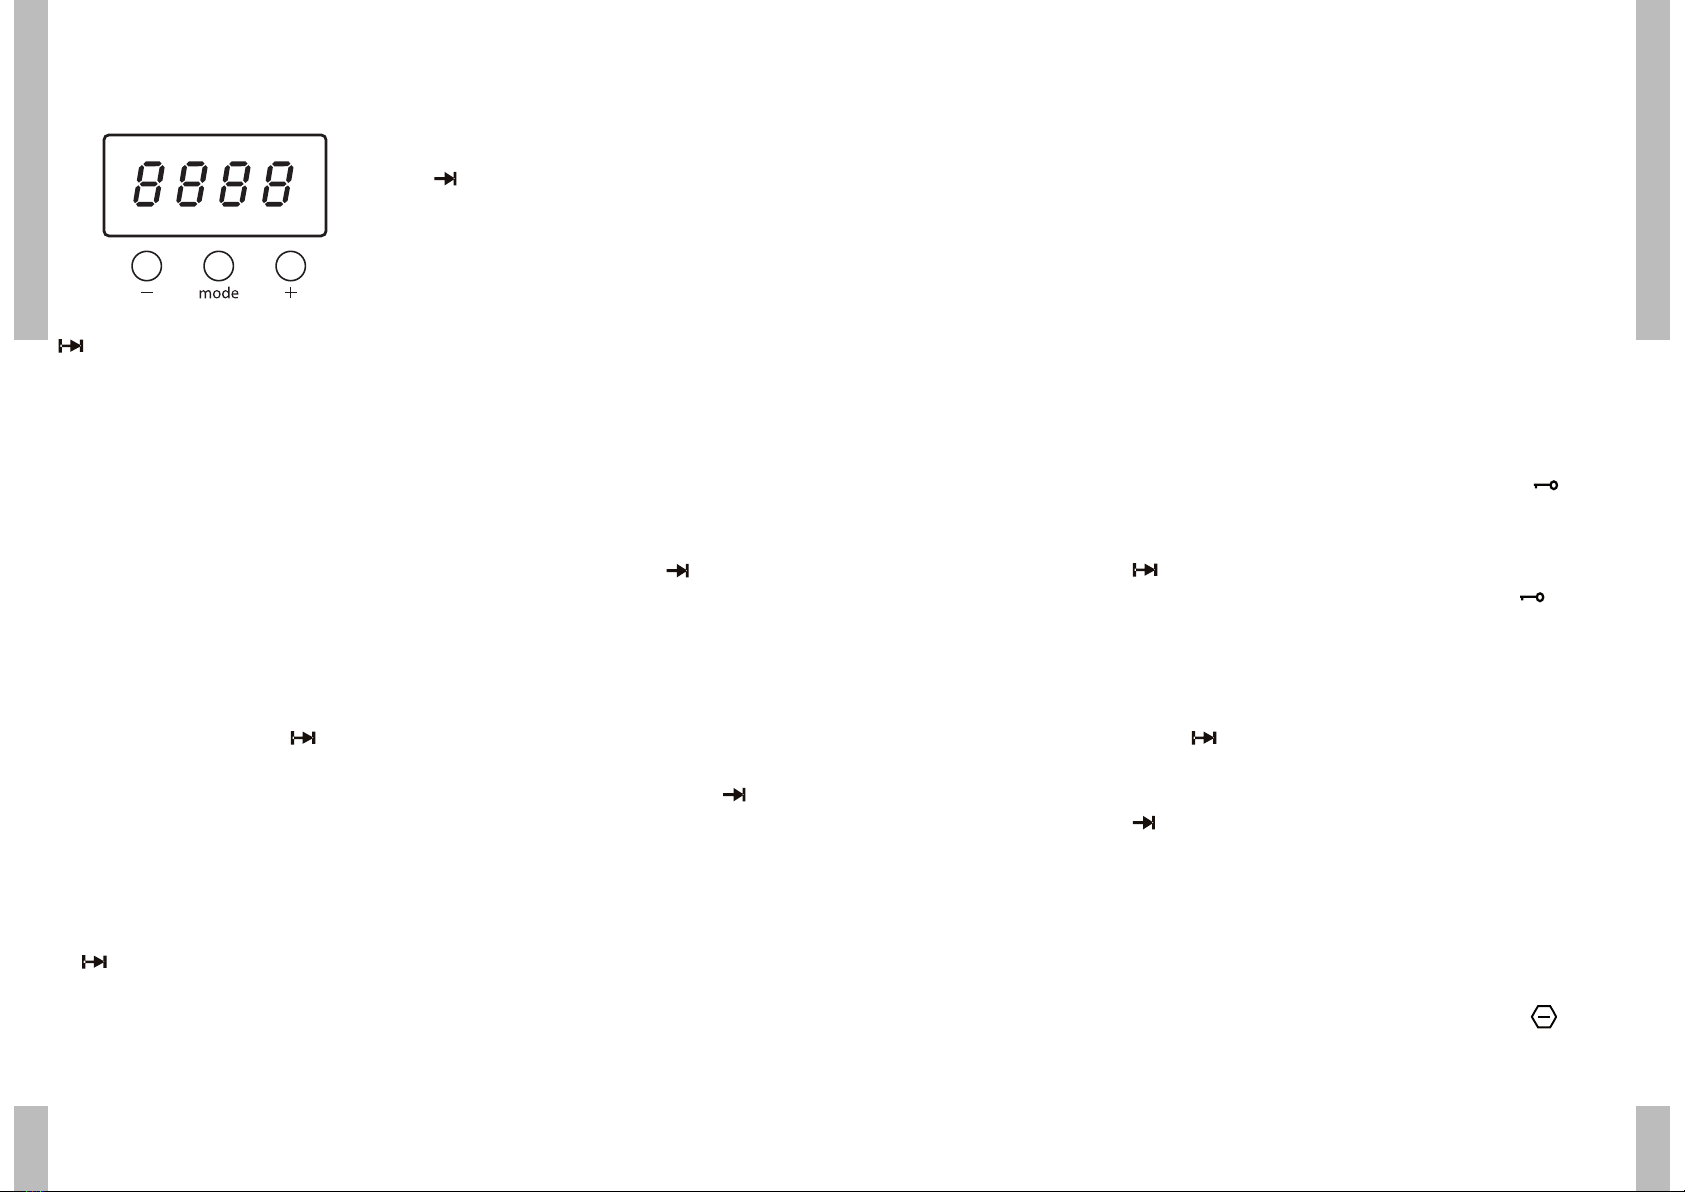
nDruk op de ‘mode’ toets tot in het
display knippert. Het
display geeft de vroegst mogelijke eindtijd
weer.
nDruk op de –/+ toetsen totdat de juiste
eindtijd bereikt is.
De oven schakelt automatisch in en uit. Ook
klinkt er een signaal. Schakel het signaal uit
door op één van de 3 toetsen te drukken.
Schakel daarna de oven definitief uit door
de functieknop en thermostaatknop op nul te
draaien.
Kinderslot
U kunt het kinderslot inschakelen om
onbedoeld gebruik van te schakelklok te
voorkomen.
nDruk 3 seconden gelijktijdig op de – en +
toets. In het display verschijnt .
nOm het kinderslot weer uit te schakelen:
Druk nogmaals 3 seconden gelijktijdig op
de – en + toets. Het symbool verdwijnt.
Kookduurbegrenzing
De kookduurbegrenzer schakelt de oven na
3 uur automatisch uit, om oververhitting te
voorkomen.
De tijd loopt vanaf het moment dat de
schakelklok voor het laatst bediend is .
Zodra de u een toets van de schakelklok
bedient begint de 3 uur tijd weer opnieuw te
lopen.
nAls de oven is uitgeschakeld door de
kookduurbegrenzer verschijnt in het
display. Zet de functieknop en
thermostaatknop op 0.
De kookduurbegrenzer is uitgeschakeld.
12 bediening
Inschakelen van de oven met
schakelklokfunctie
Automatisch uitschakelen met
baktijdfunctie
De baktijd is de tijd die nodig is om het
gerecht te bereiden. Met deze functie kunt u
door middel van het instellen van een baktijd
de oven automatisch, na het verstrijken van
de ingestelde baktijd, laten uitschakelen.
nKies een ovenfunctie door de knop op het
gewenste symbool te draaien.
nKies de gewenste temperatuur.
De temperatuur is traploos regelbaar.
nDruk op de ‘mode’ toets tot in het
display knippert.
nDruk op de –/+ toetsen totdat de juiste
baktijd bereikt is.
Vijf seconden na het loslaten van de toets
verschijnt de ingestelde baktijd in het display
en stopt met knipperen.
De oven is ingeschakeld en geeft een signaal
als de baktijd afgelopen is. De oven schakelt
dan automatisch uit. Schakel het signaal uit
door op één van de 3 toetsen te drukken.
Schakel daarna de oven definitief uit door
de functieknop en thermostaatknop op nul te
draaien.
Automatisch uitschakelen met
eindtijdfunctie
De eindtijd is de tijd wanneer het gerecht
klaar moet zijn. Met deze functie kunt u door
middel van het instellen van een eindtijd de
oven automatisch, na het bereiken van de
ingestelde eindtijd, laten uitschakelen.
nKies een ovenfunctie door de knop op het
gewenste symbool te draaien.
nKies de gewenste temperatuur.
De temperatuur is traploos regelbaar.
nDruk op de ‘mode’ toets tot in het
display knippert. In het
display verschijnt de dagtijd.
nDruk op de –/+ toetsen totdat de juiste
eindtijd bereikt is.
Vijf seconden na het loslaten van de toets
verschijnt de dagtijd in het display en
stopt met knipperen.
De oven is ingeschakeld en geeft een signaal
als de eindtijd bereikt is. De oven schakelt
dan automatisch uit. Schakel het signaal uit
door op één van de 3 toetsen te drukken.
Schakel daarna de oven definitief uit door
de functieknop en thermostaatknop op nul te
draaien.