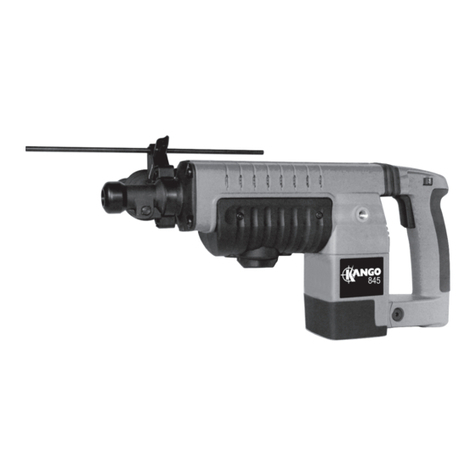
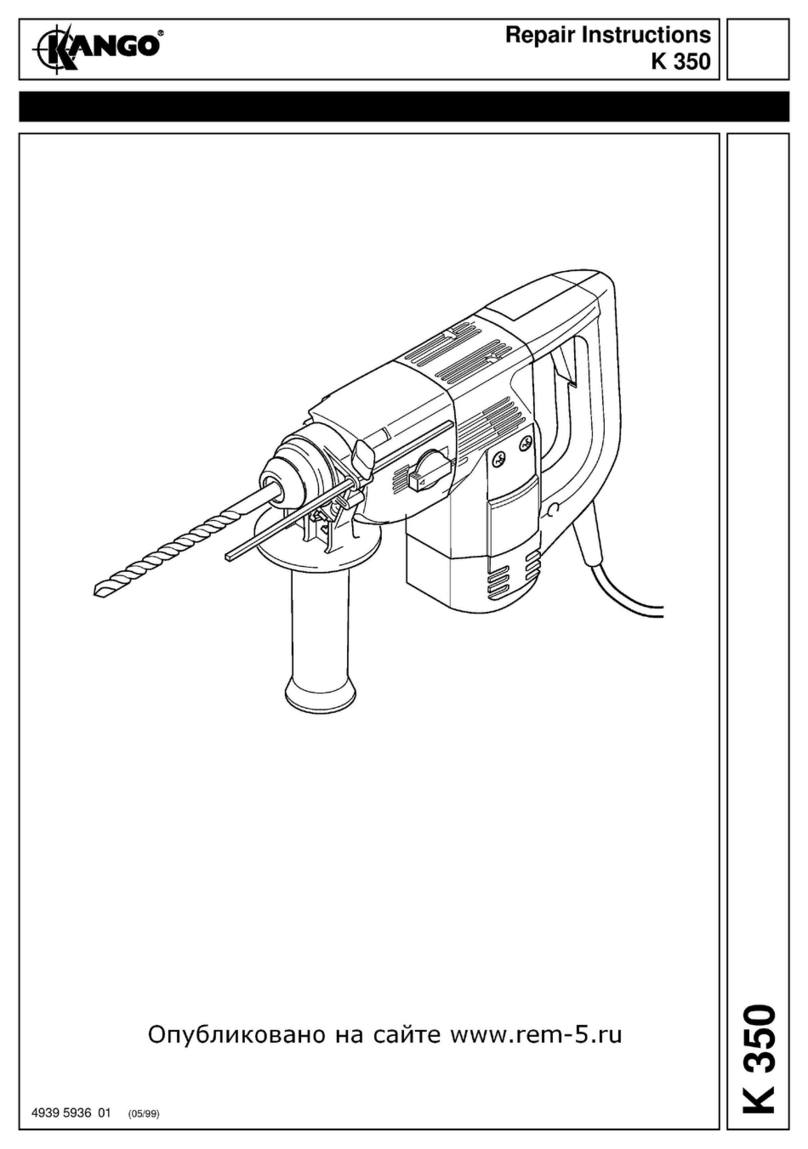
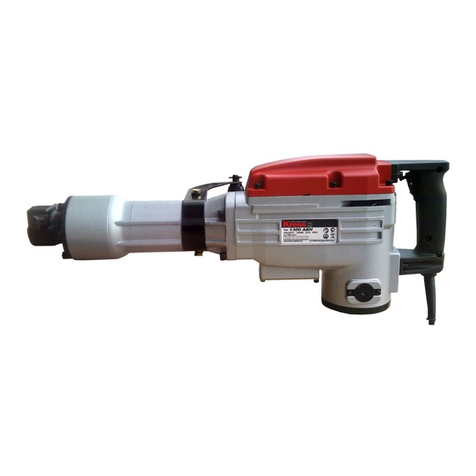
Kango 1400 Series Installation and operating manual


6
Service and Repair Manual
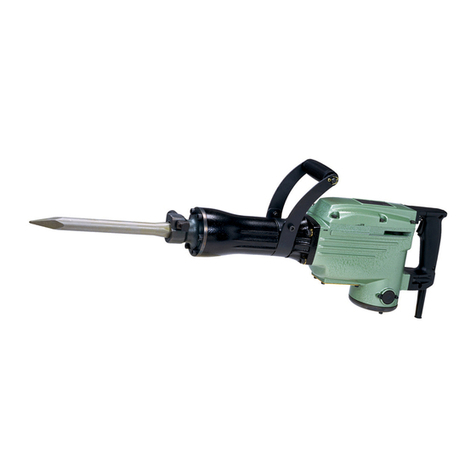
Model 1400KV/1400BV
TORQUE SETTINGS
ITEM NO. PART NO. DESCRIPTION
1 9170 0234 20 MANDREL BASE
2 9170 3023 00 STRIKER GUIDE TOOL
3 9170 3022 90 PRESS TOOL (ANVIL)
4 9170 3023 30 PRESS TOOL (ISB)
5 9170 0237 50 HOLDING SPANNER
6 9170 0233 20 MANDREL
ITEM NO. PART NO. DESCRIPTION
7 9170 3023 10 PRESS TOOL (ARMATURE)
8 9170 2383 02 MANDREL
9 9170 3023 20 PRESS TOOL (LAYSHAFT)
10 9170 7327 03 MANDREL
11 9170 3038 60 ANVIL GUIDE
MODEL 1400MV
ITEM NO. PART NO. Nm In/lbs
31 9170 0197 40 4.5 40
35 9170 0510 60 30 266
52 9170 6304 30 2.0 18
56 9170 2937 10 4.5 40
65 9170 2937 00 4.5 40
69 9170 2300 70 2.0 18
82 9170 2604 00 2.0 18
91 9170 1756 10 2.0 18
113 9170 7070 14 30 266
MODEL 1400KV/1400BV
ITEM NO. PART NO. Nm In/lbs
31 9170 0197 40 4.5 40
35 9170 0510 60 30 266
52 9170 6304 30 2.0 18
56 9170 2937 10 4.5 40
65 9170 2937 00 4.5 40
69 9170 2300 70 2.0 18
82 9170 2604 00 2.0 18
91 9170 1756 10 2.0 18
99 9170 0510 50 30 266
ServiceTools
124
5
6
7
891011
4
3
Service and Repair Manual
Model 1400KV/1400BV/1400MV

7
Service and Repair Manual
Model 1400KV/1400BV
DISMANTLING
Fig. 1
Fig. 2
Fig. 3
Important! Before carrying out any repairs, the hammer should be checked for electrical safety and for mechanical
performance. For electrical safety the hammer should be placed on a non-conductive surface which is
either of a wooden construction (with the mains supply disconnected) which contains no metal parts or a
bench which is insulated by a rubber mat. The hammer should then be checked by high voltage flash
testing. On completion of dismantling procedure all electrical components should then be checked for
electrical safety. The hammer should ONLY be checked for hammer performance if the unit passes the
electrical safety test.
Removing the
tool locking
mechanism
(1400, 1400B)
1. Using a hammer and suitable drift, remove the
latch bar (4).
2. Remove and retain the latch end retainer (7),
spring (6) and cover (5).
Removing
the nosepiece
(1400, 1400B)
1. Remove the six Allen retaining screws (35) from
the nose piece (8).
2. Remove the nosepiece assembly (8).
3. Remove the six allen screws (35) from the anvil
housing (14) and remove anvil housing (14).
4. Remove and discard O-rings (3) & (11).
Removing the
front handle
mechanism
(1400, 1400B)
1. Remove the circlip (1), knob (28), and retaining
screw (27) together with the associated washer
(29).
2. Remove the front handle (30), nose cap (2) and
strap casting (26).
Warning: Hold strap casting (26) whilst
removing nose cap (2).
48567
12
28
26
27 30
3358
11 14 34
29
35

8
Service and Repair Manual
Model 1400KV/1400BV
Fig. 4
Fig. 5
Fig. 6
Dismantling
the anvil
assembly
(1400, 1400B)
1. Remove the catcher housing (19) rubber ring (18)
and recoil absorber (17) from the anvil housing
(14).
2. Remove the anvil (13) and seal (12), recoil ring
(16) from the anvil housing (14).
3. Remove the locating ring (21), 'O' rings (22) &
(20) from the hammer casing (34).
4. Remove 'O' ring (20), from the anvil housing.
5. Place unit on a suitable protected surface and
remove liner (15) using Service Tool
9170 3022 90.
19 20
13 16 17 18121415
21 22 20 34
Dismantling
the SDS
assembly
(1400M)
1. Remove end cap (102) and chuck cover (103).
2. Remove the following items:
- wire clip (104)
- buffer stop (105)
- buffer (106)
- SDS chuck (107)
3. Remove two latches (108) and remove the
following items:
- latch plate (109)
- spring (110)
- lock plate (111)
- lock chuck (112)
Removing
the driver
(1400M)
1. Remove six screws (113), nose piece (115) four
balls (114) and trans housing (124).
2. Remove nose cover (120) and ‘O’ ring (121).
3. Remove the following items:
- driver (117)
- ‘O’ ring (126)
- junk ring (118)
- anvil (119)
- seal (12)
- ‘O’ ring (122)
- junk ring (123)
- recoil transfer ring (125)
102 104 106 108 109 111
103 105 107 108 110 112
113
114 115 117 118
126 11912
123 125
124
122
121
120

9
Service and Repair Manual
Model 1400KV/1400BV
Fig. 7
Fig. 8
Fig. 9
Dismantling
the Inclined
Shaft
Bearing
(ISB)
Assembly
1. Using Service Tool 9170 3023 20 (A) press the
complete assembly (46) from the tapered roller
bearing (41) and gear (48).
2. Invert the assembly and using Service Tool
9170 3023 30 (B) press on the layshaft to
remove the tapered roller bearing (41) from the
layshaft (47), and the layshaft (49) from the
inclined shaft bearing.
41
48
46
47
41
41
B
41
48
47
41 46
41 A
Removing
the hammer
casing
1. Remove the six Allen bolts (35) and their
associated washers (36).
2. Remove the hammer casing (34) from the bearing
housing (51). Remove and discard the gasket
(49).
Removing
the Inclined
Shaft
Bearing
(ISB)
Assembly
1. Withdraw the complete inclined shaft (47)
bearing assembly (A) from the hammer casing
(34).
2. Remove the taper roller bearing outer (41),
packing washer (40) and spring disk assembly
(39).
35 34 49
51
A
41
40
39
34
36

10
Service and Repair Manual
Model 1400KV/1400BV
Fig. 13
Fig. 10
Fig. 11
Fig. 12
1. Using a wooden hammer shaft, gently push the
striker assembly (23), from the hammer case (34).
2. Remove and discard the striker bearing clips (24)
and the seal (25).
Removal and
Dismantling
of the
Striker
Assembly
1. Pull the piston assembly (45) from the hammer
casing (34).
2. Remove and discard the bearing clip (44) and
withdraw the gudgeon pin (43).
3. Remove and discard the nu-lip seal (42) from the
piston (45).
Removal and
Dismantling
of the Piston
Assembly
Removal of
the Barrel
Assembly
1. Remove the three retaining screws (31) and the
barrel retainer (38).
2. Press the barrel assembly (37) , from the hammer
case (34).
Note: The following procedure is carried out only if
the barrel is damaged or worn, and is to be
replaced.
45
44
42
34
43
23 24 25 34
31
38
34 37
Removal of
the Carbon
Brushes
1. Remove two screws (76) and mounting plate (86).
2. Disconnect condensor unit (89).
3. Identify and disconnect cables from terminal
block (87).
DETAIL A DETAIL B
CONDENSOR
CONDENSOR
CONNECTION
SWITCH
CONNECTION
FIELD
CONNECTION
BLUE
DETAIL B
DETAIL A
SWITCH LEADS
SWITCH LEADS
89
87
86
76
69

11
Service and Repair Manual
Model 1400KV/1400BV
Fig. 14
Removal of
the Motor
Assembly
from the
Bearing
Housing
1. Remove the six Allen bolts (35) from the motor
housing (73) and lift off the motor assembly (A).
A
74 35
73
Dismantling
the Rear
Handle
Assembly
1. Remove the upper handle locking plate screws
(69) and, using a screwdriver, withdraw the
upper plate (80).
2. Using a screwdriver, lever off the upper handle
support (79) together with its associated rubber
handle support (78), releasing both sides at the
same time.
Note: It will be necessary to spread the two locating
clips inside the housing (73).
3. Remove the handle cover retaining screw (82) and
withdraw the rear grip (81).
4. Disconnect the wires from the switch (83).
5. Remove the switch assembly from the handle
(77).
73 79 80
81
83
77
80
79
78
Fig. 16
Fig. 15
Dismantling
the field case
1. Remove two brush cover retaining screws (76)
and remove the covers (75).
2. Release the brush spring (68).
3. Release the locating screws (94) and remove the
brush assemblies (71).
4. Remove the brush (61) and switch lead (64)
assemblies.
5. Remove the four Allen bolts (65) and withdraw
the field casing assembly (66).
6. Remove the baffle (59) from the field case and
withdraw the field coil assembly (60).
7. Remove the baffle gasket (51).
8. Remove rubber supports (62) and (63), and (72).
50 51 59 6061 66
64 62
65 72
82
69
63
75
68
71
94
76
75
12
Service and Repair Manual
Model 1400KV/1400BV
Fig. 17
Fig. 18
Dismantling
the Armature
Assembly
Removal of
the Taper
Roller
Bearing
Outer Ring
1. Remove the four retaining Allen bolts (56) and
withdraw the armature assembly (B).
2. Place the assembly into a suitable vice and
remove the bearing (54) and bearing clamp plate
(55).
3. Remove ‘O’ ring (53).
1. Remove the two screws (A) from the inner face of
the bearing housing.
2. Refit longer screws (A) and turn alternatively to
withdraw bearing outer ring.
53
57
A
56
55
54
B
50
B
50
A
58

13
Service and Repair Manual
Model 1400KV/1400BV
General For best performance hammers should be serviced at regular intervals, any indication that the hammer is
not performing as specified should be investigated to prevent any adverse damage occurring.
ALL SEALS, GASKETS, GREASE OR OTHER PARTS DEEMED NECESSARY FOR
SERVICING ARE IN THE SERVICE KIT.
ALL NEEDLE ROLLER BEARINGS SHOULD BE PRESSED WITH THE ROUNDED
EDGE ENTERING THE BORE FIRST, AND THE PRESS TOOL PRESSING AGAINST
THE FLAT SURFACE OF THE BEARING.
Cleaning All mechanical parts with the exception of any sealed bearings should be cleaned in a suitable cleaning
fluid. Electrical parts should be cleaned by the use of compressed air.
PRECAUTIONS MUST BE TAKEN FOR PERSONAL SAFETY THE USE OF EYE
PROTECTION AND GLOVES IS RECOMMENDED.
Inspection All mechanical and electrical parts should be inspected for wear and replaced as required.
Lubrication At service and repair intervals the lubrication should be carried out as shown in the diagram below. All
parts in the service kit should be fitted. The total amount of grease for the 1400 is 390 grms
(9170304323, blue). Lubrication of the hammer is as shown on the grease chart.
ALL SCREWS SHOULD BE REFITTED WITH LOCKTITE®271 OR SIMILAR
(at 45°from
centre to
outside)
1.5 x 85gms
Liberally coat
GREASE APPLICATION CODE
GREASING PROCEDURE - 1400
Pack
Generously coat

14
Service and Repair Manual
Model 1400KV/1400BV
ARMATURES
MODEL 100V 110V 120V 230V 240V
1400 0.21Ω0.21Ω0.32Ω1.06Ω1.2Ω
FIELD COILS
100V 110V 120V 230V 240V
1400 0.37Ω 0.49Ω 0.49Ω1.77Ω1.77Ω
PERFORMANCE
Full Load Hammer Test
100V 110V 120V 230V 240V
1400 1400W
ELECTRICALTESTING
ELECTRICALPERFORMANCE TESTREADINGS
Electrical test Before assembly all electrical parts MUST be checked for safety, and that they conform to specification.
AArmature shaft to lamination pack 2500 volts
BLamination pack to commutator 1500 volts
CArmature shaft to commutator 4000 volts
DCommutator to commutator bush 1500 volts
ECommutator bush to shaft 2500 volts
Testing the
Armature
(Flash
Testing)
Note:- On all test readings + or - 5% of figures shown is acceptable.

15
Service and Repair Manual
Model 1400KV/1400BV
ASSEMBLY
Fig. 19
Fig. 20
1. Refit the small screws (A) to the inner side of the
casing (50).
2. Press bearing outer (41) into housing (50).
Refitting the
Taper Roller
Bearing
Housing
1. Position bearing clamp plate (55) over the
armature.
2. With service tool press the bearings (54) and (58)
onto armature shaft (57).
3. Fit ‘O’ ring (53) into bearing housing (50).
4. Fit the assembly into the bearing housing (50)
and secure with the four Allen bolts (56).
(Torque load to 4.5 Nm).
Assembling
the Armature
Assembling
the Field Case
1. Ensure correct location of field location rubbers
(63) and mount (62) prior to assembly.
2. Position the field coil assembly (60) into the field
case (66).
3. Fit the baffle gasket (51) and baffle (59) to the
field case. Ensure correct orientation.
4. Locate the field case (66) over the armature
assembly (57) and fit. Secure with the four
retaining Allen bolts (65). (Torque load to 4.5
Nm).
5. Refit the brush and switch lead assemblies (61)
and (84).
50 A
B
53
57
A
56
55
54
50
66
65
61
60
59
51
50
84
62
72
57
63
Fig. 21
58
41

16
Service and Repair Manual
Model 1400KV/1400BV
Fig. 22
Fig. 23
Fig. 24
Assembly of
the rear
handle
79
1. Fit the lower handle support (79) and rubber into
the motor housing (73) and secure the lower
locking plate (80).
2. Depress the switch (83) trigger and engage the
locking button. Fit the unit into the handle front.
(77) and depress the trigger, ensuring correct
location of the switch (83).
3. Identify and connect the switch leads, POS (+) to
lower terminal and NEG (-) to upper.
4. Fit the handle rear cover (81), ensure leads are
positioned correctly. Fit the handle into lower
support rubber and housing (79).
5. Fit the upper support rubber (78) and handle
support (79) and locate into motor housing (73).
Fit and secure the upper locking plate (80).
Refitting the
Motor Housing
Assembly
1. Position the motor housing (73) over the bearing
housing (50) ensuring correct orientation.
2. Fit the six inserts (74) and their respective Allen
bolts (35). (Torque load to 15 Nm).
50
74 35
73
DETAIL A DETAIL B
CONDENSOR
CONDENSOR
CONNECTION
SWITCH
CONNECTION
FIELD
CONNECTION
BLUE
DETAIL B
DETAIL A
SWITCH LEADS
SWITCH LEADS
1. Identify and connect cables to terminal block (87),
as shown in diagram opposite.
2. Fit and secure the terminal block mounting plate
(86) ensuring correct location of the condensor
unit (89). (Torque load to 0.8 Nm).
Mounting the
input termi-
nal block
89
87
86
76
69
73
79
80
81
83
77
80
78
82
69

17
Service and Repair Manual
Model 1400KV/1400BV
Fig. 25
Fig. 26
Fig. 27
Refitting/
Replacing the
Brushes
1. Lever the retaining spring (68) upwards and
insert the brush(s) (71). Ensure the correct fitting.
2. Secure the brush lead with retaining screw (94).
3. Fit and secure brush covers (75), with screws
(76).
Refitting the
Barrel
Assembly
1. Locate and fit the barrel assembly (37) with the
'cut-out' toward the inclined shaft bearing mount.
2. Temporarily fit the location ring (21) to give
correct depth of barrel assembly (37). Press home
the barrel assembly (37), ensure the correct
alignment of ISB slot.
3. Insert the barrel retaining bracket (38) ensuring
correct location of lug. Fit retaining screws (31).
4. Remove location ring (21).
1. Fit bearing clips (24) to striker (23).
Note: Fit striker to barrel and check for free
movement. If restricted discard the clips for
better fit.
2. Fit the Nu-lip Seal (25) to striker (23).
3. Lightly lubricate the assembly (23) and fit into the
barrel.
Refitting the
Striker
Assembly
Assembly and
Refitting the
Piston
Assembly
1. Fit the gudgeon pin (43) and retainer clip (44) to
the piston (45).
2. Fit the Nu-lip Seal (42).
3. Fit piston assembly (45), into the barrel (34).
Note: Refer to lubrication diagram for piston area
lubrication.
31
38
34 37
23 24 25 34
45
44
42
34
43
Fig. 28
75
68
71
94
76

18
Service and Repair Manual
Model 1400KV/1400BV
Fig. 33
Fig. 31
Fig. 32
INSERT A
Assembling
the Inclined
Shaft Bearing
Assembly
1. Fit the Inclined Shaft Bearing (46) to the Service
Tool and fit the layshaft (47). Press the layshaft
until seated.
Note: Flange on bearing is fitted to flange
on layshaft.
2. Locate and fit the gear (48) and the taper forward
roller bearing (41) and press on both items to
layshaft assembly (47).
3. Fit taper roller bearing (41) onto layshaft
assembly.
Refitting the
Inclined Shaft
Bearing
Assembly
Note: Lubricate (34) and (46) layshaft assembly as
shown in the lubrication diagram.
1. Fit the eight concave spring washers (39) into the
Hammer Case bearing housing (34) as follows:
2 x facing inward }
2 x facing outward }See insert (A)
2 x facing inward }
2 x facing outward }
2. Place steel washer (40) on to the spring washer
assembly (39). Fit the bearing outer (41).
3. Insert the ISB assembly (A) into the Hammer
Case (34) ensure the inclined shaft (46) engages
with the piston gudgeon pin. Ensure the assembly
fits into the bearing housing (34).
A
46
47
A
41
41
A
41
34
39 40 41
46
48
Note: Lubricate bearing housing (50) as shown in
the lubrication diagram.
1. Align the gasket (49) to the hammer case (50)
assembly. Ensure correct orientation.
2. Fit the bearing housing (50) to the hammer case
(34) ensure engagement of gears.
3. Secure the two halves with the six Allen bolts
(35) and washers (36). (Torque load to 30 Nm).
Fitting the
Hammer
Case
Assembly
35 34 49
50
36
39 40

19
Service and Repair Manual
Model 1400KV/1400BV
Fig. 34
Fig. 35
Fitting the
Anvil and
Nosepiece
Assemblies
(1400, 1400B)
1. Fit two new O-rings (20) to the location ring (21).
Fit the location ring (21) to the hammer case (34).
2. Fit anvil housing assembly (14) to hammer case
(34) and secure using six allen bolts (35)
(Torque load to 30 Nm).
Note: Cut outs on location ring (21) face the striker.
3. Fit new O-ring (11).
4. Fit new O-ring (3) to the nosepiece (8).
5. Fit nosepiece (8) and secure using six allen bolts
(35) (Torque load to 30 Nm).
Note: Lubricate parts as shown in the lubrication
diagram.
1. Press in the liner (15) into the anvil housing (14).
2. Lightly lubricate the anvil (13) and fit seal
assembly (12). Insert anvil (13) into the housing
(14) and ensure correct fit.
3. Fit the recoil ring (16), recoil absorber (17), ring
(18) and catcher housing (19).
Assembly of
the Anvil Unit
(1400, 1400B)
19
13
16 17
18
12
14
15
335 8 11 14 20 21
20
34
Fitting the
Front Handle
Assembly
(1400, 1400B)
1. Position the strap casting (26) over the hammer
case (34).
2. Fit the nose cap (2) over the nosepiece (34)
ensuring correct location of the cut-out over the
strap casting (26). Fit the retaining circlip (1).
3. Expand the front handle (30) and engage over the
strap casting (26).
4. Position the handle (30) horizontally to the rear
handle and fit the retaining bolt (27) though the
front handle (30) and secure with washer and
plastic knob (28).
12
28
26
27 30
29 34
Fig. 36
35

20
Service and Repair Manual
Model 1400KV/1400BV
1. Insert the latch bar (4) into the hole of the
nosepiece (8).
2. Fit the spring cover (5), spring (6) and latch
retainer (7) over the latchbar.
3. Using a suitable drift, tap the latchbar (4) into the
latchbar retainer (7).
Fitting the
Tool Locking
Mechanism
(1400, 1400B)
48567
Fitting the
Driver
(1400M)
1. Fit seal (12) on anvil (119), fit anvil (119), recoil
TR ring (125) and junk ring (123).
2. Fit the following items:
- junk ring (118)
- ‘O’ ring (126)
- driver (117)
- ‘O’ ring (126)
3. Fit the following items and secure using six
screws (35):
- trans housing (124)
- ‘O’ ring (121)
- nose cover (120)
- nose piece (115)
- four balls (114)
1. Fit the following items and secure using two
latches (108):
- lock chuck (112)
- lock plate (111)
- spring (110)
- latch plate (109)
2. Fit the following items and secure using wire clip
(104):
- SDS chuck (107)
- buffer (106)
- buffer stop (105)
3. Fit chuck cover (103) and end cap (102).
Assembling
the SDS
assembly
(1400M)
Fig. 37
Fig. 38
Fig. 39
35
114 115 117 118
126 11912
123 125
124
122
121
120
102 104 106 108 109 111
103 105 107 108 110 112

21
Service and Repair Manual
Model 1400KV/1400BV
FAULT FINDING
With the aid of the Fault Finding chart (below) the source of any malfunction may be quickly identified and repaired.
REMEDY FAULT
AND RETEST
MOTOR
REVOLVES?
MACHINE
HAMMERS?
MACHINE
IDLES?
SUPPLY
OK?
PLUG FUSE
OK?
BRUSHES
OK?
CORD
OK?
SWITCH
OK?
ARMATURE FIELD INTERNAL
WIRING
SERVICE
MECHANISM
MODULE
WAS MOTOR
BURNT OUT?
MACHINE
OK
YES
NO NO
YES
YES YES
YES
YES
YES
YES
YES
NO
NO
NO
NO
NO
NO
NO
LETHAL VOLTAGES PRESENT!!
On completion of the assembly, the unit must be flash tested at 4000 volts.
1. With the breaker completely assembled and with the switch “ON” apply 2000 volts initially and
increase rapidly to 4000 volts between the main casting and one of the pins of the plug on the power
supply cord. Apply test to both live and neutral pins.
2. The full voltage of 4000 volts should be maintained without breakdown or flashover for a few
seconds.
3. If the armature has been tested, remove the carbon brushes before carrying out the test, (thus
avoiding over-stressing the armature insulation system.)
4. The test voltage must be applied between the main casting and each live pin of the plug in
succession.
1. Ensure the unit is switched ON before testing. Operate the unit for approx. 10 minutes at half
voltage for initial ‘bedding in’ of the carbon brushes followed by full operational voltage. Compare
readings with Performance Data.
WARNING
Important
Flash Test
Running Test
This manual suits for next models
3
Table of contents
Other Kango Power Hammer manuals
Popular Power Hammer manuals by other brands

Makita
Makita HM001G instruction manual

EINHELL
EINHELL BT-DH 1600 Original operating instructions

Truper Expert
Truper Expert MADE-30NX manual

Hitachi
Hitachi H 70SA Handling instructions

Ingersoll-Rand
Ingersoll-Rand IR9PS Operation and maintenance

Parkside
Parkside PAH 1700 C3 Operation and safety notes translation of the original instructions

EINHELL
EINHELL 41.391.00 Original operating instructions

Bosch
Bosch 0 611 318 703 Repair instructions

VITO
VITO Pro Power VIMD1500 instruction manual

YATO
YATO YT-82002 manual

Bosch
Bosch 11317EVS - Hex Demolition Hammer 3/4 Inch parts list

Scheppach
Scheppach AB1500MAX Translation of original instruction manual