Katz Eye Optics Focusing Screen User manual

Installation Guide: Canon 350D, 400D, 450D, 500D, 1000D (Rebel XT, XTi, XSi, T1i, XS)
Thank you very much for your purchase of a Katz Eye™ focusing screen. This
document provides installation instructions for the Canon 350D, 400D, 450D, 500D &
1000D. While these instructions are based on a 400D installation, the procedure is
equally applicable to all listed models. The installation of the Katz Eye™ screen
requires no modifications to the camera, and when properly performed, is completely
reversible. For best results, please read completely through the instructions before
beginning the procedure.
WARNING:THESE INSTRUCTION ARE PROVIDED "AS IS"WITHOUT WARRANTY OF ANY KIND,EITHER
EXPRESSED OR IMPLIED,INCLUDING,BUT NOT LIMITED TO THE IMPLIED WARRANTIES OF
MERCHANTABILITY AND FITNESS FOR A PARTICULAR PURPOSE.KATZ EYE™OPTICS ACCEPTS NO
LIABILITY FOR DAMAGE RESULTING FROM USING THESE INSTRUCTIONS.SHOULD DAMAGE OCCUR AS A
RESULT OF FOLLOWING THESE INSTRUCTIONS,THE USER WILL ASSUME THE ENTIRE COST OF ALL
NECESSARY SERVICING,REPAIR OR CORRECTION.KATZ EYE™OPTICS’LIABILITY IS LIMITED TO
REPAIR OR REPLACEMENT OF PARTS SUPPLIED BY KATZ EYE™OPTICS,AT OUR SOLE DISCRETION.
Note: All pictures are available in larger format on the internet. Just click the links.
1. Set up a work area which is relatively free of dust and has
a soft surface on which to place the camera.
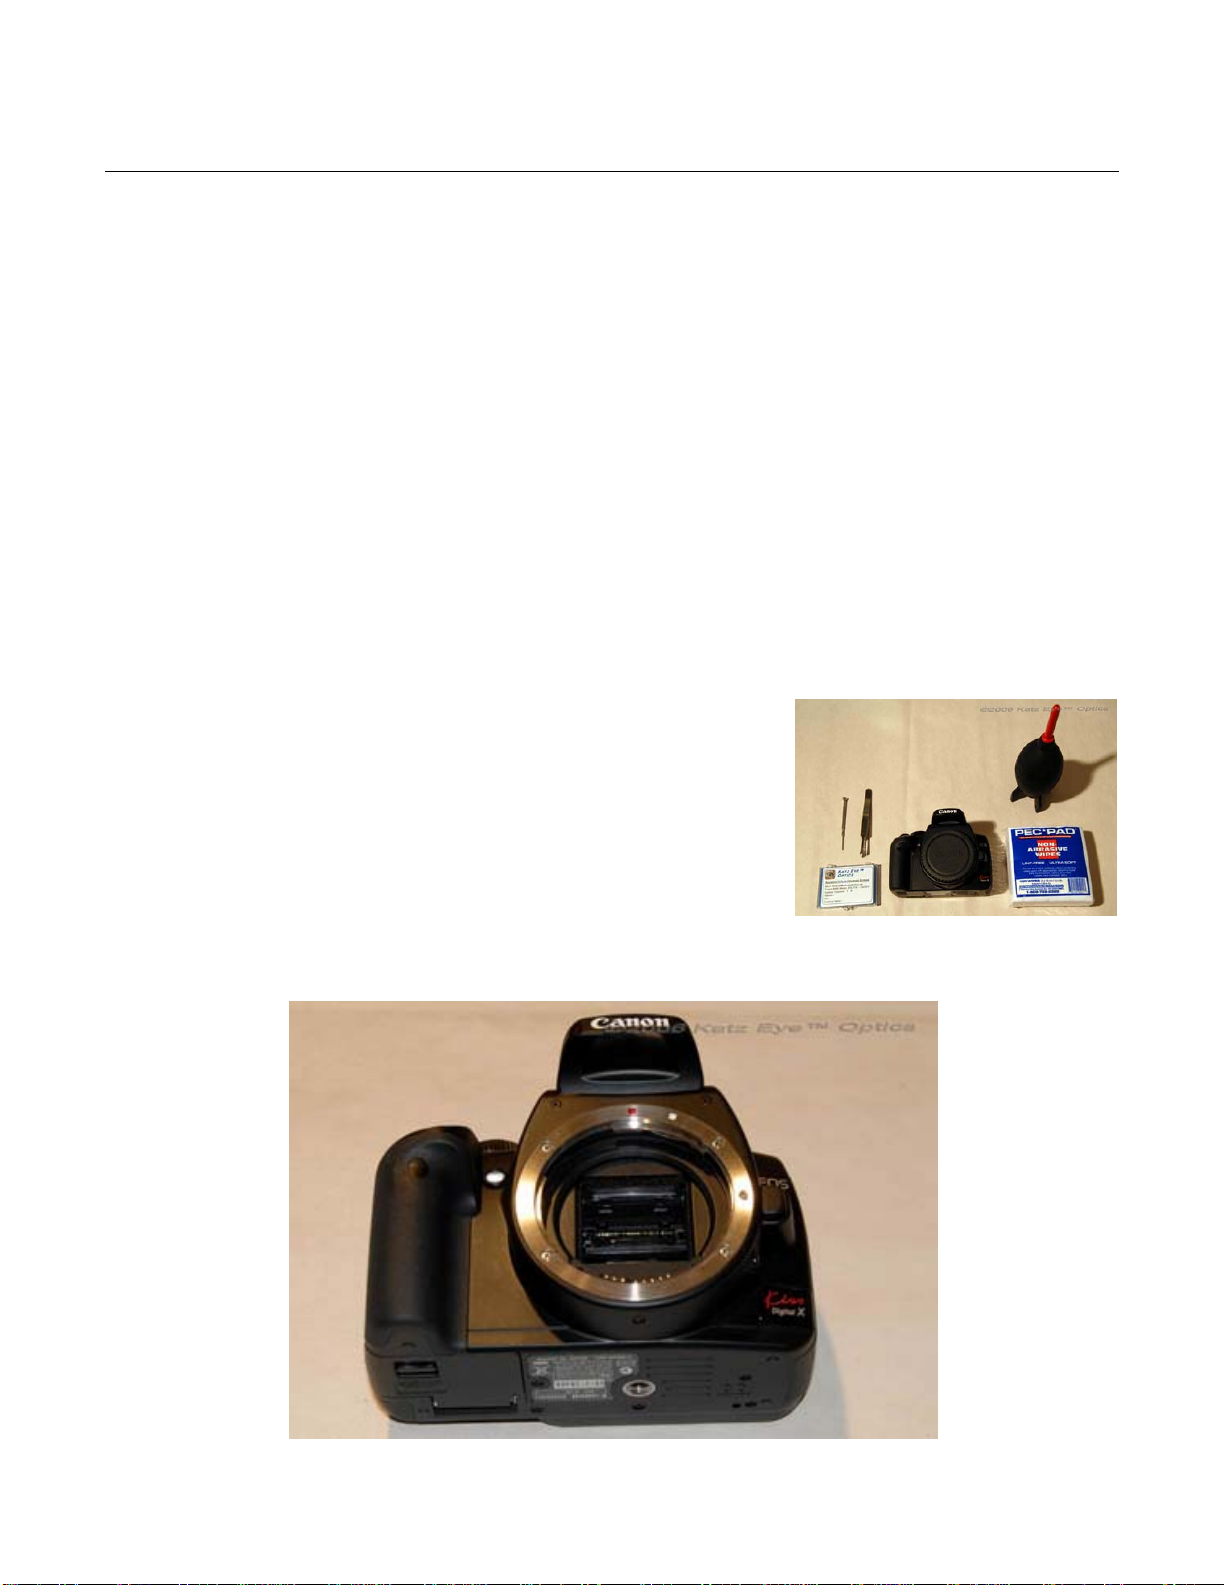
2. Collect the necessary tools and supplies. You will need:
a. Miniature screwdriver.
b. Tweezers.
c. Bulb blower.
d. Pec-Pads or lens cloth (optional). Click Photo to Enlarge
3. Remove the lens from the camera and place the camera flat on its back (on the LCD side).
Click Photo to Enlar
g
e
©2006 Katz Eye™ Optics Page 2 August 29, 2009

4. Place a folded Pec-Pad or lens cloth against the reflex mirror for protection. The pad is not
used in these illustrations for clarity of view. While this step is not absolutely necessary, it
is a good general precaution. To minimize introduction of dust into the camera, it is also
very helpful to clean the mirror chamber before beginning the installation procedure.
5. The catch for the screen retainer clip is shown in the photos below. The foam is only being
lifted to show the catch; it is generally not necessary to lift the foam to this degree to
release the clip. Try not to displace the foam more than necessary and exercise care to
ensure the foam doesn’t become damaged. Release the screen retainer clip by inserting
your screwdriver into the small notch in the clip and gently pry the retainer clip out from
under the mirror damping foam.
Click Photo to Enlar
g
eClick Photo to Enlar
g
e
6. Pivot the clip away from the focusing screen and lift out with tweezers.
Click Photo to Enlar
g
e
©2006 Katz Eye™ Optics Page 3 August 29, 2009

7. Tip the camera so that the focusing screen falls toward the main mirror. Grasp the screen
by one of the nearest tabs and lift out the focusing screen. Be very careful to touch only
the tab, so the screen face does not become damaged! Store the screen in a safe place,
such as wrapped in a lens cloth and placed in the Katz Eye™ box. The plastic bag in
which the Katz Eye™ screen is packed may also be reused to store the OEM screen.
Click Photo to Enlar
g
e
8. The shim(s) behind the focusing screen should not be removed – they are shown below
with the focusing screen and retainer for reference only. The number of shims present will
vary depending on Canon’s calibration of the camera – there may only be one shim or
there may be several. All of the shims should be left in place to maintain the factory
calibration. If the shim(s) are accidentally removed or dislodged during the installation
process, place the shim(s) back in position before continuing.
Click Photo to Enlar
g
e
©2006 Katz Eye™ Optics Page 4 August 29, 2009

9. Remove the bagged Katz Eye™ screen from the plastic case. Orient the screen so that the
protruding prism is facing you. Grasp the Katz Eye™ focusing screen by its handling tab
and withdraw from the protective bag. Be very careful to touch only the tab, so the screen
faces do not become damaged!
Click Photo to Enlar
g
eClick Photo to Enlar
g
e
10.Insert the screen into the camera. The screen may require a slight nudge to fall completely
flat into its recess. It is VERY IMPORTANT that the screen sit completely flat. In the 450D
and 1000D models (Rebel XSi and XS), the screen is a very close fit and make take
several tries to get completely seated.
Click Photo to Enlar
g
e Click Photo to Enlar
g
e
--Please Continue on Next Pa
g
e--
©2006 Katz Eye™ Optics Page 5 August 29, 2009

11.Insert the retainer clip into the camera. Be sure the two tabs at the rear of the clip engage
the matching notches in the frame.
Click Photo to Enlar
g
e Click Photo to Enlar
g
e
12.Press the retainer clip gently toward the top of the camera until it engages. It is important
not to catch the mirror damping foam strip in the retainer as it is closed. The easiest way to
accomplish this is to gently roll the foam strip back slightly with your fingertip and press the
clip home in the same motion. Only a small amount of force will be required. If the clip is
difficult to latch, please do not use excessive force – check for correct seating of focusing
screen before proceeding.
Click Photo to Enlar
g
e
13.If necessary, blow any dust out of the mirror chamber with the bulb blower. Attach a lens
and test the camera functions. If the camera functions correctly, the installation is
complete. If any problems are encountered, please contact Katz Eye™ Optics technical
support for assistance.
Installation Complete
©2006 Katz Eye™ Optics Page 6 August 29, 2009

©2006 Katz Eye™ Optics Page 7 August 29, 2009
Technical Support
return all emails within 24 hours. Technical support is also available by phone at
+1.413.743.2523 between the hours of 8:00am and 6:00pm Eastern Standard Time (GMT-
5:00), Monday through Saturday. If we are not available, please leave a brief message,
including your name and phone number, and we will call you back as soon as possible and
always within 24 hours.
If you do not wish to complete the installation yourself, Katz Eye™ Optics can provide
installation services. Please visit the Katz Eye™ Optics website, www.katzeyeoptics.com to
purchase our installation service. We would also be happy to advise your choice of local
camera shop regarding the installation procedure. Thank you very much for your purchase of
a Katz Eye™ focusing screen and may the world favor you with abundant photo opportunities.
Take care,
Rachael Katz – Co-Owner, Katz Eye™ Optics
Table of contents