Keestar GK1800 Technical reference manual

INSTRUCTIONS, ENGINEER’S AND PARTS MANUAL
PORTABLE BAG CLOSER
Bag Closing SewingMachine

INSTRUCTIONS FORPortable Bag Closer
First Edition
TABLEOFCONTENTS Page
APPLICATIONS AND STRUCTURE 2
SAFTY AND ADJUSTMENTS 3-4
SAFTY 3
INSTALLATION AND ADJUSTMENTS 4
OPERATION 5-9
STITCHING 5
CHANGING THE NEEDLE 6
LOOPER AND NEEDLE ADJUSTMENTS
CLEANING THE MACHINE 7
LUBRICATION 8
MAINTAINANCE 8
OPTIONAL ACCESSORIES 9
EXPLODED VIEWS AND DESCRIPTION OF PARTS 10
SPARE PARTS LIST 11

APPLICATIONS AND STRUCTURE
ThePortable Bag Closer is a lastest and upgraded product, which hasbeendesignedtostitch
paper, plastic, net, jute, raffia, textile bags etc. with different thicknessfromthintothick.
Wholly metallic built, the well processed components ensures a great performance also with
heavy materials and hard duty work. The machine is light and handy, allowing easy and fast
operations.
The large overarm allows to stitch thin, medium, and thick bags.
The one thread simple chain stitch gives a very strong, simple and quick bag stitching.
The alternated looper avoids the thread's entanglement and the stitch failure.
Stitch Length: 6-7mm
Max. Sewing Capacity: up to 3mm
Thread: 21 counts, 2×3 Polyester
Net Weight: 3.8 kg
Power Supply: 220V/240V
Rated Power: 105W
5040 R.P.M No Load
4800 R.P.M Load

SAFETY AND ADJUSTMENTS
SAFETY
The machine has to be disconnected from the
power supply by pulling out the main plug before:
1. Threading needle and looper. 2.replacing any
parts such as needle presser foot, throat plate,
looper, spreader, feed dog, needle guard, folder,
fabric guide etc. 3. Leaving the workplace and
when the work place is unattended. 4. Doing
maintenance work.
Check if the voltage of the sewing motor
corresponds with the voltage of the wall socket.
Theratedvoltageismarkedinthelabelof
transformer or machine.
Wall sockets for machines with ground wire must
be porperly grounded.
Do not block up the thermal hole of the motor.

INSTALLATION AND ADJUSTMENS
Do not damage the button under hammer stroke.
Routineandmaintenancemustbedonebyan
electrician or under direction and supervision of
special skilled personnel.
Thread the machine as shown, and make sure
the thread end is about 10cm out of the needle's
eye.
Turn the tension knob, regulated tension till the
machine sews and chains off perfectly

OPERATION
STITCHING
Adjust the current knob in the transformer will
change the sewing speed of the machine.
Use a sample to test the quality of stitching. Place
a sample under the press foot and push the start
button.
If the chain stitch is tight or loose, please turn the
tension knob to regulat till the machine sews and
chains off perfectly.
Clockwise: tight
Counterclockwise: loose
Suggestion:
Turn the tension knob a quarter per time till the
machine sews and chains off perfectly.

CHANGING THE NEEDLE
LOOPER AND NEEDLE ADJUSTMENTS
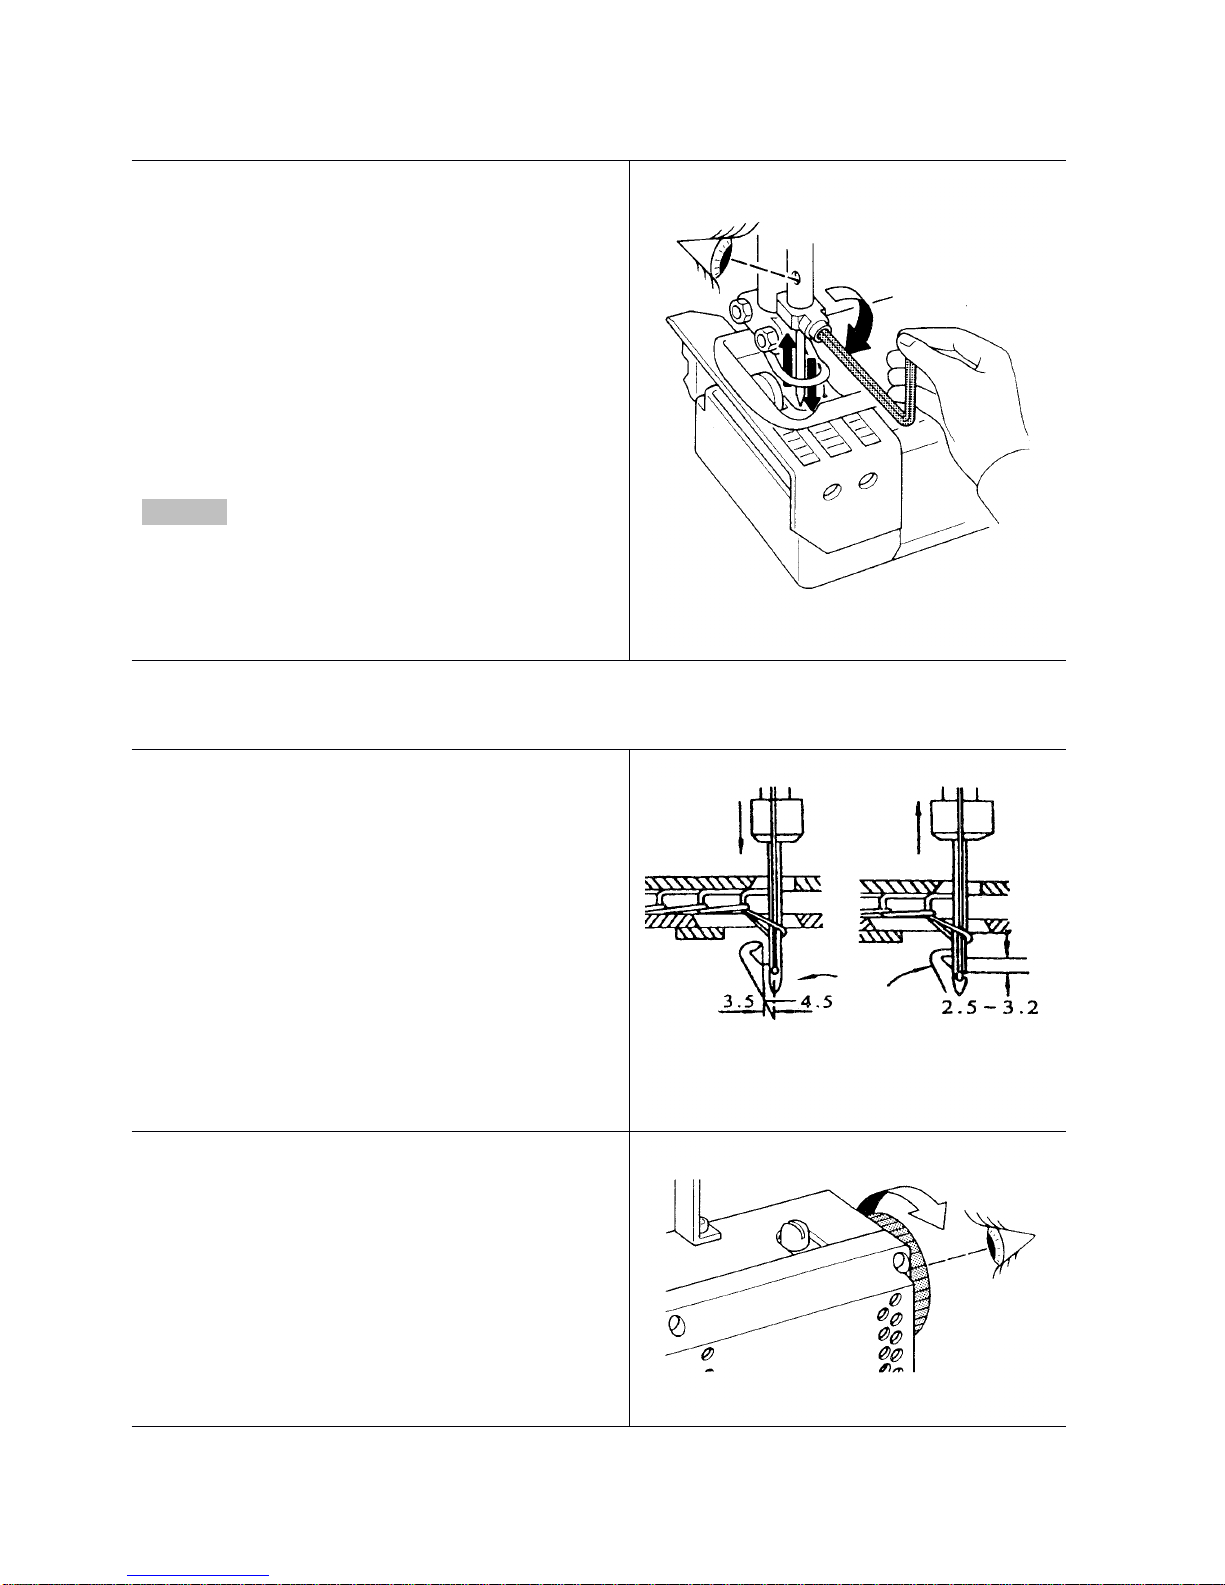
Loosen the screw for the needle and draw out
the needle. Insert the shank of the new needle as
far as it will go into the needle seat and with the
flat on the shank
facing to the front.
Retighten screw for the needle on the flat of the
needle shank and thread the needle eye.
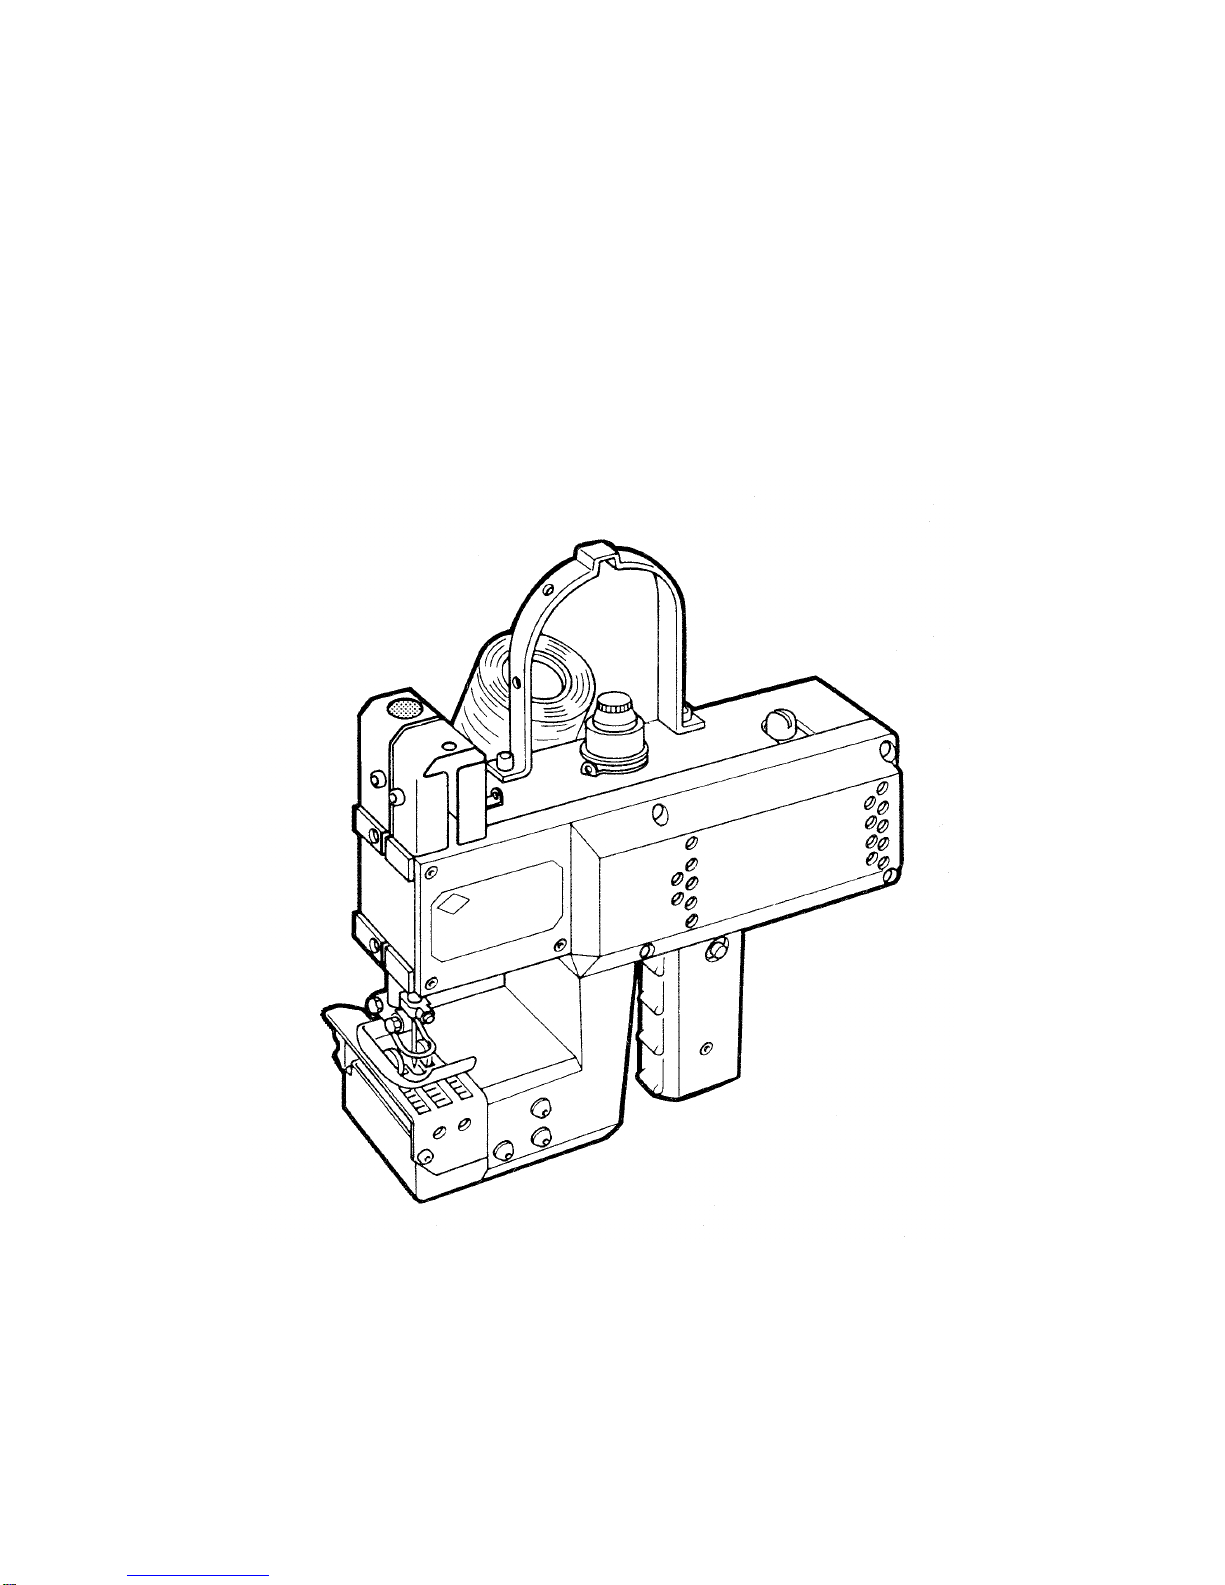
Warning:
Pull out mains plug before changing the needle!
1. Needle position: When the needle goes to the
lowest position, the space between looper point
and needle center is about 3.5~4.5mm.
2. When the looper hook the thread loop which
shoot off by the needle. The space between
looper and needle not more than 0.2mm, the
space between looper point and needle eye is
about 2.5~3.2mm.
Turn motor handwheel in operating direction until
the needle is in its upmost position above the
throat plate.

CLEANING THE MACHINE
Loosen the screw for the looper and replace the
looper. Retighten screw for the looper.
Warning:
Do not loosen the screw Awhich is position the
looper.
The presser foot pressure is regulated with the
regulating screw.
Clean the machine at least once a week from lint.
For this also open hinged cover and the
punched cover.
Reclose covers.

LUBRICATION
MAINTAINANCE
The machine has to be oiled before use.
Monthly:
Oiled on thread cutter, needle bar and pressure
foot bar.
Release the screw shown in the figure.
Lubricated by grease from the oil point, retighten
the screw.
Warning:
Do not drop oil and grease on the belt.
Yearly:
Open the cover, lubricated by grease on feed
dog gear, looper cam and moving parts of
needle bar breaker.
Warning:
Do not drop oil and grease on the belt.
Yearly:
Releasethecarbonbrushcap,replacenew
carbon brush.

OPTIONAL ACCESSORIES
Balancer
Pedestal stand with foot pedal
Pedestal and Column

EXPLODED VIEWS AND DESCRIPTION OF PARTS

SPARE PARTS LIST
M001 Cone holder M043 Pressure bar bushing M085 Carbon brush
M002 Thread guide bracket M044 Bearing M086 Motor
M003 Tension knob M045 Lever shaft washer M087 Screw
M004 Tension spring M046 Lever M088 Position screw
M005 Tension screw M047 Pressure bar bracket slot M089 Pulley
M006 Screw M048 Looper feed base M090 Bearing
M007 Tension cup M049 Washer M091 Screw
M008 Tension disc M050 Lever shaft M092 Screw nut
M009 Thread guide M051 Front lever shaft washer M093 Connecting rod
M010 Thread disc M052 Sunk screw M094 Screw
M011 Pulley cover M053 Motor pulley M095 Crank main shaft
M012 Bushing M054 Pin M096 Key
M013 Bushing M055 Gear M097 Spring ring
M014 Screw M056 Cover spring clip M098 Bearing
M015 Pressure foot spring screw M057 Cover M099 Bearing washer
M016 Pressure foot spring M058 Looper
M017 Joint M059 Looper lever
M018 Covering panel M060 Busing
M019 Upper thread guide M061 Bushing
M020 Sunk screw M062 Axis front bushing
M021 Thread stretcher M063 Pin
M022 Pressure bar M064 Looper crank
M023 Pressure bar bracket M065 Washer
M024 Needle bar joint M066 Looper shaft bushing
M025 Needle bar M067 Bearing
M026 Needle clamp M068 Screw nut
M027 Pressure foot assembly M069 Looper shaft
M028 Throat plate base M070 Washer
M029 Sunk screw M071 Timing belt
M030 Thread cutter bushing M072 turbine wheel
M031 Thread cutter slide bar M073 Central gear
M032 Feed dog M074 Crank ball
M033 Feed dog washer M075 Switch
M034 Screw M076 Screw
M035 Needle guard M077 Switch base
M036 Thread Cutter M078 Screw
M037 Feed dog shaft M079 Power lead
M038 Screw M080 Transformer
M039 Needle M081 Front cover
M040 Screw M082 Hanging belt
M041 Joint pin M083 Main body
M042 Spring ring M084 Carbon brush cap
Table of contents
Other Keestar Sewing Machine manuals