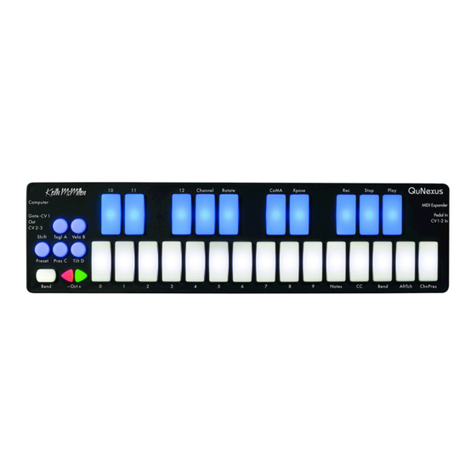
Keith McMillen Instruments QuNexus RED User manual

QuNe x u s 2.0
us e r Ma N u a l

Table OfCONTeNTs
ii
QuNexus 2.0
QuNexus 2.0
GETTING STARTED�����������������������������������������������������������������������������������������������������������������������������������������������������5
WELCOME�������������������������������������������������������������������������������������������������������������������������������������������������������������������6
1. FEATURES OVERVIEW �������������������������������������������������������������������������������������������������������������������������������������������7
1�1 Keyboard Expression �����������������������������������������������������������������������������������������������������������������������������������8
1�2 Control, Composition, and Jamming ����������������������������������������������������������������������������������������������������������8
1�3 MPE Compatible�������������������������������������������������������������������������������������������������������������������������������������������������������� 8
2. QUNEXUS HARDWARE������������������������������������������������������������������������������������������������������������������������������������������9
2�1 Connecting QuNexus���������������������������������������������������������������������������������������������������������������������������������10
2�2 Input/Output Routing���������������������������������������������������������������������������������������������������������������������������������11
2�2�1 USB ��������������������������������������������������������������������������������������������������������������������������������������������������11
2�2�2 MIDI Expander Port�������������������������������������������������������������������������������������������������������������������������12
2�2�3 CV�����������������������������������������������������������������������������������������������������������������������������������������������������13
2�2�3�1 CV Cable Connections�����������������������������������������������������������������������������������������������13
2�2�3�2 CV Cable Kit����������������������������������������������������������������������������������������������������������������13
2�2�3�3 CV Data �����������������������������������������������������������������������������������������������������������������������13
2�2�3�4 Avoiding strange behavior when patching CV Input signals ����������������������������������14
2�3 QuNexus Function Buttons ������������������������������������������������������������������������������������������������������������������������14
2�3�1 The OCT +/- Buttons�����������������������������������������������������������������������������������������������������������������������14
2�3�2 The BEND Pad ���������������������������������������������������������������������������������������������������������������������������������14
2�3�3 The SHIFT/PRESET Button ��������������������������������������������������������������������������������������������������������������15
2�3�4 HOLD A, VELO B, PRES C, & TILT D������������������������������������������������������������������������������������������������15
2�4 Smart Sensor Keys��������������������������������������������������������������������������������������������������������������������������������������15
2�5 Expression Pedal ���������������������������������������������������������������������������������������������������������������������������������������16
2�6 Controlling LEDs�����������������������������������������������������������������������������������������������������������������������������������������16
3. SEQUENCER/ARPEGGIATOR ������������������������������������������������������������������������������������������������������������������������������17
3�1 System Transport - Playback, Synchronization and Clock������������������������������������������������������������������������18
3�2 Shift Menu���������������������������������������������������������������������������������������������������������������������������������������������������18
3�3 Number Keys and Parameter Values ���������������������������������������������������������������������������������������������������������18
3�4 Understanding Tracks���������������������������������������������������������������������������������������������������������������������������������19
3�4�1 Selecting and Muting Tracks ����������������������������������������������������������������������������������������������������������19

Table OfCONTeNTs
iii
QuNexus 2.0
3�4�2 Assigning MIDI Channels to Tracks���������������������������������������������������������������������������������������������� 19
3�4�3 Assigning Program Changes to Tracks ���������������������������������������������������������������������������������������� 19
3�4�4 Enabling MPE on Track 1�������������������������������������������������������������������������������������������������������������� 19
3�4�5 USB and Expander MIDI Routing������������������������������������������������������������������������������������������������� 20
3�4�6 CV and Gate Output Routing ������������������������������������������������������������������������������������������������������� 20
3�5 Arpeggiator ���������������������������������������������������������������������������������������������������������������������������������������������� 20
3�5�1 Arpeggiator Hold Modes ������������������������������������������������������������������������������������������������������������� 20
3�5�2 Arpeggiator Playback Patterns����������������������������������������������������������������������������������������������������� 21
3�6 Sequencer������������������������������������������������������������������������������������������������������������������������������������������������� 21
3�6�1 Entering Steps������������������������������������������������������������������������������������������������������������������������������� 21
3�6�2 Entering Rests, Ties, Slurs, and Deleting Steps��������������������������������������������������������������������������� 21
3�6�3 Playing, Stopping and Clearing Sequences�������������������������������������������������������������������������������� 22
3�6�4 Step Sequencer Overdub Input��������������������������������������������������������������������������������������������������� 22
3�6�5 Adjusting Sequence Pattern Length �������������������������������������������������������������������������������������������� 22
3�6�6 Playback Patterns (ie Arpeggiator “Patterns”) ����������������������������������������������������������������������������� 23
3�6�7 Loading and Saving Patterns (ie Step Sequencer “Patterns”) ���������������������������������������������������� 23
3�6�8 Adjusting Tempo��������������������������������������������������������������������������������������������������������������������������� 23
3�6�9 Setting Clock Sources������������������������������������������������������������������������������������������������������������������� 23
3�6�10 Setting Clock Destinations��������������������������������������������������������������������������������������������������������� 23
3�6�11 Setting Track Clock Division������������������������������������������������������������������������������������������������������� 24
3�6�12 Gate Off Percentage ������������������������������������������������������������������������������������������������������������������� 24
3�6�13 Transposition������������������������������������������������������������������������������������������������������������������������������� 25
3�6�14 Enabling and Disabling LEDs����������������������������������������������������������������������������������������������������� 25
4. QUNEXUS EDITOR SOFTWARE ������������������������������������������������������������������������������������������������������������������������ 27
4�1 System Requirements������������������������������������������������������������������������������������������������������������������������������� 27
4�2 Installing the Software������������������������������������������������������������������������������������������������������������������������������ 27
4�3 Updating the Firmware ���������������������������������������������������������������������������������������������������������������������������� 27
4�4 Syncing the QuNexus and Editor ������������������������������������������������������������������������������������������������������������ 28
4�5 Main Window Overview ��������������������������������������������������������������������������������������������������������������������������� 28
4�6 Preset Management ��������������������������������������������������������������������������������������������������������������������������������� 28
4�7 Menu Bar��������������������������������������������������������������������������������������������������������������������������������������������������� 29
4�7�1 File Menu��������������������������������������������������������������������������������������������������������������������������������������� 29
4�7�2 Edit Menu �������������������������������������������������������������������������������������������������������������������������������������� 29

Table OfCONTeNTs
iv
QuNexus 2.0
4�7�3 Hardware Menu������������������������������������������������������������������������������������������������������������������������������ 29
4�7�3�1Update Firmware���������������������������������������������������������������������������������������������������������29
4�7�3�2 Load Preset �����������������������������������������������������������������������������������������������������������������29
4�7�3�2 LED Refresh Mode������������������������������������������������������������������������������������������������������30
4�7�3�3 Per Key Sensitivity�������������������������������������������������������������������������������������������������������30
4�7�3�4 CV Trims ����������������������������������������������������������������������������������������������������������������������30
4�7�3�5 Tables ��������������������������������������������������������������������������������������������������������������������������31
4�8 Keyboard Layer������������������������������������������������������������������������������������������������������������������������������������������ 31
4�8�1 Message Types������������������������������������������������������������������������������������������������������������������������������� 31
4�8�2 Sensor Sources������������������������������������������������������������������������������������������������������������������������������� 32
4�8�3 Mathematical Modifiers����������������������������������������������������������������������������������������������������������������� 32
4�8�3�1 View and Edit Tables ��������������������������������������������������������������������������������������������������32
4�8�4 Keyboard Sensitivity Settings�������������������������������������������������������������������������������������������������������� 32
4�8�5 Key Priority ������������������������������������������������������������������������������������������������������������������������������������� 33
4�8�6 Toggle��������������������������������������������������������������������������������������������������������������������������������������������� 33
4�9 Sequencer Tab������������������������������������������������������������������������������������������������������������������������������������������� 34
4�9�1 Sequencer Settings������������������������������������������������������������������������������������������������������������������������ 34
4�9�2 Transpose ��������������������������������������������������������������������������������������������������������������������������������������� 34
4�9�3 Track Settings ��������������������������������������������������������������������������������������������������������������������������������� 35
4�10 CV Layer��������������������������������������������������������������������������������������������������������������������������������������������������� 35
4�10�1 Pitch Scaling��������������������������������������������������������������������������������������������������������������������������������� 36
4�10�2 Gate Legato and S Trig���������������������������������������������������������������������������������������������������������������� 36
4�10�3 CV OUTPUT ��������������������������������������������������������������������������������������������������������������������������������� 36
4�10�4 CV Input���������������������������������������������������������������������������������������������������������������������������������������� 36
4�10�5 CV Trims���������������������������������������������������������������������������������������������������������������������������������������� 36
4�11 Controller Layer��������������������������������������������������������������������������������������������������������������������������������������� 37
4�11�1 Sensor Settings ���������������������������������������������������������������������������������������������������������������������������� 37
4�11�1�1 Participate �����������������������������������������������������������������������������������������������������������������37
4�11�1�2 Controller Layer Sources �����������������������������������������������������������������������������������������38
4�11�1�3 Controller Layer Toggle �������������������������������������������������������������������������������������������38
4�12 Settings Tab ��������������������������������������������������������������������������������������������������������������������������������������������� 39
4�12�1 LED Control and Brightness�������������������������������������������������������������������������������������������������������� 39
4�12�2 QuNexus MIDI Thru ��������������������������������������������������������������������������������������������������������������������� 39

Table OfCONTeNTs
v
QuNexus 2.0
APPENDIX A: QUNEXUS 2�0 FACTORY PRESETS: ��������������������������������������������������������������������������������������������������41
Preset A (Basic 2�0) �������������������������������������������������������������������������������������������������������������������������������������������41
Preset B (Aftertouch and Mod) ������������������������������������������������������������������������������������������������������������������������41
Preset C (MPE and Sequencer) ������������������������������������������������������������������������������������������������������������������������42
Preset D (Drums & Clips 2�0)���������������������������������������������������������������������������������������������������������������������������� 42
APPENDIX B: KEY SENSITIVITY ADJUSTMENTS ����������������������������������������������������������������������������������������������������� 44
Global Sensitivity Adjustment ����������������������������������������������������������������������������������������������������������������������������������44
Per-Key Sensitivity Adjustment���������������������������������������������������������������������������������������������������������������������������������44
TROUBLESHOOTING �����������������������������������������������������������������������������������������������������������������������������������������������45
SAFETY PRECAUTIONS��������������������������������������������������������������������������������������������������������������������������������������������48

Getting Started

GeTTiNG sTarTed
7
QuNexus 2.0
WelCOMe
QuNexus RED is a powerful 25-key MPE keyboard controller and three track arpeggiator/step sequencer
with USB, MIDI, and CV outputs� The keys detect velocity, polyphonic aftertouch, and per-key tilt, giving you
unprecedented control and musical expression�
QuNexus is a hub for new and vintage technology� Plug into your computer, iPad (Apple Camera Connector
required), or Android tablet via USB� Control hardware via 5-PIN MIDI or control your modular synthesizers with
the included CV inputs and output�
In this manual you will nd detailed information to help answer all of your questions about the QuNexus
hardware and Editor software�
QuesTiONs? feedbaCk? CONTaCT us!
Any questions or feedback that may come up regarding QuNexus or its software can be directed to us
here:
• Technical Support: https://support�keithmcmillen�com
• General Questions: contact@keithmcmillen�com
WhaT’siNThe QuNexus red bOx?
QuNexus red
MPE Keyboard Sequencer and Arpeggiator with CV
MiCrO usb Cable
For connecting QuNexus to a USB host (computer, tablet, etc)�
kMi Midi OuT adapTer
For sending MIDI data from QuNexus to MIDI hardware via 5 pin DIN MIDI�
Where TOdOWNlOad everyThiNG
All QuNexus software can be downloaded on the KMI website: keithmcmillen�com/downloads

Features Overview

feaTures OvervieW
9
QuNexus 2.0
ChapTer 1 - feaTures OvervieW
The QuNexus is a compact composition tool for your home or mobile studio, with a highly nuanced keyboard
and a powerful sequencer�
1.1 keybOard expressiON
The QuNexus keys capture Pitch, Velocity, Pressure, and Tilt (aka slide, or Y-Axis)� These dimensions of
expression can be sent to your instruments as a variety of different MIDI messages and control voltages�
Notes - QuNexus can send Pitch and Velocity as MIDI Note-On/Off messages, as well as Gate and Control
Voltages compatible with analog and modular synthesizers�
Control Data - QuNexus can be congured to send key Pressure and Tilt using the following MIDI
messages: Pitch Bend, Aftertouch, Poly-Aftertouch, and Control Changes� It can do this globally (averaging
all of the active keys) or polyphonically (using Poly-Aftertouch or MPE)� Global Tilt and Pressure can also be
sent as Control Voltages�
1.2 CONTrOl, COMpOsiTiON, aNd JaMMiNG
The QuNexus arpeggiator and sequencer features three tracks that can control various MIDI and analog
instruments� Each track can be routed to a combination of USB, 5-Pin DIN MIDI (using the expander port),
and CV outputs� By switching between tracks, you can quickly change which instrument you are controlling
with the keyboard or arpeggiator, and each track has its own 32 step sequencer that can record and play
back your performance�
1.3 Mpe COMpaTible
The QuNexus is fully MPE compatible right out of the box, with an included MPE factory preset�
MPE stands for MIDI Polyphonic Expression� While most keyboards have a pitch wheel, modulation wheel,
and aftertouch (where you can press a key down further than it’s initial on-state), these are usually global
controls that affect all of the keys at the same time� MPE allows a keyboard to have these controls for each
individual key, usually by moving your nger on the key up/down or left/right (X and Y-axis), and pressing
the key harder or softer (Z-axis)�
Synthesizers and Instruments can use the MPE standard to allow a player to capture more dynamic and
expressive performances, while keeping their ngers on the keyboard rather than turning knobs.
MPE works by assigning each voice (i.e. each nger on the keyboard) it’s own MIDI channel, and then
sending Pitch Bend, Channel Aftertouch, and CC74 messages on that channel� The QuNexus keyboard has
two dimensions (Tilt and Pressure) that can be congured to send these messages, and the MPE factory
preset (Preset C) defaults to Tilt as CC74, and Pressure as Chanel Aftertouch�
If you’d like to dig a little deeper into the MPE specication you can nd the full documentation here:
https://www�midi�org/articles-old/midi-polyphonic-expression-mpe
FUN FACT: When QuNexus was rst released in 2012 (before MPE was a recognized standard), it had a feature called
“Channel Rotation”, which used many of the conventions that were later adopted by the MIDI Organization as MPE in
2018� KMI continues to work as a member of the MIDI Organization to help develop and update the MPE standard�
QuNexus Hardware

QuNexus hardWare
11
QuNexus 2.0
ChapTer 2 - QuNexus hardWare
QuNexus is a class compliant USB device that does not require a driver or software to function� Out of the
box, QuNexus has everything you need to get started� We also provide a QuNexus Editor application (for Mac
and Windows), which allows further customization (discussed in Chapter 3)� This chapter is a guide to getting
started using QuNexus out of the box and will provide detailed information about how to use the hardware
features of QuNexus�
2.1 CONNeCTiNG QuNexus
Connecting QuNexus to a computer:
To connect QuNexus to a computer, use a USB A-to-Micro cable (included) to connect the QuNexus micro
port to a computer’s USB port� QuNexus will receive power from the computer�
Connecting QuNexus to an iPad:
To connect QuNexus to an iPad, you will need the iPad Camera Connection Kit (sold by Apple)� Attach the
camera connector to the iPad and then use a USB A-to-Micro cable to connect the QuNexus micro port
to the camera connector� It is recommended that you supply power to the QuNexus and iPad by either
plugging the Camera Connection Kit to a power supply, or by using a KMI USB Y-cable�
See the USB chapter for more information�
Connecting QuNexus to MIDI hardware with MIDI Out Adapter Cable:
To connect QuNexus to MIDI hardware via the KMI MIDI Out Adapter Cable, plug the cable into the MIDI
Expander port� Plug the 5 pin MIDI connector into your hardware device, or into a longer MIDI cable if
necessary� You will need to supply power to the QuNexus via the QuNexus micro USB port (the same port
that connects to a computer)�
Connecting QuNexus to MIDI hardware with MIDI Expander:
To connect QuNexus to a hardware MIDI device via our MIDI Expander (sold separately):
1� Use a USB A-to-Mini cable to connect the QuNexus Mini port (on the right side of the QuNexus) to the
USB “Expand” port on the MIDI Expander�
2� Connect the MIDI Out on the Expander to the MIDI In on a synth or other MIDI device�

QuNexus hardWare
12
QuNexus 2.0
3� Connect the power supply to the MIDI Expander USB “Power” port� (You can also power the unit via
the QuNexus micro USB port (the same port that connects to a computer)�
Connecting QuNexus to Eurorack Synthesizers or other CV devices:
There are 3 different ways to connect QuNexus to your CV devices�
Powered by a Computer (or iPad):
Use a USB A-to Micro cable to connect the QuNexus Micro port to a USB port on a computer or iPad� This
connects the QuNexus to power�
Use a cable that is compatible with your CV device’s CV ports� Using adapters if needed, make sure one
end can plug into one of the stereo 1/8in� CV out ports on the QuNexus�
Plug your cable into the “Gate-CV1 Out” port on the left side of the QuNexus� Plug the other end into the
desired destination on your CV device�
Powered by KMI MIDI Expander:
Use a USB A-to-Mini cable to connect the QuNexus Mini port (on the right side of the QuNexus) to the USB
“Expand” port on the MIDI Expander�
Connect the power supply to the MIDI Expander USB “Power” port�
See steps 2 and 3 from the “Powered by a Computer” steps�
Powered by USB Power Supply:
Use a USB A-to-Mini cable to connect the QuNexus Mini port (on the right side of the QuNexus) to a USB
Power Supply�
Connect the Power Supply to a power outlet�
See steps 2 and 3 from the “Powered by a Computer” steps�
See the CV chapter for more information�
2.2 iNpuT/OuTpuT rOuTiNG
QuNexus can output USB MIDI, 5pin DIN MIDI and Control Voltage information� Each of these data types
can be routed to one or both of the other data types�
2.2.1 usb
QuNexus is connected and powered using the micro USB port on the left side of the QuNexus�
QuNexus is a class compliant USB device and does not require a special driver� This allows for
maximum compatibility with a wide range of devices�
QuNexus communicates with the computer via 3 virtual MIDI ports� Port 1 is the main port, on which
the QuNexus sends and receives MIDI data to and from the computer or iPad� Port 2 is used for the
expander port, and Port 3 is used for CV�
You can control the QuNexus LEDs by sending MIDI data into the QuNexus on Port 1 (see the
Controlling LEDs chapter for more information)�

QuNexus hardWare
13
QuNexus 2.0
2.2.2 Midi expaNder pOrT
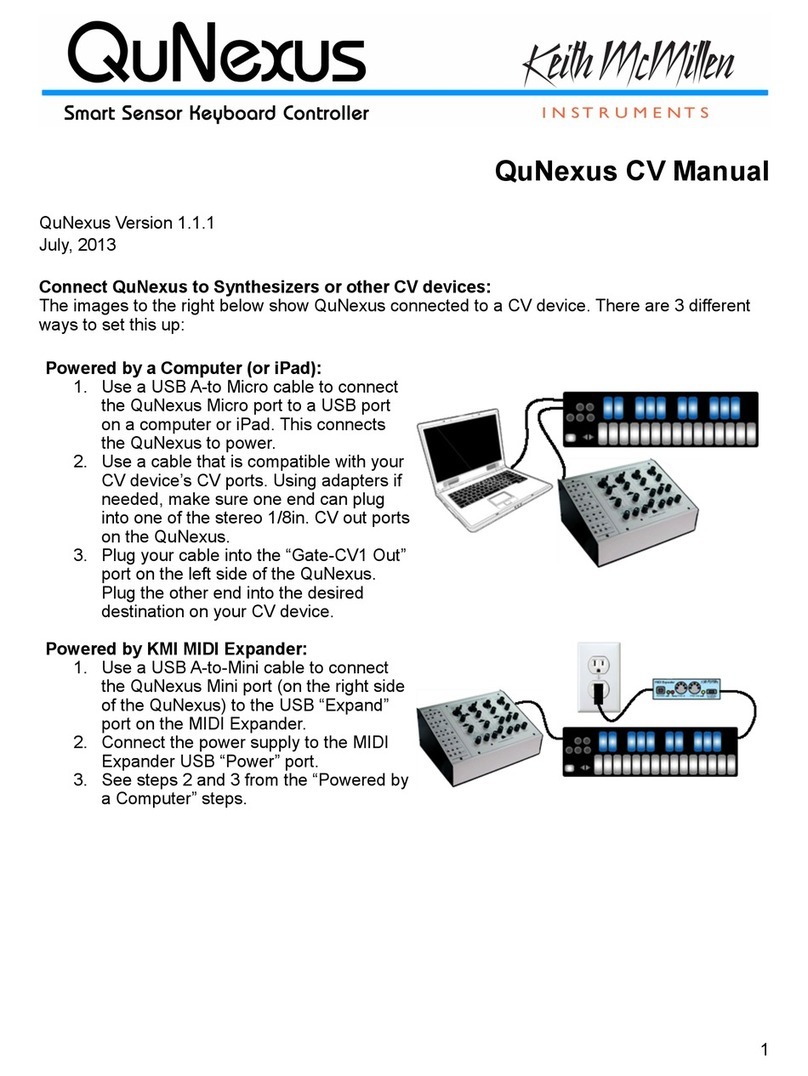
The QuNexus has a USB mini “Expander” port that breaks out to 5-pin DIN MIDI, either with the MIDI
Out cable (included with QuNexus RED), or with the KMI MIDI Expander (sold separately)�
To use QuNexus with the KMI MIDI Expander follow these steps:
1� Connect a QuNexus to the KMI MIDI Expander (see Connecting QuNexus for instructions)�
2� Plug MIDI devices into the MIDI Expander using 5-pin MIDI cables�
The QuNexus will now send and receive MIDI messages through the MIDI Expander�

QuNexus hardWare
14
QuNexus 2.0
2.2.3 Cv
QuNexus can control modular synthesizers and other CV devices using Control Voltages�
2.2.3.1 Cv Cable CONNeCTiONs
There are 2 CV output ports on the left side of the QuNexus and 1 CV input port on the right side�
Outputs - The two output ports use stereo 1/8” TRS connectors and provide 4 outputs: a Gate
Output and three 16-bit CV Outputs� Output voltages range from 0 to 5V�
Inputs - The input port should be used with a TRRS connector to access both CV Inputs and the 5V
Power for an expression pedal� QuNexus’ CV In is uni-polar� If you send it a bi-polar signal, half of the
signal will be clipped (which can cause malfunctions in extreme cases�) Sending a signal above 5V is
also unsupported�
These are the 2 types of plugs that are required to plug QuNexus into a CV device� The TRS type is
for the CV output ports and the TRRS type is for the CV input port�
2.2.3.2 Cv Cable kiT
The QuNexus CV Cable Kit is an optional QuNexus accessory that comes with all the cables and
adapters needed to connect QuNexus to your CV ins and outs�
The QuNexus CV Cable Kit comes with the following 5 cables:
CV INPUT:
• 1 right angle 3�5mm (1/8”) stereo plug to ¼” stereo jack
• 1 3�5mm (1/8”) stereo plug to ¼” mono jack
• 1 3�5mm (1/8”) TRRS plug to dual 3�5mm (1/8”) stereo jacks
CV OUTPUT:
• 1 3�5mm (1/8”) stereo plug to dual 3�5mm (1/8”) mono plugs
2.2.3.3 Cv daTa
Output: The QuNexus Gate and CV outs can output signals from USB3/Expander MIDI and the
keyboard/sequencer tracks� The supported sources are Clock, Pitch Bend, Control Changes,
Channel Aftertouch, Note On/Off (gate and pitch), Velocity, Tilt, and Pressure�
The default routings for factory preset A (Basic 2�0) are:
• Gate - Track 1 - Note Ons and Offs� Note Ons are expressed as 5 volts�
• CV1 - Track 1 - Note Pitch
• CV2 - Track 2 - Note ons and Offs� Note Ons are expressed as 5 volts�
• CV3 - Track 2 - Note Pitch

QuNexus hardWare
15
QuNexus 2.0
Input: QuNexus receives data from the 2 CV inputs and converts them to MIDI messages:
• CV1 - CC#112
• CV2 - CC#113
This data is sent on Channel 2 to USB Port 3 and the MIDI Expander�
2.2.3.4 avOidiNG sTraNGe behaviOr WheN paTChiNG Cv iNpuT siGNals
Make sure to establish a ground connection between your synth and the QuNexus before patching
the QuNexus CV inputs, otherwise you might observe strange behavior (interference in the QuNexus
key scanning)� The easiest way to do this is to patch any of the QuNexus Gate or CV outputs to your
synth�
!! Warning !!: The QuNexus CV inputs can only accept signals from 0 to 5 volts! Patching signals outside of this range
will cause the signal to be clipped, and negative signals will interfere with the QuNexus key scanning. While this should
not damage the QuNexus, it could potentially modify your preset settings, causing unexpected behavior. If this has
happened to you, we recommend re-loading the factory default presets using the QuNexus editor.
2.3 QuNexus fuNCTiON buTTONs
The function buttons on the left side of the QuNexus are used to select presets and change the playing
behavior of the keyboard� This chapter explores the use of each button: OCT +/-, BEND, SHIFT/PRESET,
HOLD A, VELO B, PRES C, and TILT D�
2.3.1 The OCT +/- buTTONs
There are 2 triangular “OCT” buttons that increment or decrement the keyboard octave (in Keyboard
Layer only). When the QuNexus is rst plugged in, both the OCT + and - buttons are lit up and the
keyboard has a range of C2 (note 48) to C4 (note 72)� QuNexus treats C3 as note 60 (Middle C)�
The OCT +/- buttons increment and decrement the QuNexus keyboard by one octave� The QuNexus
has a total range of 7 octaves (C0 - C7)�
The LEDs of the OCT +/- buttons indicate which octave you are in� When both LEDs are solid, you know
that you are in the original octave (with a base note of C2�) If the green Oct + button is pressed, the LED
will begin to ash, indicating that the QuNexus keyboard has been raised one octave. The LED will ash
faster as you continue to raise the keyboard by octaves� The same LED behavior applies in the opposite
direction for the OCT - button�
2.3.2 The beNd pad
The BEND Pad is found in the bottom left corner of the QuNexus� It acts similarly to a pitch bend wheel�
When playing the keyboard, pressing the Bend Pad will send MIDI Pitch Bend data to bend the pitch of
the note� Shift pressure on the Bend Pad from side to side to bend up and down� Press the Bend Pad left
and right to bend the pitch up and down�

QuNexus hardWare
16
QuNexus 2.0
2.3.3 The shifT/preseT buTTON
The SHIFT/PRESET Button is used to select Presets and access the “Shift” menu�
QuNexus can store 4 presets� To load or save a preset, tap the SHIFT/PRESET Button on the left side of
the QuNexus� The LEDs on the keyboard will swipe to indicate that you are in Preset Mode� One of the
four buttons (A, B, C or D) will light up to indicate which Preset is currently selected�
To load a preset, press one of the A, B, C, or D buttons�
To save a preset, hold one of the A, B, C, or D buttons for 3+ seconds�
Upon making a selection the LEDs on the keyboard will swipe again to indicate that you are leaving
Preset Mode�
The Factory Presets can be customized and new Presets can be created using the shift-menu or the
QuNexus Editor software�
2.3.4 hOld a, velO b, pres C, & TilT d
These buttons toggle functions that change the QuNexus’ playing behavior� These functions can be
toggled on and off by pressing and holding the buttons� The functions they control are listed below:
HOLD A - This button turns Toggle Mode on and off for notes in Keyboard Layer, and turns Hold on
and off when using the arpeggiator� Presets will always start with the Hold button off� Depending on the
settings of your preset, Toggle Mode will either use Toggle or Legato� The QuNexus Factory Presets all
use Toggle� For information about how to set Toggle Mode to use Legato, see the Toggle section in the
QuNexus Editor Chapter�
VELO B - This button toggles velocity response on and off for notes in the Keyboard Layer� If the button
is lit, velocity response is on� If the button is dark then each note will have a velocity of 127�
PRES C - This button toggles the Pressure source On and Off for control in the Keyboard Layer� If the
button is lit, pressure response is on�
TILT D - This button toggles the Tilt source On and Off for control in the Keyboard Layer� If the button is
lit, key tilt response is on�
2.4 sMarT seNsOr keys
QuNexus keys output MIDI data from several different sources for a high degree of expressive control in
multiple axes. QuNexus keys can detect Velocity, Pressure, and Tilt. Listed below are denitions for each of
these:
Velocity (for Notes only): The value between 0 and 127 that represents the overall pressure on the
QuNexus keys at the moment a Note On is detected� Key Sensitivity can be adjusted using the QuNexus
Editor (see the QuNexus Editor chapter for more information)�
Pressure: Continuous values (between 0 and 127) represent the applied pressure of your nger on the
QuNexus keys�
Tilt: Continuous values (between 0 and 127) represent the Y-axis “tilt” of the QuNexus keys�

QuNexus hardWare
17
QuNexus 2.0
2.5 expressiON pedal
When an expression pedal is plugged into the CV input of QuNexus, the expression pedal data will be converted
to MIDI CC# 112 or 113 on Channel 2 and go from 0 - 127� This behavior can be changed using the QuNexus
Editor� See the Chapter on CV Layer for more information�
NOTE: Not all Expression Pedals are made equal, and some are noisier than others� We recommend the Roland EV-5�
2.6 CONTrOlliNG leds
LEDs can be controlled by sending MIDI Notes through USB Port 1 to the QuNexus� Notes 48 (C2) - 72(C4)
will control the keyboard LEDs� If you send notes outside of that range, they will wrap around and still control
the QuNexus keyboard LEDs� Channel 1 is used as the default LED Input channel, but the Channel number is
editable using the QuNexus Editor�
See the LED Mode chapter for more information�

Sequencer/Arpeggiator

seQueNCer/arpeGGiaTOr
19
QuNexus 2.0
ChapTer 3 - TraCks, seQueNCer aNd arpeGGiaTOr
The QuNexus can function as a 3 track sequencer and arpeggiator� Each track can control different instruments,
arpeggiate, and play step patterns up to 32 steps in length. Everything ows from the keyboard through the
Tracks to the various USB, MIDI, CV and Gate outputs�
QuNexus powers on with Track 1 as the current active track� Playing the keyboard will control any instruments
that are connected to that current active track’s assigned USB, MIDI, CV and Gate outputs� Tracks can be
assigned their own MIDI channels, and Track 1 can be set to MPE with 1-15 member channels� By switching
between the three different tracks, you can quickly change which instrument that you are controlling�
Each track can be set to either Arpeggiate or Step Sequence, and playback is synchronized to the system
transport� The track Arpeggiator/Sequencers will only play back when the system transport is playing�
3.1 sysTeM TraNspOrT - playbaCk, syNChrONizaTiON aNd ClOCk
The system transport is controlled by the Play, Stop, and Record keys, which are accessed using the shift
menus described below� The system clock is based on a 24 pulse per quarter note (ppqn) metronome, and
every track’s arpeggiator/sequencer is synchronized to the quarter note pulse� The internal clock can be set
to any tempo between 5 and 255 bpm�
A track’s clock division determines the speed that its arpeggiator/sequencer notes are played�
For example, a track with a whole note division will play each step every four quarter notes, and a track with
an 8th note division will play two steps for every quarter note� Track Arp/Seq can be set to any length from
1 to 32 steps, and all steps are quantized to the clock division of the track�
3.2 shifT MeNu
All of the new QuNexus 2�0 functions are in the “shift” menu, which you get to by holding down the preset/
shift button and pressing the other function keys� Some function keys can be pressed again to exit that
function’s menu, and pressing any dark key will return you to the previous menu� Release the shift key to
exit and return to playing the keyboard as an instrument�
As you navigate the shift menus, any functions that are available will be lit up half or full brightness� Options
that are enabled (ie arp or sequencer) will be lit at full brightness�
NOTE: Most of the shift-menu functions will only affect the currently selected/active track� The exceptions are the
transport keys (REC, STOP/CLR, PLAY), and global transposition (XPOSE)�
3.3 NuMber keys aNd paraMeTer values
Many functions will allow you to adjust numeric values� These values are displayed on the 1234567890
numeric keys, where the ones digit is solid, the tens digit blinks slowly, and the hundreds digit blinks fast�
Depending on the function that you are adjusting, you can increment and decrement the values using the
left/right arrows, aka the Octave +/- buttons, in which case their LEDs will light up� Other times, you can
select the value using the numeric keys, in which case they will light up and blink accordingly�

seQueNCer/arpeGGiaTOr
20
QuNexus 2.0
3.4 uNdersTaNdiNG TraCks
The QuNexus has three Tracks that can be set to either arpeggiate keyboard input or record and playback step
sequence patterns�
Each track can be assigned its own MIDI channel, routed to either or both USB and Expander MIDI outputs, and
tracks can have their own lengths and time divisions�
Track arpeggiations and sequences can be up to 32 steps in length, and tracks can play at different time divisions,
each derived from the same 24 pulse per quarter-note (ppqn) clock� Divisions range from whole notes to 32nd notes,
and all divisions can be dotted or triplets (except for 32nd notes, which cannot be dotted)� This means that you can
program a 32 whole note bass pattern on one track, while a second track plays an 8 note sequence of 32nd notes as
you perform and arpeggiate live on a third track�
3.4.1 seleCTiNG aNd MuTiNG TraCks
To select the track menu, hold shift and press/release “Track”� From here you can select track 1-3 using the
numeric keys, which will be either fully lit to indicate the currently active/selected track, or dim for the two
unselected tracks� While in the track menu, you can mute or unmute tracks by holding down the corresponding
numeric key for 3+ seconds� Muted track LEDs will blink while unmuted tracks will remain solid�
NOTE: Most of the shift-menu functions will only affect the currently selected/active track� The exceptions are the transport keys
(REC, STOP/CLR, PLAY) and global transposition (XPOSE)�
3.4.2 assiGNiNG Midi ChaNNels TO TraCks
To change the current Track’s MIDI channel, hold shift and press “MPE/CH”� The current channel will be displayed
on the numeric keys, and can be adjusted with the left/right arrows�
3.4.3 assiGNiNG prOGraM ChaNGes TO TraCks
You can assign program changes to each track using the QuNexus editor� These program changes will be sent to
each track MIDI channel when you recall a QuNexus preset�
3.4.4 eNabliNG Mpe ON TraCk 1
The QuNexus can be used as a single zone MPE controller, with channel 1 as the manager channel and a default
of 15 member channels� Global pitch bend is sent on the manager channel, while polyphonic messages are sent
on member channels with key tilt sent as CC74 (Y) and key pressure sent as channel aftertouch (Z)�
To enable MPE, hold shift and press MPE/CH and then press MPE/CH again until it blinks� Now the numeric keys
will display the number of MPE member channels, which you can adjust using the left/right arrows� Press MPE/CH
again to disable MPE and select a single MIDI channel�
Only Track 1 can use MPE, and when enabled it will occupy MIDI channel 1 plus the number of member channels
above it� For example, Preset C has MPE enabled on Track 1 with 13 member channels (using channels 1-14),
track 2 is set to channel 15, and track 3 is set to channel 16. This conguration allows you to simultaneously
control one MPE and two MIDI 1�0 instruments�
Table of contents
Other Keith McMillen Instruments Electronic Keyboard manuals

Keith McMillen Instruments
Keith McMillen Instruments K-Board Pro 4 User manual

Keith McMillen Instruments
Keith McMillen Instruments QuNexus User manual

Keith McMillen Instruments
Keith McMillen Instruments QuNexus User manual

Keith McMillen Instruments
Keith McMillen Instruments K-Board Pro 4 Specification sheet