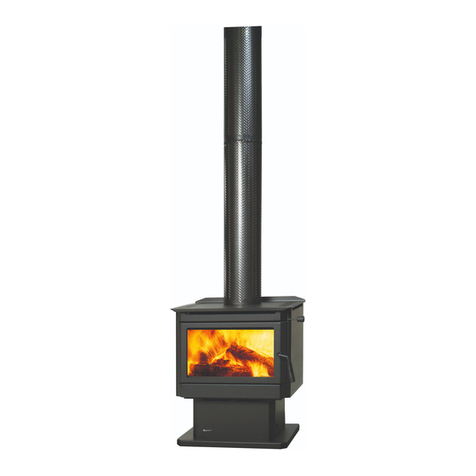
Kemlan XL MK111 Manual

KEMLAN XL FREESTANDING Mk. III
INSTALLATION & OPERATING INSTRUCTIONS
IMPORTANT:
INSTALLER PLEASE LEAVE THESE INSTRUCTIONS WITH THE UNIT ON COMPLETION.
1x900mm LENGTH HEATSHIELD OR DECROSHIELD MUST BE FITTED TO THE FLUE TO ACHIEVE
CLEARANCES TO HEAT SENSITIVE MATERIALS.
10 YEAR FIREBOX WARRANTY
Thefireboxis coveredbya 10 yearwarranty.
Otherpartsarecoveredbya one yearlimitedwarranty.
Head Office –13 French Avenue, Brendale, Queensland 4500
Telephone –PH: (07) 3490 5500
Facsimile –FAX: (07) 3490 5520
Website: - www.kemlan.com.au
Business hours: - Monday to Thursday 7:30am-4:00pm. Friday 7:30am-2:00pm
Email: - sales@kemlan.com.au

D
B
A
C
A
- 785mm width
B
- 838mm height
C
- 603mm depth
D
- 216mm depth (centreof fluetoback)
OVERALL DIMENSIONS
OVERALL DIMENSIONS:

G
I*
F
C
D
B
A
C
TECHNICAL SPECIFICATIONS
H
F
I*
E
STANDARD INSTALLATION CORNER INSTALLATION
A
- 100mm
B
- 550mm
C
- 150mm
D
-
3200mm
E
- 945mm
F
- 620mm
G
-
1200mm
H
-
1060mm
I*
- 500mm
NOTE:
*As per Clause 3.3.3 of AS/NZS 2918 for floor protector
constructionrequirements.
Wherea sample appliance installation (or prototype
installation
) has not been tested, the floorprotector
shall extendeither to a distanceof not less than 500mm
(measurement C) beyondany partof the appliance or a
lesser distanceatw hich itforms a abutment w itha wallor
heat shield (subjecttothe requirements of Clause 3.2
).
Glass viewingarea
- 602mm widex 302mm high
Flue pipe
- ø150mm –top exit
Shipping weight
-215kg
All dimensions shownareapproximate.Check all
dimensions accurately beforeinstallation.Before
installing refer tothe installation instructions.
In line withour policy of continuous improvement, w e
reservetherightto alter specifications withoutnotice.
CONSTRUCTION
- 6 & 8mm heavy duty steel firebox
–fully welded
- 25mm thick firebricklined floor
- 19mm ceramic lined sides and baffle
PERFORMANCE
- Heating capacity
–220-320m2 (23-33squares)
-Peak heat output
–21.6kW
- Averageoutput
–2.0g/kg
- Averageefficiency
–61%
Heating capacity of this appliance is givenas a guide only
and may vary depending on the climate zone and type
of dwelling(floorplanand degree of insulation). Consult
your local authoriseddistributor to determine realistic
expectations for your home
.
Heat output and fuelconsumption of this appliance
is dependent on the moisture content,size,loading
geometry and the typeof hardwoodused.
The appliance complies to the safety standardsAS/NZS
2918. When in use some parts may become hot. A
suitable fireguardis recommended w herethevery young,
elderly or infirmareconcerned.
The floor protector consists of a12mm thick cement fibresheet
w hich has athermal resistance of 0.8² k/W, per 4mm thick sheet
MINIMUM CLEARANCES FOR THE KEMLAN XL SOLID FUEL APPLIANCE
INSTALLED WITH A DEFAULT FLUE KIT

Roof flashingsupplied
by contractor
Stainless steel
double cone
cowl
1000mm minimum distance
aboveroof line or 600 minimum
aboveridge if penetration
closerthan3 meters to ridge
Support outer flue
withanglebracket
supplied
Ceiling line
All casingfluepipes must
be connectedwithpop
rivets suppliedby installer
Stainless steel fluepipe.
All fluepipes must be
connectedwithpoprivets
supplied by installer
25mm min
clearance
12mm min air gap
betweenceilingline
and celling plate
Ventedcap
Decroshield
150mm min
NOTE
:
When
decromesh/heatsheild
is fitted,it must finisha minimum 600mm below
the ceiling or extendthrough the ceiling dropbox into the outer fluecasing.
Always cover fluecompletely until installation and
cleanupis complete.
Support outer fluew ith
bracketsupplied. Run a
bead of silicon downseam
of outercasingto ensure
against leaks.
Pop rivetor
screw bracketsto
the outside of the
outer casing
Short tube fits into flue
pipe. All flues should
be trimmed level
INSTALLATION INSTRUCTION
TRIPLE FLUE KIT
INSTALLATION TO COMPLY WITH AS/NZS 2918
A
B
DETAIL A
DETAIL B
FLAT CEILING
Decroshield
6” Flue
8” Flue
10” Flue
10” Flue
8” Flue

Roof flashingsupplied
by contractor
Stainless steel
double cone
cowl
1000mm minimum distance
aboveroof line or 600 minimum
aboveridge if penetration
closerthan3 meters to ridge
Stainless steel fluepipe.
All fluepipes must be
connectedwithpoprivets
supplied by installer
25mm min
clearance
12mm min air gap
betweenceilingline
and celling plate
Ventedcap
Decroshield
150mm min
NOTE
:
When
decromesh/heatsheild
is fitted,it must finisha minimum 600mm below
the ceiling or extendthrough the ceiling dropbox into the outer fluecasing.
Always cover fluecompletely until installation and
cleanupis complete.
Support outer fluew ith
bracketsupplied. Run a
bead of silicon downseam
of outer casingto ensure
against leaks.
Pop rivetor
screw bracketsto
the outside of the
outer casing
Short tube fits into flue
pipe. All flues should
be trimmed level
INSTALLATION INSTRUCTION
TRIPLE FLUE KIT
INSTALLATION TO COMPLY WITH AS/NZS 2918
A
DETAIL A
DETAIL B
RAKED
CEILING
Decroshield
6” Flue
8” Flue
10” Flue
10” Flue
8” Flue

3000 OR LESS
INSTALLATIONINSTRUCTIONS
MINIMUM HEIGHT OF FLUE SYSTEM EXIT
INSTALLATION TO COMPLY WITH AS/NZS 2918
INCREASE FROM 1000 MIN
UNTIL CLEAR WITHIN 3000 OF
TOP OF FLUE
3000
ANY NEARBY
STRUCTURE
3000 MORE THAN 3000
600 MIN 3000
1000 MIN IF CLEAR WITHIN
3000 OF TOP OF FLUE
INCREASE ASNECESSARY UNTIL
NOTHING WITHIN 3000 OF FLUE TOP
600 MIN
3000 OR LESS

ABOUT CURING
Your stove has been painted with the highest quality silicone stove paint and has special break-in
procedures to cure it with heat and make it hard.
VENTILATE WELL
Ventilate the house during the first three times the stove is used. The paint on the stove will give off smoke
heavy with carbon dioxide and has an odor. Without adequate ventilation, concentrations of smoke could
irritate, or be upsetting, so open doors and windows and use a fan if necessary. After these initial burns the
paint will be cured and there should be no more smoke.
DON’T TOUCH DURING CURING
Don’t touch the surface. It will be soft and gummy during this paint curing phase. Once cured, it will not be
soft again.
CURE WITH 3 FIRES
Most stoves cure with 3 burns. The first two (2) should be 250°F for 20 minutes, or about half a normal fire.
Let the stove cool down between burns. The last fire should be 500°F to 700°F for at least 45 minutes. The
point being, cure slowly without a hot fire.
Stoves with cooler surface temperature and those that have been painted with another colour before, will
take longer to cure.
Curing can usually be observed by the effect of the paint turning flat as the heat radiates out from hotter
parts of the stove.
So remember...
•Ventilate well
•Do not touch during curing
•Cure with 3 fires
•Call your dealer for any questions

INSTRUCTIONS FOR OPERATING YOUR
KEMLAN SLOW COMBUSTION WOOD
BURNING HEATER
1. Open the air inlet fully by sliding the air inlet controlto high.
2. Crumple at least threedouble pages of newspaperintolooseballs and placethem into the centreof the
firebox.
Cross layat least 15 to 20 pieces of kindling on top of the paper –if pine is used, the sizeshould vary from
the thickness of a pencil to that of a knifehandle –if hardw oodis usedsplitit even smaller.
3. Light the paper and closethe door.
Once the kindling is wellalight, add a few pieces of slightly largerhardwood,splittoapproximately 25mm x
50mm (2” x 1”).
4. Close the door and leavethe air inlet controlon high. When the hardwoodis wellalight(usually 5
to10minutes) and coals arestarting to form,largerpieces of hardwoodmay be added–fiveor six pieces the
equivalent of 50mm x 50mm (2” x 2”) is ideal.
The object is to createa fiercely burningfireof reasonablesmall hardwood,whichwillquickly producea
good bed of glowingcoals onthe floorof the firebox.This willtake from20 to 40 minutes depending on the
quality of the firewood.
5 Largerpieces of hardwoodmay now beadded.Half fill the fireboxandleave the air inlet controlon high until
the woodis wellalightthen closethe controlapproximately a third of its travel.
Usually about one hour after lighting, the air inlet control can be further shut dow nto achieve thedesired
heat output.
When adding new firewooditis desirable to fullyopen the air inlet for approximately 10 to 15 minutes until
the new pieces areburningwell,thenit may be returnedto itsdesired setting.
6. To set the firefor overnightburn–tw o-thirdsfillthefirebox withhardwoodandfully openthe air inlet.
Once the fireisburning well,theair inlet controlshould be shutdownapproximately three-quarters of its
travel.Setting the airinlet controlmay be varied to suityourparticularrequirements and the quality and size
of your firewood.
Remember wetorgreenwoodmaycauseadramatic reductionin the heat output of your heater (refer to
“Operating Hints” for more details).
7. Have the flueinspectedat least onceevery 12months as it may require cleaning.
8. Clean out excess ashfromthefloor of the firebox whenrequired.Donot removeall the ashand in particular
leave anypieces of charcoalin the heateras they aregood fuel.
9. If the glass door in your heater becomes dirty,your firewoodis either green,w etor both. Youmay be
closingthe air inlet downtoosoonafterlighting or after adding new firewood.
To clean the glass,simply use some of the whiteashinthe firebox.Applyit withadamp clothin a circular
motion. Remove residuew ithaclean clothor paper. Do not clean the glass whentheheater is operating.
10. To clean the painted surface,simply dustwithasoftdusterandwipeover withadamp cottoncloth. Only
clean w hentheheater is cool.
IMPORTANT:
UNDER NO CIRCUMSTANCES SHOULD ANY SOLVENTS SUCH AS METHYLATED SPIRITS, PETROL, MINERAL
TURPENTINE ETC BE ALLOWED TO COME IN CONTACT WITH THE PAINTED SURFACE OF THE HEATER AS
DAMAGE TO THE FINISH WILL RESULT. IF AN ACCIDENT DOES OCCUR, SPRAY CANPAINT IS AVAILABLE FROM
YOUR NEAREST KEMLAN DEALER.

OPERATING HINTS
To get the best fromyourKemlan heater it is essentialthat youuse good firewood,anduseit correctlyManypeople do not understandthe
principle of usinga woodburningappliance and wesuggestthatit willbew orthyourwhiletostudy thefollowingextractfromawellknown
Americanpublication.
PRINCIPLES OF COMBUSTION: HOW WOOD BURNS
Technically,w ooddoes notburn. What burns is the volatiles and charcoalthat arecreated. That is why woodwillnotcatch on fire
immediately w henyouputa match to it; it has to firstundergothe chemical changesthat createthevolatiles, and a match does not create
enough heat to activatethe process.As kindlingand paper evaporatethe moisture in the wood,thew oodabsorbsheat.Ata certainpoint,
gases are given off and w hen these volatiles reach 480 degrees F, or the “Flash point”, as it is called, they w ill burst into flame if sufficient
oxygenis present.The volatiles give off moreheat than does charcoal,w hichis whyafirew ithflames (whichburnthevolatiles) produces
more heat than one that is all charcoal.
Since the volatiles are gases and sinceheat rises,taking the gases withit,it is very easy tocreateasituation in w hich mostof thevolatiles go
up the chimney almost as soonas they areproduced.This is whathappens witharoaringfireand, to a lesserextent,withan open fire.One of
the reasons(butonly one) that a freestandingwoodstoveproducesmoreheat than an open fireisthat the volatiles arecontained withinthe
firebox andare not soquickly dissipatedup the chimney. A stovethat isbaffledismerely one that has interiorconstructiondesignto keep the
volatiles in the fireboxlonger;the longer they are in the firebox,themore completely they burn. The more completely they burn,the more heat
is produced. It’s that simple.
Since the flames burn the volatiles and produceheat, the ideal situation is the longestpossible flame path. As soonas wood burners
understandthis,they tried to devisewaysof makingthe flame path longerthan in an ordinary openfire.Even though the role of oxygenin
combustion w as notunder- stood in Ben Franklin’s time, Franklin did realize the importance of more completely burned volatiles. His solution
was totry toinventa downdraft stove
–one that sentthe volatiles back downthroughthefire–but he neversucceededingetting it to work.A downdraftgoesagainstthenature of
volatiles, w hichistorise.In more recenttimes, there havebeen some successfuldowndraft –or partialdowndraft –stoves createdandsome
of the fireplacestovesandunits utilise this principle. Ideally, it wouldbebest if the volatiles couldbe redirecteddown throughthefireseveral
times, until they w ereal- most totally consumed.This wouldnotonly make the maximum use of the heat potential of the wood;it wouldreduce
creosotebuild-upto almost zero.Perhaps someday an ingenious inventor w illdesign a unit that does this; sofarno has been able to.
MOISTURE AND COMBUSTION
As w ehaveseen,dry woodignites faster andburns better –w ithhigher heat production–than w etor greenw ood. Thedifferencebetween
the amount of heat producedby dry w oodandgreenwoodis sogreatthat a dry softwoodof goodgradew illproducemoreheat than green
hardwood.Greenw hiteash,for instance,is notas good a fuelas dry tamarack.
The reasonfor the superiority of drywoodis easy tounderstand.Heatcannot be produceduntil moisture has been drivenoff. Sinceevenso-
called seasoneddry woodcontains approximately 20percentmoisture, it takes time for any firetobegin producinguseable heat. Wet w ood,
whichcanhaveamoisture contentof over100 percent(dueto the waymoistureismeasured),willtake that much longer to produceheat.
Meanwhile,the firewillproducesmoke and creosoteandvery little heat. This was broughtsharply tomy attention whenIinstalled my first
woodheater. To my surpriseanddelight, I foundit comfortablyheatedeight rooms, w hereIhad expectedto heat only twoor three.After
some time, whenIhad someone helping me runthe fire,I suddenly noticed that the housew as chilly.Weadded more woodandadjustedthe
draftcontrols,butnothing wedidseemed to help. It finally occurredtome to checkthe woodpile.My friendhad been getting green woodfrom
a stackthat w as drying,insteadof fromthedry-woodstack.Thedifferencethegreenw oodmadew as sodramatic Iw illnever forgetit.
HOW TO TEST WOOD FOR DRYNESS
There are tw o easy w ays for even a novice to spot dry w ood. Dry w ood tends to “check”. Look at the log ends and you w ill see cracks radiating
fromthe centreof the log. If the logs havebeen split, the cracks willbeharder to findbecausew oodtends tosplit along the cracks.
Another testfordry w oodis thesoundit makes whentwologs arebangedagainst eachother. Green woodwillmake sortof a dull thud; dry
woodmakes a nice crisp,sharpsound. Onceyouhave heardthe two,youwillremember the difference.
FROM THE ABOVE EXTRACT SEVERAL FACTS BECOME APPARENT:
1. It is vital that your firewoodbedry andseasoned.
2. A good hot fireof kindling and smaller pieces of fuelmust be establishedbeforeadding larger logs.
3. The larger logs should be wellalight beforeslowingdownthecombustionbyadjusting the air intake.
4. A hot bed of coals needsto be maintained to ensurecontinuedcombustion in the firebox.
5. When new timber is added to the fireboxtheair controlshould be opened until the fuel is wellalight beforedamping it down again.This will
take from10 to 20 minutes.
6. When setting the controls forovernightburnyouwillneedto experiment withthesettings to suit yourparticulartypeof fuel.Very dense
hardwoodrequiresmoreairto combustand over damping w illresultin charringandsmoking causingthe glass in the door to become dirty.
The same w illapply w ithfuelwhichis notfully seasonedor is not dry enough. Kemlan have followedapolicy since1969of checking on all
complaints about poor performanceof their heaters andapart froma few instancesof incorrect installation(mostly insufficientfluelength) all
problems havebeen directly related to incorrectoperationand/orpoor fuel.We know youwillexperiencemanyyears of satisfactionfromyour
heaterif youfollow theaboveadvice.


WARRANTY
1. Kemlan woodheaters carrya warranty onthe 6mmfireboxfor a period often (10) years.
2. This warranty also covers other components of the heater for a period of one (1) year. These
components include thebaffle plate,handleassembly,secondaryairtubes andfan.
3. Kemlan’s warrantycovers the wood heaters againstdefects inmaterials andmanufacture.
4. THIS WARRANTY DOES NOT COVER –
4.1 Failureto complywith manufacturer’s operationinstructions.
4.2 Normal wearandtear or damagecausedbyincorrectinstallation.
4.3 Any form ofrustand/or corrosionto the painted finishofthe heater.
4.4 Damageto the glass inthe door, ifthe damageis caused byimpactor misuse.
4.5 The cost ofcollectionanddeliveryof the woodheaterand/orparts.
4.6 Damagecausedbywater ingress.
4.7 Costof removalof defective heater or re-installationofreplacementheater.
4.8 Failureto use fireplacecomponents suppliedbyKemlanIndustriesPtyLtd.
4.9 Costof inspection fordamagedheater.
5. CLAIMS –
5.1 (I) Kemlanwillprovide afull replacementofthe heaterin the firstfive years after installation.
(ii) Replacement in the subsequent five years (i.e. sixth to tenth year after installation will be on the
followingbasis.
Owner will pay fifty percent of purchase price if the claim is made in the sixth year –tenth year after
purchase.
5.2 Replacementofheatersubjectto allconditions insectionfourof warranty.
5.3 Should anydefects occur, contact the Kemlan distributor from whom youpurchased theheater.
5.4 Underthis warrantythe defective parts willberepairedor replaced byKemlan’s option,free ofcharge.
6. The fireplace installation must comply with the relevant local statutes, ordinances, regulations and by-
laws.
PLEASE COMPLETE AND RETAIN THIS SECTION FOR YOUR
RECORDS
Purchasedfrom: .......................................................................................................
Address: ....................................................................................................................
Date of Purchase: ......................................................................................................
Table of contents
Other Kemlan Wood Stove manuals
Popular Wood Stove manuals by other brands

Fogo Montanha
Fogo Montanha A700 instruction manual

Drolet
Drolet DB04816 Installation and operation manual

Stuv
Stuv 16-cube Series Installation, user and servicing instructions

Quadra-Fire
Quadra-Fire 57ST-ACC installation guide

Cannon
Cannon CAWDFS12 Use, care and installation instructions

EdilKamin
EdilKamin AQUAMAXI 28 Installation, use and maintenance

Dik Geurts
Dik Geurts 8900010903 User and installation manual

Harvia
Harvia M1 Instructions for installation and use

Napoleon
Napoleon EPA 1400 Installation and operating instructions

ACR STOVES
ACR STOVES FB5BK Technical manual

Mendip Stoves
Mendip Stoves Ashcott Operation and installation manual

Jøtul
Jøtul F 602 N installation manual